
Zero Maintenance Cowpea Garden: Imagine a garden bursting with fresh, delicious cowpeas, all without the constant weeding, watering, and worrying! Sounds like a dream, right? Well, it doesn’t have to be! I’m thrilled to share some incredible DIY tricks and hacks that will help you create your very own zero maintenance cowpea garden.
Cowpeas, also known as black-eyed peas, have a rich history, deeply rooted in African and Southern American cultures. They’ve been a staple food for centuries, prized for their nutritional value and ability to thrive in challenging climates. Historically, they were a vital source of protein and sustenance, especially for those with limited resources.
But let’s face it, not everyone has the time or the green thumb to dedicate hours to gardening. That’s where these DIY solutions come in! In today’s busy world, who wouldn’t want a garden that practically takes care of itself? These simple, yet effective, techniques will minimize your workload, maximize your yield, and allow you to enjoy the satisfaction of harvesting your own fresh cowpeas. Whether you’re a seasoned gardener or a complete beginner, these tips for a zero maintenance cowpea garden will empower you to grow your own food with ease. Get ready to ditch the garden stress and embrace the joy of effortless gardening!
Dein pflegeleichter Kuhbohnengarten: So geht’s!
Ich liebe es, frisches Gemüse aus dem eigenen Garten zu ernten, aber ehrlich gesagt, habe ich nicht immer die Zeit, mich stundenlang darum zu kümmern. Deshalb habe ich mich auf die Suche nach Pflanzen gemacht, die wenig Pflege benötigen und trotzdem eine reiche Ernte liefern. Und da sind mir die Kuhbohnen (auch Augenbohnen genannt) ins Auge gefallen! Sie sind nicht nur super lecker und vielseitig, sondern auch unglaublich robust und anspruchslos. In diesem Artikel zeige ich dir, wie du einen pflegeleichten Kuhbohnengarten anlegen kannst, der dir den ganzen Sommer über Freude bereitet.
Warum Kuhbohnen? Die Vorteile auf einen Blick
Bevor wir loslegen, lass mich dir kurz erklären, warum Kuhbohnen so eine tolle Wahl für einen pflegeleichten Garten sind:
* Trockenheitstolerant: Kuhbohnen sind extrem widerstandsfähig gegen Trockenheit. Das bedeutet, dass du sie nicht ständig gießen musst, was besonders in heißen Sommern ein großer Vorteil ist.
* Bodenverbesserer: Als Leguminosen binden Kuhbohnen Stickstoff aus der Luft im Boden. Das verbessert die Bodenqualität und kommt auch anderen Pflanzen zugute, die du vielleicht in der Nähe anbaust.
* Schädlingsresistent: Kuhbohnen sind relativ resistent gegen viele gängige Gartenschädlinge. Das spart dir den Einsatz von Pestiziden und macht den Anbau noch einfacher.
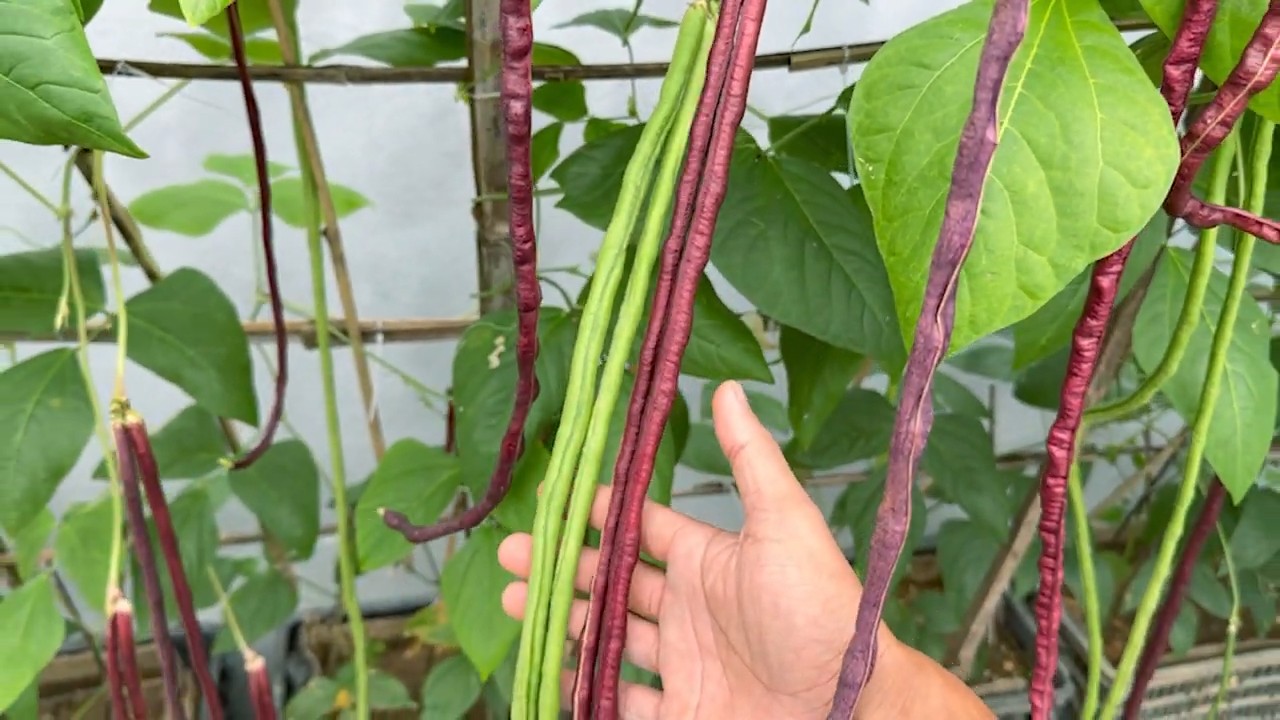
* Vielseitig verwendbar: Du kannst die jungen Schoten als grüne Bohnen essen, die reifen Bohnen trocknen und lagern oder die Blätter als Gemüse verwenden.
* Schnellwachsend: Kuhbohnen wachsen schnell und liefern schon nach kurzer Zeit eine reiche Ernte.
Die Vorbereitung: Was du brauchst
Bevor du mit dem Pflanzen beginnst, solltest du ein paar Dinge vorbereiten:
* Samen: Kaufe Kuhbohnensamen in einem Gartencenter oder online. Achte auf Sorten, die für dein Klima geeignet sind. Es gibt Buschbohnen und Stangenbohnen. Ich persönlich bevorzuge Buschbohnen, weil sie weniger Platz benötigen und keine Rankhilfe brauchen.
* Standort: Wähle einen sonnigen Standort für deinen Kuhbohnengarten. Kuhbohnen lieben die Sonne und brauchen mindestens 6 Stunden direktes Sonnenlicht pro Tag.
* Boden: Kuhbohnen sind nicht besonders anspruchsvoll, was den Boden angeht. Ein gut durchlässiger Boden ist jedoch wichtig, um Staunässe zu vermeiden. Wenn dein Boden sehr lehmig ist, kannst du ihn mit etwas Sand oder Kompost verbessern.
* Werkzeug: Du benötigst eine Schaufel oder einen Spaten, eine Harke und eventuell eine Gießkanne.
* Mulch: Mulch hilft, die Feuchtigkeit im Boden zu halten und Unkraut zu unterdrücken. Ich verwende gerne Stroh, Heu oder Holzhackschnitzel.
Schritt-für-Schritt-Anleitung: So legst du deinen Kuhbohnengarten an
Jetzt geht’s ans Eingemachte! Folge diesen Schritten, um deinen eigenen pflegeleichten Kuhbohnengarten anzulegen:
1. Boden vorbereiten: Entferne Unkraut und Steine von der Fläche, auf der du die Kuhbohnen anbauen möchtest. Lockere den Boden mit einer Schaufel oder einem Spaten auf.
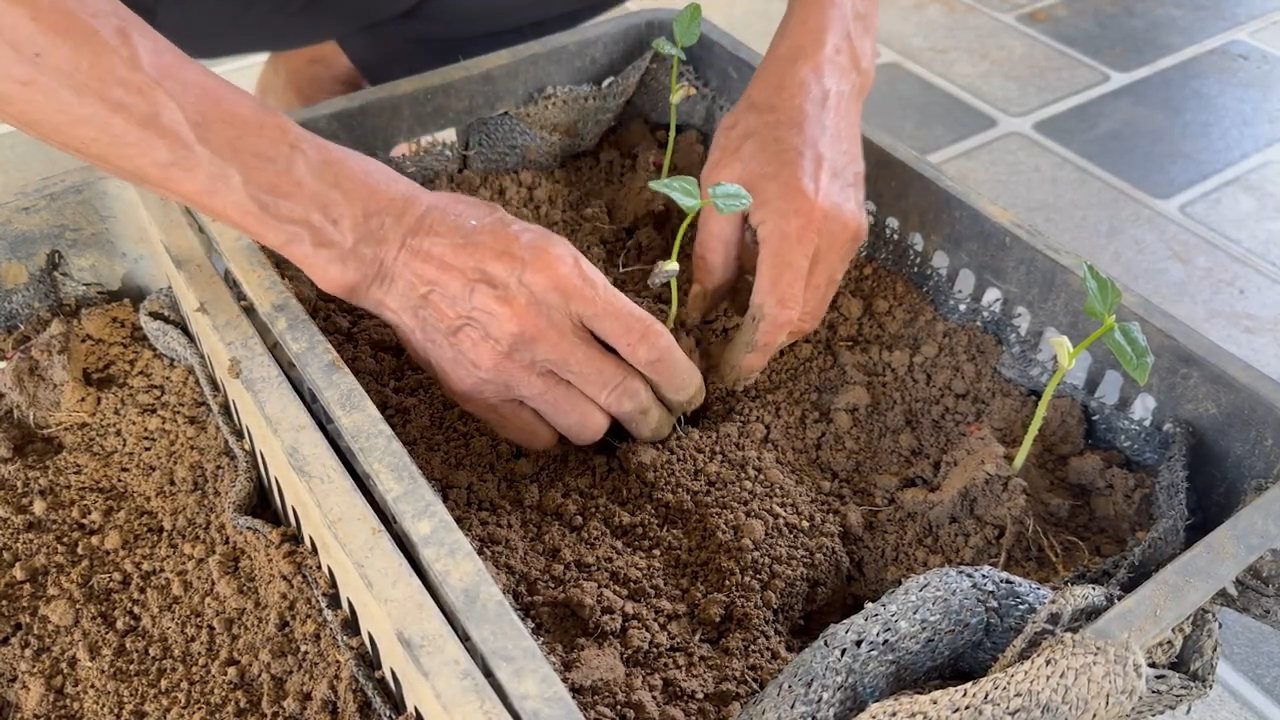
2. Samen säen: Säe die Kuhbohnensamen direkt ins Freiland, sobald die Frostgefahr vorüber ist. Die Bodentemperatur sollte mindestens 15°C betragen. Ich säe die Samen etwa 2-3 cm tief und mit einem Abstand von etwa 10-15 cm zueinander. Bei Buschbohnen lasse ich etwa 45-60 cm zwischen den Reihen, bei Stangenbohnen etwas mehr.
3. Gießen: Gieße die Samen nach dem Säen gründlich an. Halte den Boden feucht, bis die Samen keimen.
4. Mulchen: Sobald die Sämlinge ein paar Zentimeter hoch sind, mulche den Boden um die Pflanzen herum. Das hilft, die Feuchtigkeit zu halten und Unkraut zu unterdrücken.
5. Gießen (sparsam): Kuhbohnen sind trockenheitstolerant, aber in längeren Trockenperioden solltest du sie trotzdem gießen. Gieße am besten früh morgens, damit die Blätter tagsüber abtrocknen können.
6. Unkraut jäten: Entferne regelmäßig Unkraut, das zwischen den Kuhbohnen wächst. Unkraut konkurriert mit den Pflanzen um Nährstoffe und Wasser.
7. Ernten: Die Erntezeit hängt von der Sorte und den Wetterbedingungen ab. Du kannst die jungen Schoten als grüne Bohnen ernten, sobald sie die gewünschte Größe erreicht haben. Die reifen Bohnen kannst du ernten, wenn die Schoten trocken und braun sind.
Extra-Tipps für einen noch pflegeleichteren Garten
Hier sind noch ein paar zusätzliche Tipps, die dir helfen, deinen Kuhbohnengarten noch pflegeleichter zu gestalten:
* Direktsaat: Kuhbohnen vertragen das Umpflanzen nicht gut. Säe sie daher direkt ins Freiland.
* Fruchtfolge: Wechsle den Standort deiner Kuhbohnen jedes Jahr, um Krankheiten und Schädlingen vorzubeugen.
* Begleitpflanzen: Pflanze Basilikum, Ringelblumen oder Kapuzinerkresse in der Nähe deiner Kuhbohnen. Diese Pflanzen helfen, Schädlinge abzuwehren.
* Selbst aussäen lassen: Lasse einige Kuhbohnen am Ende der Saison ausreifen und trocknen. Du kannst die Samen im nächsten Jahr wieder aussäen.
Häufige Probleme und wie du sie vermeidest
Auch wenn Kuhbohnen relativ pflegeleicht sind, können doch ein paar Probleme auftreten. Hier sind die häufigsten und wie du sie vermeidest:
* Schädlinge: Blattläuse und Bohnenkäfer können Kuhbohnen befallen. Kontrolliere deine Pflanzen regelmäßig und bekämpfe Schädlinge bei Bedarf mit natürlichen Mitteln wie Neemöl oder Schmierseife.
* Krankheiten: Pilzkrankheiten wie Mehltau können bei feuchtem Wetter auftreten. Sorge für eine gute Belüftung und vermeide es, die Blätter beim Gießen zu benetzen.
* Nährstoffmangel: Wenn die Blätter gelb werden, kann das ein Zeichen für Nährstoffmangel sein. Dünge die Pflanzen mit einem organischen Dünger.
Kuhbohnen in der Küche: Leckere Rezeptideen
Kuhbohnen sind unglaublich vielseitig und können in vielen verschiedenen Gerichten verwendet werden. Hier sind ein paar meiner Lieblingsrezepte:
* Kuhbohnensalat: Koche die Kuhbohnen, bis sie weich sind. Mische sie mit gehackten Tomaten, Gurken, Zwiebeln und einem Dressing aus Olivenöl, Zitronensaft und Kräutern.
* Kuhbohnensuppe: Koche die Kuhbohnen mit Gemüsebrühe, Karotten, Sellerie und Zwiebeln. Püriere die Suppe und würze sie mit Salz, Pfeffer und Kräutern.
* Kuhbohnen-Curry: Koche die Kuhbohnen mit Kokosmilch, Currypaste, Gemüse und Gewürzen. Serviere das Curry mit Reis.
* Gebratene Kuhbohnen: Brate die Kuhbohnen mit Knoblauch, Zwiebeln und Gewürzen in der Pfanne an. Serviere sie als Beilage oder als Hauptgericht.
Ich hoffe, dieser Artikel hat dich inspiriert, deinen eigenen pflegeleichten Kuhbohnengarten anzulegen. Mit ein wenig Vorbereitung und Pflege kannst du den ganzen Sommer über eine reiche Ernte genießen. Viel Spaß beim Gärtnern!
Conclusion
So, there you have it! Creating a zero maintenance cowpea garden isn’t just a gardening hack; it’s a pathway to sustainable, effortless food production. We’ve explored how to minimize your workload while maximizing your yield, allowing you to enjoy fresh, delicious cowpeas without the constant demands of traditional gardening. This method is a game-changer for busy individuals, those with limited mobility, or anyone simply looking to simplify their gardening experience.
The beauty of this approach lies in its adaptability. Feel free to experiment with different mulching materials. Straw, wood chips, or even shredded cardboard can all work wonders in suppressing weeds and retaining moisture. Consider companion planting to further enhance your garden’s ecosystem. Marigolds, for example, can deter pests, while basil can improve the flavor of your cowpeas. You can also explore different varieties of cowpeas to find the ones that thrive best in your specific climate and soil conditions. Some varieties are bush types, while others are vining, so choose accordingly based on your available space and support structures.
Don’t be afraid to get creative with your watering system. While the initial deep watering is crucial, you might find that your garden benefits from occasional supplemental watering during particularly dry spells. Observe your plants closely and adjust your watering schedule as needed. Remember, the goal is to create a self-sustaining ecosystem, but a little intervention can sometimes be necessary.
The key takeaway here is that a zero maintenance cowpea garden is not about completely neglecting your plants. It’s about setting up a system that minimizes your involvement while still providing the essential elements for healthy growth. It’s about working smarter, not harder, and reaping the rewards of a bountiful harvest with minimal effort.
We firmly believe that this DIY trick is a must-try for any gardener, regardless of their experience level. It’s a simple, effective, and rewarding way to grow your own food and connect with nature. Imagine the satisfaction of harvesting your own fresh cowpeas, knowing that you’ve done so with minimal effort and maximum sustainability.
We encourage you to embark on this gardening adventure and discover the joys of a zero maintenance cowpea garden for yourself. Share your experiences with us! We’d love to hear about your successes, challenges, and any variations you’ve tried. Your feedback will help us refine this method and make it even more accessible to other gardeners. Let’s build a community of effortless gardeners, one cowpea at a time! So, get your seeds ready, prepare your garden bed, and get ready to experience the magic of a truly low-maintenance harvest. This is your chance to enjoy the fruits (or rather, the legumes) of your labor without breaking a sweat. This **zero maintenance cowpea garden** will change the way you think about gardening forever.
Frequently Asked Questions (FAQ)
What exactly does “zero maintenance” mean? Does it really require no work at all?
While “zero maintenance” might be a slight exaggeration, it accurately reflects the significantly reduced workload compared to traditional gardening. You’ll still need to initially prepare the garden bed, plant the seeds, and provide a deep watering. However, after that, the goal is to create a self-sustaining ecosystem that requires minimal intervention. This means no regular weeding, watering, or fertilizing. You might need to occasionally check for pests or diseases and provide supplemental watering during extreme droughts, but overall, the maintenance is drastically reduced.
What kind of soil is best for a zero maintenance cowpea garden?
Cowpeas are relatively adaptable and can tolerate a wide range of soil types. However, they thrive best in well-drained soil with a pH between 6.0 and 7.0. If your soil is heavy clay or sandy, amend it with compost or other organic matter to improve drainage and fertility. Adding compost also helps retain moisture, which is crucial for a low-maintenance garden. A soil test can help you determine the pH and nutrient levels of your soil and guide you in making necessary amendments.
How much sunlight do cowpeas need?
Cowpeas need at least 6-8 hours of direct sunlight per day to thrive. Choose a location for your garden that receives ample sunlight throughout the day. If you live in a particularly hot climate, some afternoon shade can be beneficial to prevent the plants from overheating.
What are the best mulching materials to use?
The best mulching materials are those that are readily available, affordable, and effective at suppressing weeds and retaining moisture. Straw, wood chips, shredded leaves, and even cardboard are all excellent options. Avoid using grass clippings that have been treated with herbicides. The thickness of the mulch layer is also important. Aim for a layer that is at least 3-4 inches thick to effectively block sunlight from reaching weed seeds.
How often should I water my cowpea garden after the initial deep watering?
The goal of a zero maintenance garden is to minimize watering. After the initial deep watering, you should only need to water your cowpeas during prolonged periods of drought. Observe your plants closely for signs of stress, such as wilting leaves. If the soil feels dry to the touch several inches below the surface, it’s time to water. When you do water, water deeply to encourage deep root growth.
What about pests and diseases? How do I prevent them in a zero maintenance garden?
A healthy, well-established garden is naturally more resistant to pests and diseases. The key is to create a balanced ecosystem that supports beneficial insects and microorganisms. Companion planting can be a great way to deter pests. For example, marigolds repel nematodes, while basil repels aphids. Regularly inspect your plants for signs of pests or diseases and take action promptly if you notice any problems. Organic pest control methods, such as insecticidal soap or neem oil, can be effective in controlling pests without harming beneficial insects.
Can I grow other vegetables in a zero maintenance garden alongside cowpeas?
Yes, companion planting is a great way to maximize the productivity of your garden and create a more diverse ecosystem. Some good companion plants for cowpeas include corn, sunflowers, and squash. Avoid planting cowpeas near onions or garlic, as they can inhibit their growth.
How long does it take for cowpeas to mature?
Cowpeas typically mature in 60-90 days, depending on the variety and growing conditions. You can start harvesting the pods when they are plump and tender. Regular harvesting will encourage the plants to produce more pods.
What are some different varieties of cowpeas I can grow?
There are many different varieties of cowpeas to choose from, each with its own unique characteristics. Some popular varieties include Black-Eyed Peas, Cream Peas, and Whippoorwill Peas. Choose a variety that is well-suited to your climate and growing conditions.
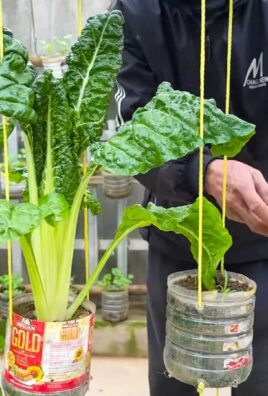
What if I don’t have a lot of space? Can I still create a zero maintenance cowpea garden?
Absolutely! Cowpeas can be grown in containers or raised beds, making them a great option for small spaces. Choose a container that is at least 12 inches deep and wide to provide ample room for the roots to grow. Use a well-draining potting mix and follow the same principles of mulching and minimal watering as you would for a traditional garden. Vining varieties can be grown on a trellis or fence to save space.

Leave a Comment