
Vinegar All Purpose Cleaner DIY: Are you tired of harsh chemicals and sky-high prices for your household cleaners? I know I was! That’s why I dove headfirst into the world of DIY cleaning solutions, and let me tell you, it’s been a game-changer. Imagine a sparkling clean home, achieved with ingredients you probably already have in your pantry. Sounds good, right?
Using vinegar as a cleaning agent isn’t some newfangled trend; it’s a practice that stretches back centuries. Our grandmothers and great-grandmothers knew the power of this humble ingredient. In many cultures, vinegar was a staple not just for cooking, but for disinfecting and deodorizing. It’s a testament to its effectiveness and versatility that it’s still relevant today.
But why should you bother with a Vinegar All Purpose Cleaner DIY? Well, for starters, it’s incredibly cost-effective. You’ll save a bundle compared to buying commercial cleaners. More importantly, you’ll be reducing your exposure to potentially harmful chemicals. Many store-bought cleaners contain ingredients that can irritate your skin, lungs, and even contribute to indoor air pollution. By making your own, you have complete control over what goes into your cleaner, ensuring a safer and healthier environment for you and your family. Plus, it’s incredibly satisfying to create something useful and effective with your own two hands! So, let’s get started and unlock the secrets to a sparkling clean home, naturally!
DIY All-Purpose Vinegar Cleaner: A Natural Cleaning Powerhouse!
Hey there, fellow DIY enthusiasts! I’m so excited to share my go-to recipe for an all-purpose cleaner that’s not only incredibly effective but also eco-friendly and budget-friendly. Forget those harsh chemicals and expensive store-bought cleaners – we’re going natural with the power of vinegar! This cleaner is fantastic for tackling grime, grease, and everyday messes on various surfaces around your home. Let’s get started!
What You’ll Need: The Essential Ingredients
Before we dive into the mixing process, let’s gather our supplies. This recipe is super simple, so you probably already have most of these items on hand.
* White Distilled Vinegar: This is the star of the show! Vinegar’s acidity makes it a powerful disinfectant and degreaser. Make sure you use white distilled vinegar, as other types might stain or leave unwanted residue.
* Water: Diluting the vinegar is crucial to prevent damage to certain surfaces and to make the scent more manageable.
* Essential Oils (Optional): While vinegar is a fantastic cleaner, its smell can be a bit strong for some. Essential oils not only mask the vinegar scent but also add extra cleaning power and a pleasant aroma. My favorites are lemon, lavender, tea tree, and eucalyptus.
* Spray Bottle: You’ll need a sturdy spray bottle to store and dispense your cleaner. Make sure it’s clean and has a reliable spray nozzle.
* Measuring Cup: For accurate measurements, a measuring cup is essential.
* Funnel (Optional): A funnel can be helpful for pouring liquids into the spray bottle without making a mess.
Mixing Your All-Purpose Vinegar Cleaner: Step-by-Step Guide
Now for the fun part – creating our natural cleaning solution! Follow these steps carefully to ensure the perfect blend.
1. Prepare Your Spray Bottle: Make sure your spray bottle is clean and dry. This will prevent any contamination of your cleaner.
2. Combine Vinegar and Water: The standard ratio for an all-purpose vinegar cleaner is 1:1 – that’s equal parts vinegar and water. For a standard 16-ounce spray bottle, I usually use 8 ounces of white distilled vinegar and 8 ounces of water. Pour the water into the spray bottle first, then add the vinegar. This helps to minimize foaming.
3. Add Essential Oils (Optional): If you’re using essential oils, now’s the time to add them. I typically add about 10-20 drops of essential oil per 16-ounce bottle. Start with a smaller amount and adjust to your preference. Remember, some essential oils are stronger than others. Lemon and tea tree are great for disinfecting, while lavender and eucalyptus offer a calming and refreshing scent.
4. Secure the Lid and Shake Well: Tightly screw the spray nozzle onto the bottle. Then, shake the bottle vigorously for about 30 seconds to ensure that all the ingredients are thoroughly mixed.
5. Label Your Bottle: This is an important step! Clearly label your spray bottle as “All-Purpose Vinegar Cleaner” and include the date you made it. This will prevent any confusion and ensure you’re using a fresh batch.
Using Your DIY Vinegar Cleaner: Tips and Tricks
Now that you have your homemade cleaner, let’s talk about how to use it effectively.
* Test on a Small, Inconspicuous Area: Before using your vinegar cleaner on any surface, especially delicate ones like wood or natural stone, test it on a small, hidden area first. This will help you ensure that it doesn’t cause any discoloration or damage.
* Spray and Wipe: Simply spray the cleaner onto the surface you want to clean and let it sit for a few seconds to loosen dirt and grime. Then, wipe it clean with a clean cloth or sponge. For tougher messes, you might need to let the cleaner sit for a few minutes before wiping.
* Rinse if Necessary: On some surfaces, like glass or mirrors, you might want to rinse with clean water after wiping to prevent streaks.
* Ventilate the Area: While the vinegar scent dissipates quickly, it’s always a good idea to ventilate the area while you’re cleaning, especially if you’re sensitive to smells.
Where to Use Your Vinegar Cleaner: Versatile Cleaning Power
One of the best things about this DIY cleaner is its versatility. You can use it on a wide range of surfaces around your home.
* Kitchen Counters and Sinks: Vinegar is excellent for cutting through grease and grime in the kitchen. It’s safe to use on most countertop materials, but always test first.
* Bathroom Surfaces: Use it to clean bathroom sinks, toilets, showers, and tubs. Vinegar helps to remove soap scum and hard water stains.
* Floors: Vinegar cleaner is safe for most sealed floors, including tile, linoleum, and vinyl. However, avoid using it on hardwood floors, as the acidity can damage the finish. Always dilute the cleaner well when using it on floors.
* Windows and Mirrors: Vinegar is a fantastic window and mirror cleaner. It leaves surfaces streak-free and sparkling.
* Appliances: Use it to clean the exterior of your appliances, such as refrigerators, ovens, and dishwashers.
* Cutting Boards: Vinegar is a natural disinfectant, making it ideal for cleaning cutting boards after preparing food.
Surfaces to Avoid: When Vinegar Isn’t the Answer
While vinegar is a powerful and versatile cleaner, there are certain surfaces you should avoid using it on.
* Hardwood Floors: As mentioned earlier, vinegar can damage the finish on hardwood floors.
* Natural Stone Surfaces: Avoid using vinegar on granite, marble, and other natural stone surfaces, as it can etch and dull the finish.
* Waxed Furniture: Vinegar can strip the wax from waxed furniture, leaving it looking dull and damaged.
* Electronics: Never spray vinegar cleaner directly onto electronic devices.
* Iron: Vinegar can cause iron to rust.
Troubleshooting: Addressing Common Concerns
Let’s address some common concerns and questions you might have about using a vinegar cleaner.
* The Vinegar Smell: The strong vinegar smell is a common concern. The good news is that the scent dissipates quickly. Adding essential oils can also help to mask the smell. You can also try using a higher concentration of essential oils if the vinegar scent is still too strong.
* Streaking: Streaking can occur when cleaning glass or mirrors. To prevent streaks, use a clean microfiber cloth and rinse with clean water after wiping.
* Cloudiness: If your cleaner appears cloudy, it’s likely due to hard water. You can use distilled water instead of tap water to prevent this.
* Residue: If you notice a residue after cleaning, you might be using too much cleaner. Try using less cleaner or rinsing with clean water after wiping.
Boosting Cleaning Power: Advanced Techniques
Want to take your vinegar cleaner to the next level? Here are a few advanced techniques to boost its cleaning power.
* Infused Vinegar: Infuse your vinegar with citrus peels or herbs for added cleaning power and a pleasant scent. Simply place citrus peels (lemon, orange, grapefruit) or herbs (rosemary, lavender, thyme) in a jar of vinegar and let it sit for a few weeks. Then, strain the vinegar and use it in your cleaner.
* Baking Soda Boost: For extra cleaning power, especially on tough stains, sprinkle baking soda onto the surface before spraying with your vinegar cleaner. The combination of vinegar and baking soda creates a fizzing action that helps to lift dirt and grime. Be careful when using this method, as the fizzing can be messy.
* Castile Soap Addition: Adding a small amount of castile soap to your vinegar cleaner can help to emulsify grease and dirt. Use a very small amount (about 1/4 teaspoon per 16-ounce bottle) to avoid leaving a soapy residue.
Storage and Shelf Life: Keeping Your Cleaner Fresh
Proper storage is essential to maintain the effectiveness of your DIY vinegar cleaner.
* Store in a Cool, Dark Place: Store your cleaner in a cool, dark place away from direct sunlight and heat. This will help to preserve the essential oils and prevent the vinegar from degrading.
* Shelf Life: Your DIY vinegar cleaner will typically last for about 6-12 months. Over time, the essential oils may lose their potency, but the vinegar will still be effective.
Why DIY? The Benefits of Homemade Cleaner
Making your own all-purpose vinegar cleaner offers numerous benefits.
* Cost-Effective: DIY cleaner is significantly cheaper than store-bought cleaners.
* Eco-Friendly: You’re reducing your reliance on harsh chemicals and plastic packaging.
* Customizable: You can tailor the scent and strength of your cleaner to your preferences.
* Safe and Non-Toxic: You know exactly what’s in your cleaner, so you can avoid harmful

Conclusion
So, there you have it! Ditching those harsh chemicals and embracing the power of nature with this Vinegar All Purpose Cleaner DIY is not just a trend; it’s a smart, sustainable, and surprisingly effective way to keep your home sparkling. We’ve walked you through the simple steps, highlighted the incredible benefits, and hopefully, dispelled any lingering doubts about vinegar’s cleaning prowess.
Why is this a must-try? Because it’s more than just a cleaner; it’s a conscious choice. You’re reducing your exposure to potentially harmful chemicals, saving money by using readily available ingredients, and contributing to a healthier planet. Plus, the satisfaction of knowing you created a powerful cleaning solution with your own two hands is a reward in itself.
But the beauty of this DIY cleaner lies in its adaptability. Feel free to experiment with different essential oil combinations to create your signature scent. Lavender and lemon offer a calming and refreshing aroma, while tea tree and eucalyptus provide a more potent, antibacterial boost. You can also adjust the vinegar-to-water ratio depending on the task at hand. For tougher stains, a stronger vinegar concentration might be necessary. Consider adding a tablespoon of baking soda to the mix for extra scrubbing power on stubborn grime. Remember to test any new variation on an inconspicuous area first to ensure it doesn’t damage the surface.
Don’t be afraid to get creative! Infuse your vinegar with citrus peels for a naturally fragrant and even more potent cleaner. Simply add orange, lemon, or grapefruit peels to a jar of vinegar and let it steep for a few weeks before straining and using. This adds a delightful citrusy scent and enhances the cleaning power.
We truly believe that once you try this Vinegar All Purpose Cleaner DIY, you’ll never go back to store-bought alternatives. It’s effective, affordable, eco-friendly, and customizable to your specific needs and preferences.
So, what are you waiting for? Gather your ingredients, mix up a batch, and experience the difference for yourself. We’re confident you’ll be amazed by the results.
And most importantly, we want to hear about your experience! Share your tips, variations, and before-and-after photos in the comments below. Let’s build a community of DIY cleaning enthusiasts and inspire others to embrace a more natural and sustainable way of life. Your feedback is invaluable and helps us all learn and grow together. Let us know what essential oil combinations you loved, what surfaces you found it worked best on, and any other creative uses you discovered. Happy cleaning!
Frequently Asked Questions (FAQ)
Is vinegar really effective as a cleaner?
Absolutely! Vinegar, especially white distilled vinegar, is a fantastic natural cleaner due to its acetic acid content. Acetic acid is a mild acid that can dissolve grease, grime, soap scum, and hard water deposits. It’s also a natural disinfectant, killing many common household bacteria and viruses. While it might not be as powerful as some harsh chemical cleaners, it’s a safe and effective alternative for everyday cleaning tasks. The key is to use it correctly and understand its limitations. For heavily soiled or greasy areas, you might need to let the vinegar solution sit for a few minutes before wiping it clean.
What surfaces can I safely use this Vinegar All Purpose Cleaner DIY on?
This cleaner is generally safe for most non-porous surfaces, including countertops (except for natural stone like marble and granite), sinks, toilets, showers, floors (except for hardwood – see below), and appliances. However, there are some surfaces you should avoid:
* **Natural Stone (Marble, Granite, Limestone):** Vinegar can etch and damage these surfaces due to their porous nature.
* **Hardwood Floors:** Vinegar can strip the finish and dull the shine of hardwood floors.
* **Waxed Furniture:** Vinegar can dissolve the wax coating.
* **Electronics Screens:** Avoid spraying vinegar directly onto electronic screens, as it can damage them.
* **Cast Iron:** Vinegar can cause rust.
Always test the cleaner on an inconspicuous area first to ensure it doesn’t cause any damage or discoloration.
What essential oils are best to use in this cleaner?
The best essential oils to use are those with antibacterial, antiviral, and antifungal properties, as well as those with pleasant scents. Some popular choices include:
* **Lemon:** A natural degreaser and disinfectant with a bright, uplifting scent.
* **Lavender:** Known for its calming and relaxing properties, as well as its antibacterial and antifungal benefits.
* **Tea Tree:** A powerful antiseptic and antifungal oil, ideal for disinfecting surfaces.
* **Eucalyptus:** Has antibacterial and antiviral properties and a refreshing, invigorating scent.
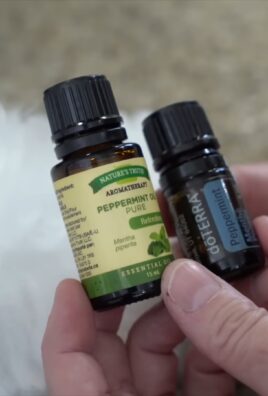
* **Peppermint:** A natural insect repellent and has a refreshing, clean scent.
* **Orange:** A natural degreaser with a cheerful and uplifting scent.
Experiment with different combinations to find your favorite scent and cleaning power. A good starting point is 10-20 drops of essential oil per cup of vinegar solution.
Will my house smell like vinegar after cleaning?
The vinegar smell will dissipate quickly after cleaning. The essential oils you add will also help to mask the vinegar scent and leave behind a pleasant aroma. If you’re particularly sensitive to the smell of vinegar, you can open windows to ventilate the area while cleaning.
How long does this Vinegar All Purpose Cleaner DIY last?
This cleaner has a long shelf life due to the preservative properties of vinegar. It can last for several months when stored in a cool, dark place. However, it’s always a good idea to make a fresh batch every few months to ensure optimal effectiveness.
Can I use this cleaner to disinfect?
While vinegar does have disinfectant properties, it’s not as powerful as commercial disinfectants. It can kill many common household bacteria and viruses, but it may not be effective against all pathogens. For disinfecting surfaces, it’s best to use a solution of undiluted white vinegar and let it sit on the surface for at least 30 minutes before wiping it clean. For more thorough disinfection, consider using a commercial disinfectant or a bleach solution.
Can I use this cleaner on my clothes?
Yes, vinegar can be used as a laundry booster and stain remover. Adding a cup of white vinegar to your washing machine can help to brighten whites, remove odors, and soften fabrics. You can also use vinegar to pretreat stains by applying it directly to the stain and letting it sit for a few minutes before washing.
Is this cleaner safe for pets and children?
This cleaner is generally safe for pets and children, as it doesn’t contain harsh chemicals. However, it’s still important to keep it out of reach of children and pets to prevent accidental ingestion. If your pet or child ingests the cleaner, contact a medical professional or veterinarian immediately.
Can I use different types of vinegar?
While white distilled vinegar is the most commonly recommended type for cleaning, you can experiment with other types of vinegar, such as apple cider vinegar. However, keep in mind that apple cider vinegar has a stronger odor and may leave a slight residue on some surfaces. White distilled vinegar is generally the most effective and versatile option.
What if I don’t have essential oils? Can I still make this cleaner?
Yes, you can definitely make this cleaner without essential oils. The vinegar itself is a powerful cleaning agent. The essential oils are primarily added for their scent and additional antibacterial properties. If you don’t have essential oils, simply use a mixture of vinegar and water. You can also infuse the vinegar with citrus peels for a natural fragrance.
Leave a Comment