
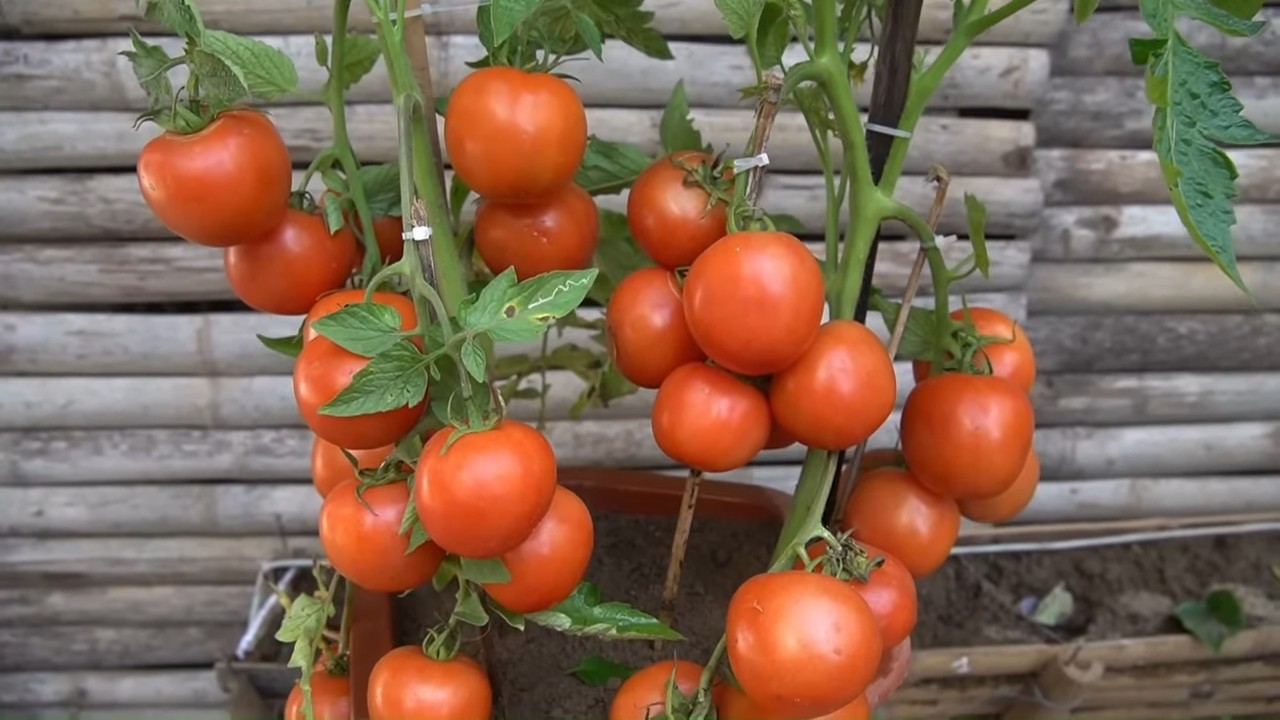
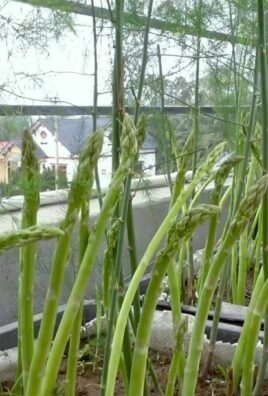
Vertical tomato garden DIY projects are taking the gardening world by storm, and for good reason! Imagine plucking juicy, sun-ripened tomatoes right from your patio, balcony, or even a small corner of your yard. No more back-breaking weeding or sprawling vines taking over your precious space. Sounds dreamy, right?
For centuries, humans have cultivated tomatoes, tracing back to their origins in South America. From humble beginnings, they’ve become a global staple, and now, we’re finding innovative ways to grow them, even without vast acres of land. This DIY guide isn’t just about gardening; it’s about connecting with that rich history and bringing a touch of nature’s bounty into your everyday life.
But why should you embark on a vertical tomato garden DIY adventure? Well, let’s face it, space is a luxury these days. Many of us are living in apartments or smaller homes with limited outdoor areas. Plus, traditional gardening can be physically demanding. This DIY project offers a fantastic solution, allowing you to enjoy fresh, homegrown tomatoes regardless of your space constraints or physical limitations. I’m going to show you how to create a stunning and productive vertical tomato garden that will have your neighbors green with envy. Get ready to roll up your sleeves and let’s get growing!
DIY Vertical Tomato Garden: Grow Up, Not Out!
Hey there, fellow gardening enthusiasts! Are you dreaming of juicy, sun-ripened tomatoes but short on space? Well, I’ve got the perfect solution for you: a DIY vertical tomato garden! This project is not only space-saving but also adds a touch of rustic charm to your balcony, patio, or even a sunny corner indoors. Trust me, once you taste a homegrown tomato, you’ll never go back to store-bought!
This guide will walk you through creating a sturdy and productive vertical tomato garden using readily available materials. Let’s get our hands dirty!
Materials You’ll Need
Before we dive in, let’s gather our supplies. Here’s what you’ll need:
* Wooden Pallet: Look for a sturdy, untreated pallet. Check for any loose nails or splinters. You can often find these for free at local businesses, construction sites, or online marketplaces. Make sure it’s heat-treated (HT) and not chemically treated (MB).
* Heavy-Duty Landscape Fabric: This will line the pockets and prevent soil from escaping.
* Staple Gun and Staples: Essential for securing the landscape fabric to the pallet.
* Potting Soil: Choose a high-quality potting mix specifically formulated for vegetables.
* Tomato Seedlings: Select your favorite tomato varieties! I recommend choosing determinate (bush) varieties for easier management in a vertical garden. Cherry tomatoes and Roma tomatoes are excellent choices.
* Gloves: Protect your hands from splinters and dirt.
* Measuring Tape: For accurate fabric cutting.
* Scissors or Utility Knife: For cutting the landscape fabric.
* Sandpaper (Optional): To smooth out any rough edges on the pallet.
* Wood Stain or Paint (Optional): To customize the look of your vertical garden.
* Watering Can or Hose: For watering your tomato plants.
* Fertilizer: A balanced, slow-release fertilizer to nourish your plants.
* Eye Protection: Safety first!
Preparing the Pallet
This is a crucial step to ensure your vertical garden is safe and aesthetically pleasing.
1. Inspect the Pallet: Carefully examine the pallet for any loose nails, splinters, or damaged boards. Remove any loose nails with a hammer and pliers. Sand down any rough edges or splinters with sandpaper.
2. Clean the Pallet: Use a brush or broom to remove any dirt, debris, or cobwebs from the pallet. You can also wash it down with a mild soap and water solution. Allow it to dry completely before proceeding.
3. Reinforce (Optional): If your pallet feels a bit flimsy, you can reinforce it by adding extra screws or nails to the joints. This will make it more stable and durable.
4. Sand (Optional): If you want a smoother finish, sand the entire pallet with medium-grit sandpaper. This will also help the stain or paint adhere better.
5. Stain or Paint (Optional): This is where you can get creative! Choose a stain or paint color that complements your outdoor space. Apply the stain or paint according to the manufacturer’s instructions. Allow it to dry completely before moving on to the next step. I personally love a weathered gray stain for a rustic look.
Creating the Planting Pockets
This is where the magic happens! We’ll be transforming the pallet into a series of individual planting pockets.
1. Measure the Pockets: Determine the size and shape of the planting pockets you want to create. Consider the size of your tomato seedlings and how much space they will need to grow. I usually aim for pockets that are at least 8-10 inches deep and wide.
2. Cut the Landscape Fabric: Cut the landscape fabric into pieces that are large enough to line each pocket. Be sure to leave some extra fabric to fold over the edges and secure it to the pallet. A good rule of thumb is to add about 4-6 inches to each side of your desired pocket size.
3. Line the Pockets: Carefully line each pocket with the landscape fabric. Make sure the fabric is snug against the inside of the pocket and that there are no gaps or holes.
4. Secure the Fabric: Use a staple gun to secure the landscape fabric to the pallet. Start by stapling the top edge of the fabric to the top of the pocket. Then, staple the sides and bottom of the fabric to the sides and bottom of the pocket. Make sure the staples are close together to prevent the fabric from tearing or coming loose. Overlap the fabric at the corners for extra strength.
5. Reinforce (Optional): For added durability, you can reinforce the pockets by adding an extra layer of landscape fabric. Simply repeat steps 3 and 4 with a second layer of fabric.
6. Test the Pockets: Before filling the pockets with soil, test them to make sure they are sturdy and secure. Gently tug on the fabric to see if it comes loose. If necessary, add more staples to reinforce any weak spots.
Planting Your Tomatoes
Now for the fun part – planting your tomato seedlings!
1. Fill the Pockets with Soil: Carefully fill each pocket with potting soil. Leave about an inch or two of space at the top of the pocket to prevent the soil from overflowing when you water.
2. Prepare the Seedlings: Gently remove the tomato seedlings from their containers. Loosen the roots slightly with your fingers.
3. Plant the Seedlings: Dig a small hole in the center of each pocket and carefully place the tomato seedling in the hole. Make sure the top of the root ball is level with the surface of the soil.
4. Backfill with Soil: Gently backfill the hole with soil, pressing down lightly to secure the seedling in place.
5. Water Thoroughly: Water the tomato seedlings thoroughly after planting. This will help to settle the soil and encourage root growth.
6. Fertilize: Apply a balanced, slow-release fertilizer to the soil according to the manufacturer’s instructions. This will provide your tomato plants with the nutrients they need to thrive.
Caring for Your Vertical Tomato Garden
Maintaining your vertical tomato garden is essential for a bountiful harvest.
1. Watering: Water your tomato plants regularly, especially during hot, dry weather. Check the soil moisture by sticking your finger into the soil. If the soil feels dry to the touch, it’s time to water. Water deeply, allowing the water to soak into the soil. Avoid watering the foliage, as this can lead to fungal diseases. Drip irrigation is a great option for vertical gardens.
2. Fertilizing: Fertilize your tomato plants every 2-3 weeks with a balanced liquid fertilizer. Follow the manufacturer’s instructions for dilution rates.
3. Sunlight: Tomato plants need at least 6-8 hours of sunlight per day. Place your vertical garden in a sunny location where it will receive plenty of direct sunlight.
4. Pruning: Prune your tomato plants regularly to remove suckers (the small shoots that grow between the main stem and the branches). This will help to improve air circulation and prevent diseases.
5. Support: As your tomato plants grow, they may need additional support. You can use stakes, cages, or trellises to support the stems and prevent them from breaking.
6. Pest Control: Keep an eye out for pests such as aphids, whiteflies, and tomato hornworms. If you notice any pests, treat them with an appropriate insecticide or organic pest control method. I prefer using neem oil for a natural solution.
7. Disease Prevention: To prevent diseases, make sure your tomato plants have good air circulation and are not overcrowded. Avoid watering the foliage and remove any diseased leaves promptly.
8. Harvesting: Harvest your tomatoes when they are fully ripe and have a deep, rich color. Gently twist the tomatoes off the vine.
Tips for Success
Here are a few extra tips to help you succeed with your vertical tomato garden:
* Choose the Right Tomato Varieties: Determinate (bush) tomato varieties are generally better suited for vertical gardens than indeterminate (vining) varieties. Determinate varieties are more compact and require less pruning.
* Use High-Quality Potting Soil: A good potting mix will provide your tomato plants with the nutrients and drainage they need to thrive.
* Water Regularly and Deeply: Consistent watering is essential for healthy tomato plants.
* Fertilize Regularly: Tomato plants are heavy feeders and need regular fertilization to produce a bountiful harvest.
* Provide Adequate Sunlight: Tomato plants need at least 6-8 hours of sunlight per day.
* Prune Regularly: Pruning helps to improve air circulation and prevent diseases.
* Support Your Plants: As your tomato plants grow, they may need additional support.
* Monitor for Pests and Diseases: Catching pests and diseases early can prevent them from
Conclusion
So, there you have it! Creating your own vertical tomato garden DIY isn’t just a fun weekend project; it’s a game-changer for anyone looking to maximize their gardening space, enjoy fresh, homegrown tomatoes, and add a touch of rustic charm to their balcony, patio, or even a small backyard. We’ve walked you through the process, highlighting the simplicity and affordability of this method. But why is this DIY project a must-try?
Firstly, think about the yield. A vertical garden allows you to grow more tomatoes in a smaller footprint compared to traditional row gardening. This is especially beneficial for urban dwellers or those with limited outdoor space. Imagine plucking ripe, juicy tomatoes right from your vertical tower, knowing you cultivated them yourself. The taste difference between store-bought and homegrown is undeniable, and with this method, you can enjoy that superior flavor all season long.
Secondly, consider the health benefits. Gardening is a fantastic stress reliever, and tending to your vertical tomato garden can be a therapeutic and rewarding experience. Plus, you’ll be getting some much-needed Vitamin D while you’re at it! Knowing exactly where your food comes from and how it was grown gives you peace of mind, especially in a world where food safety is a growing concern.
Thirdly, let’s talk about aesthetics. A well-designed vertical tomato garden can be a stunning focal point in your outdoor space. It adds a touch of greenery and vibrancy, transforming a dull corner into a thriving oasis. You can customize the look to match your personal style, using different materials, colors, and even adding companion plants like basil or marigolds for added visual appeal and pest control.
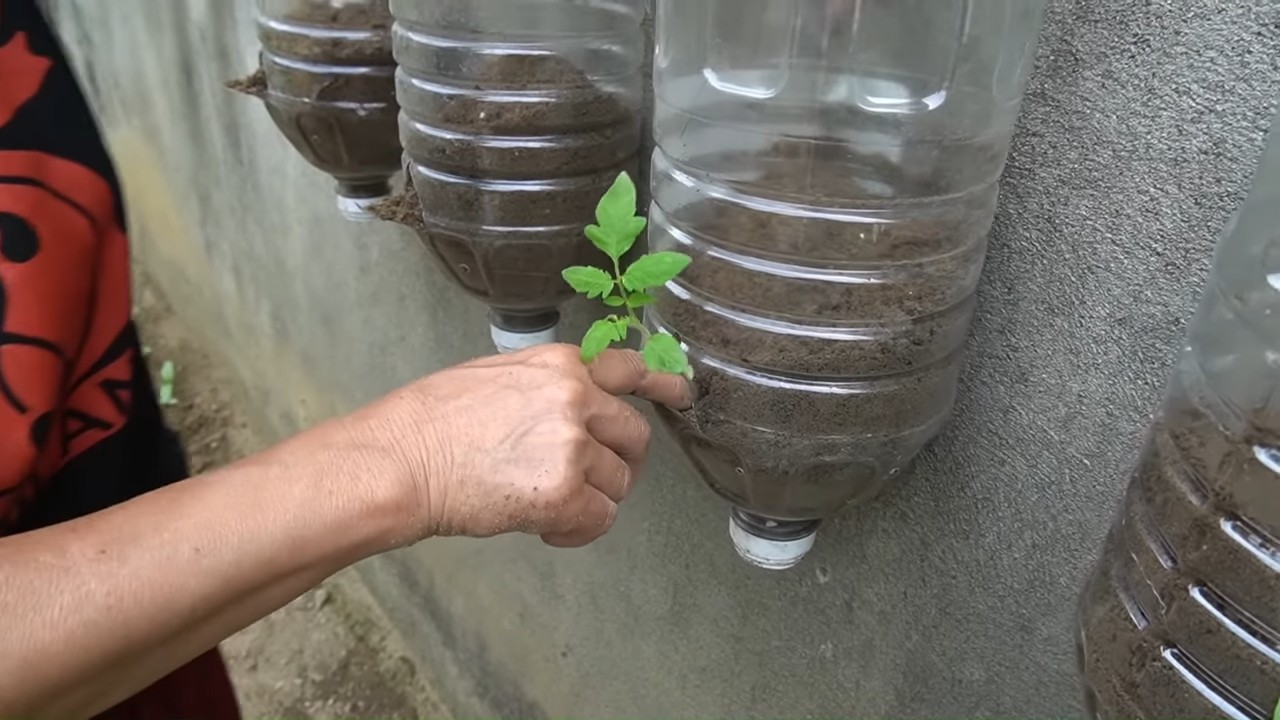
But the beauty of this project lies in its adaptability. Feel free to experiment with different container types. Instead of plastic buckets, consider using repurposed wooden pallets, hanging baskets, or even fabric grow bags. Each material offers a unique aesthetic and drainage properties, so choose what best suits your needs and preferences.
Want to take it a step further? Try incorporating an automated watering system. This will save you time and ensure your tomatoes receive consistent hydration, especially during hot summer months. You can also add a trellis or support structure to help your tomato plants climb and prevent them from becoming too heavy and collapsing.
Consider different tomato varieties as well. While cherry tomatoes are a popular choice for vertical gardens due to their compact size and prolific yields, you can also grow smaller determinate varieties like Roma or Early Girl. Just be sure to provide adequate support for heavier fruits.
Don’t be afraid to get creative with your planting arrangement. Interplant your tomatoes with herbs like basil, oregano, or thyme. These companion plants not only enhance the flavor of your tomatoes but also help to deter pests and attract beneficial insects.
The possibilities are endless! The most important thing is to have fun and experiment. So, grab your tools, gather your materials, and get ready to embark on this exciting DIY adventure. We are confident that you will be amazed by the results.
We encourage you to try this vertical tomato garden DIY project and share your experiences with us. Post photos of your creations on social media using #VerticalTomatoGardenDIY and tag us so we can see your amazing work. We can’t wait to see what you come up with! Happy gardening!
Frequently Asked Questions (FAQ)
What type of tomatoes are best for a vertical garden?
Determinate or bush varieties, and smaller indeterminate varieties, are generally best suited for vertical gardens. Determinate tomatoes grow to a specific size and then stop, making them easier to manage in a confined space. Cherry tomatoes, grape tomatoes, and Roma tomatoes are excellent choices. Indeterminate tomatoes, which continue to grow and produce fruit throughout the season, can also be grown vertically, but they require more pruning and support. Be sure to check the mature size of the tomato variety before planting to ensure it will fit comfortably in your vertical garden.
How often should I water my vertical tomato garden?
Watering frequency depends on several factors, including the weather, the type of container you’re using, and the size of your tomato plants. Generally, you should water your vertical tomato garden whenever the top inch of soil feels dry to the touch. During hot, dry weather, you may need to water daily, or even twice a day. In cooler, wetter weather, you may only need to water every few days. Be sure to water deeply, allowing the water to drain out of the bottom of the container. Avoid overwatering, as this can lead to root rot. Consider using a moisture meter to accurately gauge the moisture level in the soil.
What kind of soil should I use for my vertical tomato garden?
Use a high-quality potting mix that is well-draining and rich in organic matter. Avoid using garden soil, as it can be too heavy and compact, which can restrict root growth. A good potting mix will provide adequate drainage and aeration, allowing your tomato plants to thrive. You can also amend your potting mix with compost or other organic materials to improve its fertility and water-holding capacity. Look for potting mixes specifically formulated for vegetables or tomatoes.
How much sunlight do vertical tomato gardens need?
Tomatoes need at least 6-8 hours of direct sunlight per day to produce a good crop of fruit. Choose a location for your vertical tomato garden that receives plenty of sunlight throughout the day. If you don’t have a sunny spot, you can supplement with grow lights. Be sure to rotate your plants regularly to ensure that all sides receive adequate sunlight.
How do I fertilize my vertical tomato garden?
Tomatoes are heavy feeders, so regular fertilization is essential for optimal growth and fruit production. Start fertilizing your tomato plants a few weeks after transplanting them into your vertical garden. Use a balanced fertilizer that is specifically formulated for tomatoes. Follow the instructions on the fertilizer label for application rates and frequency. You can also use organic fertilizers, such as compost tea or fish emulsion. Avoid over-fertilizing, as this can lead to excessive foliage growth and reduced fruit production.
How do I prevent pests and diseases in my vertical tomato garden?
Prevention is key when it comes to pests and diseases. Start by choosing disease-resistant tomato varieties. Inspect your plants regularly for signs of pests or diseases. Remove any infected leaves or plants immediately. Use organic pest control methods, such as insecticidal soap or neem oil, to control common tomato pests like aphids, whiteflies, and tomato hornworms. Provide good air circulation around your plants to prevent fungal diseases. Water your plants at the base to avoid wetting the foliage, which can also promote fungal growth. Companion planting with herbs like basil and marigolds can also help to deter pests.
Can I grow other vegetables or herbs in my vertical tomato garden?
Yes, you can definitely grow other vegetables and herbs in your vertical tomato garden! Companion planting can be beneficial for tomatoes, as certain plants can help to deter pests, attract beneficial insects, or improve the flavor of your tomatoes. Good companion plants for tomatoes include basil, marigolds, oregano, thyme, and carrots. Avoid planting tomatoes near brassicas like cabbage, broccoli, and cauliflower, as they can compete for nutrients.
How do I support my tomato plants in a vertical garden?
Tomato plants, especially indeterminate varieties, can become quite heavy as they grow and produce fruit. Providing adequate support is essential to prevent them from collapsing or breaking. You can use a variety of methods to support your tomato plants, including stakes, cages, or trellises. Stakes are a simple and inexpensive option, but they may not provide enough support for larger plants. Cages are a more robust option, providing support all around the plant. Trellises are a good choice for indeterminate tomatoes, allowing them to climb and spread out. Be sure to choose a support system that is strong enough to handle the weight of your mature tomato plants.
What do I do with my vertical tomato garden at the end of the season?
At the end of the growing season, remove all of the dead or dying plant material from your vertical tomato garden. Dispose of any diseased plants properly to prevent the spread of disease. Clean your containers thoroughly with soap and water. You can amend the soil with compost or other organic matter to replenish nutrients. If you plan to reuse the soil next year, consider sterilizing it to kill any remaining pests or diseases. Store your containers in a dry place over the winter.
Leave a Comment