
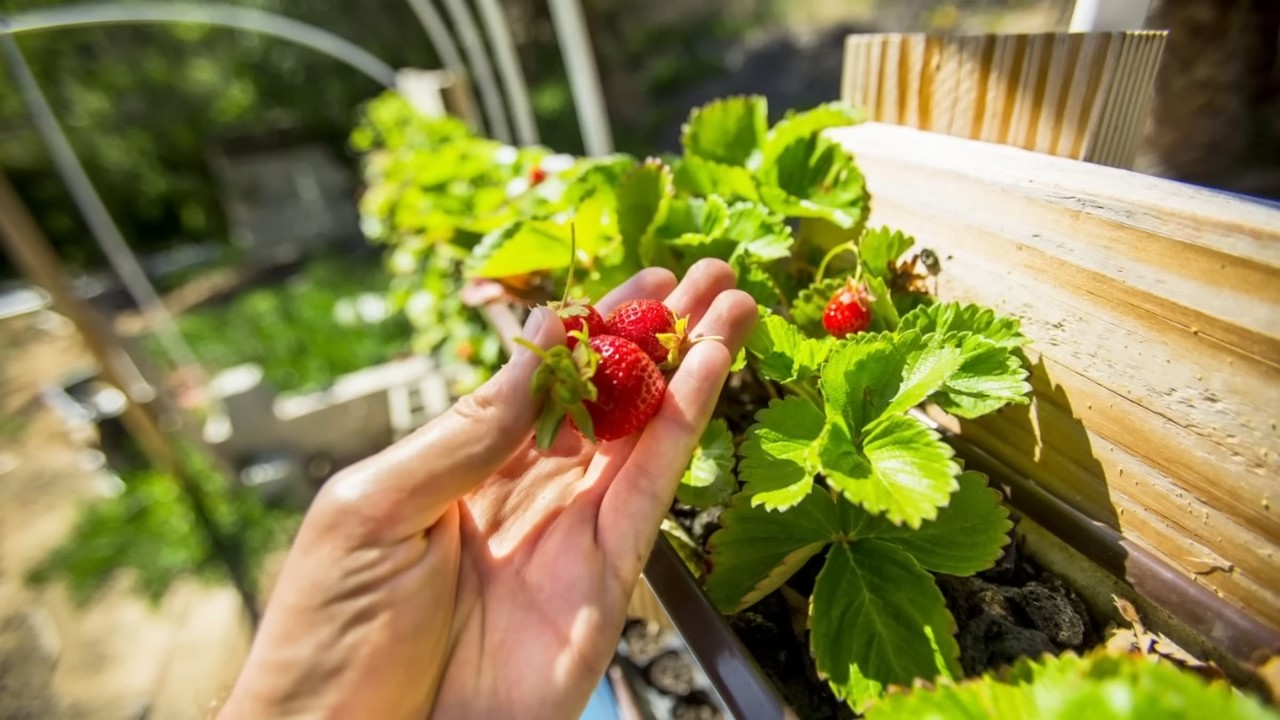
Strawberry Yield Raised Beds: Dreaming of baskets overflowing with juicy, sun-ripened strawberries? I know I am! There’s nothing quite like the taste of a homegrown strawberry, and the good news is, you don’t need acres of land to achieve a bumper crop. For centuries, gardeners have sought ways to maximize their harvests, and one method that consistently delivers impressive results is using raised beds, especially for strawberries.
Raised beds aren’t just a modern trend; they’ve been used in various forms throughout history, from ancient civilizations building terraces for agriculture to medieval monks creating raised garden plots. The beauty of a raised bed lies in its ability to provide optimal growing conditions. But why are they so effective for strawberries, and why should you consider building one (or more!) yourself?
Well, strawberries are notoriously picky about their soil. They crave well-draining, nutrient-rich soil to truly thrive. Many of us don’t have naturally perfect soil in our backyards, and that’s where raised beds come to the rescue! They allow you to create the ideal growing environment, controlling the soil composition, drainage, and even the temperature. Plus, raised beds offer better weed control, easier harvesting, and can even deter pests. In this article, I’ll share some simple yet effective DIY tricks and hacks to help you build your own strawberry yield raised beds and unlock the secret to a truly abundant strawberry harvest. Get ready to enjoy the sweetest, most flavorful strawberries you’ve ever tasted!
DIY Strawberry Yield Raised Beds: A Bumper Crop Awaits!
Hey there, fellow garden enthusiasts! Are you dreaming of juicy, sun-ripened strawberries bursting with flavor? I know I am! And if you’re like me, you’re always looking for ways to maximize your harvest. That’s why I’m so excited to share my tried-and-true method for creating strawberry yield raised beds. This isn’t just about building a raised bed; it’s about crafting the *perfect* environment for your strawberry plants to thrive, leading to a significantly larger and more delicious crop. Let’s get started!
Why Raised Beds for Strawberries?
Before we dive into the how-to, let’s quickly touch on why raised beds are so beneficial for strawberries.
* Improved Drainage: Strawberries hate soggy feet! Raised beds provide excellent drainage, preventing root rot and other moisture-related issues.
* Warmer Soil: Raised beds warm up faster in the spring, giving your strawberry plants a head start on the growing season.
* Better Soil Control: You have complete control over the soil composition in your raised bed, allowing you to create the ideal growing medium for strawberries.
* Pest and Weed Control: Raised beds make it easier to manage pests and weeds, keeping your strawberry plants healthy and productive.
* Easier Harvesting: No more bending over and straining your back! Raised beds bring your strawberries up to a more comfortable harvesting height.
Materials You’ll Need
Okay, let’s gather our supplies. This list might seem long, but trust me, it’s worth it!
* Untreated Lumber: I recommend using cedar or redwood for its natural rot resistance. You’ll need enough to build the frame of your raised bed. The size is up to you, but I find a 4ft x 8ft bed is a good starting point. For a bed that size, you’ll need:
* Two 8-foot long boards for the sides
* Two 4-foot long boards for the ends
* Four corner posts (2-foot long)
* Hardware Cloth (Optional, but Highly Recommended): This will line the bottom of your bed to prevent gophers and other burrowing critters from snacking on your strawberry roots.
* Landscaping Fabric: This will go between the hardware cloth (if using) and the soil to prevent weeds from growing up from below.
* Soil Mix: This is crucial! Strawberries love slightly acidic, well-draining soil. I recommend a mix of:
* Compost (about 50%)
* Peat Moss or Coco Coir (about 25%)
* Perlite or Vermiculite (about 25%)
* Gardening Gloves: Protect those hands!
* Safety Glasses: Always a good idea when working with tools.
* Measuring Tape: For accurate cuts.
* Saw: To cut the lumber.
* Drill with Screws: To assemble the frame.
* Staple Gun: To attach the hardware cloth and landscaping fabric.
* Shovel or Garden Fork: To mix and move the soil.
* Wheelbarrow (Optional): To transport the soil mix.
* pH Meter (Optional): To test the soil pH. Strawberries prefer a pH between 5.5 and 6.5.
* Soil Amendment (Optional): If your soil pH is too high, you can add sulfur to lower it. If it’s too low, you can add lime to raise it.
* Strawberry Plants: Of course! Choose a variety that’s well-suited to your climate. June-bearing, everbearing, and day-neutral varieties are all popular choices.
Building the Raised Bed Frame
Okay, let’s get our hands dirty!
1. Cut the Lumber: If you haven’t already, cut the lumber to the desired lengths. Remember, for a 4ft x 8ft bed, you’ll need two 8-foot boards and two 4-foot boards. The corner posts should be about 2 feet long.
2. Assemble the Frame: Place the boards on a flat surface to form a rectangle. Use the corner posts to connect the boards, screwing them together securely. Make sure the corners are square! I like to use a carpenter’s square for this.
3. Reinforce the Corners (Optional): For added stability, you can add metal corner braces to the inside of the frame. This is especially helpful if you’re building a larger bed.
Preparing the Bed for Planting
Now that we have the frame, let’s get it ready for our strawberry plants.
1. Choose a Location: Select a sunny spot in your yard that receives at least 6-8 hours of direct sunlight per day. Strawberries need plenty of sun to produce a good crop.
2. Level the Ground: Clear the area where you’ll be placing the raised bed and level the ground as much as possible. This will help ensure that the bed drains evenly.
3. Install Hardware Cloth (Optional): If you’re concerned about gophers or other burrowing pests, staple hardware cloth to the bottom of the frame. Make sure the edges are securely attached to prevent critters from digging underneath.
4. Line with Landscaping Fabric: Cover the hardware cloth (or the bottom of the frame if you’re not using hardware cloth) with landscaping fabric. This will prevent weeds from growing up from below. Staple the fabric to the inside of the frame.
Creating the Perfect Soil Mix
This is where the magic happens! The right soil mix is essential for healthy, productive strawberry plants.
1. Gather Your Ingredients: Collect your compost, peat moss (or coco coir), and perlite (or vermiculite).
2. Mix the Soil: In a wheelbarrow or on a tarp, combine the ingredients in the following proportions:
* 50% Compost
* 25% Peat Moss or Coco Coir
* 25% Perlite or Vermiculite
3. Test the pH (Optional): Use a pH meter to test the soil pH. Strawberries prefer a pH between 5.5 and 6.5.
4. Adjust the pH (Optional): If the pH is too high, add sulfur to lower it. If it’s too low, add lime to raise it. Follow the instructions on the product label.
5. Fill the Bed: Fill the raised bed with the soil mix, leaving a few inches of space at the top.
Planting Your Strawberry Plants
Almost there! Now for the fun part: planting the strawberries.
1. Choose Your Plants: Select healthy, vigorous strawberry plants from a reputable nursery. Consider the variety and its suitability for your climate.
2. Prepare the Planting Holes: Dig holes in the soil that are large enough to accommodate the root balls of your strawberry plants. Space the plants about 12-18 inches apart.
3. Plant the Strawberries: Gently remove the strawberry plants from their containers and loosen the root balls. Place the plants in the holes, making sure the crown (the point where the roots meet the stem) is level with the soil surface.
4. Backfill with Soil: Fill the holes with soil and gently firm the soil around the plants.
5. Water Thoroughly: Water the newly planted strawberries thoroughly to help them settle in.
Caring for Your Strawberry Plants
The work doesn’t stop after planting! Here’s how to keep your strawberry plants happy and healthy.
1. Water Regularly: Strawberries need consistent moisture, especially during fruiting. Water deeply whenever the top inch of soil feels dry. Avoid overhead watering, as this can promote fungal diseases. Drip irrigation is ideal.
2. Fertilize: Feed your strawberry plants with a balanced fertilizer every few weeks during the growing season. Follow the instructions on the fertilizer label. I like to use an organic fertilizer specifically formulated for berries.
3. Weed Regularly: Keep the raised bed free of weeds, as they can compete with your strawberry plants for nutrients and water. Hand-pull weeds carefully to avoid disturbing the strawberry roots.
4. Mulch: Apply a layer of mulch around the strawberry plants to help retain moisture, suppress weeds, and keep the berries clean. Straw, pine needles, or wood chips are all good options.
5. Protect from Pests and Diseases: Monitor your strawberry plants regularly for signs of pests or diseases. Take action promptly to prevent problems from spreading. Organic pest control methods, such as insecticidal soap or neem oil, can be effective.
6. Prune Runners: Strawberry plants produce runners, which are horizontal stems that grow along the ground and develop new plantlets. If you want to maximize fruit production, prune the runners regularly. This will encourage the plants to put

Conclusion
So, there you have it! Creating your own strawberry yield raised beds is not just a gardening project; it’s an investment in a bountiful harvest of sweet, juicy strawberries for years to come. We’ve walked you through the process, highlighting the benefits of improved drainage, better soil control, and easier accessibility for tending to your precious plants.
But why is this DIY trick a must-try? Simply put, it empowers you to take control of your strawberry growing environment. Forget battling poor soil conditions or contending with pests that thrive in ground-level gardens. Raised beds provide a clean, elevated space where you can tailor the soil composition to perfectly suit your strawberry plants’ needs. This translates directly into healthier plants, more abundant blooms, and ultimately, a significantly increased strawberry yield.
Beyond the practical advantages, building your own raised beds offers a sense of accomplishment and connection to your food. There’s nothing quite like the satisfaction of harvesting strawberries that you nurtured from start to finish, knowing that you played an active role in their growth.
Ready to take your strawberry growing to the next level? Here are a few suggestions and variations to consider:
* Vertical Strawberry Towers: If space is limited, consider building a vertical strawberry tower using stacked planters or repurposed materials like pallets. This maximizes your growing area and adds a visually appealing element to your garden.
* Companion Planting: Enhance your raised beds by incorporating companion plants like basil, thyme, or marigolds. These herbs and flowers can deter pests, attract pollinators, and even improve the flavor of your strawberries.
* Soil Amendments: Experiment with different soil amendments to find the perfect blend for your strawberries. Compost, aged manure, and peat moss are all excellent options for improving soil fertility and drainage.
* Consider different materials: While we’ve focused on wood, consider using other materials like cinder blocks, repurposed metal, or even woven willow branches for a more rustic look.
* Add a trellis: For everbearing varieties, consider adding a small trellis to support the runners and keep the berries off the ground.
Don’t be afraid to get creative and personalize your raised beds to suit your unique needs and preferences. The most important thing is to create a healthy and thriving environment for your strawberry plants.
We’re confident that you’ll be amazed by the results. So, gather your materials, roll up your sleeves, and get ready to enjoy a bumper crop of delicious strawberries. We encourage you to try this DIY trick and share your experience with us! Post photos of your raised beds and your strawberry harvest on social media using #StrawberryYieldRaisedBeds and let us know what worked best for you. We can’t wait to see your creations and celebrate your success! Happy gardening!
Frequently Asked Questions (FAQ)
What type of wood is best for building strawberry yield raised beds?
The best type of wood for raised beds is naturally rot-resistant wood like cedar, redwood, or cypress. These woods can withstand moisture and decay for many years without needing chemical treatments. However, these options can be more expensive. A more budget-friendly alternative is untreated pine, but it will likely need to be replaced sooner. You can extend the lifespan of pine by lining the inside of the bed with plastic sheeting or landscape fabric. Avoid using treated lumber (like pressure-treated lumber) as the chemicals used to treat the wood can leach into the soil and potentially harm your plants.
How deep should my strawberry yield raised beds be?
A depth of at least 8-12 inches is recommended for strawberry yield raised beds. This depth provides enough space for the roots to grow and access nutrients. If you have particularly poor soil underneath the raised bed, you may want to consider a deeper bed (18-24 inches) to provide even more room for root development.
What kind of soil should I use in my strawberry yield raised beds?
Strawberries thrive in well-draining, slightly acidic soil with a pH between 5.5 and 6.5. A good soil mix for raised beds includes equal parts topsoil, compost, and peat moss or coconut coir. Compost provides essential nutrients and improves soil structure, while peat moss or coconut coir helps retain moisture. You can also add a slow-release fertilizer specifically formulated for strawberries to provide a steady supply of nutrients throughout the growing season.
How far apart should I plant my strawberry plants in the raised bed?
The spacing between strawberry plants depends on the variety. For June-bearing strawberries, space plants 12-18 inches apart in rows that are 3-4 feet apart. For everbearing and day-neutral strawberries, space plants 8-12 inches apart in rows that are 2-3 feet apart. Proper spacing allows for adequate air circulation, which helps prevent fungal diseases.
How often should I water my strawberry yield raised beds?
Strawberries need consistent moisture, especially during flowering and fruiting. Water deeply whenever the top inch of soil feels dry to the touch. Avoid overwatering, as this can lead to root rot. A good rule of thumb is to water 1-2 times per week, depending on the weather and soil drainage. Consider using a soaker hose or drip irrigation system to deliver water directly to the roots and minimize water loss through evaporation.
How do I protect my strawberries from pests and diseases in raised beds?
Raised beds can help reduce pest and disease problems by improving drainage and air circulation. However, strawberries are still susceptible to certain pests and diseases. Common pests include slugs, snails, aphids, and spider mites. You can control these pests with organic methods like handpicking, introducing beneficial insects (like ladybugs), or using insecticidal soap. Common diseases include gray mold (Botrytis), leaf spot, and powdery mildew. Prevent these diseases by providing good air circulation, avoiding overhead watering, and removing any infected leaves promptly. You can also use organic fungicides if necessary. Bird netting is also a good idea to protect your ripening berries from hungry birds.
Can I grow strawberries in raised beds in containers?
Yes, you can definitely grow strawberries in containers within your raised beds, or even as a standalone option. This is a great option for smaller spaces or for those who want to move their plants around easily. Choose containers that are at least 6-8 inches in diameter and have drainage holes. Use a well-draining potting mix and follow the same watering and fertilizing guidelines as for raised beds.
How do I overwinter my strawberry plants in raised beds?
In colder climates, strawberry plants need protection during the winter months. After the first frost, cut back the foliage to about 2-3 inches above the crown. Cover the plants with a layer of straw or pine needles to insulate them from the cold. In very cold regions, you may also want to cover the raised bed with a tarp or blanket for extra protection. Remove the mulch in the spring when new growth begins to emerge.
How long will my strawberry plants produce in raised beds?
Strawberry plants typically produce for 3-5 years. June-bearing varieties produce a large crop of berries in the spring, while everbearing and day-neutral varieties produce smaller crops throughout the growing season. After 3-5 years, the plants will start to decline in productivity, and it’s best to replace them with new plants. You can propagate new plants from runners produced by your existing plants.


Leave a Comment