
Shaving Cream Hacks: Who knew that humble can of shaving cream held the key to unlocking a world of DIY possibilities beyond just a smooth shave? I certainly didn’t, until I stumbled upon a treasure trove of clever uses that have completely transformed my approach to everyday tasks. From cleaning to crafting, this unexpected multi-tasker is about to become your new best friend!
While shaving cream’s primary purpose has always been grooming, its unique properties – its foamy texture, moisturizing agents, and gentle cleansing power – have been recognized and utilized in surprising ways throughout the years. Think of it as a modern-day baking soda, a versatile household staple with a history of unexpected applications.
Are you tired of struggling with stubborn stains, dull mirrors, or kids’ messy artwork? Do you crave simple, effective solutions that won’t break the bank? Then you absolutely need these shaving cream hacks in your life! I’m going to show you how to leverage this inexpensive product to tackle common household challenges with ease. Get ready to be amazed by the power of shaving cream and discover how it can simplify your life, one foamy application at a time!
Unlock the Magic: Unexpected Shaving Cream Hacks You Need to Know!
Hey there, DIY enthusiasts! I’m about to let you in on a little secret: shaving cream isn’t just for shaving. Nope! This humble bathroom staple is a surprisingly versatile cleaning and household helper. Get ready to be amazed by these unexpected shaving cream hacks that will save you time, money, and a whole lot of elbow grease. Let’s dive in!
Cleaning Powerhouse: Shaving Cream to the Rescue!
Shaving cream’s foamy texture and mild cleaning agents make it perfect for tackling a variety of messes around the house. The key is to use the non-gel kind – the fluffy, white stuff.
Cleaning Mirrors and Glass
Tired of streaks on your mirrors and windows? Shaving cream is your new best friend!
Step-by-step instructions:
1. Apply a thin layer: Squirt a small amount of shaving cream onto the mirror or glass surface. You don’t need much!
2. Spread it around: Use your fingers or a soft cloth to spread the shaving cream evenly over the entire surface. It should look like you’re giving your mirror a fluffy white beard.
3. Let it sit: Allow the shaving cream to sit for a minute or two. This gives it time to loosen any dirt and grime.
4. Wipe it clean: Using a clean, damp cloth, wipe away the shaving cream. You might need to rinse the cloth a few times to remove all the residue.
5. Buff to a shine: Finally, use a dry, lint-free cloth to buff the surface to a sparkling shine.
Why it works: The shaving cream creates a protective layer that helps prevent fogging, especially in the bathroom. Plus, it leaves your mirrors and windows streak-free!
Removing Stains from Carpets and Upholstery
Accidents happen! But don’t panic when you spill something on your carpet or upholstery. Shaving cream can often come to the rescue.
Step-by-step instructions:
1. Act fast: The sooner you treat the stain, the better your chances of removing it completely.
2. Blot the stain: Use a clean cloth or paper towel to blot up as much of the spill as possible. Avoid rubbing, as this can spread the stain.
3. Apply shaving cream: Cover the stain with a generous amount of shaving cream.
4. Let it sit: Allow the shaving cream to sit on the stain for 15-30 minutes. This gives it time to penetrate the stain and break it down.
5. Blot and wipe: Use a clean, damp cloth to blot up the shaving cream and the stain. Work from the outside of the stain towards the center to prevent it from spreading.
6. Rinse (if necessary): If there’s any shaving cream residue left, rinse the area with a small amount of clean water and blot dry.
7. Air dry: Allow the area to air dry completely. You can speed up the process by using a fan.
Important note: Always test the shaving cream on a small, inconspicuous area of the carpet or upholstery first to make sure it doesn’t cause any discoloration.
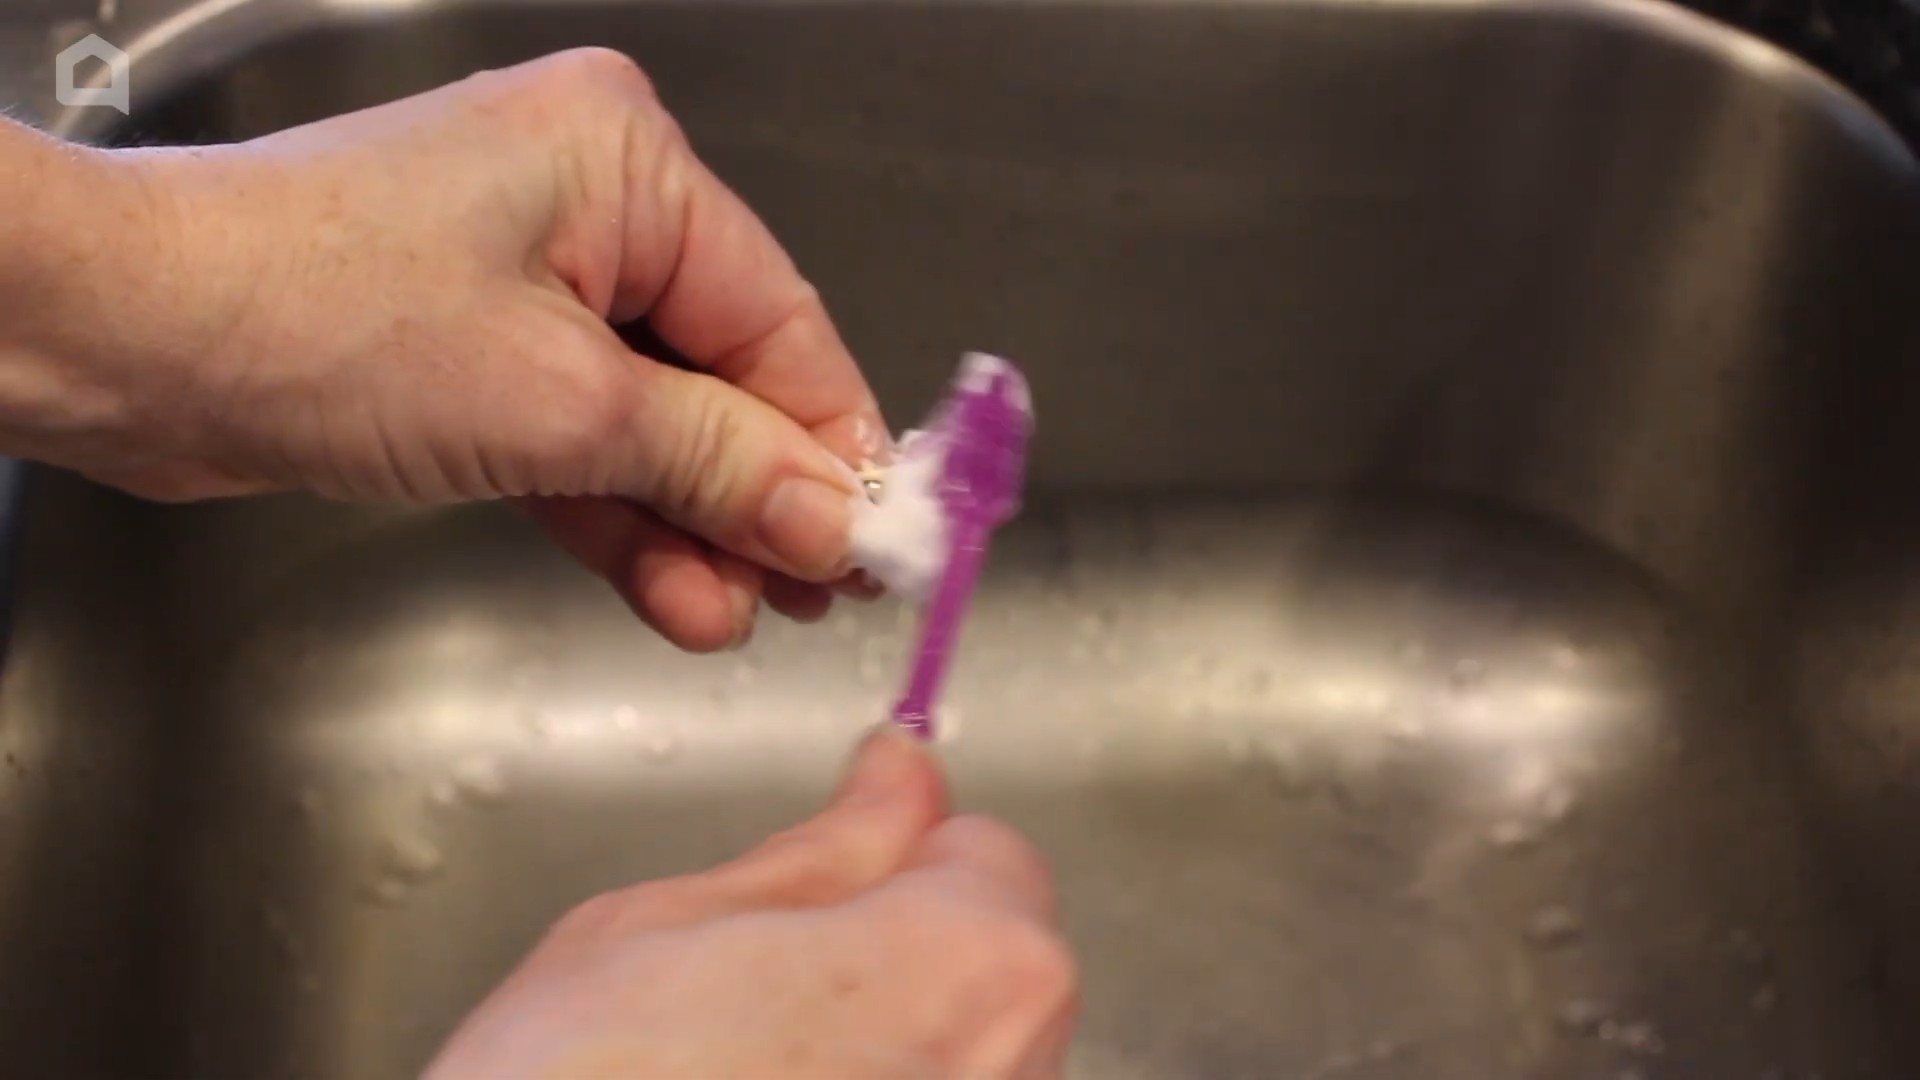
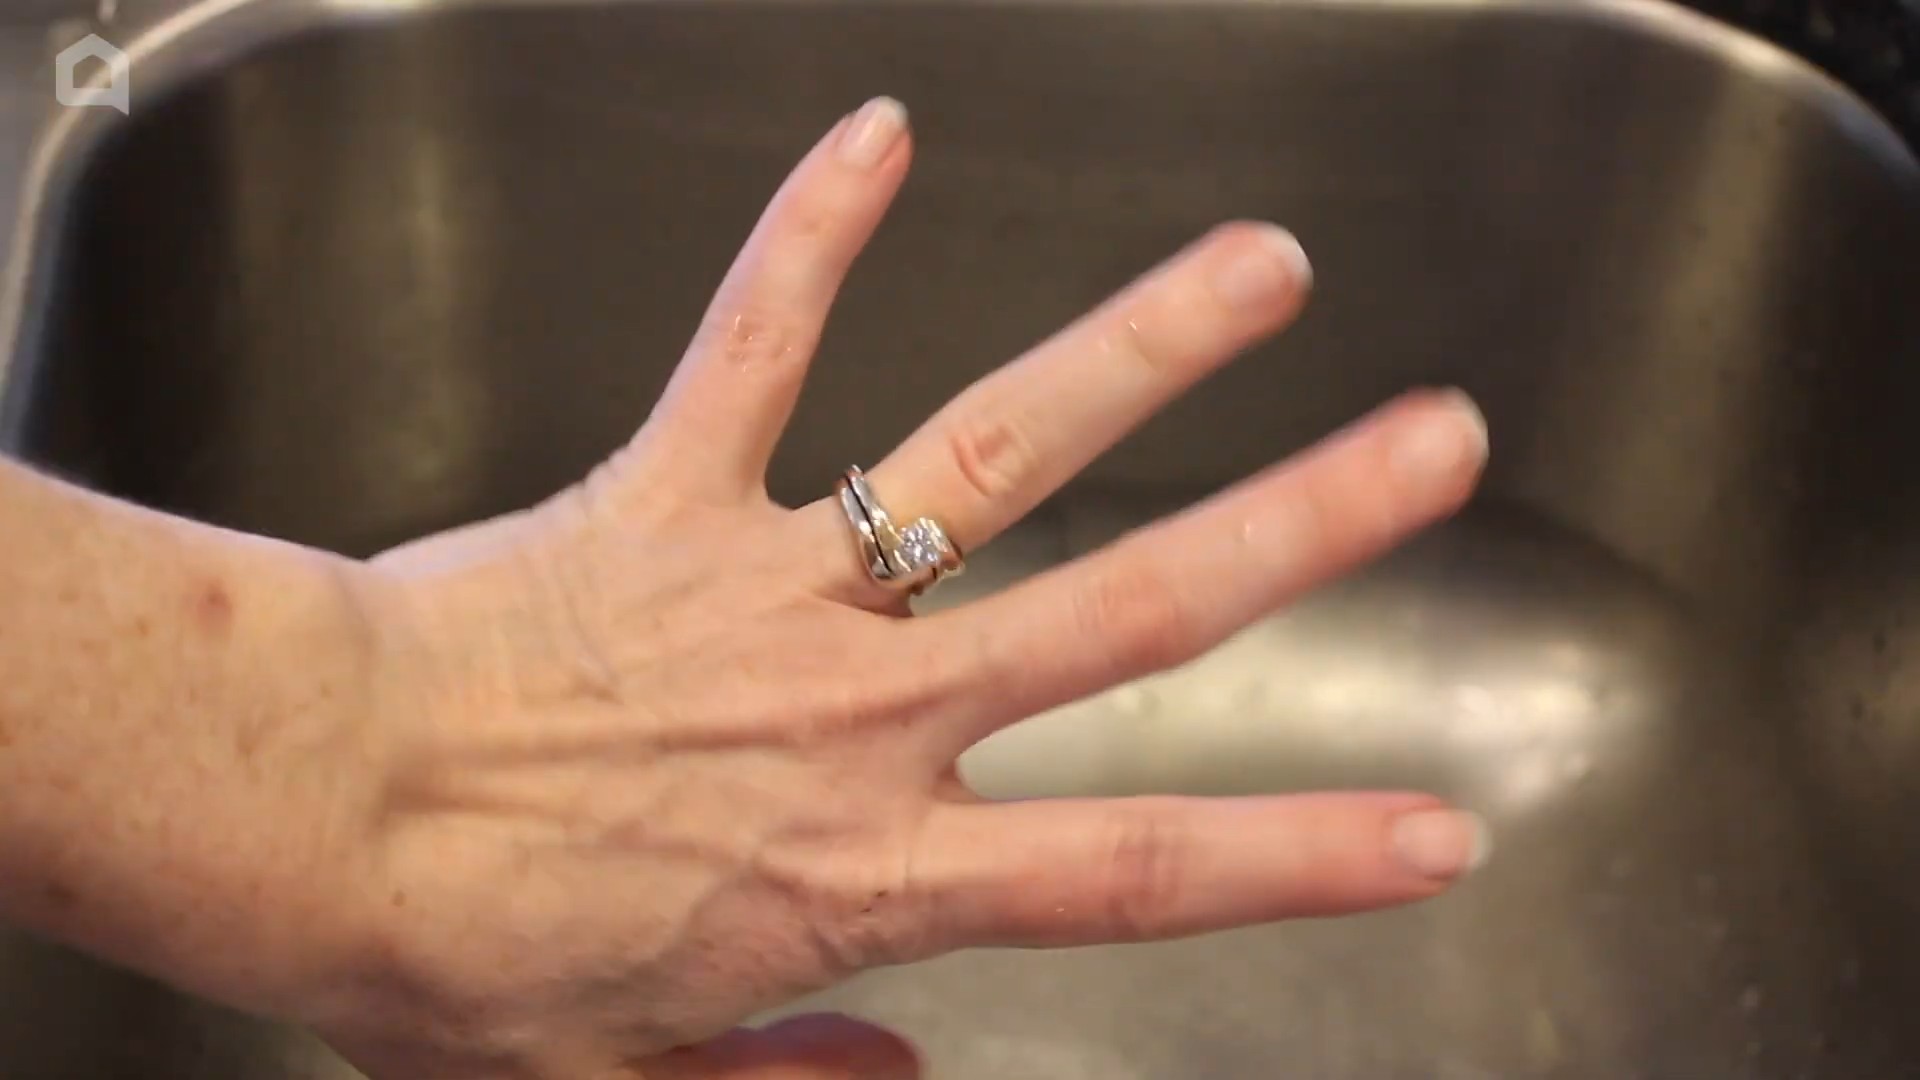
Cleaning Jewelry
Want to give your jewelry a quick shine without harsh chemicals? Shaving cream to the rescue!
Step-by-step instructions:
1. Apply a small amount: Squeeze a tiny amount of shaving cream onto your jewelry.
2. Gently rub: Use your fingers or a soft toothbrush to gently rub the shaving cream into the jewelry, paying attention to any crevices or areas with dirt buildup.
3. Rinse thoroughly: Rinse the jewelry thoroughly under warm water to remove all traces of shaving cream.
4. Dry and buff: Pat the jewelry dry with a soft cloth and then buff it to a shine.
Caution: Avoid using this method on delicate or porous gemstones, as the shaving cream could damage them.
Polishing Stainless Steel
Give your stainless steel appliances a sparkling makeover with shaving cream!
Step-by-step instructions:
1. Apply a thin layer: Apply a thin layer of shaving cream to the stainless steel surface.
2. Wipe and buff: Use a soft cloth to wipe the shaving cream over the surface, then buff it to a shine.
Why it works: Shaving cream helps remove fingerprints, smudges, and water spots, leaving your stainless steel looking brand new.
Household Hacks: Beyond Cleaning
Shaving cream isn’t just for cleaning; it can also be used for a variety of other household tasks.
Preventing Foggy Mirrors in the Bathroom
We already touched on this, but it’s worth emphasizing! Say goodbye to foggy mirrors after a hot shower.
Step-by-step instructions:
1. Apply a thin layer: Apply a thin layer of shaving cream to the mirror.
2. Wipe it off: Wipe off the shaving cream with a clean, dry cloth.
3. Enjoy a fog-free view: Enjoy a clear reflection, even after the hottest showers!
How often to apply: You’ll need to reapply the shaving cream every few weeks to maintain the fog-free effect.
Loosening Stuck Zippers
A stuck zipper can be a real pain! But don’t despair – shaving cream can help.
Step-by-step instructions:
1. Apply a small amount: Apply a small amount of shaving cream to the zipper teeth, both above and below the stuck area.
2. Gently work the zipper: Gently try to move the zipper up and down. The shaving cream will act as a lubricant, helping to loosen the zipper.
3. Repeat if necessary: If the zipper is still stuck, repeat the process.
4. Wipe away excess: Once the zipper is unstuck, wipe away any excess shaving cream with a clean cloth.
Soothing Minor Burns
Did you know shaving cream can help soothe minor burns?
Step-by-step instructions:
1. Cool the burn: First, cool the burn under cold running water for several minutes.
2. Apply shaving cream: Apply a thin layer of shaving cream to the burn.
3. Leave it on: Leave the shaving cream on the burn for several minutes.
4. Rinse gently: Rinse the shaving cream off gently with cool water.
Important note: This remedy is only for minor burns. For severe burns, seek medical attention immediately.
Making Bubbles for Kids
Need a quick and easy way to make bubbles for the kids? Shaving cream to the rescue!
Step-by-step instructions:
1. Mix ingredients: In a bowl, mix together 1 part shaving cream, 1 part dish soap, and 6 parts water.
2. Stir gently: Stir the mixture gently until it’s well combined.
3. Blow bubbles: Use a bubble wand or any other bubble-blowing tool to blow bubbles.
Tip: Add a few drops of food coloring to the mixture to create colorful bubbles.
Cleaning Paint Brushes
Don’t let your paint brushes dry out with paint! Shaving cream can help keep them soft and pliable.
Step-by-step instructions:
1. Rinse the brush: Rinse the paint brush under warm water to remove as much paint as possible.
2. Apply shaving cream: Apply a generous amount of shaving cream to the brush.
3. Work it in: Work the shaving cream into the bristles of the brush, making sure to reach all the way to the base.
4. Rinse thoroughly: Rinse the brush thoroughly under warm water until all the shaving cream is gone.
5. Shape and dry: Shape the brush and allow it to air dry.
Why it works: The shaving cream helps to loosen the paint and keep the bristles soft.
Shaving Cream Art: Unleash Your Creativity!
Beyond cleaning and household hacks, shaving cream can also be used for fun and creative art projects.
Marbling Paper
Create beautiful marbled paper with shaving cream and food coloring!
Materials you’ll need:
* Shaving cream (non-gel)
* Food coloring
* Shallow dish or tray
* Paper
* Ruler or scraper
Step-by-step instructions:
1. Prepare the shaving cream: Fill the shallow dish or tray with shaving cream.
2. Add food coloring: Drop food coloring onto the shaving cream in various colors.
3. Swirl the colors: Use a toothpick or skewer to swirl the food coloring around in the shaving cream, creating a marbled effect.
4. Lay the paper: Gently lay a piece of paper on top of the
Conclusion
So, there you have it! We’ve explored a range of surprising and effective shaving cream hacks that extend far beyond its primary purpose. From banishing stubborn stains to creating mesmerizing marbled art, and even achieving a streak-free shine on your mirrors, the versatility of this everyday product is truly remarkable. These aren’t just quirky tips; they’re practical solutions that can save you time, money, and a trip to the store for specialized cleaning products.
The beauty of these shaving cream hacks lies in their simplicity and accessibility. You likely already have a can of shaving cream tucked away in your bathroom, making these solutions readily available whenever a need arises. No need for complicated ingredients or specialized equipment – just a dollop of shaving cream and a little bit of elbow grease.
But why should you try these shaving cream hacks? Because they work! They offer a cost-effective and surprisingly efficient alternative to traditional cleaning methods. Imagine effortlessly removing grease stains from your clothing, leaving your bathroom mirrors sparkling, or creating unique and beautiful art projects with your kids, all thanks to a simple can of shaving cream.
Don’t be afraid to experiment and adapt these hacks to your specific needs. For instance, if you’re using shaving cream to clean jewelry, consider adding a drop of mild dish soap for extra cleaning power. When using it to remove stains, always test a small, inconspicuous area first to ensure colorfastness. And for those with sensitive skin, opt for a fragrance-free and hypoallergenic shaving cream to minimize any potential irritation.
We encourage you to embrace the unexpected and give these shaving cream hacks a try. You might be surprised at just how versatile and effective this humble product can be. Discover the magic of using shaving cream hacks to simplify your life and add a touch of creativity to your everyday routines.
Most importantly, we want to hear about your experiences! Did you try one of these hacks and find it particularly helpful? Did you discover a new and innovative use for shaving cream that we haven’t mentioned? Share your stories, tips, and variations in the comments below. Let’s create a community of shaving cream enthusiasts and unlock even more of its hidden potential together! Your feedback will not only help other readers but also inspire us to continue exploring the endless possibilities of everyday household items. So go ahead, grab that can of shaving cream, and prepare to be amazed!
Frequently Asked Questions (FAQs)
What type of shaving cream works best for these hacks?
Generally, a basic, non-gel shaving cream works best for most of these hacks. The foamy texture is ideal for lifting stains, cleaning surfaces, and creating art projects. Avoid using shaving gels or creams that contain added moisturizers or oils, as these can leave a residue on surfaces or interfere with the desired effect. For sensitive skin, always opt for a fragrance-free and hypoallergenic option to minimize the risk of irritation. When in doubt, test a small, inconspicuous area first to ensure the shaving cream doesn’t damage or discolor the surface you’re working with.
Can I use shaving cream to remove all types of stains?
While shaving cream is effective on many types of stains, including grease, ink, and makeup, it may not work on all stains. Stubborn or set-in stains may require more specialized stain removers. It’s always best to treat stains as quickly as possible for the best results. Before applying shaving cream to a stain, test it on a hidden area of the fabric to ensure it doesn’t cause discoloration. For delicate fabrics, consider consulting a professional cleaner.
Is shaving cream safe to use on all surfaces?
Shaving cream is generally safe to use on most non-porous surfaces like mirrors, glass, and tile. However, it’s essential to exercise caution when using it on porous surfaces like wood or painted walls, as it could potentially cause damage or discoloration. Always test a small, inconspicuous area first to ensure the shaving cream doesn’t harm the surface. Avoid using shaving cream on electronic devices or surfaces that are sensitive to moisture.
How long should I leave shaving cream on a stain before wiping it off?
The amount of time you leave shaving cream on a stain depends on the severity of the stain. For light stains, a few minutes may be sufficient. For more stubborn stains, you can leave it on for up to 30 minutes. After applying the shaving cream, gently rub it into the stain with a clean cloth or sponge. Once the time is up, wipe away the shaving cream with a damp cloth and check to see if the stain has been removed. If the stain persists, repeat the process or try a different stain removal method.
Can I use shaving cream to clean my jewelry?
Yes, shaving cream can be used to clean certain types of jewelry, particularly those made of metal like silver or gold. However, avoid using it on delicate or porous gemstones, as it could potentially damage them. To clean your jewelry with shaving cream, apply a small amount to a soft cloth and gently rub it over the surface of the jewelry. Rinse the jewelry thoroughly with warm water and dry it with a clean cloth. For heavily tarnished jewelry, you may need to repeat the process or use a specialized jewelry cleaner.
Will shaving cream clog my drains if I use it to clean my bathroom?
While shaving cream is generally safe to use in the bathroom, excessive amounts can potentially clog drains over time. To prevent clogs, avoid using large quantities of shaving cream when cleaning your bathroom. After cleaning, rinse the surfaces thoroughly with water to flush away any remaining shaving cream. You can also use a drain strainer to catch any hair or debris that may contribute to clogs. If you notice your drains are running slowly, consider using a drain cleaner to remove any buildup.
Are there any safety precautions I should take when using shaving cream for these hacks?
While shaving cream is generally safe, it’s essential to take a few precautions when using it for these hacks. Avoid getting shaving cream in your eyes, as it can cause irritation. If you do get it in your eyes, rinse them thoroughly with water. Keep shaving cream out of reach of children and pets. When using shaving cream to clean surfaces, ensure the area is well-ventilated. If you have sensitive skin, wear gloves to protect your hands. And as always, test a small, inconspicuous area first to ensure the shaving cream doesn’t damage or discolor the surface you’re working with.
Can I use shaving cream to polish my shoes?
Yes, shaving cream can be used as a quick and easy shoe polish, especially for leather shoes. Apply a small amount of shaving cream to a soft cloth and rub it onto the shoes in a circular motion. Let it sit for a few minutes, then buff the shoes with a clean, dry cloth. The shaving cream will help to clean and condition the leather, leaving your shoes looking shiny and new. However, avoid using shaving cream on suede or nubuck shoes, as it can damage the delicate fibers.
How can I use shaving cream to prevent fogging on my bathroom mirror?
To prevent fogging on your bathroom mirror, apply a thin layer of shaving cream to the mirror and spread it evenly with a clean cloth. Let it sit for a few minutes, then wipe away the shaving cream with a clean, dry cloth. The shaving cream will create a protective barrier on the mirror that prevents condensation from forming, keeping your mirror fog-free even after a hot shower. Reapply the shaving cream every few weeks or as needed to maintain the anti-fog effect.


Leave a Comment