
Salt tricks you should know can completely transform your home gardening experience! Are you tired of battling weeds, struggling with nutrient deficiencies, or watching your precious plants wither despite your best efforts? I know I have been there! It’s frustrating to pour time and energy into your garden only to be met with disappointing results. But what if I told you that a simple, inexpensive ingredient you probably already have in your kitchen could be the key to unlocking a thriving, vibrant garden?
For centuries, gardeners have experimented with natural remedies to enhance plant growth and protect their crops. While the specific use of salt in gardening might not be as ancient as, say, composting, its effectiveness in certain applications has been recognized for generations. Think about it – even the word “salary” comes from the Latin word for salt, highlighting its historical value and importance! Now, we’re not talking about dumping heaps of table salt on your flowerbeds, but rather using it strategically and in moderation to achieve some amazing results.
This DIY guide is packed with clever salt tricks you should know to tackle common gardening challenges. From boosting soil health and controlling pests to even cleaning your terracotta pots, salt can be a surprisingly versatile tool. I’m going to show you how to harness the power of salt to create a healthier, more productive, and more beautiful garden, all while saving you money and reducing your reliance on harsh chemicals. So, grab your gardening gloves and let’s get started!

Unlocking the Magic of Salt: DIY Hacks You Need to Know
Hey there, fellow DIY enthusiasts! I’m so excited to share some amazing salt hacks that will seriously simplify your life. Salt is more than just a seasoning; it’s a powerhouse ingredient with incredible cleaning, beauty, and even gardening applications. Get ready to be amazed!
Cleaning Powerhouse: Salt’s Cleaning Abilities
Salt’s abrasive texture and chemical properties make it a fantastic natural cleaner. It’s a great alternative to harsh chemicals, and you probably already have it in your pantry!
Cleaning a Scorched Pot or Pan
Ever burned something in a pot and dreaded the cleanup? Salt to the rescue!
1. Cool it Down: Let the pot cool down completely before you start. Trying to clean a hot pot is just asking for trouble (and burns!).
2. Generous Salt Application: Pour a generous amount of salt into the scorched pot or pan. I usually use about half a cup, but you might need more depending on how badly it’s burned.
3. Add a Little Water: Add just enough water to create a thick paste with the salt. You don’t want it too runny.
4. Scrub-a-dub-dub: Using a non-abrasive sponge or cloth (you don’t want to scratch your cookware!), scrub the burnt areas with the salt paste. Apply some elbow grease! You’ll be surprised how easily the burnt food starts to lift.
5. Rinse and Repeat: Rinse the pot with water. If there are still stubborn spots, repeat steps 3 and 4. For really tough burns, let the salt paste sit in the pot for a few hours or even overnight before scrubbing.
6. Wash as Usual: Once you’ve removed the burnt food, wash the pot as you normally would with soap and water.
Cleaning a Rusty Cast Iron Skillet
Cast iron skillets are amazing, but rust can be a real pain. Salt is a gentle yet effective way to remove rust without damaging the seasoning.
1. Dry the Skillet: Make sure your cast iron skillet is completely dry.
2. Coarse Salt Application: Sprinkle a generous layer of coarse salt (like kosher salt or sea salt) all over the rusty areas of the skillet.
3. Scrub with a Potato: Cut a potato in half and use the cut side to scrub the salt into the rust. The potato’s natural acids help to break down the rust, and the salt acts as an abrasive. Trust me, it works like a charm!
4. Rinse and Dry Immediately: Rinse the skillet with hot water and dry it immediately with a clean towel. Don’t let it air dry, or the rust will come back.
5. Re-season: After cleaning, you’ll need to re-season your cast iron skillet to protect it from future rust. Apply a thin layer of cooking oil (like vegetable oil or canola oil) to the entire skillet, inside and out. Place the skillet upside down in a preheated oven at 350°F (175°C) for an hour. Let it cool completely in the oven.
Cleaning a Stained Cutting Board
Cutting boards can get stained and smelly, especially after cutting things like onions or garlic. Salt can help!
1. Sprinkle with Salt: Sprinkle a generous amount of salt over the stained cutting board.
2. Lemon Power: Cut a lemon in half and use the cut side to scrub the salt into the cutting board. The lemon juice acts as a natural disinfectant and helps to lift the stains.
3. Let it Sit: Let the salt and lemon juice sit on the cutting board for about 5-10 minutes.
4. Scrub Again: Scrub the cutting board again with the lemon half.
5. Rinse and Dry: Rinse the cutting board with warm water and dry it thoroughly.
Beauty Boost: Salt for Skin and Hair
Believe it or not, salt can also be a fantastic addition to your beauty routine. It can exfoliate your skin, add volume to your hair, and even soothe sore muscles.
Salt Scrub for Exfoliation
A salt scrub is a great way to remove dead skin cells and leave your skin feeling smooth and refreshed.
1. Choose Your Salt: I prefer using fine sea salt for my face and coarser sea salt for my body.
2. Mix with Oil: In a bowl, mix the salt with a carrier oil like olive oil, coconut oil, or almond oil. The ratio should be about 2 parts salt to 1 part oil. You can also add a few drops of your favorite essential oil for fragrance and added benefits (lavender is great for relaxation!).
3. Apply to Damp Skin: In the shower or bath, apply the salt scrub to damp skin.
4. Gently Massage: Gently massage the scrub onto your skin in circular motions. Be careful not to scrub too hard, especially on your face.
5. Rinse Thoroughly: Rinse your skin thoroughly with warm water.
6. Moisturize: After exfoliating, it’s important to moisturize your skin to keep it hydrated.
Salt Spray for Beachy Waves
Want those effortless beachy waves without hitting the beach? Salt spray is your answer!
1. Gather Your Ingredients: You’ll need 1 cup of warm water, 1 tablespoon of sea salt, 1 teaspoon of coconut oil (optional, for added moisture), and a few drops of your favorite essential oil (optional).
2. Mix it Up: In a spray bottle, combine the warm water, sea salt, coconut oil (if using), and essential oil (if using). Shake well until the salt is dissolved.
3. Spray and Scrunch: Spray the salt spray onto damp or dry hair, focusing on the roots and ends. Scrunch your hair with your hands to create waves.
4. Air Dry or Diffuse: Let your hair air dry for a more natural look, or use a diffuser attachment on your hairdryer for faster drying and more defined waves.
Salt Bath for Sore Muscles
A salt bath is a great way to relax and soothe sore muscles after a workout or a long day. Epsom salt is technically magnesium sulfate, not sodium chloride (table salt), but it’s often used in similar ways and offers fantastic benefits.
1. Draw a Warm Bath: Fill your bathtub with warm water.
2. Add the Salt: Add 1-2 cups of Epsom salt to the bathwater.
3. Soak and Relax: Soak in the bath for 20-30 minutes.
4. Hydrate: Drink plenty of water after your bath to stay hydrated.
Gardening Guru: Salt in the Garden
Salt can also be a helpful tool in the garden, but it’s important to use it sparingly and carefully, as too much salt can harm plants.
Weed Killer (Use with Caution!)
Salt can be used as a natural weed killer, but it’s important to use it only on weeds that you want to eliminate completely, as it will also kill any other plants in the area.
1. Mix Salt and Water: Mix 1 cup of salt with 2 cups of hot water. Stir until the salt is dissolved.
2. Apply Directly to Weeds: Carefully pour the salt solution directly onto the weeds, avoiding any desirable plants.
3. Repeat as Needed: Repeat the application as needed until the weeds are dead.
Important Note: This method is best used on weeds growing in cracks in pavement or in areas where you don’t want anything to grow. Avoid using it near your lawn or garden beds.
Slug and Snail Deterrent
Slugs and snails can wreak havoc on your garden. Salt can be used as a barrier to deter them.
1. Create a Barrier: Sprinkle a thin line of salt around the plants you want to protect.
2. Reapply After Rain: Reapply the salt barrier after it rains, as the rain will wash it away.
Important Note: Be careful not to get salt on the plants themselves, as it can damage them.
Testing Soil Salinity
While salt can be harmful to most plants in high concentrations, some plants (like certain coastal plants) are more tolerant of salty soil. You can use a simple test to get an idea of your soil’s salinity.
1. Collect a Soil Sample: Collect a sample of soil from your garden.
2. Mix with Water: Mix the soil with distilled water in a ratio of 1:5 (1 part soil to 5 parts water).
3. Let it Settle: Let the mixture sit for at least 30 minutes, allowing the soil to settle.
4. Test with a Salinity Meter: Use a salinity meter (available online or at garden supply stores) to measure the salinity of the water.
Important Note: This
Conclusion
So, there you have it! These simple yet incredibly effective salt tricks are game-changers in the kitchen and beyond. We’ve explored how this humble ingredient, often relegated to just seasoning, can become your secret weapon for everything from reviving wilted greens to achieving perfectly poached eggs. The versatility of salt is truly astounding, and incorporating these techniques into your daily routine will undoubtedly make your life easier and more efficient.
Why is this a must-try? Because it’s practical, economical, and yields impressive results. Forget expensive specialty products or complicated procedures. With just a pinch of salt, you can tackle common household challenges with ease. Think about it: no more soggy vegetables, no more messy spills, and no more struggling to peel stubborn eggs. These salt tricks are about simplifying your life and maximizing the potential of an ingredient you already have on hand.
But don’t stop there! Feel free to experiment and adapt these techniques to your specific needs and preferences. For example, if you’re dealing with particularly stubborn stains on your cutting board, try creating a paste of salt and lemon juice for extra cleaning power. Or, if you’re looking to add a unique flavor to your baked goods, consider using a flavored salt, such as smoked salt or rosemary salt, in your recipes. The possibilities are endless!
We’ve shown you how to use salt tricks to elevate your cooking and cleaning game. Now it’s your turn to put these tips to the test. We are confident that you’ll be amazed by the results. Don’t just take our word for it – try them out for yourself and see the difference they can make.
We encourage you to embrace these salt tricks and share your experiences with us. Did you discover a new way to use salt? Did one of these techniques work particularly well for you? Let us know in the comments below! We’re always eager to learn from our readers and build a community of resourceful home cooks and cleaners. So go ahead, grab that salt shaker, and get ready to unlock a world of possibilities. You might be surprised at just how much this simple ingredient can do.
Frequently Asked Questions (FAQs)
Q: What kind of salt is best for these tricks?
A: The type of salt you use will depend on the specific trick. For most cleaning and general household purposes, regular table salt or kosher salt will work just fine. For cooking, kosher salt is often preferred due to its larger crystals and cleaner taste. Sea salt can also be used, but it tends to be more expensive. For some applications, like cleaning delicate surfaces, a finer grain salt might be preferable to avoid scratching. Experiment and see what works best for you!
Q: Can I use these salt tricks on all types of surfaces?
A: Not necessarily. While salt is generally safe for most surfaces, it’s always a good idea to test it in an inconspicuous area first, especially on delicate materials like wood or painted surfaces. Avoid using salt on surfaces that are prone to corrosion, such as aluminum or copper. When in doubt, consult the manufacturer’s instructions for the surface you’re cleaning.
Q: How much salt should I use for each trick?
A: The amount of salt needed will vary depending on the specific application. In general, it’s best to start with a small amount and add more as needed. For example, when reviving wilted greens, start with a tablespoon of salt in a bowl of cold water and adjust the amount based on the quantity of greens. For cleaning, a sprinkle or a paste of salt is usually sufficient.
Q: Are there any safety precautions I should take when using salt for these tricks?
A: Salt is generally safe to handle, but it’s always a good idea to wash your hands after using it, especially if you have sensitive skin. Avoid getting salt in your eyes, as it can cause irritation. When using salt for cleaning, wear gloves to protect your hands from prolonged exposure. And, as with any cleaning product, keep salt out of reach of children and pets.
Q: Can I use these salt tricks to remove stains from clothing?
A: Yes, salt can be effective for removing certain types of stains from clothing, especially fresh stains. For example, you can use salt to absorb red wine spills or to loosen grease stains. To use salt for stain removal, apply it directly to the stain and let it sit for a few minutes to absorb the liquid. Then, blot the stain with a clean cloth and wash the garment as usual. However, it’s important to note that salt may not be effective for all types of stains, and it’s always a good idea to test it on a small, inconspicuous area of the fabric first.
Q: How long will the salt trick last? For example, how long will the revived greens stay fresh?
A: The longevity of the effects of these salt tricks varies. For revived greens, they should stay fresher for a day or two longer than they would have otherwise. The salt helps to draw moisture back into the leaves, but it doesn’t prevent them from eventually wilting. For other tricks, like cleaning a cast iron skillet, the effect is immediate and lasting as long as you maintain the skillet properly. The key is to use these tricks as needed and to store items properly to maximize their freshness and longevity.
Q: What are some other creative uses for salt that I might not know about?
A: Beyond the tricks mentioned in the article, salt has a surprising number of other uses. You can use it to:
* Prevent apples from browning: Soak sliced apples in a saltwater solution to prevent oxidation.
* Clean your iron: Sprinkle salt on an ironing board and iron over it to remove residue.
* Keep ants away: Sprinkle salt along ant trails to deter them.
* Deodorize your garbage disposal: Pour a cup of salt down the drain followed by cold water.
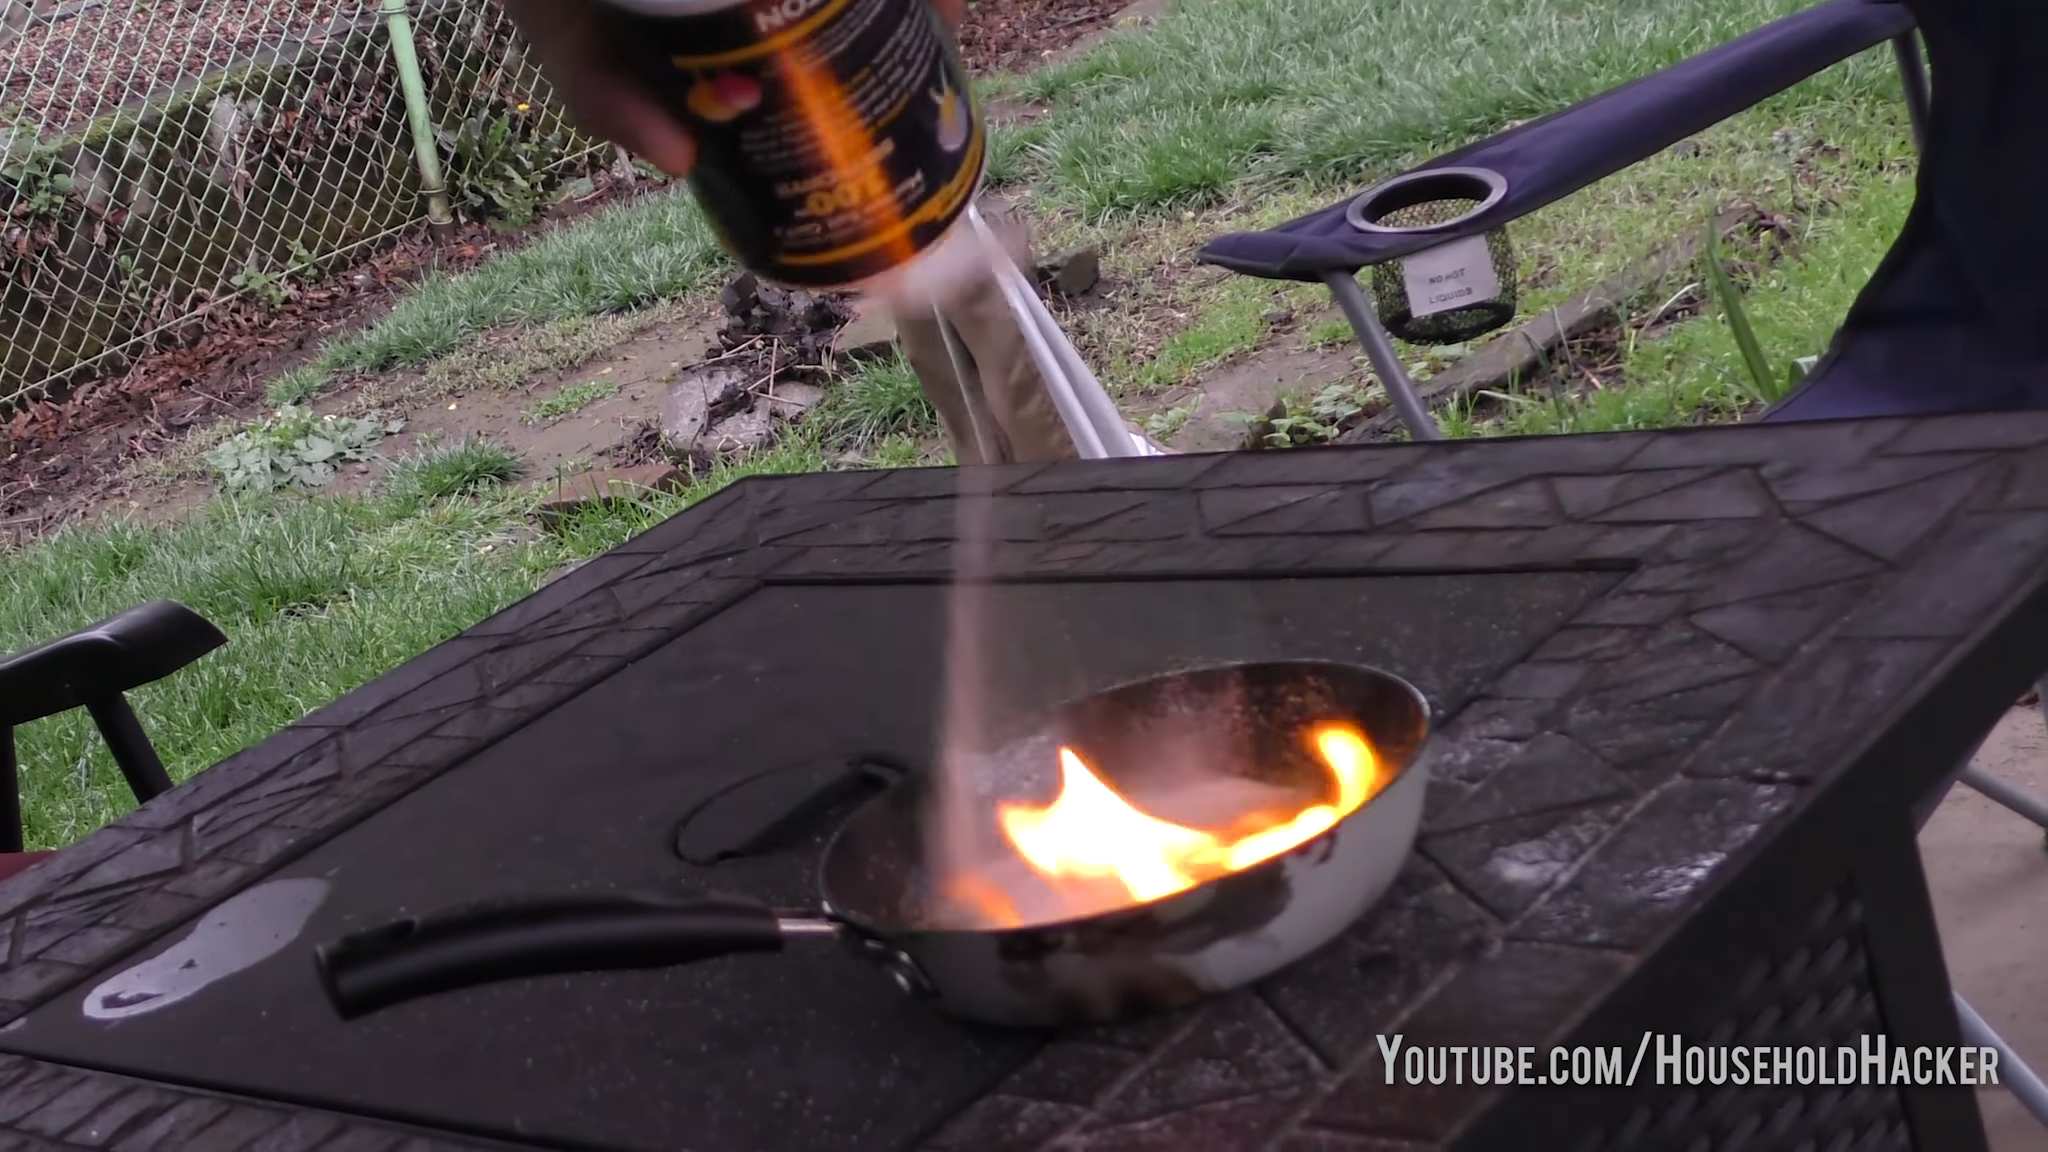
* Extinguish grease fires: Pour salt directly onto the flames to smother them. (Never use water!)
These are just a few examples, and there are many other creative ways to use salt around the house.
Q: I tried one of the salt tricks, and it didn’t work as well as I expected. What could I have done wrong?
A: There are several factors that could affect the outcome of these salt tricks. Make sure you’re using the correct type of salt and the appropriate amount. Also, consider the condition of the item you’re working with. For example, if your greens are already severely wilted, the salt trick may not be able to fully revive them. Finally, be patient and persistent. Some tricks may require a little trial and error to get right. If you’re still having trouble, try searching online for additional tips and troubleshooting advice. And don’t hesitate to share your experience in the comments section – we’re here to help!
Leave a Comment