
Rooftop Corn Farming Guide: Your Path to Urban Harvest!
Imagine stepping onto your rooftop and being greeted by the sight of lush, green corn stalks swaying gently in the breeze. Sounds like a dream, right? Well, it doesn’t have to be! This Rooftop Corn Farming Guide is your key to unlocking the secrets of growing delicious, homegrown corn right in the heart of the city. For centuries, corn has been a staple crop, deeply woven into the cultures of countless civilizations, providing sustenance and shaping traditions. Now, you can bring this agricultural heritage to your own urban oasis.
Why should you consider rooftop corn farming? In today’s world, where access to fresh, locally sourced produce is becoming increasingly important, growing your own food offers a fantastic solution. Not only does it provide you with nutritious and flavorful corn, but it also reduces your carbon footprint and connects you with nature in a meaningful way. Plus, let’s be honest, there’s something incredibly satisfying about harvesting your own corn and enjoying the fruits (or rather, vegetables!) of your labor. This guide will provide you with the essential knowledge and practical tips you need to succeed, even if you’re a complete beginner. Let’s get started and transform your rooftop into a thriving cornfield!

Rooftop Corn Farming: A Beginner’s Guide to Growing Your Own Stalks in the Sky
Okay, so you’re thinking about growing corn on your roof? Awesome! It might sound a little crazy, but with the right approach, you can absolutely have a mini cornfield above your head. I’m going to walk you through everything you need to know, from choosing the right varieties to dealing with potential pests. Let’s get started!
Planning Your Rooftop Corn Patch
Before you even think about seeds, there’s some crucial planning to do. This will save you a lot of headaches later on.
* Assess Your Roof’s Load Capacity: This is the MOST important step. Corn, soil, and water are heavy. Seriously heavy. You need to consult with a structural engineer or a qualified contractor to determine if your roof can handle the added weight. Don’t skip this! Safety first.
* Sunlight: Corn needs at least 6-8 hours of direct sunlight per day. Observe your roof throughout the day to see where the sun hits and for how long.
* Water Source: You’ll need a reliable water source nearby. Hauling buckets of water up to your roof is not fun, trust me. Consider installing an outdoor faucet or using a long hose.
* Wind Protection: Rooftops can be windy. Strong winds can damage or even topple your corn stalks. Think about ways to provide wind protection, such as using trellises, windbreaks (like sturdy shrubs in containers), or planting in a more sheltered area of the roof.
* Container Selection: Choose large, sturdy containers with good drainage. I recommend containers that are at least 12-18 inches deep and wide. Fabric pots are a great option because they allow for good airflow and drainage.
* Variety Selection: Not all corn varieties are suitable for container gardening. Look for shorter, more compact varieties like ‘On Deck’, ‘Trinity’, or ‘Golden Bantam’. These are bred to be more manageable in smaller spaces.
* Pollination Considerations: Corn is wind-pollinated, meaning the pollen from the tassels (male flowers) needs to reach the silks (female flowers) on the ears. If you’re only growing a few plants, you might need to hand-pollinate to ensure good ear development. More on that later!
Materials You’ll Need
Here’s a list of everything you’ll need to get started:
* Corn seeds (choose a suitable variety)
* Large containers (at least 12-18 inches deep and wide)
* High-quality potting mix (not garden soil!)
* Slow-release fertilizer
* Watering can or hose
* Trowel or small shovel
* Gloves
* Optional: Trellises or stakes for support
* Optional: Windbreak materials (shrubs, fencing, etc.)
* Optional: Bird netting (to protect your corn from hungry birds)
Step-by-Step Planting Guide
Alright, let’s get our hands dirty! Here’s how to plant your corn:
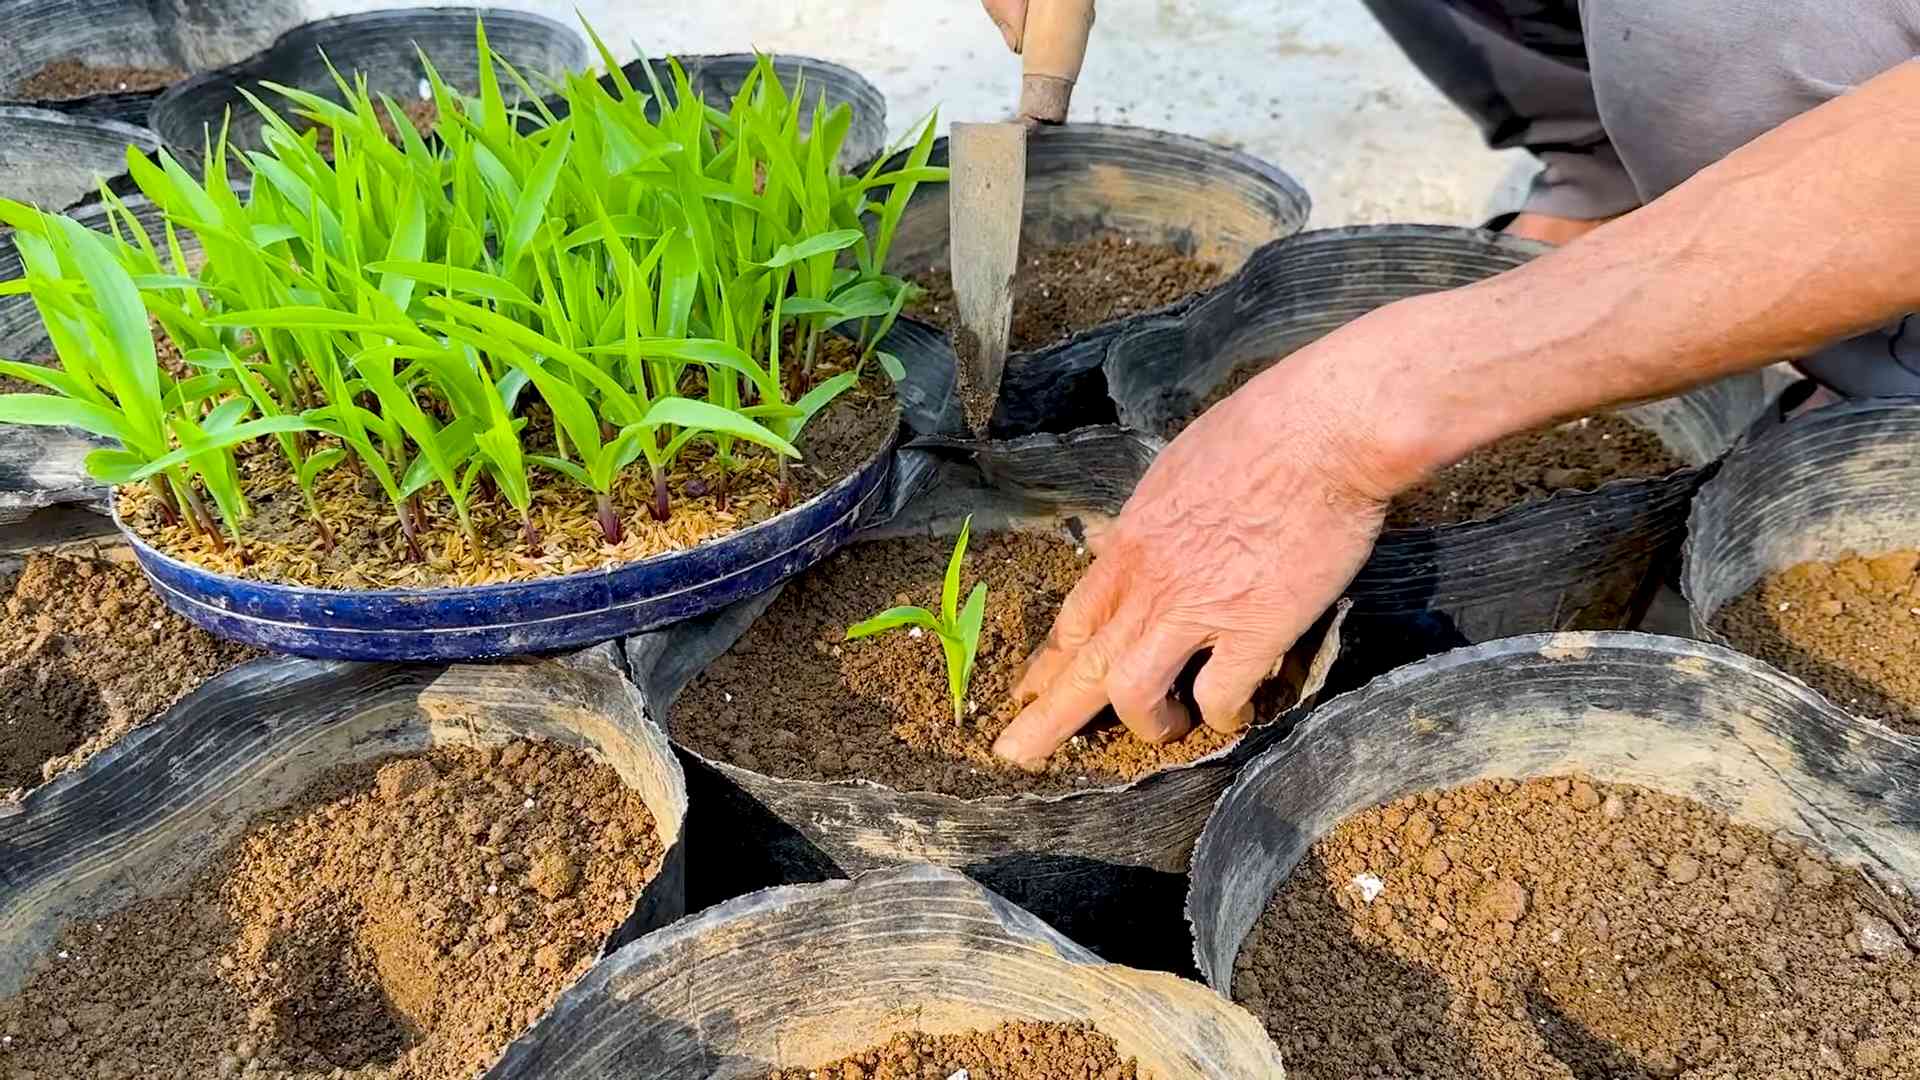
1. Prepare Your Containers: Fill your containers with high-quality potting mix, leaving a few inches of space at the top. Don’t use garden soil, as it’s too heavy and doesn’t drain well in containers.
2. Add Fertilizer: Mix a slow-release fertilizer into the potting mix according to the package directions. This will provide your corn plants with the nutrients they need to grow.
3. Plant Your Seeds: Sow the corn seeds about 1-2 inches deep and 4-6 inches apart in the container. I usually plant 3-4 seeds per container and then thin them out later, keeping the strongest plant.
4. Water Thoroughly: Water the containers thoroughly after planting, making sure the soil is evenly moist.
5. Place in a Sunny Location: Move the containers to your prepared rooftop location, ensuring they receive at least 6-8 hours of direct sunlight per day.
6. Monitor Germination: Corn seeds typically germinate in 7-10 days. Keep the soil consistently moist during this time.
7. Thin Seedlings: Once the seedlings are a few inches tall, thin them out to one plant per container (if you planted multiple seeds). Choose the strongest, healthiest-looking seedling and snip off the others at the soil line.
8. Provide Support (Optional): If you’re growing a taller variety of corn or if your rooftop is particularly windy, provide support for your plants using trellises or stakes.
Caring for Your Rooftop Corn
Now that your corn is planted, here’s how to keep it happy and healthy:
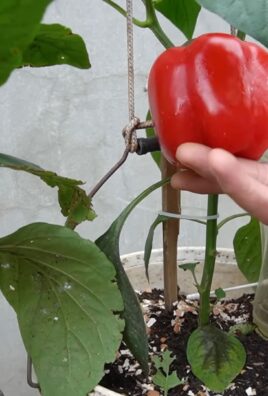
* Watering: Corn needs consistent moisture, especially during hot weather. Water deeply whenever the top inch of soil feels dry to the touch. Avoid overwatering, as this can lead to root rot.
* Fertilizing: Corn is a heavy feeder, so you’ll need to fertilize it regularly. Apply a liquid fertilizer every 2-3 weeks, following the package directions. Look for a fertilizer that’s high in nitrogen, which is essential for leaf growth.
* Weeding: Keep your containers free of weeds, as they can compete with your corn plants for nutrients and water.
* Pest Control: Keep an eye out for common corn pests like corn earworms, aphids, and spider mites. If you spot any pests, treat them promptly with an appropriate insecticide or organic pest control method. I prefer using insecticidal soap or neem oil for organic pest control.
* Hand-Pollination (If Necessary): As I mentioned earlier, corn is wind-pollinated. If you’re only growing a few plants, you might need to hand-pollinate to ensure good ear development. Here’s how:
* Wait until the tassels (male flowers) are shedding pollen. You’ll see a fine, yellow powder.
* Gently shake the tassels over the silks (female flowers) on the ears.
* Repeat this process every day for a few days to ensure pollination.
* Monitor for Diseases: Corn can be susceptible to diseases like rust and leaf blight. If you notice any signs of disease, treat them promptly with an appropriate fungicide. Good air circulation can help prevent diseases.
Harvesting Your Corn
The moment you’ve been waiting for! Here’s how to know when your corn is ready to harvest:
1. Check the Silks: The silks should be dry and brown.
2. Feel the Ears: Gently squeeze the ears. They should feel plump and full.
3. Peel Back the Husk: Carefully peel back a small portion of the husk and check the kernels. They should be plump and milky.
4. Harvest: To harvest, grasp the ear firmly and twist it downward. It should snap off easily from the stalk.
Troubleshooting Common Problems
Even with the best planning, you might encounter some problems along the way. Here are some common issues and how to fix them:
* Poor Germination: Make sure your seeds are fresh and that the soil is consistently moist.
* Yellowing Leaves: This could be a sign of nutrient deficiency. Try fertilizing with a balanced fertilizer.
* Stunted Growth: This could be due to a lack of sunlight, water, or nutrients. Make sure your plants are getting enough of all three.
* Pest Infestations: Treat pests promptly with an appropriate insecticide or organic pest control method.
* Poor Pollination: Hand-pollinate your plants to ensure good ear development.
Choosing the Right Corn Variety
As I mentioned earlier, choosing the right corn variety is crucial for rooftop gardening. Here are a few of my favorites:
* ‘On Deck’: This is a super-sweet variety that’s specifically bred for container gardening. It’s compact and produces small, but delicious, ears.
* ‘Trinity’: This is another great option for containers. It’s a shorter variety that produces good-sized ears.
* ‘Golden Bantam’: This is a classic heirloom variety that’s known for its sweet flavor. It’s a bit taller than the other varieties, so you might need to provide some support.
* ‘Blue Hopi’: If you’re looking for something a little different, try growing ‘Blue Hopi’ corn. It’s a beautiful variety with blue kernels that can be used to make cornmeal.
Dealing with Wind on Your Rooftop
Rooftops can be notoriously windy, which can be a challenge for growing corn. Here are some tips for dealing with wind:
* Choose a Sheltered Location: If possible, choose a location on your roof that’s sheltered from the wind. This could be near a wall or behind a taller structure.
* Use Windbreaks: Create windbreaks by planting shrubs in containers or using fencing.
* Provide Support: Use trellises or
Conclusion
So, there you have it – a comprehensive guide to transforming your rooftop into a thriving cornfield! We’ve walked you through everything from selecting the right corn variety and preparing your containers to mastering pollination and harvesting your golden bounty. But why should you embark on this slightly unconventional, yet incredibly rewarding, journey?
Simply put, rooftop corn farming offers a unique blend of sustainability, fresh produce, and sheer satisfaction. Imagine stepping outside your door to harvest sweet, juicy corn on the cob, knowing you nurtured it from seed to table. It’s a connection to nature that’s often missing in urban environments, and a tangible way to reduce your carbon footprint by growing your own food locally. Plus, let’s be honest, it’s a fantastic conversation starter!
Beyond the environmental and personal benefits, rooftop corn farming is surprisingly accessible. With a little planning and effort, even those with limited space can enjoy the fruits (or rather, vegetables) of their labor. And don’t think you’re limited to just one type of corn! Experiment with different varieties to find your favorites. Consider growing ornamental corn for beautiful fall decorations, or try a smaller, faster-maturing variety if you’re in a region with a shorter growing season. You can even companion plant with beans and squash to create a miniature “Three Sisters” garden on your roof.
This DIY rooftop corn farming project is a must-try for anyone seeking a sustainable, rewarding, and delicious gardening experience. It’s a chance to reclaim urban spaces, connect with nature, and enjoy the unparalleled taste of homegrown corn.
We understand that venturing into rooftop corn farming might seem daunting at first, but we’re confident that with the knowledge and guidance provided in this article, you’ll be well-equipped to succeed. Remember to start small, observe your plants carefully, and don’t be afraid to experiment.
Now, it’s your turn! We encourage you to take the plunge and transform your rooftop into a corn-growing oasis. Share your experiences, successes, and challenges with us in the comments below. We’d love to see photos of your rooftop cornfields and hear about the delicious meals you create with your homegrown harvest. Let’s build a community of rooftop corn farmers and inspire others to embrace this innovative and sustainable gardening practice. Happy growing!
Frequently Asked Questions (FAQ)
What are the best corn varieties for rooftop farming?
Choosing the right corn variety is crucial for success in a rooftop environment. Look for varieties that are well-suited to container gardening and have shorter growing seasons. Some excellent options include:
* ‘Golden Bantam’: A classic sweet corn variety known for its excellent flavor and relatively short maturity time (around 75-80 days).
* ‘Trinity’: A hybrid sweet corn that matures quickly (around 70 days) and produces good yields in smaller spaces.
* ‘On Deck’: A super sweet corn variety specifically bred for container gardening, maturing in about 75 days.
* ‘Blue Hopi’: An heirloom corn variety with beautiful blue kernels, suitable for grinding into cornmeal. It’s more drought-tolerant than sweet corn.
* ‘Strawberry Popcorn’: A novelty popcorn variety with small, red kernels. It’s fun to grow and makes a unique snack.
Consider your local climate and growing season when making your selection. Check seed packets for information on maturity time, space requirements, and disease resistance.
How much sunlight does rooftop corn need?
Corn is a sun-loving plant and requires at least 6-8 hours of direct sunlight per day to thrive. Without sufficient sunlight, your corn plants will be weak, spindly, and produce little to no corn. Assess your rooftop’s sunlight exposure before planting. If your rooftop receives less than 6 hours of direct sunlight, you may need to supplement with grow lights.
What size containers are needed for rooftop corn farming?
Corn plants have extensive root systems and require large containers to grow properly. A general rule of thumb is to use containers that are at least 12 inches in diameter and 12 inches deep per plant. However, larger containers (15-20 gallons) are preferable, especially for taller varieties. Make sure your containers have drainage holes to prevent waterlogging.
How often should I water my rooftop corn?
Rooftop corn plants require consistent watering, especially during hot weather. Check the soil moisture regularly and water when the top inch feels dry to the touch. Water deeply, ensuring that the entire root ball is moistened. Avoid overwatering, which can lead to root rot. Consider using a soaker hose or drip irrigation system to provide consistent moisture.
How do I pollinate corn on my rooftop?
Corn is wind-pollinated, but on a rooftop, there may not be enough wind to effectively transfer pollen from the tassels (male flowers) to the silks (female flowers). You’ll likely need to hand-pollinate your corn plants. Here’s how:
1. Gently shake the tassels to release pollen.
2. Collect the pollen in a small container or bag.
3. Use a small brush or your fingers to transfer the pollen to the silks of each ear of corn.
4. Repeat this process every day for about a week, or until the silks start to turn brown.
What are common pests and diseases that affect rooftop corn?
Common pests that can affect rooftop corn include aphids, corn earworms, and spider mites. Diseases include corn smut and leaf blight. Regularly inspect your plants for signs of pests or diseases. Treat infestations promptly with organic insecticides or fungicides. Good air circulation and proper watering can help prevent many diseases. Consider using companion planting to deter pests. For example, planting marigolds near your corn can help repel nematodes.
How do I fertilize my rooftop corn?
Corn is a heavy feeder and requires regular fertilization to produce a good harvest. Use a balanced fertilizer (e.g., 10-10-10) at planting time. Side-dress your corn plants with nitrogen fertilizer when they are about knee-high and again when the tassels appear. You can also use organic fertilizers such as compost tea or fish emulsion.
When is rooftop corn ready to harvest?
Corn is typically ready to harvest about 20-30 days after the silks appear. The silks will turn brown and dry, and the ears will feel plump and full. To check for ripeness, peel back a portion of the husk and puncture a kernel with your fingernail. If the liquid is milky, the corn is ready to harvest. If the liquid is clear, it needs more time. If the liquid is doughy, it’s overripe.
Can I grow corn in containers year-round?
In regions with mild climates, it may be possible to grow corn year-round. However, in most areas, corn is a warm-season crop that is best grown during the spring and summer months. If you live in a colder climate, you can start your corn seeds indoors a few weeks before the last frost and transplant them to your rooftop garden when the weather warms up.
What are the benefits of rooftop corn farming compared to traditional gardening?
Rooftop corn farming offers several advantages over traditional gardening, especially in urban environments:
* Space-saving: It allows you to grow corn even if you don’t have a yard.
* Pest control: Rooftop gardens are often less susceptible to ground-dwelling pests.
* Sunlight: Rooftops often receive more sunlight than ground-level gardens.
* Accessibility: Rooftop gardens can be more accessible for people with mobility issues.
* Microclimate: Rooftops can create a warmer microclimate, extending the growing season.
Leave a Comment