
Potato growing in bottles might sound like something out of a science fiction novel, but trust me, it’s a surprisingly simple and incredibly rewarding way to cultivate your own spuds, even if you’re short on space! Have you ever dreamed of harvesting a bounty of fresh, homegrown potatoes without needing a sprawling garden? Well, get ready to turn that dream into reality with this fun and easy DIY project.
The concept of container gardening, including innovative methods like potato growing in bottles, has roots stretching back centuries. From the hanging gardens of Babylon to the resourceful “victory gardens” of wartime, people have always found creative ways to grow food in limited spaces. But this particular method takes resourcefulness to a whole new level!
Let’s be honest, traditional gardening can be intimidating. Digging, weeding, and dealing with pests can feel overwhelming. That’s where this DIY trick comes in. Growing potatoes in bottles is not only a fantastic space-saver, perfect for balconies, patios, or even sunny windowsills, but it also simplifies the entire process. You’ll have better control over the soil, watering, and pest management, leading to a healthier and more abundant harvest. Plus, it’s a super fun project to do with kids, teaching them about where their food comes from. So, ditch the garden gloves (maybe!) and let’s get started on this exciting adventure of growing potatoes in bottles!
Growing Potatoes in Bottles: A Fun and Space-Saving DIY Project
Hey there, fellow gardening enthusiasts! Are you short on space but dreaming of fresh, homegrown potatoes? Well, you’re in luck! I’m going to walk you through a super cool and surprisingly easy DIY project: growing potatoes in bottles. It’s a fantastic way to maximize your yield, even if you only have a balcony or a small patio. Plus, it’s a great conversation starter!
What You’ll Need
Before we dive in, let’s gather our supplies. This is a pretty low-cost project, which is always a bonus!
* Large Plastic Bottles: Think 2-liter soda bottles, water jugs, or even those big juice containers. The taller, the better, as this allows for more potato growth. Aim for at least 3 bottles per potato plant you want to grow.
* Seed Potatoes: These are potatoes specifically grown for planting. You can find them at your local garden center or online. Choose a variety that you enjoy eating! I personally love Yukon Gold for their creamy texture.
* Potting Soil: A good quality potting mix is essential. Avoid using garden soil, as it can compact and hinder drainage.
* Sharp Knife or Scissors: For cutting the bottles. Be careful!
* Drill or Nail: To create drainage holes.
* Watering Can: For, well, watering!
* Optional: Fertilizer (a balanced liquid fertilizer works well), gloves (to keep your hands clean), and a sunny spot!
Preparing the Bottles
This is where we get our hands a little dirty (or not, if you’re wearing gloves!).
1. Clean the Bottles: Give your bottles a good rinse with soap and water to remove any residue. This will help prevent mold or bacteria growth.
2. Cut the Bottles: This is the trickiest part, so take your time and be careful. You’ll need to cut the bottles in a specific way to create stackable sections.
* Bottle 1 (Bottom): Cut off the top of the bottle, about 4-6 inches from the neck. This will be the base of your potato tower.
* Bottle 2 (Middle Sections): Cut off the bottom of the bottle, leaving about 4-6 inches from the base. Then, cut off the top of the bottle, again leaving about 4-6 inches from the neck. You’ll be left with a cylindrical section. You’ll need several of these depending on how tall you want your tower to be.
* Bottle 3 (Top): Cut off the bottom of the bottle, leaving about 4-6 inches from the base. This will be the top section.
3. Create Drainage Holes: Using a drill or nail, poke several drainage holes in the bottom of each bottle section. This is crucial to prevent waterlogging, which can rot your potatoes.
4. Optional: Reinforce the bottles: If you are using thinner plastic bottles, you can reinforce them by wrapping duct tape around the cut edges. This will prevent them from splitting or cracking.
Planting Your Seed Potatoes
Now for the fun part – planting!
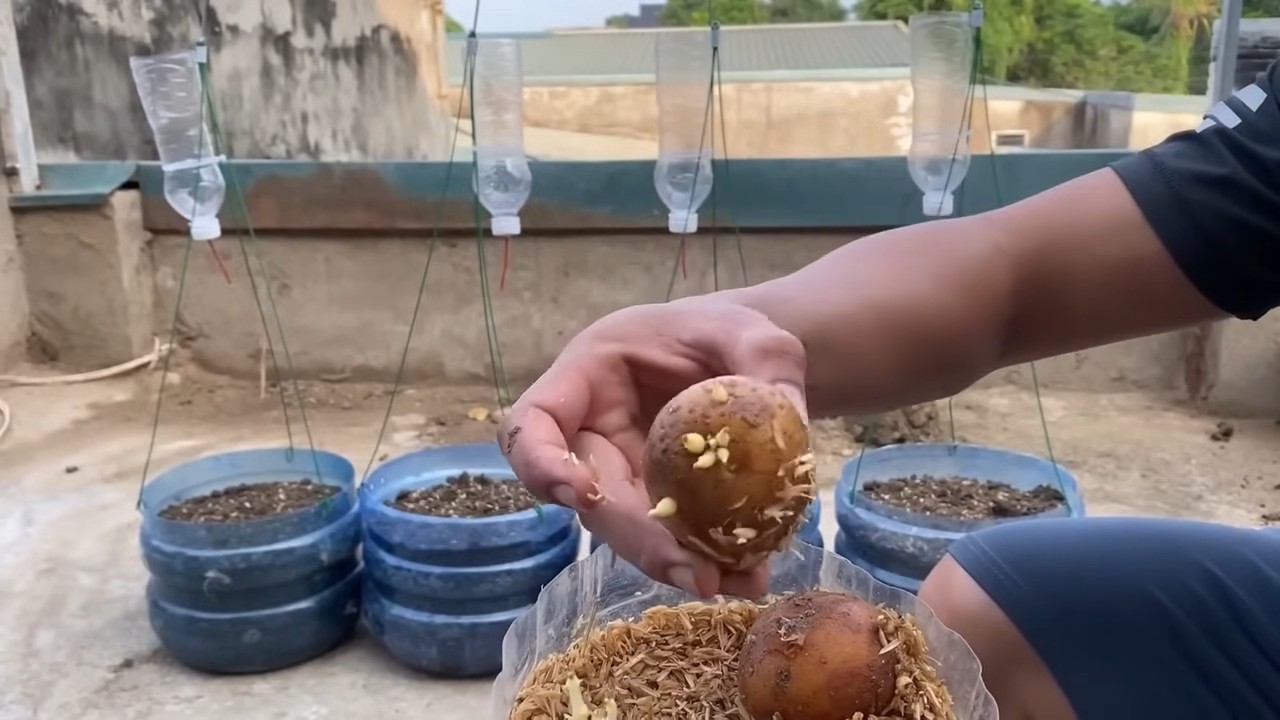
1. Prepare the Seed Potatoes: A few days before planting, you can “chit” your seed potatoes. This means encouraging them to sprout. Place them in a cool, bright location (but not direct sunlight) until small sprouts appear. This isn’t strictly necessary, but it can give your potatoes a head start. You can also cut larger seed potatoes into smaller pieces, ensuring each piece has at least one “eye” (sprout). Let the cut pieces dry for a day or two before planting to prevent rotting.
2. Fill the Bottom Section: Place the bottom section of your first bottle (the one with the top cut off) on a stable surface. Fill it with about 4-6 inches of potting soil.
3. Plant the Seed Potato: Place one or two seed potatoes on top of the soil, with the sprouts (if any) facing upwards.
4. Cover with Soil: Cover the seed potatoes with another 4-6 inches of potting soil.
5. Water Gently: Water the soil gently until it’s moist but not soggy.
Stacking and Growing
This is where the magic happens!
1. Add the Middle Section: Once the potato plant starts to sprout and reach a few inches tall, it’s time to add the first middle section of your bottle. Carefully slide the middle section over the existing plant, resting it on top of the bottom section.
2. Fill with Soil: Fill the middle section with potting soil, covering the lower part of the potato plant’s stem. This encourages the plant to grow more roots along the buried stem, which will lead to more potatoes! This process is called “hilling.”
3. Repeat: Continue adding middle sections and filling them with soil as the plant grows taller. The more you “hill” the plant, the more potatoes you’ll get!
4. Add the Top Section: Once you’ve reached your desired height, add the top section of the bottle. This will help to contain the soil and prevent it from drying out too quickly.
5. Water Regularly: Keep the soil consistently moist, but not waterlogged. Check the moisture level by sticking your finger into the soil. If it feels dry an inch or two down, it’s time to water.
6. Fertilize (Optional): If you want to give your potatoes an extra boost, you can fertilize them every few weeks with a balanced liquid fertilizer. Follow the instructions on the fertilizer package.
7. Sunlight: Place your potato tower in a location that receives at least 6-8 hours of sunlight per day. Potatoes love sunshine!
8. Monitor for Pests and Diseases: Keep an eye out for any signs of pests or diseases, such as aphids, potato beetles, or blight. Take action promptly if you notice any problems.
Harvesting Your Potatoes
The moment we’ve all been waiting for!
1. When to Harvest: Potatoes are typically ready to harvest about 70-90 days after planting. You’ll know they’re ready when the plant starts to flower and the foliage begins to yellow and die back.
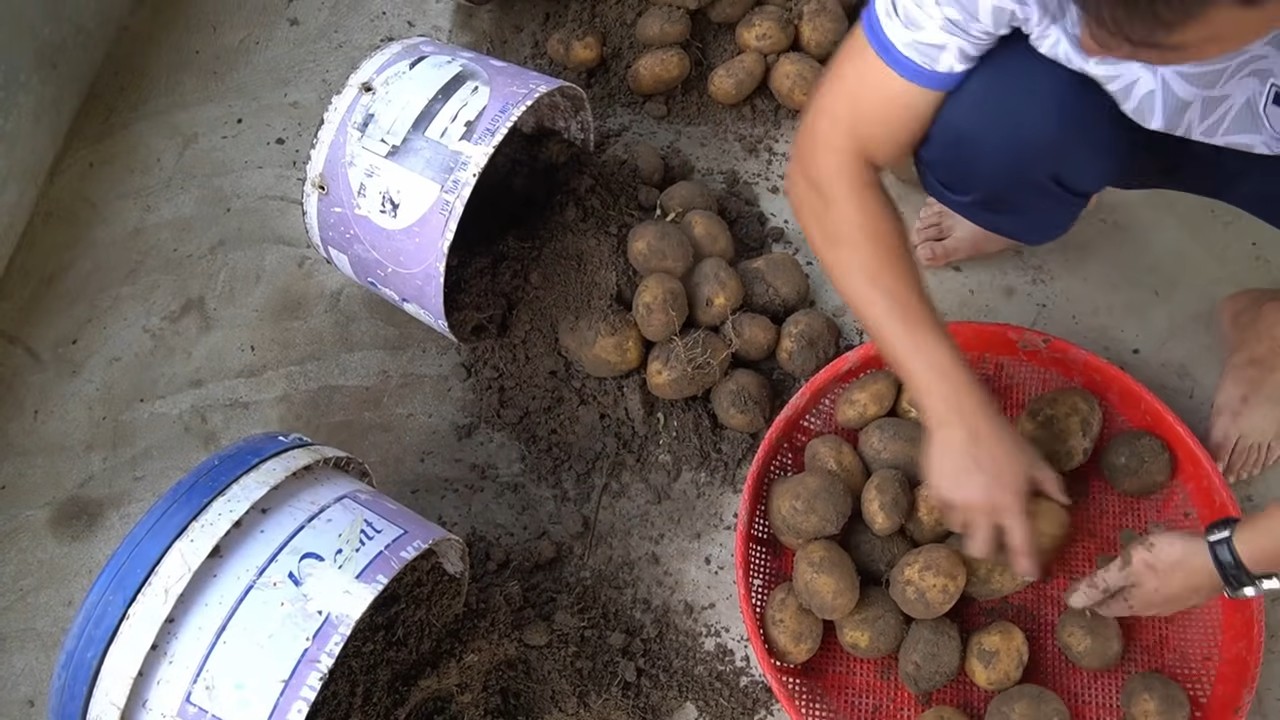
2. Harvesting: The beauty of growing potatoes in bottles is that harvesting is super easy! Simply tip over the tower and gently remove the potatoes from the soil. You can harvest potatoes gradually as needed, or harvest them all at once.
3. Curing (Optional): If you plan to store your potatoes for a longer period, you can cure them for a week or two after harvesting. To cure potatoes, spread them out in a cool, dark, and well-ventilated location. This will help to toughen the skins and prevent them from rotting.
Troubleshooting
Even with the best planning, things can sometimes go awry. Here are a few common issues and how to address them:
* Yellowing Leaves: This could be a sign of overwatering, underwatering, nutrient deficiency, or disease. Check the soil moisture and adjust your watering accordingly. If the soil is consistently moist, it could be a sign of root rot. Make sure your bottles have adequate drainage. If you suspect a nutrient deficiency, try fertilizing with a balanced fertilizer. If you suspect a disease, consult your local garden center for advice.
* Lack of Potatoes: This could be due to insufficient sunlight, poor soil, or improper hilling. Make sure your potatoes are getting enough sunlight and that you’re using a good quality potting mix. Be sure to “hill” the plants regularly by adding more soil as they grow.
* Pests: Aphids and potato beetles are common potato pests. You can control aphids with insecticidal soap or by introducing beneficial insects like ladybugs. Potato beetles can be handpicked or controlled with insecticides.
Tips for Success
Here are a few extra tips to help you get the most out of your potato bottle garden:
* Choose the Right Variety: Some potato varieties are better suited for container growing than others. Look for varieties that are compact and early-maturing.
* Use High-Quality Potting Mix: Don’t skimp on the potting mix! A good quality mix will provide the nutrients and drainage that your potatoes need to thrive.
* Water Consistently: Potatoes need consistent moisture, especially during hot weather. Check the soil moisture regularly and water as needed.
* Don’t Overcrowd: Avoid planting too many seed potatoes in each bottle. Overcrowding can lead to smaller potatoes and reduced yields.
* Rotate Your Crops: If you grow potatoes in the same bottles year after year, you may experience a buildup of soilborne diseases. To prevent this, rotate your crops by growing different plants in the bottles each year.
Conclusion
Growing potatoes in bottles is a fun, rewarding, and space-saving way to enjoy fresh, homegrown potatoes. With a little bit of effort and these tips,
Conclusion
So, there you have it! Growing potatoes in bottles isn’t just a quirky gardening experiment; it’s a genuinely effective and rewarding way to cultivate your own fresh, delicious potatoes, even if you’re short on space or gardening experience. This DIY trick offers a unique blend of convenience, control, and educational fun, making it a must-try for anyone interested in sustainable living, gardening, or simply enjoying the satisfaction of harvesting their own food.
Think about it: no more back-breaking digging through vast garden beds, hoping to unearth a hidden treasure of potatoes. With bottle gardening, the entire process is contained, visible, and easily managed. You can monitor the soil moisture, adjust the sunlight exposure, and even observe the root development, giving you unparalleled control over your potato crop. Plus, the vertical nature of this method makes it ideal for balconies, patios, or even indoor spaces with sufficient light.
But the benefits extend beyond mere convenience. Growing potatoes in bottles is also a fantastic way to teach children about plant life cycles, sustainable food production, and the importance of connecting with nature. It’s a hands-on learning experience that fosters curiosity, responsibility, and a deeper appreciation for the food we eat.
Ready to take your potato growing to the next level? Consider these variations to personalize your bottle gardening experience:
* Experiment with different potato varieties: From classic Russets to colorful fingerlings, each variety offers a unique flavor and texture. See which ones thrive best in your bottle garden.
* Add companion plants: Interplant herbs like basil or thyme around the base of your potato plants to deter pests and enhance the flavor of your potatoes.
* Use different types of bottles: While clear plastic bottles are ideal for observation, you can also use opaque containers or even repurposed grow bags for a more discreet look.
* Try different soil mixes: Experiment with different combinations of potting soil, compost, and perlite to find the perfect blend for your potatoes.
Ultimately, the key to successful bottle gardening is experimentation and observation. Don’t be afraid to try new things, learn from your mistakes, and adapt your approach as needed. The rewards – fresh, homegrown potatoes and a deeper connection with nature – are well worth the effort.
We’re confident that once you try this DIY trick, you’ll be hooked. The satisfaction of harvesting your own potatoes from a simple bottle is truly unparalleled. So, gather your supplies, get your hands dirty, and embark on this exciting gardening adventure.
We can’t wait to hear about your experiences! Share your photos, tips, and stories in the comments below. Let’s build a community of bottle gardeners and inspire others to embrace this sustainable and rewarding way of growing their own food. Happy gardening!
Frequently Asked Questions (FAQ)
What type of potatoes are best for growing in bottles?
While you can technically grow any type of potato in a bottle, smaller varieties like fingerling potatoes or new potatoes tend to be more successful due to their smaller size and shorter growing season. These varieties are less likely to outgrow the limited space within the bottle and will mature more quickly, allowing you to harvest your potatoes sooner. However, don’t be afraid to experiment with other varieties as well! Just be sure to choose seed potatoes that are certified disease-free to ensure a healthy crop.
How big should the bottle be?
The ideal bottle size depends on the potato variety you’re growing, but generally, a bottle with a capacity of at least 2-3 gallons is recommended. This provides enough space for the potato plant to develop a healthy root system and produce a decent yield of potatoes. Larger bottles are always better, as they offer more room for growth and reduce the risk of the plant becoming root-bound. Consider using repurposed water cooler bottles or large plastic containers for optimal results.
What kind of soil should I use?
A well-draining potting mix is essential for growing potatoes in bottles. Avoid using garden soil, as it can be too heavy and compacted, which can hinder root growth and lead to waterlogging. A good potting mix should be light, airy, and rich in organic matter. You can also amend your potting mix with compost, perlite, or vermiculite to improve drainage and aeration. A mix of equal parts potting soil, compost, and perlite is a good starting point.
How often should I water my potato plants in bottles?
Water your potato plants regularly, keeping the soil consistently moist but not waterlogged. The frequency of watering will depend on the weather conditions, the size of the bottle, and the type of soil you’re using. Check the soil moisture regularly by sticking your finger into the soil. If the top inch feels dry, it’s time to water. Avoid overwatering, as this can lead to root rot. Ensure the bottle has drainage holes to prevent water from accumulating at the bottom.
How much sunlight do potato plants need?
Potato plants need at least 6-8 hours of direct sunlight per day to thrive. Place your bottle garden in a sunny location where it will receive ample sunlight throughout the day. If you don’t have a sunny spot, you can supplement with artificial grow lights. Rotate the bottle regularly to ensure that all sides of the plant receive equal sunlight.
How do I fertilize my potato plants in bottles?
Potato plants are heavy feeders and require regular fertilization to produce a good yield. Use a balanced fertilizer that is specifically formulated for vegetables. Follow the instructions on the fertilizer package for application rates and frequency. You can also use organic fertilizers like compost tea or fish emulsion to provide your plants with essential nutrients. Avoid over-fertilizing, as this can burn the roots and damage the plant.
How do I know when my potatoes are ready to harvest?
The timing of harvest will depend on the potato variety and the growing conditions. Generally, potatoes are ready to harvest when the foliage starts to turn yellow and die back. You can also gently feel around in the soil to check the size of the potatoes. If they are large enough for your liking, you can harvest them. To harvest, simply cut open the bottle and carefully remove the potatoes from the soil.
Can I reuse the soil from my potato bottle garden?
Yes, you can reuse the soil from your potato bottle garden, but it’s important to amend it with fresh compost and fertilizer before planting again. This will replenish the nutrients that were depleted by the previous crop. You should also check the soil for any signs of disease or pests and treat accordingly. If the soil is heavily infested with pests or diseases, it’s best to discard it and start with fresh soil.
What are some common problems I might encounter when growing potatoes in bottles?
Some common problems you might encounter include pests like aphids or potato beetles, diseases like blight or scab, and nutrient deficiencies. Regularly inspect your plants for any signs of problems and take action promptly to prevent them from spreading. Use organic pest control methods like insecticidal soap or neem oil to control pests. Ensure your plants are getting adequate sunlight, water, and nutrients to prevent diseases.
Is growing potatoes in bottles really worth it?
Absolutely! While it may seem like a novelty, growing potatoes in bottles is a surprisingly effective and rewarding way to produce your own fresh potatoes. It’s a great option for those with limited space, and it allows you to control the growing environment more easily. Plus, it’s a fun and educational activity for the whole family. The taste of homegrown potatoes is simply unbeatable, making this DIY trick well worth the effort.
Leave a Comment