
Planting Potatoes in Bags: Imagine harvesting a bounty of fresh, homegrown potatoes right from your patio or balcony! Forget sprawling gardens – this simple DIY trick lets you enjoy the taste of homegrown goodness, even with limited space. I’m so excited to share this with you!
Growing potatoes has a rich history, dating back thousands of years to the Andes Mountains in South America. These humble tubers have sustained civilizations and become a staple in cuisines worldwide. While traditionally grown in large fields, the beauty of modern gardening is its adaptability. We can now bring this ancient food source into our own homes, regardless of our garden size.
Why should you try planting potatoes in bags? Well, for starters, it’s incredibly space-efficient. Apartment dwellers and those with small yards can finally experience the joy of growing their own food. Plus, it’s a fantastic way to control soil conditions and prevent common potato pests and diseases. No more back-breaking digging to harvest – simply tip the bag and collect your spuds! This method also allows for easy succession planting, ensuring a continuous supply of fresh potatoes throughout the growing season. So, let’s dive into this easy and rewarding DIY project and get those potatoes growing!
Planting Potatoes in Bags: A Bumper Crop on Your Patio!
Hey there, fellow gardeners! Want to grow potatoes but don’t have a sprawling garden? No problem! I’m going to show you how to grow a fantastic potato crop right in bags. It’s easier than you think, and you’ll be enjoying homegrown potatoes in no time. This method is perfect for small spaces, patios, balconies, or even just to get a head start on the season. Let’s get digging (pun intended!)
What You’ll Need
Before we get our hands dirty, let’s gather our supplies. Here’s what you’ll need to make this potato-growing adventure a success:
* Large Bags: Think big! I recommend using heavy-duty gardening bags, burlap sacks, or even strong trash bags. Aim for a capacity of at least 10-15 gallons per bag. The bigger, the better, as it gives the potatoes plenty of room to grow.
* Seed Potatoes: These aren’t your regular grocery store potatoes. Seed potatoes are specifically grown for planting and are certified disease-free. You can find them at your local garden center or online. Choose a variety you love to eat!
* Potting Mix: A good quality potting mix is essential. It needs to be well-draining and rich in nutrients. Avoid using garden soil directly, as it can compact and hinder potato growth.
* Compost: Compost is like a superfood for your potatoes. It adds extra nutrients and improves soil structure.
* Water: Potatoes need consistent moisture, so make sure you have a reliable water source nearby.
* Fertilizer (Optional): A balanced fertilizer can give your potatoes an extra boost, but it’s not strictly necessary if your potting mix and compost are good quality. I like to use a slow-release fertilizer.
* Scissors or Knife: For cutting the seed potatoes (if needed) and making drainage holes in the bags.
* Trowel or Shovel: For scooping and mixing the potting mix and compost.
Preparing Your Seed Potatoes
This step is crucial for getting a good start. You can plant whole seed potatoes if they’re small, but if they’re larger than an egg, it’s best to cut them into pieces.
* “Chitting” (Optional but Recommended): This involves encouraging the seed potatoes to sprout before planting. Place them in a cool, bright location (but not direct sunlight) for a week or two. You’ll see small “eyes” or sprouts starting to form. This gives them a head start.
* Cutting the Potatoes: If your seed potatoes are large, cut them into pieces, ensuring each piece has at least 2-3 “eyes” or sprouts. Let the cut pieces dry for a day or two to allow the cut surfaces to callous over. This helps prevent rotting.
Planting Your Potatoes
Now for the fun part! Let’s get those potatoes in the bags.
1. Prepare the Bags: If you’re using plastic bags, make sure to poke several drainage holes in the bottom. This is essential to prevent waterlogging, which can rot the potatoes.
2. Add the Initial Soil Layer: Fill the bag with about 4-6 inches of potting mix mixed with compost. This will be the base for your first planting.
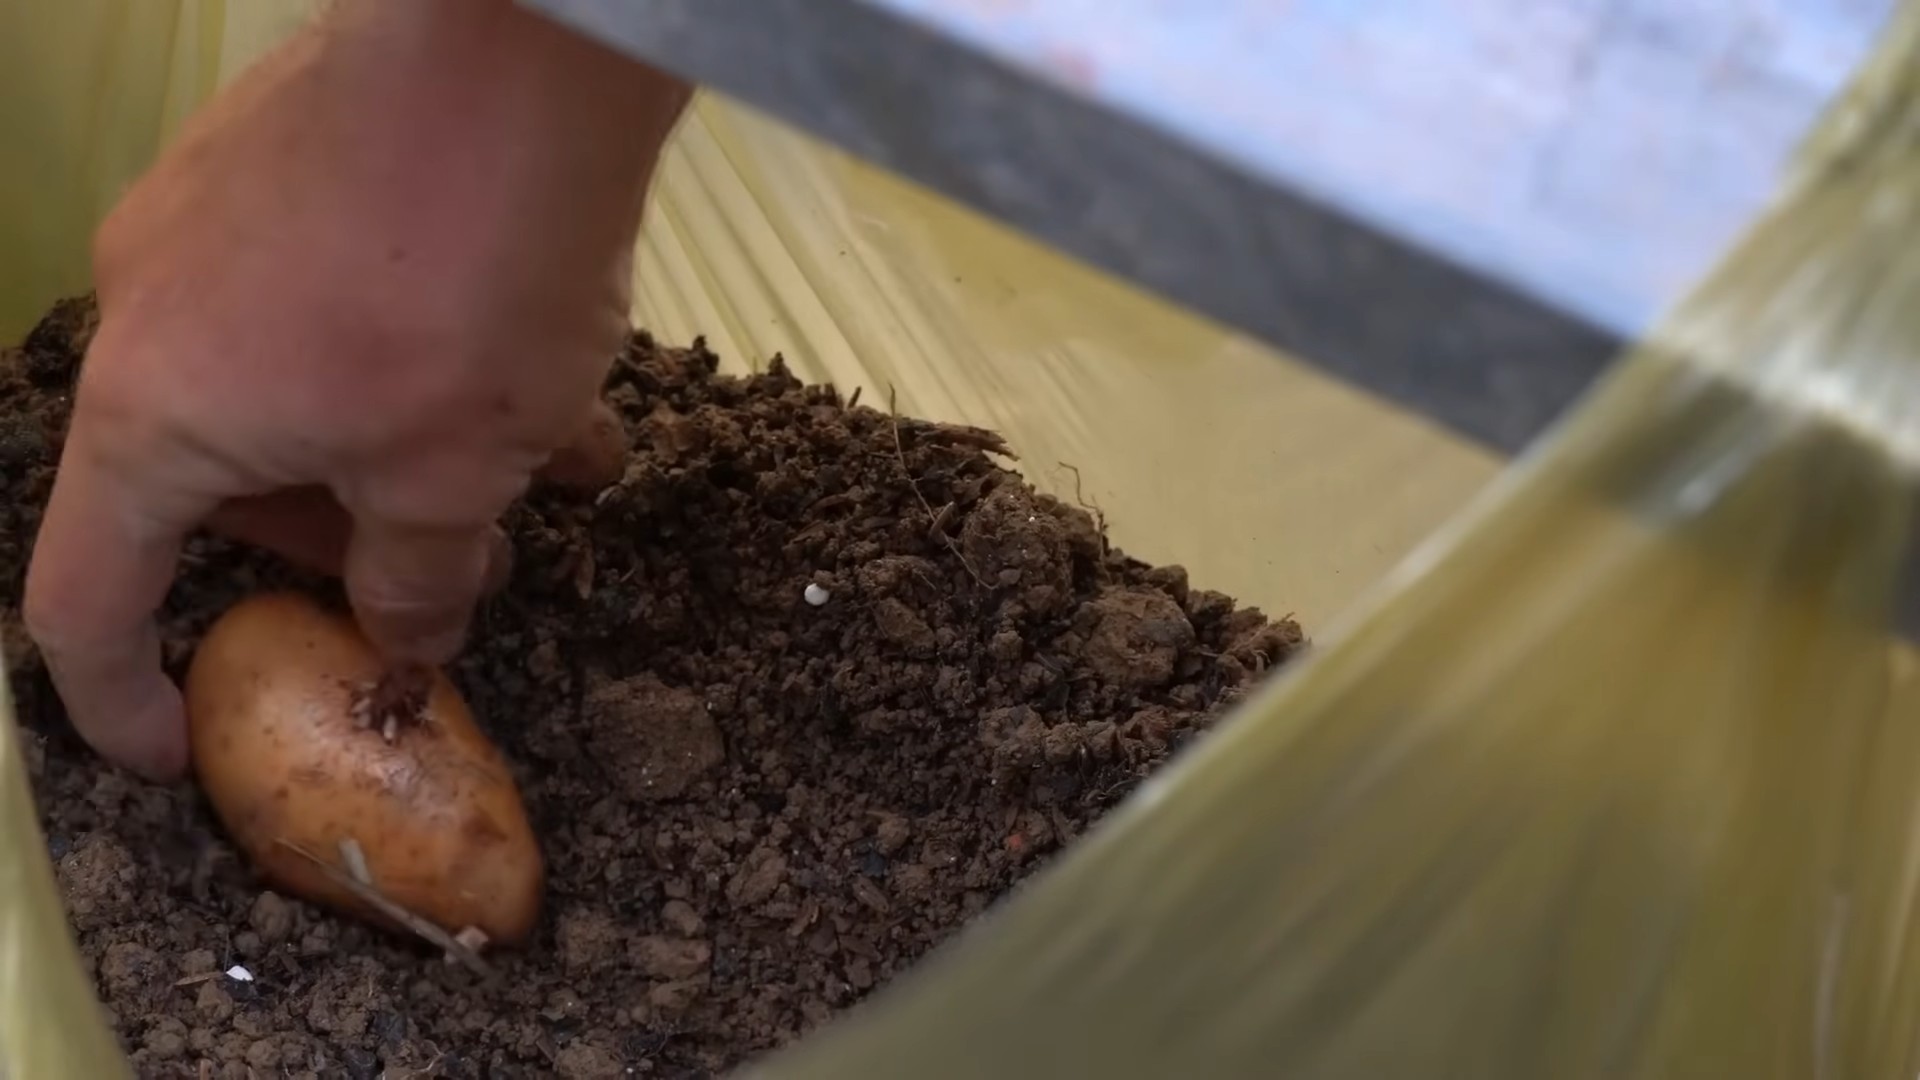
3. Plant the Seed Potatoes: Place 2-3 seed potato pieces (or whole small potatoes) on top of the soil, with the “eyes” or sprouts facing upwards. Space them evenly apart.
4. Cover the Potatoes: Cover the seed potatoes with another 4-6 inches of potting mix and compost. Gently water the soil until it’s moist but not soggy.
5. Place the Bags: Position the bags in a sunny location. Potatoes need at least 6-8 hours of sunlight per day to thrive.
“Hilling” Your Potatoes
This is the secret to getting a big harvest! As the potato plants grow, you’ll need to add more soil to encourage more potatoes to form along the stems.
1. Wait for Growth: Once the potato plants have grown about 6-8 inches tall, it’s time to “hill” them.
2. Add More Soil: Add another layer of potting mix and compost, covering the stems up to about half their height. Leave the top leaves exposed.
3. Repeat the Process: Continue this process every few weeks as the plants grow taller. Each time, add more soil, leaving only the top leaves exposed. This encourages the plants to produce more potatoes along the buried stems.
4. Water Regularly: Keep the soil consistently moist, but not waterlogged. Check the soil moisture by sticking your finger into the soil. If it feels dry an inch or two down, it’s time to water.
Caring for Your Potato Plants
A little TLC goes a long way in ensuring a bountiful harvest.
* Watering: Potatoes need consistent moisture, especially during flowering and tuber formation. Water deeply whenever the soil feels dry. Avoid overwatering, as this can lead to rot.
* Fertilizing (Optional): If you’re using a slow-release fertilizer, you can mix it into the potting mix when you plant the potatoes. Alternatively, you can use a liquid fertilizer every few weeks during the growing season. Follow the instructions on the fertilizer packaging.
* Pest Control: Keep an eye out for pests like aphids, potato beetles, and flea beetles. If you spot any pests, you can try hand-picking them off the plants or using an organic insecticide.
* Sunlight: Make sure your potato plants are getting enough sunlight. If they’re not getting at least 6-8 hours of sunlight per day, you may need to move the bags to a sunnier location.
Harvesting Your Potatoes
The moment we’ve all been waiting for! Harvesting your homegrown potatoes is incredibly rewarding.
1. When to Harvest: You can harvest “new potatoes” (small, tender potatoes) about 2-3 weeks after the plants flower. For larger, mature potatoes, wait until the plants start to die back and the foliage turns yellow or brown. This usually takes about 80-100 days from planting.
2. Harvesting New Potatoes: To harvest new potatoes, carefully reach into the bag and feel around for small potatoes near the surface. Gently pull them out, being careful not to damage the plant.
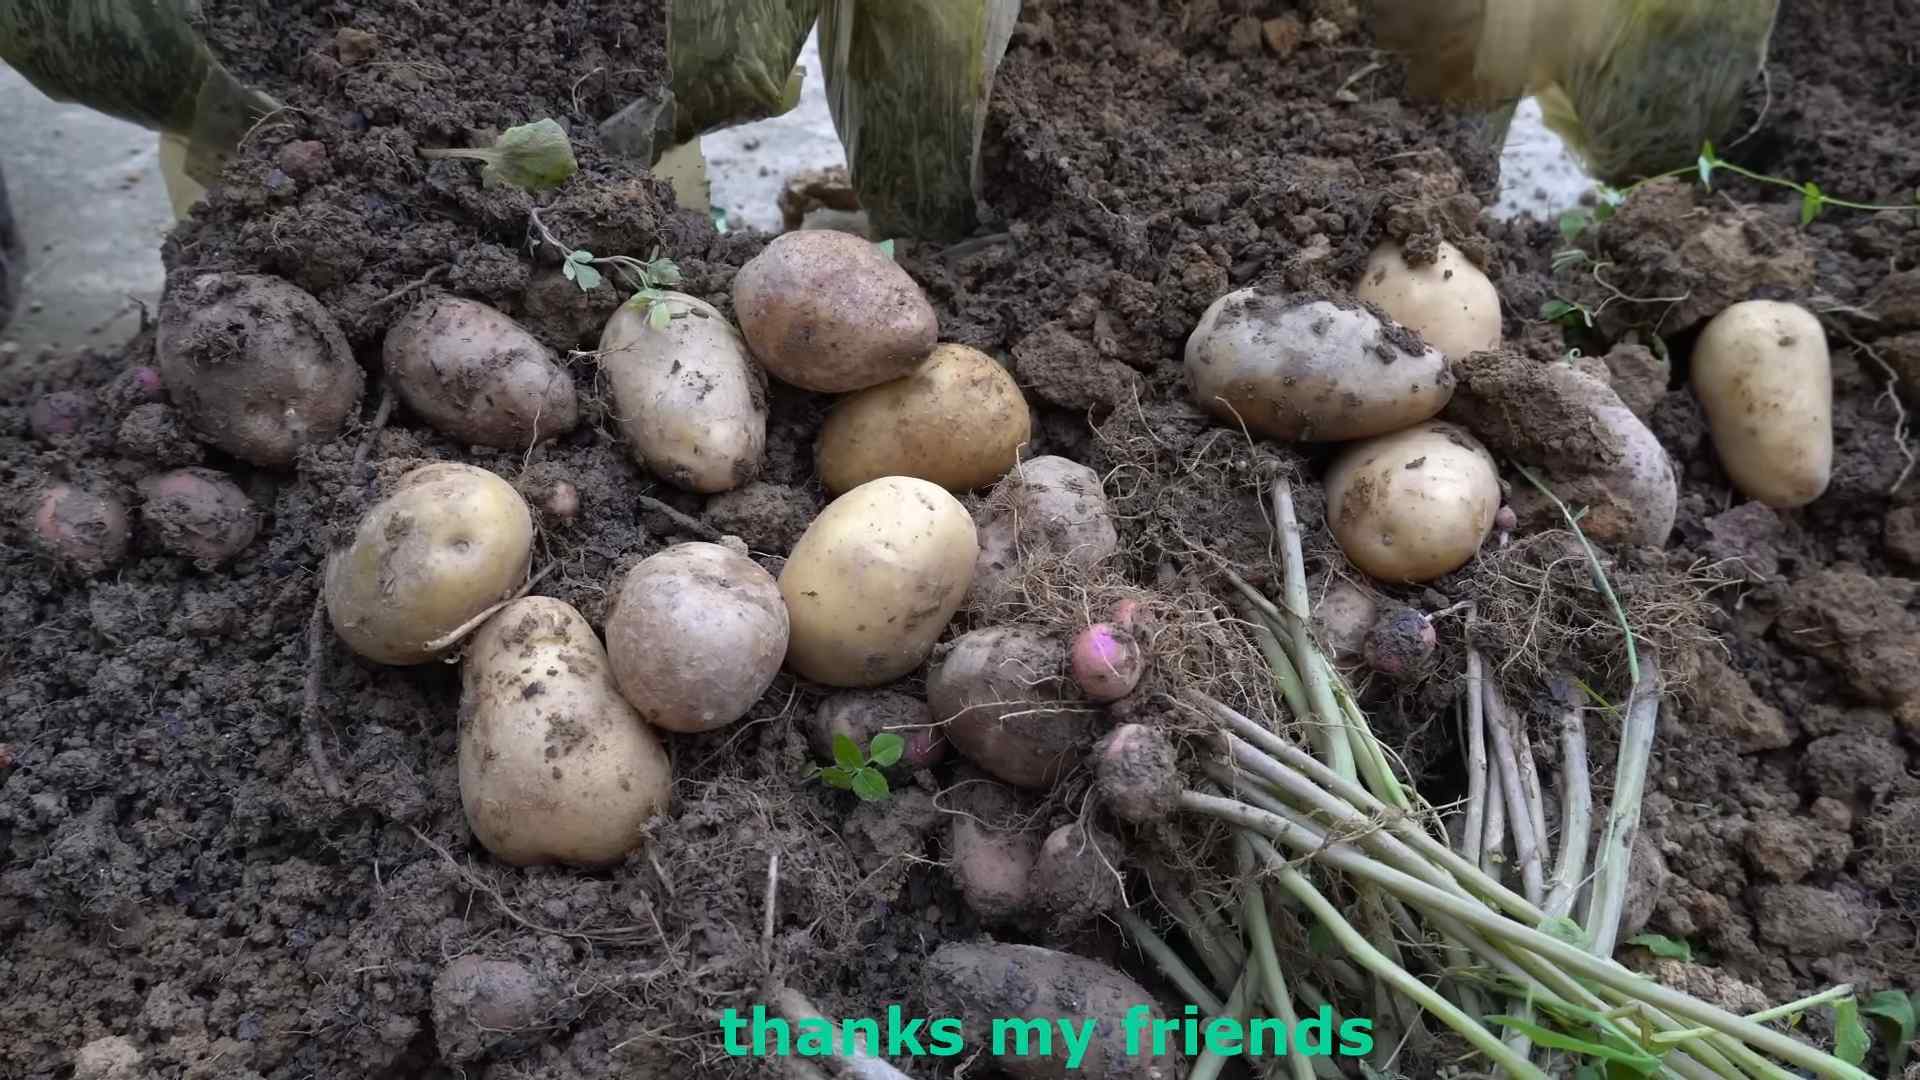
3. Harvesting Mature Potatoes: To harvest mature potatoes, simply tip the bag over and dump out the contents. Sift through the soil and collect your potatoes.
4. Curing Potatoes (Optional): If you plan to store your potatoes for a longer period, you can cure them by spreading them out in a cool, dry, and dark place for about a week. This helps to toughen the skins and prevent rot.
Troubleshooting
Even with the best planning, sometimes things don’t go exactly as expected. Here are a few common problems and how to deal with them:
* Potato Blight: This is a fungal disease that can cause brown spots on the leaves and stems. To prevent blight, choose disease-resistant potato varieties and avoid overhead watering. If you see signs of blight, remove the affected leaves and spray the plants with a fungicide.
* Potato Beetles: These pests can quickly defoliate your potato plants. Hand-pick them off the plants or use an organic insecticide.
* Rotting Potatoes: This can be caused by overwatering or poor drainage. Make sure your bags have adequate drainage holes and avoid overwatering.
* Small Potatoes: This can be caused by insufficient sunlight, poor soil, or not enough “hilling.” Make sure your plants are getting enough sunlight, use a good quality potting mix and compost, and “hill” the plants regularly.
Enjoying Your Homegrown Potatoes
Now that you’ve harvested your potatoes, it’s time to enjoy them! There are endless ways to cook and enjoy homegrown potatoes. Roast them, mash them, fry them, boil them, or add them to soups and stews. The possibilities are endless! And trust me, homegrown potatoes taste so much better than store-bought ones.
Growing potatoes in bags is a fun and rewarding experience. It’s a great way to grow your own food, even if you don’t have a lot of space. So, grab some bags, seed potatoes, and potting mix, and get ready to enjoy a bumper crop of homegrown potatoes! Happy gardening!
Conclusion
So, there you have it! Planting potatoes in bags is more than just a gardening trend; it’s a game-changer for anyone looking to maximize their yield, minimize space, and enjoy the freshest, most flavorful potatoes imaginable. This DIY trick offers a level of control and convenience that traditional in-ground planting simply can’t match. Think about it: no more back-breaking digging through endless rows, no more accidentally slicing into your precious spuds during harvest. Instead, you get a tidy, manageable system that allows you to nurture your potato plants from seedling to harvest with ease.
The beauty of this method lies in its adaptability. Feel free to experiment with different potato varieties to find your favorites. Russets, Yukon Golds, reds – they all thrive in bags! Consider adding companion plants like marigolds or basil around the base of your bags to deter pests and attract beneficial insects. You can also tailor your soil mix to suit your specific climate and potato variety. A slightly acidic soil with plenty of organic matter is generally ideal, but don’t be afraid to tweak the recipe based on your local conditions.
Beyond the practical benefits, planting potatoes in bags is incredibly rewarding. Watching those tiny sprouts emerge from the soil, carefully adding more soil as they grow, and then finally, the moment of truth when you dump out the bag and discover a treasure trove of homegrown potatoes – it’s an experience that connects you to the earth and provides a deep sense of satisfaction. Plus, the potatoes you harvest will taste infinitely better than anything you can buy in the store. The flavor is richer, the texture is creamier, and you’ll know exactly where your food came from.
Don’t be intimidated if you’re a beginner gardener. This method is incredibly forgiving and easy to learn. Start with just a few bags and see how it goes. You might be surprised at how quickly you become a potato-growing pro! And remember, the key to success is consistent watering, proper fertilization, and a little bit of patience.
We wholeheartedly encourage you to give this DIY potato planting trick a try. It’s a fun, rewarding, and incredibly productive way to grow your own food, even if you only have a small balcony or patio. Once you experience the joy of harvesting your own homegrown potatoes, you’ll never go back to buying them at the store again.
We’re eager to hear about your experiences! Share your photos, tips, and tricks in the comments below. Let us know what varieties you’re growing, what challenges you’ve faced, and what successes you’ve celebrated. Together, we can create a community of potato-loving gardeners who are passionate about growing their own food and sharing their knowledge with others. So, grab some bags, some seed potatoes, and get ready to embark on a delicious and rewarding gardening adventure! Happy planting!
Frequently Asked Questions (FAQs)
What kind of bags are best for planting potatoes?
The ideal bags for planting potatoes are durable, breathable, and have good drainage. Fabric grow bags are a popular choice because they allow air to circulate around the roots, preventing them from becoming waterlogged and promoting healthy growth. Look for bags made from a thick, non-woven fabric that can withstand the weight of the soil and potatoes. Plastic bags can also be used, but it’s crucial to ensure they have adequate drainage holes to prevent root rot. Avoid using thin, flimsy plastic bags that are likely to tear or break under the weight of the soil. The size of the bag is also important. A bag that is at least 15-20 gallons in size is recommended to provide enough space for the potato plants to grow and produce a good yield.
How many seed potatoes should I plant in each bag?
Generally, you should plant 2-3 seed potatoes per bag, depending on the size of the bag and the variety of potato. If you’re using a smaller bag (around 15 gallons), two seed potatoes are usually sufficient. For larger bags (20 gallons or more), you can plant three seed potatoes. Make sure to space the seed potatoes evenly within the bag to allow for adequate growth and prevent overcrowding. If you’re using larger seed potatoes, you can cut them into smaller pieces, ensuring that each piece has at least one or two “eyes” or sprouts. Allow the cut pieces to callous over for a day or two before planting to prevent rot.
What kind of soil should I use for planting potatoes in bags?
Potatoes thrive in well-draining, slightly acidic soil that is rich in organic matter. A good soil mix for planting potatoes in bags would include a combination of potting soil, compost, and perlite or vermiculite. The potting soil provides a good base for the plants to grow, while the compost adds essential nutrients and improves soil structure. Perlite or vermiculite helps to improve drainage and aeration, preventing the soil from becoming compacted and waterlogged. You can also add some slow-release fertilizer to the soil mix to provide a steady supply of nutrients throughout the growing season. Avoid using heavy clay soil, as it can retain too much moisture and lead to root rot.
How often should I water my potato plants in bags?
Watering frequency will depend on the climate, the type of bag you’re using, and the stage of growth of the potato plants. Generally, you should water your potato plants whenever the top inch of soil feels dry to the touch. During hot, dry weather, you may need to water them more frequently, possibly even daily. Be careful not to overwater, as this can lead to root rot. Ensure that the bags have adequate drainage holes to allow excess water to escape. When watering, water deeply and thoroughly, ensuring that the entire root zone is moistened. Avoid watering the foliage, as this can promote fungal diseases.
How do I know when my potatoes are ready to harvest?
The timing of harvest will depend on the variety of potato and your personal preference. Generally, potatoes are ready to harvest when the foliage begins to turn yellow and die back. This usually occurs about 80-100 days after planting. You can also check for maturity by gently digging around the base of the plant and feeling for the size of the potatoes. If you want to harvest “new potatoes,” which are small and tender, you can start harvesting them earlier, about 60-70 days after planting. To harvest, simply tip the bag over and gently remove the potatoes from the soil. Be careful not to damage the potatoes during harvest.
Can I reuse the soil from my potato bags?
Yes, you can reuse the soil from your potato bags, but it’s important to amend it with fresh compost and fertilizer before replanting. Potatoes are heavy feeders and deplete the soil of nutrients. Adding fresh compost will replenish the nutrients and improve soil structure. You can also add some slow-release fertilizer to provide a steady supply of nutrients throughout the growing season. It’s also a good idea to check the soil for any signs of pests or diseases before reusing it. If you find any problems, you may need to sterilize the soil or discard it altogether.
What are some common pests and diseases that affect potato plants in bags?
Some common pests that can affect potato plants in bags include aphids, potato beetles, and flea beetles. Aphids can suck the sap from the leaves, causing them to become yellow and distorted. Potato beetles can defoliate the plants, reducing their yield. Flea beetles can create small holes in the leaves, damaging the foliage. Common diseases that can affect potato plants in bags include early blight, late blight, and potato scab. Early blight causes dark, circular spots on the leaves. Late blight is a more serious disease that can quickly kill the entire plant. Potato scab causes rough, corky lesions on the surface of the potatoes. To prevent pests and diseases, it’s important to choose disease-resistant potato varieties, practice good sanitation, and monitor your plants regularly for any signs of problems.
Can I grow potatoes in bags indoors?
Yes, you can grow potatoes in bags indoors, but you’ll need to provide them with adequate light and ventilation. Potatoes need at least 6-8 hours of direct sunlight per day to grow properly. If you don’t have enough natural light, you can supplement with grow lights. It’s also important to provide good ventilation to prevent fungal diseases. Make sure to place the bags in a well-ventilated area or use a fan to circulate the air. When growing potatoes indoors, you may need to water them more frequently, as the soil can dry out quickly.
What kind of fertilizer should I use for potatoes in bags?
Potatoes benefit from a fertilizer that is high in phosphorus and potassium. A balanced fertilizer with an NPK ratio of 5-10-10 or 10-20-20 is a good choice. You can also use a fertilizer specifically formulated for potatoes. Apply the fertilizer according to the package directions. You can either mix the fertilizer into the soil before planting or side-dress the plants with fertilizer during the growing season. Avoid using a fertilizer that is too high in nitrogen, as this can promote excessive foliage growth at the expense of tuber development.
How do I store my harvested potatoes?
To store your harvested potatoes properly, cure them for a week or two in a cool, dark, and well-ventilated place. This will allow the skins to harden and prevent them from rotting. After curing, store the potatoes in a cool, dark, and dry place, such

Leave a Comment