
Citric Acid Cleaning Tricks: Unlock the Sparkling Secrets to a Spotless Home!
Ever feel like you’re battling a never-ending war against grime and stubborn stains? I know I have! For centuries, people have sought natural and effective ways to keep their homes clean, and guess what? The answer might be sitting right in your fruit bowl! We’re diving deep into the world of citric acid cleaning tricks, and trust me, you’re going to wonder why you haven’t been using this powerhouse ingredient all along.
Citric acid, naturally found in lemons, limes, and other citrus fruits, isn’t just for adding a zesty kick to your lemonade. It’s a fantastic, eco-friendly cleaning agent that can tackle everything from hard water stains in your bathroom to stubborn grease in your kitchen. Why spend a fortune on harsh chemicals when you can harness the power of nature?
This DIY guide is your ultimate resource for mastering citric acid cleaning tricks. I’ll show you simple, step-by-step methods to create your own cleaning solutions, tackle common household messes, and even revive your appliances. Get ready to ditch the harsh chemicals and embrace a cleaner, greener, and more sparkling home – all thanks to the magic of citric acid!
Growing Chili Peppers on Your Balcony: A Spicy DIY Guide
Hey there, fellow chili enthusiast! Ever dreamed of having a fiery little chili garden right on your balcony? Well, you’ve come to the right place! I’m going to walk you through everything you need to know to successfully grow chili peppers in containers, even if you’re a complete beginner. Get ready to add some serious spice to your life!
Choosing the Right Chili Variety
First things first, let’s talk chili varieties. Not all chili peppers are created equal, and some are definitely better suited for container growing than others. Here are a few of my personal favorites that thrive in pots:
* Thai Chili Peppers: These little guys are prolific producers and pack a serious punch. They’re perfect for adding heat to stir-fries and curries.
* Jalapeño Peppers: A classic for a reason! Jalapeños are relatively easy to grow and offer a moderate level of heat. Great for nachos, poppers, and salsas.
* Serrano Peppers: Similar to jalapeños but with a bit more heat. They’re also quite productive in containers.
* Habanero Peppers: If you’re a heat seeker, habaneros are a must-try. Be warned, though – they’re seriously spicy!
* Bell Peppers: Okay, okay, I know they’re not technically chili peppers, but they’re still delicious and easy to grow in containers. Plus, they add a nice splash of color to your balcony garden.
When choosing your chili varieties, consider your personal taste preferences, the amount of space you have available, and the climate you live in. Some varieties are more tolerant of cooler temperatures than others.
Gathering Your Supplies
Now that you’ve chosen your chili varieties, it’s time to gather your supplies. Here’s what you’ll need:
* Containers: Choose pots that are at least 12 inches in diameter and depth. Larger pots are generally better, as they provide more room for the roots to grow. Make sure your pots have drainage holes!
* Potting Mix: Use a high-quality potting mix that’s specifically formulated for containers. Avoid using garden soil, as it can become compacted and doesn’t drain well.
* Chili Pepper Seeds or Seedlings: You can start your chili peppers from seed or purchase seedlings from a local nursery. Starting from seed is more economical, but it takes longer.
* Fertilizer: Chili peppers are heavy feeders, so you’ll need to fertilize them regularly. Use a balanced fertilizer that’s specifically formulated for vegetables.
* Watering Can or Hose: You’ll need a way to water your chili peppers regularly.
* Gardening Gloves: Protect your hands from dirt and potential irritants.
* Optional: Plant Markers: To keep track of what you planted.
* Optional: Tomato Cage or Stakes: Some chili pepper varieties can get quite tall and may need support.
Planting Your Chili Peppers
Alright, let’s get our hands dirty! Here’s how to plant your chili peppers:
1. Prepare Your Containers: Fill your containers with potting mix, leaving about an inch of space at the top.
2. Plant Your Seeds or Seedlings:
* From Seed: Sow your chili pepper seeds about ¼ inch deep and water gently. Keep the soil moist but not soggy.
* From Seedlings: Gently remove the seedlings from their containers and plant them in the center of your pots. Make sure the top of the root ball is level with the soil surface.
3. Water Thoroughly: Water your newly planted chili peppers thoroughly until the water drains out of the bottom of the pots.
4. Label Your Plants: Use plant markers to label your chili pepper varieties. This will help you keep track of what you’ve planted.
5. Place in a Sunny Location: Chili peppers need at least 6-8 hours of sunlight per day. Place your containers in a sunny spot on your balcony.
Caring for Your Chili Peppers
Now that your chili peppers are planted, it’s time to take care of them. Here’s what you need to do:
1. Water Regularly: Water your chili peppers regularly, especially during hot, dry weather. The soil should be moist but not soggy. Check the soil moisture by sticking your finger into the soil. If the top inch of soil is dry, it’s time to water.
2. Fertilize Regularly: Fertilize your chili peppers every 2-3 weeks with a balanced fertilizer. Follow the instructions on the fertilizer package.
3. Prune Your Plants: Pruning can help to encourage bushier growth and more fruit production. Pinch off the tips of the branches to encourage side growth.
4. Provide Support: Some chili pepper varieties can get quite tall and may need support. Use tomato cages or stakes to support your plants.
5. Watch Out for Pests and Diseases: Keep an eye out for pests and diseases. Common pests that affect chili peppers include aphids, spider mites, and whiteflies. Common diseases include powdery mildew and blossom end rot. If you notice any pests or diseases, take action immediately. You can use organic pesticides or fungicides to control pests and diseases.
6. Pollination: Chili peppers are self-pollinating, but sometimes they need a little help, especially if you’re growing them indoors or on a balcony with limited airflow. You can hand-pollinate your chili peppers by gently shaking the plants or using a small paintbrush to transfer pollen from one flower to another.
Harvesting Your Chili Peppers
The most exciting part! Harvesting your chili peppers.
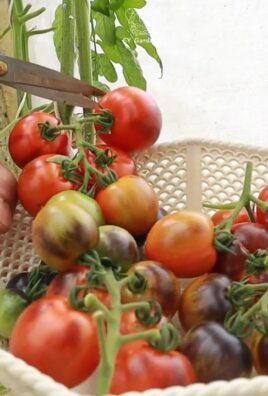
1. When to Harvest: The time to harvest your chili peppers depends on the variety and your personal preference. Generally, chili peppers are ready to harvest when they’ve reached their mature size and color.
2. How to Harvest: Use scissors or pruning shears to cut the chili peppers from the plant. Be careful not to damage the plant.
3. Enjoy Your Harvest: Now you can enjoy your homegrown chili peppers! Use them in your favorite recipes, make salsa, or dry them for later use.
Troubleshooting Common Problems
Even with the best care, you may encounter some problems when growing chili peppers. Here are a few common problems and how to fix them:
* Yellowing Leaves: Yellowing leaves can be caused by a variety of factors, including overwatering, underwatering, nutrient deficiencies, and pests. Check the soil moisture and adjust your watering accordingly. Fertilize your plants with a balanced fertilizer. Inspect your plants for pests and take action if necessary.
* Blossom End Rot: Blossom end rot is a condition that causes the bottom of the chili peppers to rot. It’s usually caused by a calcium deficiency. To prevent blossom end rot, make sure your soil is rich in calcium. You can also add calcium to the soil by adding crushed eggshells or bone meal.
* Lack of Fruit Production: Lack of fruit production can be caused by a variety of factors, including lack of sunlight, poor pollination, and nutrient deficiencies. Make sure your plants are getting at least 6-8 hours of sunlight per day. Hand-pollinate your plants if necessary. Fertilize your plants with a balanced fertilizer.
* Pests: Pests can damage your chili pepper plants and reduce fruit production. Common pests that affect chili peppers include aphids, spider mites, and whiteflies. Inspect your plants regularly for pests and take action immediately. You can use organic pesticides to control pests.
* Diseases: Diseases can also damage your chili pepper plants and reduce fruit production. Common diseases that affect chili peppers include powdery mildew and fungal spots. Provide good air circulation around your plants. Remove any infected leaves. You can use organic fungicides to control diseases.
Tips for Success
Here are a few extra tips to help you succeed in growing chili peppers on your balcony:
* Choose the Right Location: Chili peppers need at least 6-8 hours of sunlight per day. Choose a sunny spot on your balcony.
* Use High-Quality Potting Mix: Use a high-quality potting mix that’s specifically formulated for containers. Avoid using garden soil, as it can become compacted and doesn’t drain well.
* Water Regularly: Water your chili peppers regularly, especially during hot, dry weather. The soil should be moist but not soggy.
* Fertilize Regularly: Chili peppers are heavy feeders, so you’ll need to fertilize them regularly. Use a balanced fertilizer that’s specifically formulated for vegetables.
* Protect Your Plants from Frost: Chili peppers are sensitive to frost. If you live in an area with cold winters, you’ll need to protect your plants from frost. You can bring your plants indoors or cover them with a frost blanket.
* Be Patient: Growing chili peppers takes time and patience. Don’t get discouraged if you don’t see results immediately. With proper care, you’ll be harvesting your
Conclusion
So, there you have it! Harnessing the power of citric acid for cleaning is not just a trend; it’s a game-changer for anyone seeking a natural, effective, and budget-friendly alternative to harsh chemical cleaners. From tackling stubborn hard water stains in your bathroom to reviving your dingy dishwasher, the versatility of this simple powder is truly remarkable. We’ve explored a range of applications, demonstrating how easily you can create your own powerful cleaning solutions right at home.
Why is this DIY citric acid cleaning trick a must-try? Because it’s a win-win-win! You’re reducing your exposure to potentially harmful chemicals, saving money on expensive commercial cleaners, and contributing to a more sustainable lifestyle. The gentle yet potent nature of citric acid makes it safe for most surfaces (always test in an inconspicuous area first!), while its natural acidity effectively cuts through grime, dissolves mineral deposits, and eliminates odors.
But the possibilities don’t stop here! Feel free to experiment with different concentrations of citric acid to find what works best for your specific cleaning needs. For example, for heavily soiled areas, you might increase the amount of citric acid in your solution. You can also enhance your cleaning solutions with essential oils like lemon, lavender, or tea tree for added fragrance and antibacterial properties. A few drops of your favorite essential oil can transform your cleaning routine into an aromatherapy experience! Another variation is to create a citric acid paste by mixing it with a small amount of water. This paste is excellent for scrubbing stubborn stains on grout or in your oven.
Don’t be afraid to get creative and adapt these recipes to suit your individual preferences and cleaning challenges. The key is to start with a basic understanding of how citric acid works and then tailor your approach accordingly.
We are confident that once you experience the cleaning power of citric acid for yourself, you’ll be hooked! It’s a simple, effective, and eco-friendly solution that will transform your cleaning routine.
Now, we want to hear from you! Have you tried any of these citric acid cleaning tricks? What were your results? Do you have any other creative uses for citric acid that you’d like to share? We encourage you to try these DIY methods and share your experiences in the comments below. Let’s build a community of eco-conscious cleaners and discover even more ways to harness the power of this amazing natural ingredient. Your tips and insights could help others discover the magic of citric acid cleaning! Let us know what you think of our **citric acid cleaning** tips.
Frequently Asked Questions (FAQ)
1. Is citric acid safe to use on all surfaces?
While citric acid is generally considered safe for most surfaces, it’s always best to test it in an inconspicuous area first, especially on delicate materials like marble, granite, or certain types of painted surfaces. The acidity of citric acid can potentially etch or discolor these surfaces if left on for too long. Avoid using it on aluminum, as it can cause corrosion. A good rule of thumb is: when in doubt, test it out!
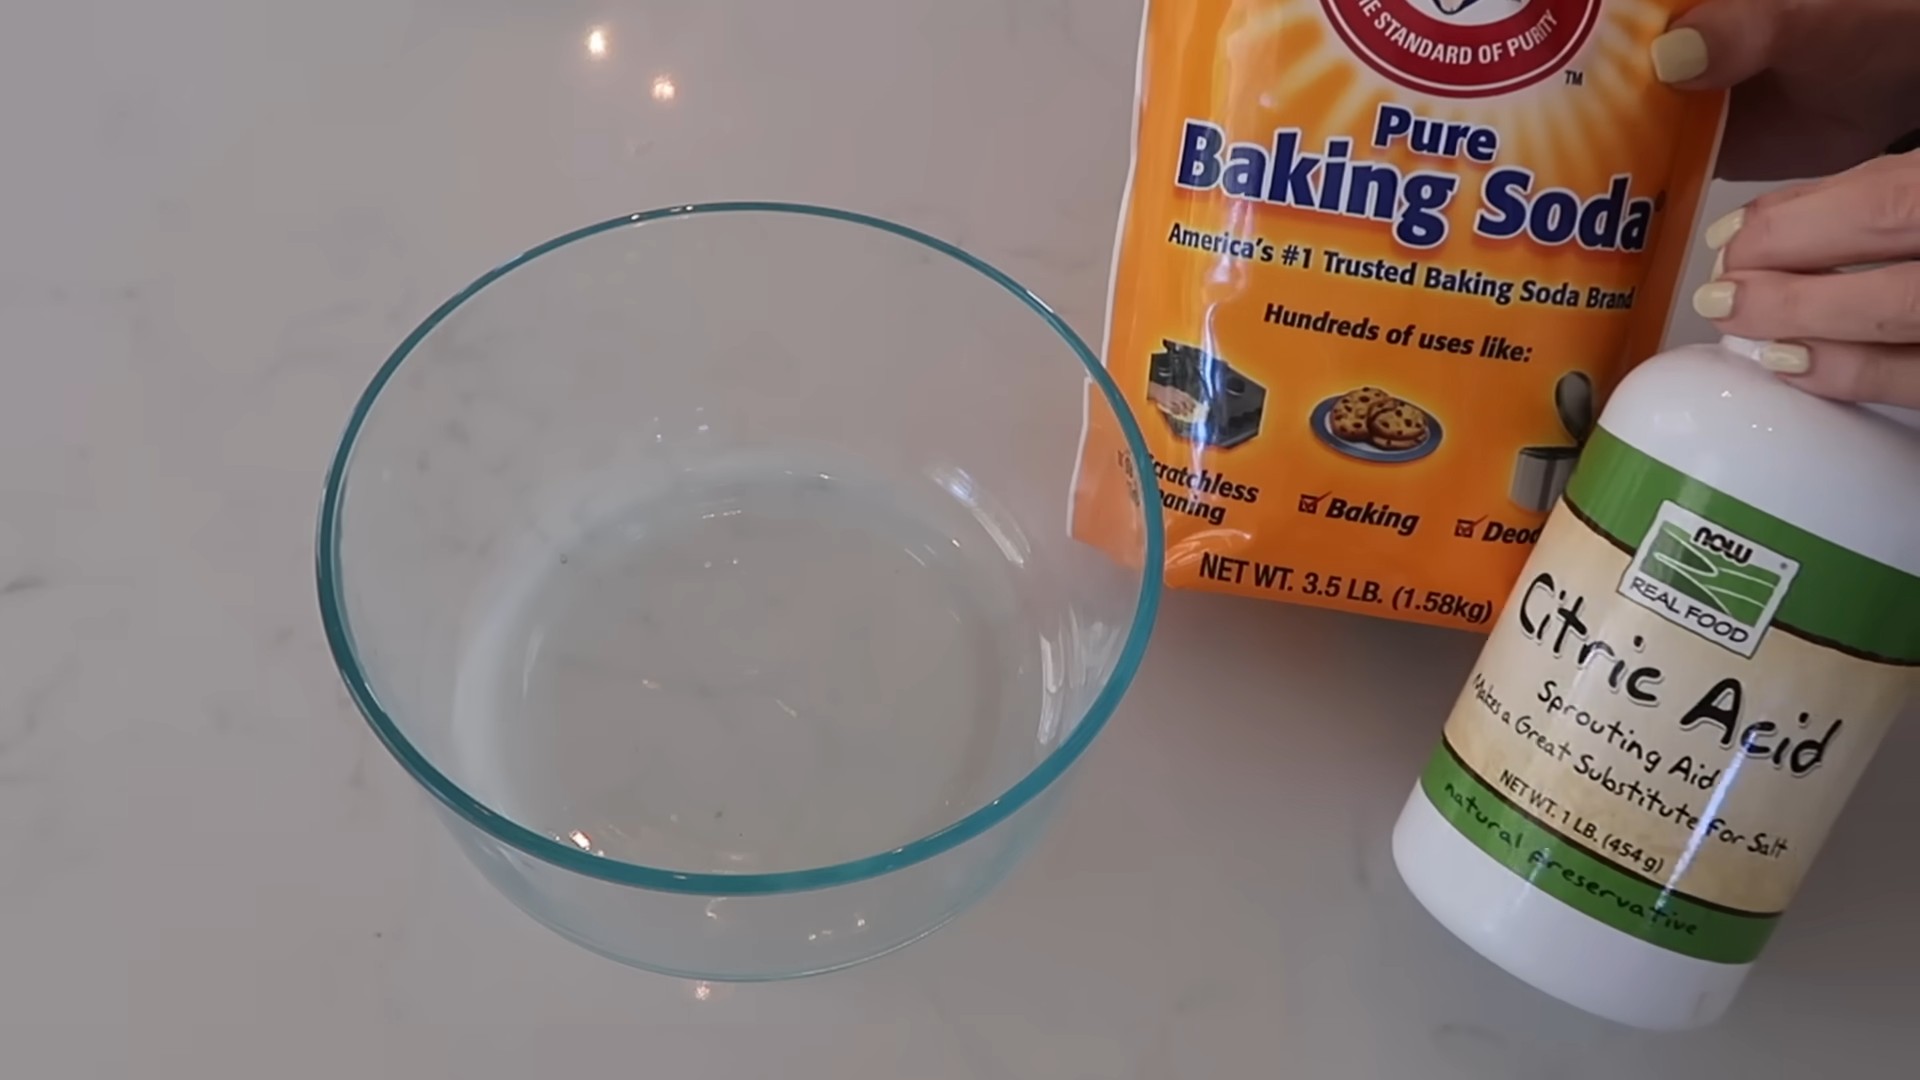
2. Where can I buy citric acid?
Citric acid is readily available in most grocery stores, pharmacies, and online retailers. Look for it in the baking aisle, where it’s often sold as a food preservative or flavoring agent. You can also find it in the cleaning supplies section or online from suppliers specializing in natural cleaning products. Ensure you are purchasing food-grade citric acid for cleaning purposes.
3. How much citric acid should I use in my cleaning solutions?
The amount of citric acid you use will depend on the specific cleaning task and the severity of the grime or stains. As a general guideline, start with a concentration of 1-2 tablespoons of citric acid per cup of water. For tougher stains or heavily soiled areas, you can increase the concentration to 3-4 tablespoons per cup of water. Remember to always test the solution in an inconspicuous area before applying it to the entire surface.
4. Can I use citric acid to clean my coffee maker?
Yes, citric acid is an excellent descaler for coffee makers. To clean your coffee maker, dissolve 1-2 tablespoons of citric acid in a full pot of water. Pour the solution into the water reservoir and run a full brewing cycle. Then, run two or three cycles with fresh water to rinse away any remaining citric acid. This will remove mineral buildup and improve the performance of your coffee maker.
5. Is citric acid safe for septic systems?
Yes, citric acid is generally considered safe for septic systems. Unlike harsh chemical cleaners that can disrupt the balance of bacteria in your septic tank, citric acid is a natural substance that breaks down quickly and doesn’t pose a threat to your septic system. However, it’s always a good idea to use cleaning products sparingly, even those that are considered septic-safe.
6. Can I use citric acid to remove rust?
Yes, citric acid is effective at removing rust from various surfaces. To remove rust, create a paste by mixing citric acid with a small amount of water. Apply the paste to the rusted area and let it sit for several hours or overnight. Then, scrub the area with a brush or sponge and rinse with water. For heavily rusted items, you can soak them in a citric acid solution (1/2 cup citric acid per gallon of water) for several hours or overnight before scrubbing.
7. How should I store citric acid?
Citric acid should be stored in a cool, dry place in an airtight container. This will prevent it from clumping or absorbing moisture from the air. Keep it out of reach of children and pets.
8. Can I mix citric acid with other cleaning agents?
It’s generally not recommended to mix citric acid with other cleaning agents, especially those containing bleach or ammonia. Mixing these substances can create harmful fumes. Citric acid is most effective when used on its own or with water and essential oils.
9. What are the benefits of using citric acid over other cleaning products?
Citric acid offers several benefits over traditional cleaning products. It’s a natural, non-toxic alternative to harsh chemicals, making it safer for your family and the environment. It’s also biodegradable, meaning it breaks down quickly and doesn’t pollute waterways. Additionally, citric acid is a cost-effective cleaning solution, as a small amount goes a long way.
10. Can citric acid be used to clean laundry?
Yes, citric acid can be used as a laundry booster to brighten whites and remove stains. Add 1/2 cup of citric acid to your washing machine along with your regular detergent. It can also help to remove hard water deposits from your washing machine. For stain removal, create a paste of citric acid and water and apply it directly to the stain before washing.
11. What safety precautions should I take when using citric acid?
While citric acid is generally safe, it’s still important to take some precautions. Avoid contact with your eyes and skin. If contact occurs, rinse thoroughly with water. Wear gloves when handling citric acid, especially if you have sensitive skin. Keep citric acid out of reach of children and pets. Do not ingest citric acid.
12. How can I make a citric acid spray for general cleaning?
To make a citric acid spray, simply dissolve 1-2 tablespoons of citric acid in a spray bottle filled with water. Shake well to ensure the citric acid is fully dissolved. You can add a few drops of your favorite essential oil for fragrance. Use this spray to clean countertops, sinks, showers, and other surfaces. Remember to test the spray in an inconspicuous area first.
Leave a Comment