
Malabar Spinach Growth Tips are what you need to unlock a vibrant, edible green wall right in your own backyard! Have you ever dreamed of harvesting fresh, nutritious greens just steps from your kitchen? Imagine adding a peppery, slightly citrusy flavor to your salads and stir-fries, all thanks to your own green thumb. This isn’t just a dream; it’s an achievable reality with Malabar spinach!
While not a true spinach, Malabar spinach boasts a rich history, particularly in Asian and African cuisines, where it’s been cultivated for centuries. It’s more than just a delicious vegetable; it’s a resilient, climbing vine that adds beauty and functionality to any garden. But let’s be honest, sometimes getting started with a new plant can feel a little daunting. That’s where these DIY tricks and hacks come in!
Many gardeners struggle with getting their Malabar spinach to thrive. Maybe you’ve had issues with slow growth, yellowing leaves, or simply not knowing where to start. That’s why I’ve compiled these easy-to-follow Malabar Spinach Growth Tips. I’m going to share my secrets to ensure you have a bountiful harvest. From choosing the right location to mastering watering techniques, these tips will empower you to cultivate healthy, delicious Malabar spinach with confidence. Let’s get growing!
Malabarspinat selbst anbauen: Ein umfassender DIY-Leitfaden
Hallo Gartenfreunde! Ich liebe es, neue und ungewöhnliche Pflanzen in meinem Garten anzubauen, und Malabarspinat (Basella alba) ist definitiv einer meiner Favoriten. Er ist nicht nur super einfach anzubauen, sondern auch unglaublich nahrhaft und vielseitig in der Küche. In diesem Artikel zeige ich euch Schritt für Schritt, wie ihr Malabarspinat erfolgreich in eurem eigenen Garten anbauen könnt. Lasst uns loslegen!
Was du über Malabarspinat wissen solltest
Bevor wir mit dem Anbau beginnen, hier ein paar wichtige Fakten über Malabarspinat:
* Kein echter Spinat: Obwohl er “Spinat” im Namen trägt, ist Malabarspinat botanisch gesehen kein echter Spinat. Er gehört zur Familie der Basellgewächse.
* Wärmeliebend: Malabarspinat liebt Wärme und gedeiht am besten bei Temperaturen zwischen 24°C und 35°C. Er ist perfekt für heiße Sommer, in denen echter Spinat schlappmacht.
* Kletterpflanze: Er ist eine Kletterpflanze und benötigt eine Rankhilfe, um optimal zu wachsen.
* Nährstoffreich: Malabarspinat ist reich an Vitamin A, Vitamin C, Eisen und Kalzium.
* Vielseitig in der Küche: Die Blätter und Stängel können roh in Salaten oder gekocht wie Spinat verwendet werden.
Benötigte Materialien und Werkzeuge
Bevor wir loslegen, stelle sicher, dass du folgende Materialien und Werkzeuge zur Hand hast:
* Malabarspinatsamen oder Stecklinge
* Anzuchttöpfe oder -schalen
* Anzuchterde
* Gartenerde oder Kompost
* Pflanzgefäße (falls du ihn im Topf anbauen möchtest)
* Rankhilfe (z.B. Bambusstäbe, Spalier oder Zaun)
* Gießkanne oder Gartenschlauch
* Gartenschere
* Handschuhe (optional)
Aussaat und Anzucht
Ich beginne meistens mit der Anzucht im Haus, um den Pflanzen einen Vorsprung zu verschaffen. Hier ist, wie ich es mache:
1. Samen vorbereiten: Malabarspinatsamen haben eine harte Schale. Um die Keimung zu beschleunigen, weiche ich die Samen 24 Stunden lang in warmem Wasser ein. Das hilft, die Schale aufzuweichen.
2. Anzuchttöpfe vorbereiten: Fülle die Anzuchttöpfe oder -schalen mit Anzuchterde. Drücke die Erde leicht an.
3. Samen aussäen: Lege 2-3 Samen pro Topf etwa 1 cm tief in die Erde.
4. Gießen: Gieße die Erde vorsichtig an, sodass sie feucht, aber nicht durchnässt ist.
5. Warm und hell stellen: Stelle die Töpfe an einen warmen und hellen Ort, z.B. auf eine Fensterbank oder in ein Gewächshaus. Die ideale Keimtemperatur liegt bei 20-25°C.
6. Feuchtigkeit halten: Halte die Erde feucht, indem du sie regelmäßig mit einer Sprühflasche besprühst. Vermeide Staunässe.
7. Keimung abwarten: Die Keimung dauert in der Regel 1-3 Wochen. Hab Geduld!
8. Pikieren (optional): Wenn mehrere Sämlinge in einem Topf aufgegangen sind, kannst du die stärksten auswählen und die anderen entfernen oder in separate Töpfe pikieren.
Auspflanzen ins Freie
Sobald die Sämlinge kräftig genug sind (etwa 10-15 cm hoch) und keine Frostgefahr mehr besteht, können sie ins Freie gepflanzt werden.
1. Abhärten: Bevor du die Pflanzen ins Freie pflanzt, solltest du sie einige Tage lang abhärten. Stelle sie tagsüber für ein paar Stunden nach draußen und hole sie abends wieder rein. Das hilft ihnen, sich an die neuen Bedingungen zu gewöhnen.
2. Standort vorbereiten: Wähle einen sonnigen Standort mit gut durchlässigem Boden. Malabarspinat verträgt auch Halbschatten, aber er gedeiht am besten in voller Sonne.
3. Boden vorbereiten: Lockere den Boden auf und mische Kompost oder gut verrotteten Mist unter. Das verbessert die Bodenstruktur und versorgt die Pflanzen mit Nährstoffen.
4. Pflanzen: Grabe Löcher, die etwas größer sind als die Wurzelballen der Sämlinge. Setze die Pflanzen vorsichtig ein und fülle die Löcher mit Erde. Drücke die Erde leicht an.
5. Gießen: Gieße die Pflanzen gründlich an.
6. Rankhilfe installieren: Installiere eine Rankhilfe in der Nähe der Pflanzen. Malabarspinat ist eine Kletterpflanze und benötigt Unterstützung, um zu wachsen. Du kannst Bambusstäbe, ein Spalier oder einen Zaun verwenden.
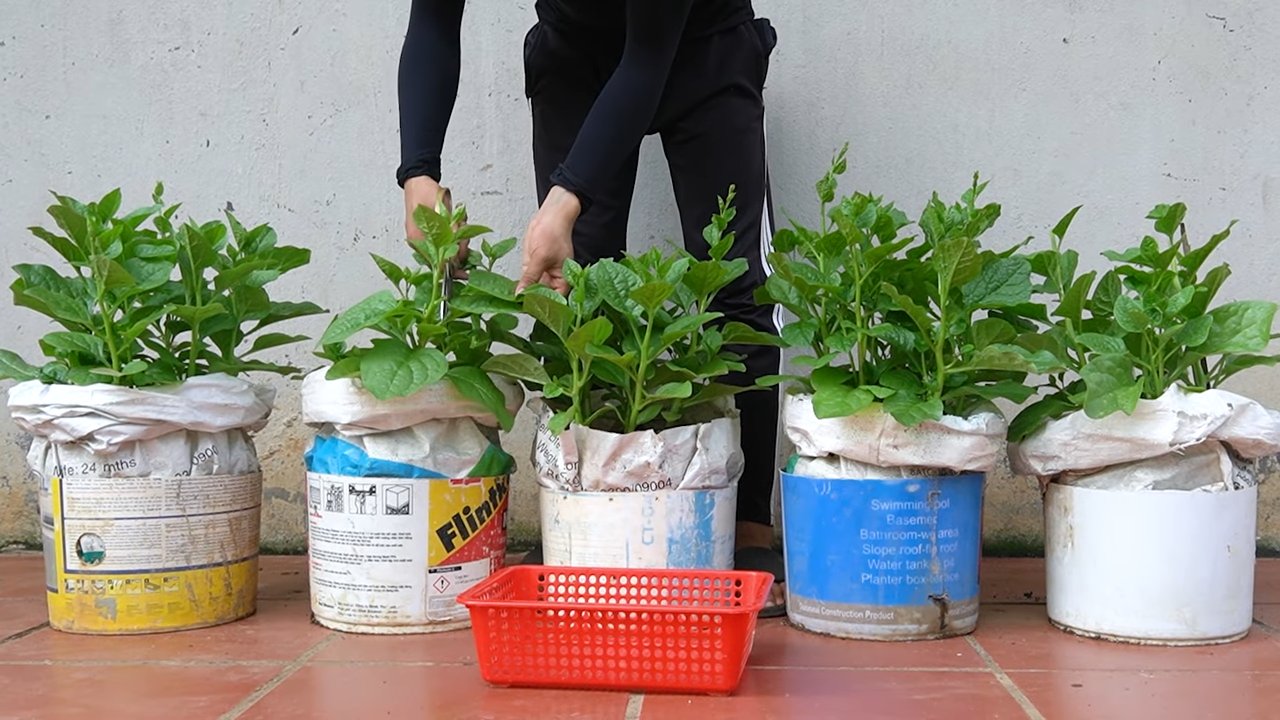
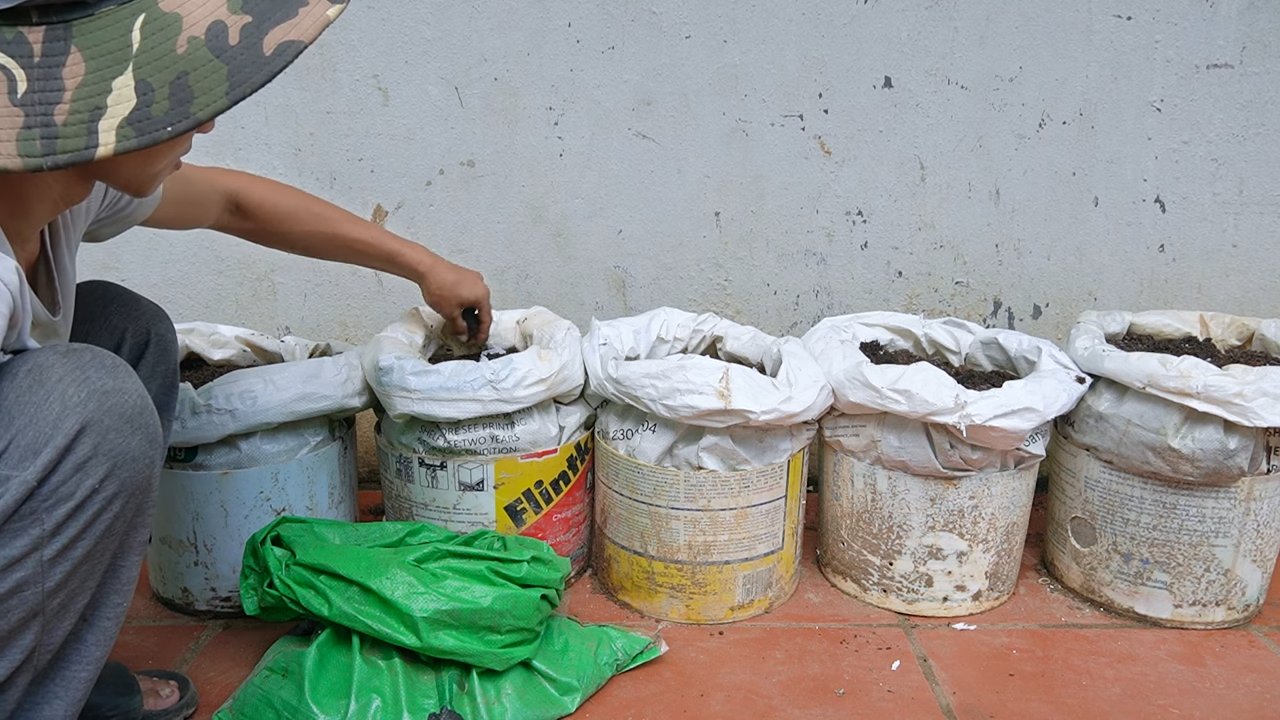
Anbau im Topf
Wenn du keinen Garten hast, kannst du Malabarspinat auch problemlos im Topf anbauen.
1. Topf auswählen: Wähle einen ausreichend großen Topf mit einem Durchmesser von mindestens 30 cm.
2. Erde vorbereiten: Fülle den Topf mit einer hochwertigen Blumenerde, die gut durchlässig ist.
3. Pflanzen: Pflanze die Sämlinge in den Topf.
4. Rankhilfe installieren: Installiere eine Rankhilfe im Topf.
5. Standort wählen: Stelle den Topf an einen sonnigen Standort.
6. Gießen: Gieße die Pflanzen regelmäßig, besonders an heißen Tagen. Achte darauf, dass die Erde nicht austrocknet.
7. Düngen: Dünge die Pflanzen alle 2-3 Wochen mit einem Flüssigdünger.
Pflege des Malabarspinats
Die Pflege von Malabarspinat ist relativ einfach. Hier sind ein paar Tipps:
* Gießen: Gieße die Pflanzen regelmäßig, besonders während trockener Perioden. Malabarspinat mag es feucht, aber nicht nass.
* Düngen: Dünge die Pflanzen alle 2-3 Wochen mit einem organischen Dünger oder Komposttee.
* Schneiden: Schneide die Triebspitzen regelmäßig, um das Wachstum zu fördern und die Pflanze buschiger zu machen.
* Rankhilfe: Achte darauf, dass die Pflanzen ausreichend Halt an der Rankhilfe finden. Hilf ihnen gegebenenfalls beim Klettern.
* Schädlinge und Krankheiten: Malabarspinat ist relativ resistent gegen Schädlinge und Krankheiten. Gelegentlich können Blattläuse auftreten. Diese können mit einem Wasserstrahl oder mit einer milden Seifenlösung bekämpft werden.
Ernte
Du kannst mit der Ernte beginnen, sobald die Pflanzen ausreichend Blätter gebildet haben. Das ist in der Regel etwa 6-8 Wochen nach dem Auspflanzen der Fall.
1. Blätter ernten: Ernte die Blätter und Stängel nach Bedarf. Du kannst die äußeren Blätter einzeln abzupfen oder die Triebspitzen abschneiden.
2. Regelmäßig ernten: Regelmäßiges Ernten fördert das Wachstum und sorgt für eine kontinuierliche Ernte.
3. Lagerung: Malabarspinat ist nicht lange haltbar. Am besten verarbeitest du ihn direkt nach der Ernte. Du kannst ihn aber auch für ein paar Tage im Kühlschrank aufbewahren.
Verwendung in der Küche
Malabarspinat ist unglaublich vielseitig in der Küche. Hier sind ein paar Ideen:
* Salate: Die jungen, zarten Blätter können roh in Salaten verwendet werden.
* Gekochter Spinat: Die Blätter und Stängel können wie Spinat gekocht und als Beilage serviert werden.
* Suppen und Eintöpfe: Malabarspinat eignet sich hervorragend für Suppen und Eintöpfe.
* Smoothies: Die Blätter können in Smoothies gemischt werden, um den Nährwert zu erhöhen.
* Currys: In der indischen Küche wird Malabarspinat häufig in Currys verwendet.
Zusätzliche Tipps und Tricks
* Mulchen: Mulche den Boden um die Pflanzen herum mit Stroh oder Grasschnitt. Das hilft, die Feuchtigkeit zu halten und Unk
Conclusion
So, there you have it! Mastering the art of growing Malabar spinach doesn’t require a green thumb blessed by the gardening gods. It’s about understanding its needs, providing the right environment, and employing a few simple, yet effective, DIY tricks. We’ve explored how to create the perfect support system, optimize watering schedules, and even concoct your own organic fertilizer blends to encourage vigorous growth.
Why is this a must-try? Because fresh, homegrown Malabar spinach is unlike anything you’ll find in a grocery store. The vibrant, slightly peppery flavor and the satisfying crunch of the leaves are a testament to your hard work and dedication. Plus, you’ll be reducing your carbon footprint by sourcing your greens directly from your backyard. Beyond the taste, you’ll be amazed at the sheer abundance of this leafy green. A single plant, properly cared for, can provide a continuous harvest throughout the growing season.
But the benefits extend beyond the culinary. Growing your own Malabar spinach is a therapeutic activity. It’s a chance to connect with nature, relieve stress, and witness the miracle of growth firsthand. It’s also a fantastic way to introduce children to the joys of gardening and healthy eating habits.
Ready to take your Malabar spinach game to the next level? Consider experimenting with different trellising methods. Bamboo stakes, repurposed tomato cages, or even a simple string trellis can all work wonders. You can also try companion planting. Basil, marigolds, and nasturtiums are known to deter pests and attract beneficial insects, creating a healthier ecosystem for your Malabar spinach.
Another exciting variation is to explore different cultivars of Malabar spinach. While the green-stemmed variety is the most common, you can also find red-stemmed cultivars, which add a beautiful splash of color to your garden and offer a slightly different flavor profile.
Don’t be afraid to experiment with different fertilizer combinations. A blend of compost tea, fish emulsion, and seaweed extract can provide a potent boost of nutrients. Just remember to start with small doses and observe how your plants respond.
We’ve armed you with the knowledge and the tools to succeed. Now, it’s your turn to put these DIY tricks into action. Plant those seeds, nurture those seedlings, and watch your Malabar spinach thrive.
We’re confident that you’ll be amazed by the results. But don’t just take our word for it. Try it for yourself and see the difference that these simple techniques can make.
And most importantly, we want to hear about your experiences! Share your photos, your tips, and your challenges in the comments section below. Let’s create a community of Malabar spinach enthusiasts, sharing our knowledge and inspiring each other to grow the best possible crop. Your insights could be invaluable to other gardeners who are just starting out. So, get growing, get sharing, and let’s celebrate the joys of homegrown Malabar spinach together! Remember, successful Malabar spinach growth is within your reach with these simple DIY techniques.
Frequently Asked Questions (FAQ)
What is the best time of year to plant Malabar spinach?
Malabar spinach thrives in warm weather, so the best time to plant it is in late spring or early summer, after the last frost has passed. The soil temperature should be at least 65°F (18°C) for optimal germination. If you live in a region with a short growing season, you can start seeds indoors 4-6 weeks before the last expected frost. This will give your plants a head start and ensure a longer harvest period.
How much sunlight does Malabar spinach need?
Malabar spinach needs at least 6-8 hours of direct sunlight per day to thrive. Choose a planting location that receives plenty of sunlight throughout the day. If you live in a particularly hot climate, some afternoon shade can be beneficial to prevent the leaves from scorching. Insufficient sunlight can lead to leggy growth and reduced yields.
What type of soil is best for Malabar spinach?
Malabar spinach prefers well-drained, fertile soil that is rich in organic matter. Amend your soil with compost or well-rotted manure before planting to improve its fertility and drainage. A slightly acidic to neutral soil pH (6.0-7.5) is ideal. You can test your soil pH using a soil testing kit and adjust it accordingly.
How often should I water Malabar spinach?
Malabar spinach needs consistent moisture to thrive, especially during hot weather. Water deeply and regularly, aiming to keep the soil consistently moist but not waterlogged. Check the soil moisture regularly by sticking your finger into the soil. If the top inch feels dry, it’s time to water. Avoid overhead watering, as this can increase the risk of fungal diseases. Drip irrigation or soaker hoses are excellent options for delivering water directly to the roots.
What kind of support system does Malabar spinach need?
Malabar spinach is a vining plant and needs a support system to climb on. A trellis, fence, or even a sturdy stake can be used. The support system should be at least 6-8 feet tall to accommodate the plant’s vigorous growth. Train the vines to climb the support system as they grow. This will help to keep the leaves off the ground, improve air circulation, and make harvesting easier.
How do I harvest Malabar spinach?
You can start harvesting Malabar spinach leaves when they are about 4-6 inches long. Simply snip off the leaves with scissors or pruning shears. Regular harvesting will encourage the plant to produce more leaves. You can also harvest the tender stems, which are also edible. Avoid harvesting more than one-third of the plant at a time to allow it to continue growing.
What are some common pests and diseases that affect Malabar spinach?
Malabar spinach is relatively pest-resistant, but it can be susceptible to aphids, spider mites, and snails. Inspect your plants regularly for signs of infestation and take action promptly. You can control aphids and spider mites with insecticidal soap or neem oil. Handpick snails and slugs or use traps. Fungal diseases, such as leaf spot, can also affect Malabar spinach, especially in humid conditions. Improve air circulation by spacing plants properly and avoid overhead watering.
Can I grow Malabar spinach in containers?
Yes, Malabar spinach can be grown successfully in containers. Choose a large container that is at least 12 inches in diameter and depth. Use a well-draining potting mix that is rich in organic matter. Provide a support system for the vines to climb on. Water regularly and fertilize every 2-3 weeks with a balanced liquid fertilizer. Place the container in a location that receives at least 6-8 hours of direct sunlight per day.
How can I encourage more leaf production in my Malabar spinach?
Regular harvesting is the key to encouraging more leaf production. Pinching off the growing tips of the vines can also promote branching and bushier growth. Fertilize regularly with a nitrogen-rich fertilizer to support leaf growth. Ensure that your plants are receiving adequate sunlight and water.
Is Malabar spinach the same as regular spinach?
No, Malabar spinach is not the same as regular spinach. While both are leafy green vegetables, they belong to different plant families. Regular spinach (Spinacia oleracea) is a member of the Amaranthaceae family, while Malabar spinach (Basella alba) is a member of the Basellaceae family. Malabar spinach is more heat-tolerant and has a slightly different flavor and texture than regular spinach. It’s often described as having a slightly peppery or citrusy flavor.
Leave a Comment