
Long Bean Bigger Harvest – that’s what we all dream of, right? Imagine baskets overflowing with those crisp, delicious beans, ready for stir-fries, salads, or even just a simple side dish. But sometimes, despite our best efforts, our long bean plants just don’t seem to produce as much as we’d like. Don’t worry, I’ve been there too!
Growing long beans, also known as yardlong beans or asparagus beans, has a rich history, particularly in Asian cuisine. For centuries, these beans have been a staple, providing essential nutrients and adding a unique flavor to countless dishes. They’re not just tasty; they’re a symbol of abundance and resourcefulness in many cultures.
But let’s face it, a meager harvest can be disheartening. That’s why I’m so excited to share some tried-and-true DIY tricks and hacks that will help you achieve a long bean bigger harvest than you ever thought possible! We’ll dive into simple, practical techniques that you can implement right away, from optimizing your soil to mastering the art of pruning. These aren’t complicated, expensive solutions; they’re clever ways to work with your plants and the environment to unlock their full potential. Get ready to transform your long bean patch into a thriving, bountiful garden!
Unlock a Bumper Crop: My Secret to HUGE Long Bean Harvests!
Hey fellow gardeners! I’m so excited to share my tried-and-true method for getting absolutely massive harvests of long beans. Forget those measly handfuls – we’re talking baskets overflowing with these delicious veggies! I’ve spent years tweaking this process, and I’m confident that if you follow these steps, you’ll be amazed at the results. Let’s get started!
Choosing the Right Variety and Location
Before we dive into the nitty-gritty, let’s talk about setting the stage for success. The variety of long bean you choose and where you plant it makes a HUGE difference.
* Variety Selection: Not all long beans are created equal! Some varieties are naturally more prolific than others. I’ve had fantastic luck with ‘Yard Long’ (also known as ‘Asparagus Bean’) and ‘Chinese Long Bean’. Do some research and see what varieties are recommended for your specific climate. Local nurseries are a great resource for this!
* Sunlight is Key: Long beans are sun-worshippers! They need at least 6-8 hours of direct sunlight per day to thrive. Choose a location in your garden that gets plenty of sunshine.
* Well-Drained Soil: These beans don’t like soggy feet! Make sure your soil drains well. If you have heavy clay soil, amend it with compost, aged manure, or other organic matter to improve drainage.
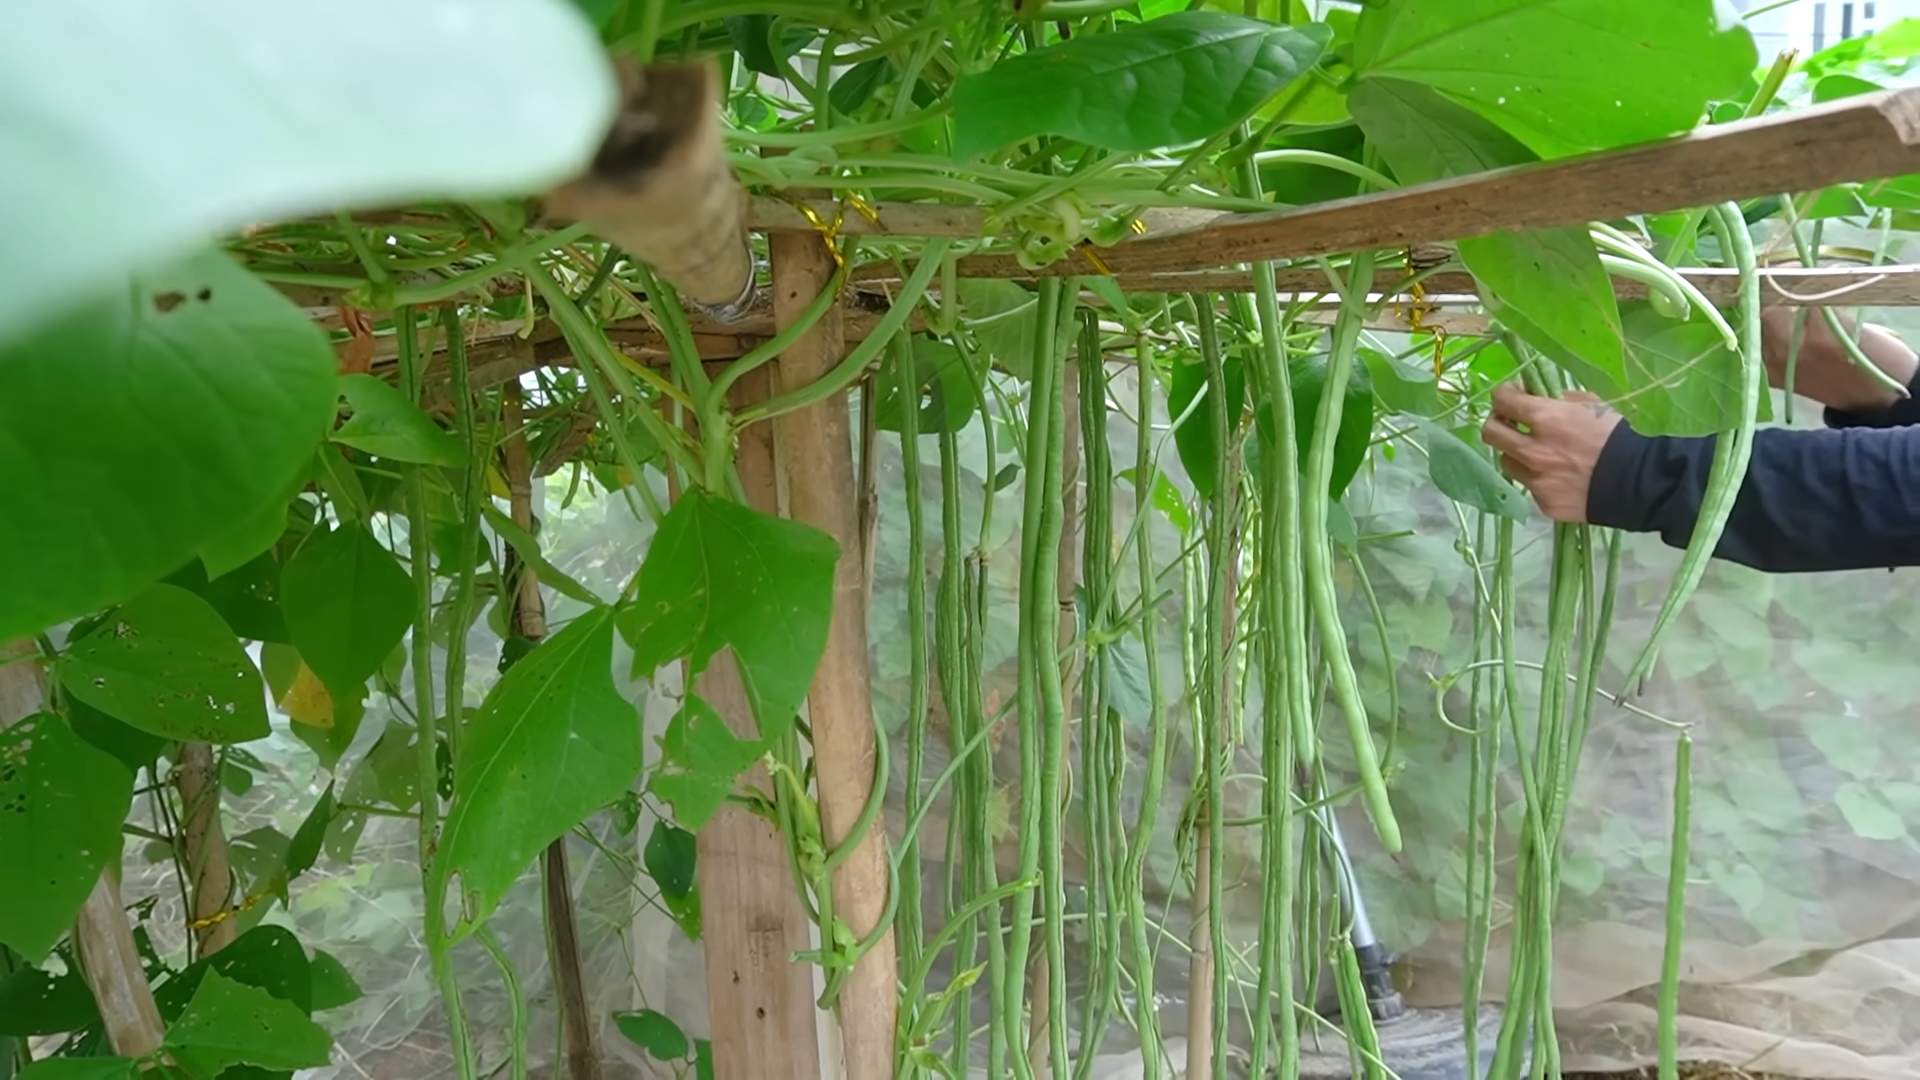
* Support System: Long beans are climbers, so they need a sturdy trellis or support system. I prefer a tall trellis made of strong netting or bamboo poles. It needs to be at least 6-8 feet tall to accommodate their vigorous growth.
Step-by-Step Planting Guide
Okay, now for the fun part – getting those seeds in the ground!
1. Prepare the Soil: Before planting, loosen the soil and mix in plenty of compost or well-rotted manure. This will provide essential nutrients and improve drainage. I like to add a slow-release organic fertilizer at this stage as well. Follow the instructions on the fertilizer package.
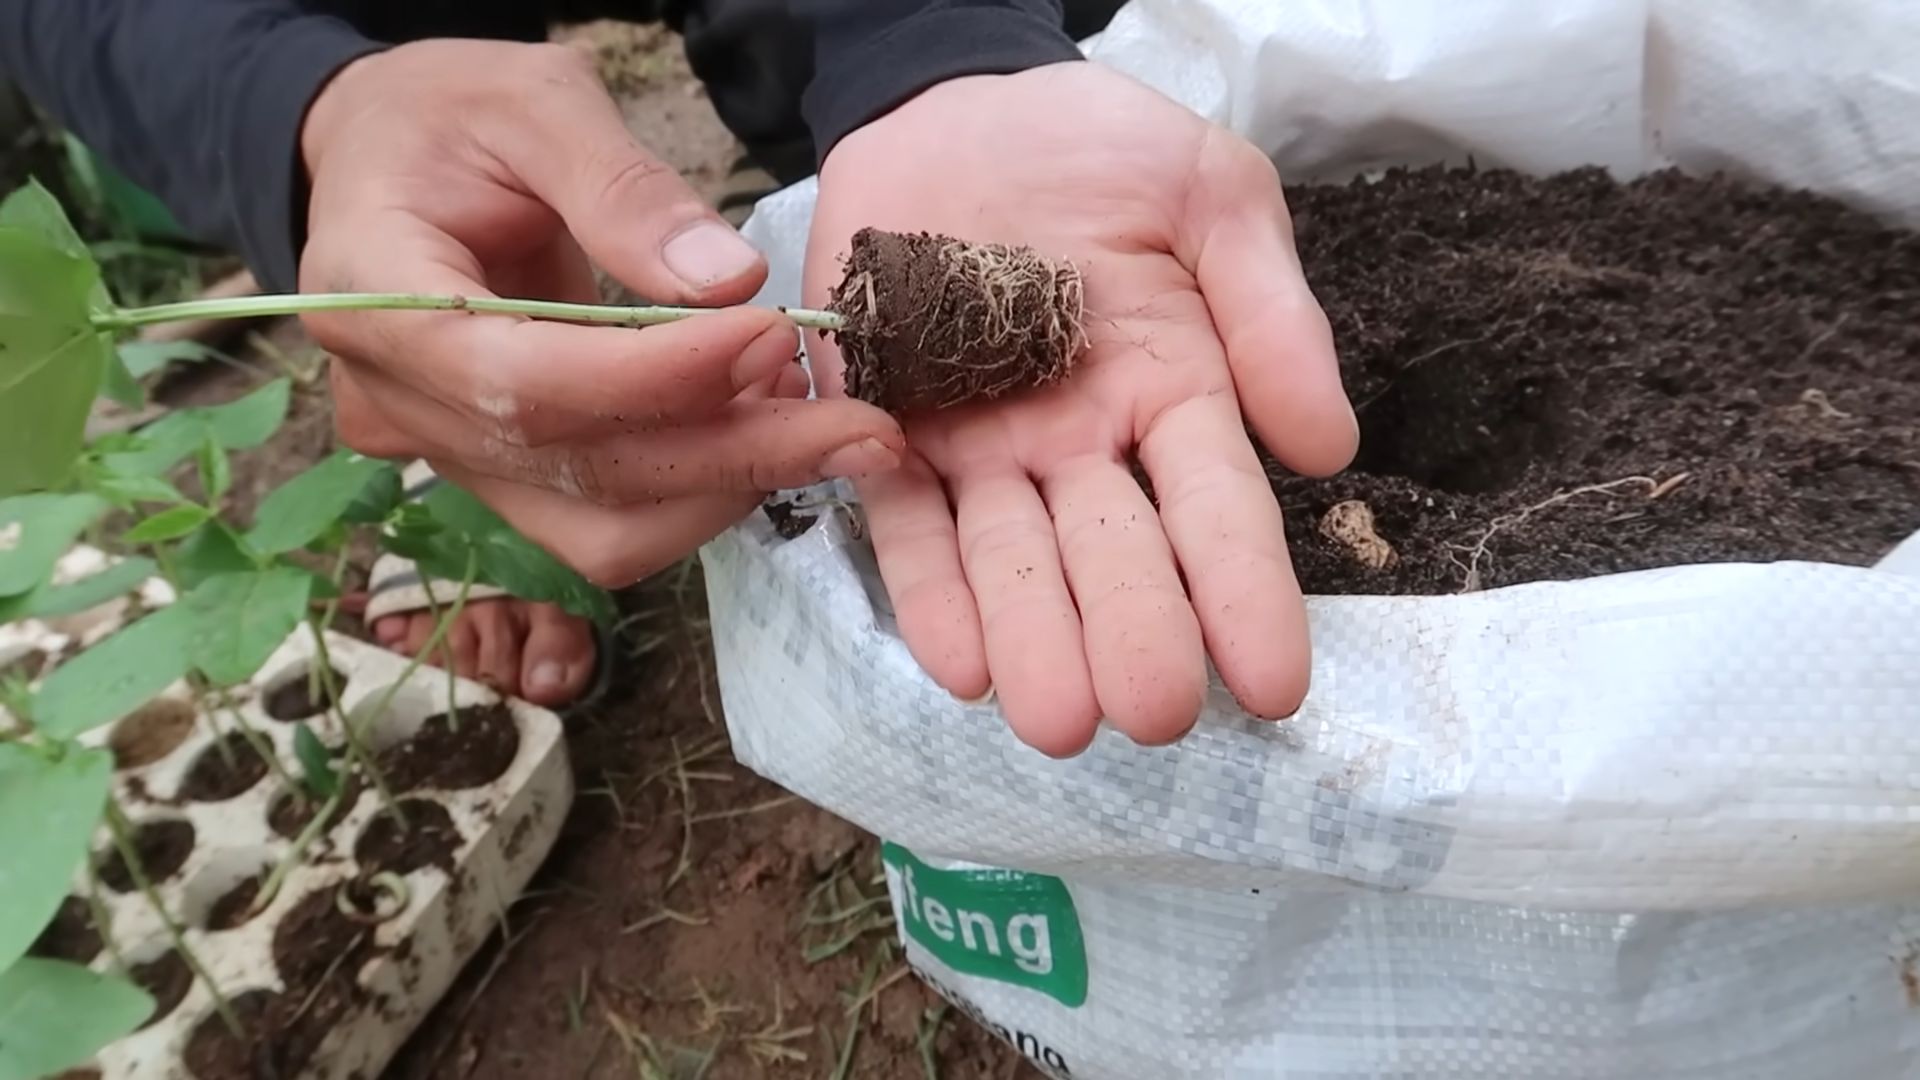
2. Sow Seeds Directly (Recommended): Long beans are best sown directly into the garden after the last frost. They don’t transplant well, so starting them indoors is generally not recommended.
3. Spacing is Important: Plant seeds about 1 inch deep and 4-6 inches apart along the base of your trellis. Once the seedlings emerge, you can thin them to about 8-12 inches apart. This gives them enough room to grow and prevents overcrowding.
4. Water Gently: After planting, water the seeds gently to avoid washing them away. Keep the soil consistently moist, but not waterlogged, until the seedlings emerge.
5. Provide Support Early: As soon as the seedlings start to develop tendrils, guide them towards the trellis. They’ll naturally start to climb, but a little encouragement early on can help them get established.
Watering and Feeding for Maximum Growth
Consistent watering and feeding are crucial for a bountiful harvest. Here’s my watering and feeding schedule:
1. Water Deeply and Regularly: Long beans need consistent moisture, especially during hot, dry weather. Water deeply at the base of the plants, avoiding wetting the foliage, which can lead to fungal diseases. I aim to water 2-3 times per week, depending on the weather.
2. Mulch to Conserve Moisture: Apply a layer of mulch around the base of the plants to help retain moisture, suppress weeds, and regulate soil temperature. Straw, wood chips, or shredded leaves are all good options.
3. Fertilize Regularly: Long beans are heavy feeders, so they need regular fertilization to produce a large crop. I like to use a balanced organic fertilizer every 2-3 weeks. Look for a fertilizer with a higher phosphorus content (the middle number) to promote flowering and fruiting.
4. Foliar Feeding (Optional): For an extra boost, you can also apply a foliar feed every couple of weeks. This involves spraying a diluted fertilizer solution directly onto the leaves. Seaweed extract or fish emulsion are excellent choices for foliar feeding.
Pruning and Training for Increased Yield
Pruning and training are essential for maximizing your long bean harvest. Here’s how I do it:
1. Train the Vines: As the vines grow, guide them up the trellis. If they start to wander, gently tie them to the trellis with soft twine or plant ties. This will help them stay organized and prevent them from shading each other.
2. Pinch Off Side Shoots: To encourage the main vines to grow taller and produce more beans, pinch off any side shoots that develop along the lower portion of the plant (up to about 2 feet from the ground). This will direct the plant’s energy towards bean production.
3. Remove Yellowing Leaves: Regularly inspect your plants for yellowing or diseased leaves and remove them promptly. This will help prevent the spread of disease and improve air circulation.
4. Top the Vines (Optional): Once the vines reach the top of the trellis, you can top them off by cutting off the growing tip. This will encourage the plant to produce more side shoots and beans. However, I usually let mine grow as long as they want, as long as they have support.
Pest and Disease Control
Long beans are generally relatively pest-resistant, but they can be susceptible to certain pests and diseases. Here’s how I manage them:
1. Regular Inspection: The best way to prevent pest and disease problems is to inspect your plants regularly. Look for signs of pests, such as aphids, spider mites, or bean beetles, and diseases, such as powdery mildew or fungal leaf spots.
2. Handpicking Pests: If you find any pests, handpick them off the plants and dispose of them. This is often the most effective way to control small infestations.
3. Insecticidal Soap or Neem Oil: For larger infestations, you can spray the plants with insecticidal soap or neem oil. These are both organic options that are effective against a wide range of pests. Be sure to follow the instructions on the product label.
4. Good Air Circulation: To prevent fungal diseases, ensure good air circulation around your plants. Space them properly and prune away any crowded foliage.
5. Fungicide (If Necessary): If you experience severe fungal disease problems, you may need to use a fungicide. Choose an organic fungicide that is specifically labeled for use on beans.
Harvesting Your Bountiful Crop
This is the moment we’ve all been waiting for – harvesting those delicious long beans!
1. Harvest Regularly: Long beans are best harvested when they are young and tender, about 12-18 inches long. Harvest them regularly, every 2-3 days, to encourage the plant to produce more beans.
2. Use Sharp Scissors or Pruners: Use sharp scissors or pruners to cut the beans from the plant. Be careful not to damage the vines.
3. Handle with Care: Long beans are delicate, so handle them with care to avoid bruising them.
4. Store Properly: Store harvested long beans in the refrigerator in a plastic bag for up to a week.
5. Enjoy Your Harvest! Long beans are delicious steamed, stir-fried, or added to soups and stews. Experiment with different recipes and enjoy the fruits (or rather, vegetables!) of your labor.
Troubleshooting Common Issues
Even with the best care, you may encounter some challenges along the way. Here are some common issues and how to address them:
* Poor Germination: If your seeds aren’t germinating well, make sure the soil is warm enough (at least 60°F). You can also soak the seeds in water for 24 hours before planting to improve germination rates.
* Yellowing Leaves: Yellowing leaves can be a sign of nutrient deficiency, overwatering, or disease. Check the soil moisture and nutrient levels and address any underlying problems.
* Lack of Flowers: If your plants aren’t flowering, they may not be getting enough sunlight or phosphorus. Make sure they are in a sunny location and fertilize with a fertilizer that is high in phosphorus.
* Bean Pods Not Filling Out: This can be caused by poor pollination or nutrient deficiency. Ensure there are plenty of pollinators in your garden and fertilize regularly.
My Secret Weapon: Companion Planting
Companion planting is a fantastic way to boost your long bean harvest naturally! Here are some of my favorite companion plants for long beans:
* Marigolds: These beautiful flowers repel many common pests, including nematodes and bean beetles.
* Nasturtiums: These edible flowers attract beneficial insects, such as ladybugs and lacewings, which prey on aphids and other pests.
* Rosemary: This fragrant herb repels bean beetles and other pests.
* Carrots: Carrots are said to improve the growth of beans.
* Cucumbers:
Conclusion
So, there you have it! This simple yet incredibly effective DIY trick for achieving a long bean bigger harvest is more than just a gardening tip; it’s a game-changer. We’ve explored the science behind it, the ease of implementation, and the potential for significantly increased yields. Why spend countless hours tending to your long bean plants only to be disappointed by a meager harvest? This method offers a proactive and natural way to boost your plant’s productivity, ensuring you’re rewarded with an abundance of delicious, fresh long beans.
The beauty of this DIY approach lies in its adaptability. Feel free to experiment with different variations to suit your specific growing conditions and preferences. For instance, if you live in a particularly humid climate, you might consider adjusting the frequency of the technique to avoid over-stimulation. Alternatively, if you’re growing a specific variety of long bean known for its sensitivity, you could dilute the solution slightly to ensure optimal results.
Don’t be afraid to get creative! Some gardeners have found success by incorporating other natural growth enhancers alongside this technique, such as compost tea or diluted seaweed extract. The key is to observe your plants closely and adjust your approach accordingly. Remember, gardening is a journey of continuous learning and experimentation.
But the most compelling reason to try this DIY trick is the sheer satisfaction of witnessing the tangible results. Imagine the pride you’ll feel as you harvest basket after basket of plump, vibrant long beans, knowing that you played an active role in maximizing your plant’s potential. This isn’t just about growing vegetables; it’s about connecting with nature, fostering a deeper understanding of plant life, and enjoying the fruits (or rather, the beans!) of your labor.
We wholeheartedly encourage you to give this DIY trick a try. It’s inexpensive, easy to implement, and has the potential to transform your long bean harvest. And once you’ve experienced the difference, we’d love to hear about it! Share your results, your variations, and your overall experience in the comments section below. Let’s create a community of gardeners who are passionate about maximizing their yields and sharing their knowledge with others. Together, we can unlock the secrets to a truly bountiful long bean harvest! So, grab your gardening gloves, gather your supplies, and get ready to witness the magic of this simple yet powerful DIY trick. Your long bean plants will thank you for it!
Frequently Asked Questions (FAQ)
What exactly does this DIY trick do to help long beans grow bigger?
This DIY trick primarily focuses on stimulating the plant’s natural growth hormones and improving nutrient uptake. By gently manipulating the plant at a specific stage of its development, we encourage it to allocate more energy towards fruit production rather than vegetative growth. This results in larger, more abundant long beans. Think of it as a gentle nudge in the right direction, optimizing the plant’s inherent potential for a long bean bigger harvest. It also helps to improve the overall health and vigor of the plant, making it more resilient to pests and diseases.
Is this DIY trick safe for my long bean plants? I don’t want to harm them.
Yes, when performed correctly, this DIY trick is perfectly safe for your long bean plants. The key is to be gentle and follow the instructions carefully. Avoid excessive force or any actions that could damage the plant’s delicate tissues. It’s also important to monitor your plants closely after applying the technique and adjust your approach if you notice any signs of stress. Remember, the goal is to stimulate growth, not to shock the plant. If you are unsure, test the technique on one plant first before applying it to your entire crop.
How often should I apply this DIY trick to my long bean plants?
The frequency of application depends on several factors, including the age of your plants, the growing conditions, and the specific variety of long bean you’re growing. As a general guideline, we recommend applying the technique once every two to three weeks during the peak growing season. However, it’s crucial to observe your plants closely and adjust the frequency accordingly. If you notice that your plants are responding well, you can increase the frequency slightly. Conversely, if you see any signs of stress, reduce the frequency or discontinue the technique altogether.
What if I don’t see any results after trying this DIY trick?
It’s important to remember that gardening is not an exact science, and results can vary depending on a multitude of factors. If you don’t see immediate results, don’t be discouraged. Continue to monitor your plants closely and ensure that they are receiving adequate sunlight, water, and nutrients. It may take some time for the effects of the DIY trick to become noticeable. Also, consider that other factors might be limiting your harvest, such as poor soil quality, pest infestations, or disease. Address these issues first, and then reassess the effectiveness of the DIY trick.
Can I use this DIY trick on other types of bean plants besides long beans?
While this DIY trick is specifically designed for long beans, it may also be effective on other types of bean plants, particularly those that are vining or climbing varieties. However, it’s important to proceed with caution and test the technique on a small scale before applying it to your entire crop. Different types of bean plants may respond differently to the stimulation, so it’s crucial to observe them closely and adjust your approach accordingly. Research the specific needs and characteristics of the bean variety you’re growing before attempting this DIY trick.
What are some common mistakes to avoid when trying this DIY trick?
One of the most common mistakes is using excessive force, which can damage the plant. Be gentle and deliberate in your movements. Another mistake is applying the technique too frequently, which can overstimulate the plant and lead to stress. Stick to the recommended frequency and adjust as needed based on your plant’s response. Finally, neglecting other essential gardening practices, such as providing adequate sunlight, water, and nutrients, can also limit the effectiveness of the DIY trick. Remember, this technique is just one piece of the puzzle; it’s important to create a healthy and supportive growing environment for your long bean plants.
Is there a specific time of day that’s best for applying this DIY trick?
While there’s no definitive answer, many gardeners find that applying the technique in the early morning or late afternoon is ideal. During these times, the plant is less likely to be stressed by the heat of the day, and it has ample time to recover before nightfall. Avoid applying the technique during the hottest part of the day, as this can increase the risk of stress and damage. Ultimately, the best time to apply the technique is when you have the time and attention to do it properly.
How do I know if my long bean plants are healthy enough to handle this DIY trick?
Before attempting this DIY trick, it’s essential to ensure that your long bean plants are healthy and vigorous. Look for signs of strong growth, such as lush green foliage, sturdy stems, and abundant flowering. Avoid applying the technique to plants that are stressed, diseased, or infested with pests. These plants are already struggling to survive, and the DIY trick could further weaken them. Focus on addressing any underlying health issues before attempting to stimulate growth. A healthy plant is much more likely to respond positively to the DIY trick and reward you with a long bean bigger harvest.


Leave a Comment