
Indoor vegetable gardening: Ever dreamt of plucking a ripe tomato straight from the vine, right in your own kitchen? Or snipping fresh herbs for dinner, even when it’s snowing outside? I know I have! The idea of bringing the bounty of the garden indoors is incredibly appealing, and it’s more achievable than you might think.
For centuries, people have sought ways to extend the growing season and cultivate food indoors. From ancient Roman greenhouses to the orangeries of European royalty, the desire to control our environment and nurture plants year-round is deeply rooted in our history. Today, with advancements in lighting and hydroponics, indoor vegetable gardening has become accessible to everyone, regardless of space or climate.
But let’s be honest, getting started can feel overwhelming. Where do you even begin? Which vegetables thrive indoors? And how do you avoid common pitfalls like pests and lack of sunlight? That’s where this DIY guide comes in! I’m going to share my favorite tricks and hacks for creating a thriving indoor vegetable garden, even if you have a small apartment or zero gardening experience. Get ready to roll up your sleeves and discover the joy of growing your own delicious, fresh produce, all year round!
Dein eigener Indoor-Gemüsegarten: So klappt’s!
Hey Leute! Habt ihr auch genug von teurem, geschmacklosem Gemüse aus dem Supermarkt? Ich auch! Deshalb zeige ich euch heute, wie ihr euren eigenen kleinen Gemüsegarten in eure Wohnung zaubern könnt. Keine Angst, ihr braucht keinen grünen Daumen, nur ein bisschen Geduld und diese Anleitung. Los geht’s!
Was du brauchst: Die Einkaufsliste
Bevor wir loslegen, hier eine Liste mit allem, was du für deinen Indoor-Gemüsegarten benötigst:
* Saatgut: Wähle Gemüsesorten, die sich gut für den Anbau in Innenräumen eignen. Salat, Kräuter, Radieschen, Mini-Paprika und Chili sind gute Anfängerpflanzen.
* Anzuchterde: Diese Erde ist speziell für die Anzucht von Sämlingen geeignet und enthält weniger Nährstoffe, um die Wurzelbildung zu fördern.
* Pflanztöpfe oder Behälter: Achte darauf, dass sie ausreichend groß sind und Löcher im Boden haben, damit das Wasser ablaufen kann.
* Untersetzer: Um überschüssiges Wasser aufzufangen und deine Wohnung sauber zu halten.
* Pflanzenerde: Nachdem die Sämlinge groß genug sind, brauchst du normale Pflanzenerde für die größeren Töpfe.
* Pflanzenlampe (optional, aber empfohlen): Gerade im Winter oder in dunkleren Wohnungen ist eine Pflanzenlampe Gold wert, um deinen Pflanzen ausreichend Licht zu geben.
* Sprühflasche: Zum Befeuchten der Erde.
* Gießkanne: Zum Gießen der Pflanzen.
* Dünger (optional): Für eine optimale Nährstoffversorgung deiner Pflanzen. Ich empfehle einen organischen Flüssigdünger.
* Anzuchtschalen oder Mini-Gewächshaus (optional): Für die Anzucht der Samen.
Phase 1: Die Anzucht – Kleine Pflänzchen großziehen
Die Anzucht ist der erste und wichtigste Schritt. Hier legst du den Grundstein für deinen Gemüsegarten.
1. Vorbereitung der Anzuchtschalen: Fülle die Anzuchtschalen oder das Mini-Gewächshaus mit Anzuchterde. Drücke die Erde leicht an.
2. Aussaat der Samen: Verteile die Samen gleichmäßig auf der Erde. Achte darauf, dass du nicht zu viele Samen in eine Zelle gibst, da die Pflänzchen sonst zu eng stehen. Die Saattiefe hängt von der Gemüsesorte ab. Lies die Anweisungen auf der Samenpackung. In der Regel sind es nur wenige Millimeter.
3. Befeuchten der Erde: Besprühe die Erde vorsichtig mit Wasser, sodass sie feucht, aber nicht nass ist.
4. Abdecken der Anzuchtschalen (optional): Wenn du ein Mini-Gewächshaus verwendest, schließe den Deckel. Ansonsten kannst du die Anzuchtschalen mit Frischhaltefolie abdecken, um die Luftfeuchtigkeit zu erhöhen.
5. Standort: Stelle die Anzuchtschalen an einen warmen und hellen Ort. Ideal ist eine Fensterbank oder ein Platz unter einer Pflanzenlampe.
6. Regelmäßige Kontrolle: Kontrolliere die Erde täglich und besprühe sie bei Bedarf mit Wasser, damit sie nicht austrocknet.
7. Keimung: Je nach Gemüsesorte dauert es unterschiedlich lange, bis die Samen keimen. In der Regel dauert es zwischen 5 und 14 Tagen.
8. Entfernen der Abdeckung: Sobald die ersten Keimlinge zu sehen sind, entferne die Abdeckung, damit die Pflänzchen ausreichend Licht bekommen.
Phase 2: Das Pikieren – Den Pflänzchen mehr Raum geben
Wenn die Sämlinge ein paar Blätter gebildet haben (in der Regel nach 2-3 Wochen), ist es Zeit, sie zu pikieren. Das bedeutet, dass du sie in größere Töpfe umpflanzt, damit sie mehr Platz zum Wachsen haben.
1. Vorbereitung der Töpfe: Fülle die größeren Töpfe mit Pflanzenerde. Achte darauf, dass die Töpfe Löcher im Boden haben.
2. Vorsichtiges Ausheben der Sämlinge: Löse die Sämlinge vorsichtig mit einem Pikierstab oder einem Löffel aus der Anzuchtschale. Versuche, die Wurzeln so wenig wie möglich zu beschädigen.
3. Einsetzen der Sämlinge: Setze jeden Sämling in einen eigenen Topf. Achte darauf, dass die Wurzeln nicht geknickt sind. Fülle den Topf mit Erde auf und drücke sie leicht an.
4. Angießen: Gieße die Sämlinge vorsichtig an.
5. Standort: Stelle die Töpfe an einen hellen und warmen Ort.
Phase 3: Die Pflege – Damit dein Gemüsegarten prächtig gedeiht
Die richtige Pflege ist entscheidend für den Erfolg deines Indoor-Gemüsegartens.
1. Gießen: Gieße deine Pflanzen regelmäßig, aber nicht zu viel. Die Erde sollte immer leicht feucht sein, aber nicht nass. Staunässe solltest du unbedingt vermeiden, da sie zu Wurzelfäule führen kann. Die Häufigkeit des Gießens hängt von der Gemüsesorte, der Größe des Topfes und der Temperatur ab.
2. Düngen: Dünge deine Pflanzen regelmäßig mit einem organischen Flüssigdünger. Die Häufigkeit des Düngens hängt vom Dünger und der Gemüsesorte ab. Lies die Anweisungen auf der Düngerpackung.
3. Licht: Deine Pflanzen brauchen ausreichend Licht, um zu wachsen. Wenn du keinen hellen Standort hast, solltest du eine Pflanzenlampe verwenden. Die Pflanzenlampe sollte 12-16 Stunden am Tag eingeschaltet sein.
4. Belüftung: Sorge für eine gute Belüftung, um Schimmelbildung zu vermeiden. Lüfte den Raum regelmäßig oder stelle einen Ventilator auf.
5. Schädlinge: Kontrolliere deine Pflanzen regelmäßig auf Schädlinge. Wenn du Schädlinge entdeckst, solltest du sie so schnell wie möglich bekämpfen. Es gibt verschiedene natürliche Mittel zur Schädlingsbekämpfung, wie z.B. Neemöl oder Schmierseife.
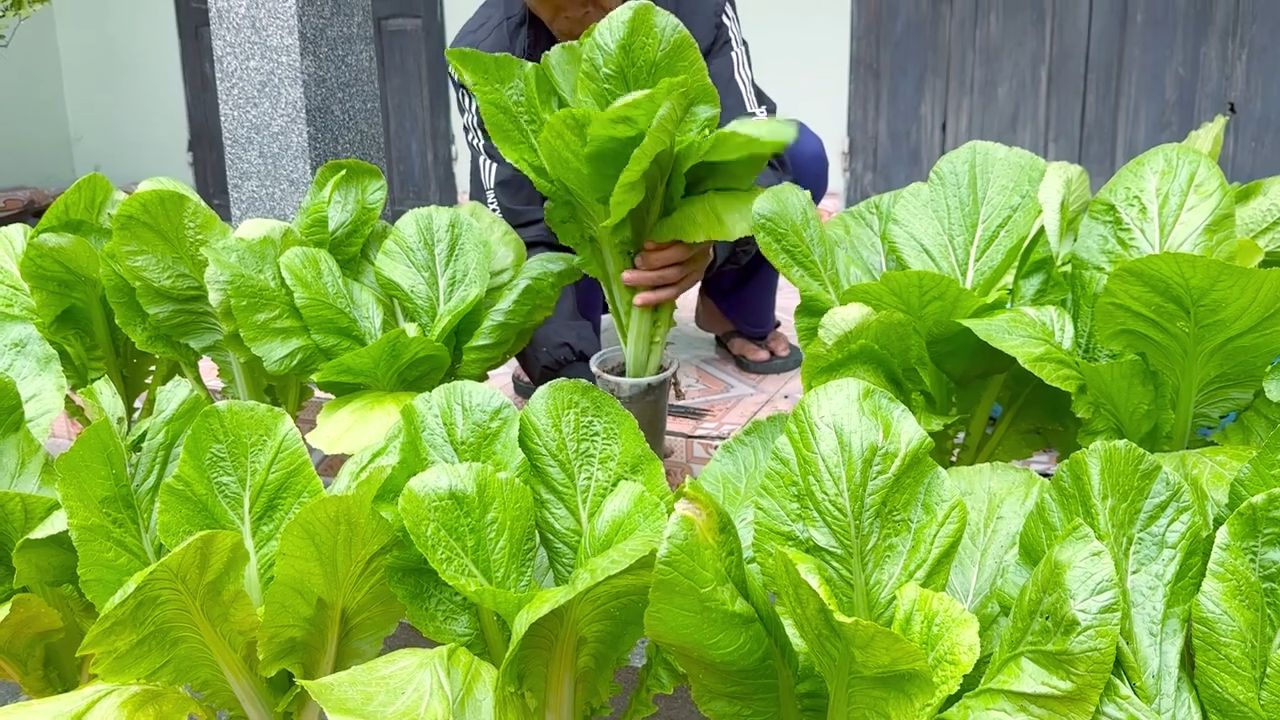
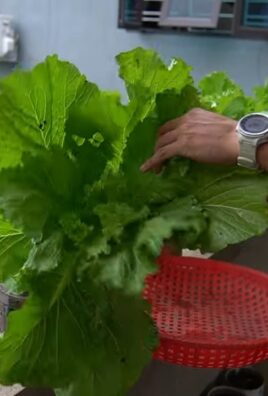
6. Ernte: Je nach Gemüsesorte kannst du nach einigen Wochen oder Monaten deine erste Ernte einfahren. Ernte das Gemüse, wenn es reif ist.
Spezielle Tipps für verschiedene Gemüsesorten
* Salat: Salat ist relativ einfach anzubauen. Er braucht einen hellen Standort und regelmäßige Bewässerung. Du kannst die Blätter nach und nach ernten, sodass die Pflanze weiterwachsen kann.
* Kräuter: Kräuter sind ebenfalls einfach anzubauen. Sie brauchen einen sonnigen Standort und wenig Wasser. Du kannst die Blätter nach Bedarf ernten.
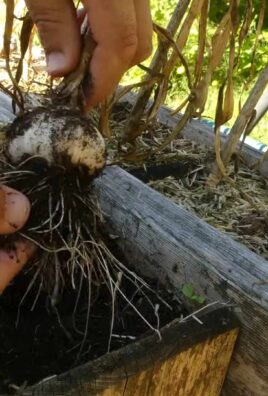
* Radieschen: Radieschen wachsen sehr schnell. Sie brauchen einen hellen Standort und regelmäßige Bewässerung. Du kannst sie nach etwa 4-6 Wochen ernten.
* Mini-Paprika und Chili: Mini-Paprika und Chili brauchen einen sonnigen Standort und regelmäßige Bewässerung. Sie brauchen etwas länger, um zu reifen. Du kannst sie ernten, wenn sie die gewünschte Farbe haben.
Häufige Fehler und wie du sie vermeidest
* Zu viel Gießen: Zu viel Gießen ist einer der häufigsten Fehler. Die Erde sollte immer leicht feucht sein, aber nicht nass.
* Zu wenig Licht: Deine Pflanzen brauchen ausreichend Licht, um zu wachsen. Wenn du keinen hellen Standort hast, solltest du eine Pflanzenlampe verwenden.
* Falsche Erde: Verwende die richtige Erde für die Anzucht und für die größeren Töpfe. Anzuchterde ist speziell für die Anzucht von Sämlingen geeignet und enthält weniger Nährstoffe.
* Schädlinge: Kontrolliere deine Pflanzen regelmäßig auf Schädlinge und bekämpfe sie so schnell wie möglich.
* Zu wenig Dünger: Dünge deine Pflanzen regelmäßig mit einem organischen Flüssigdünger.
Zusätzliche Tipps für Fortgeschrittene
* Hydrokultur: Wenn du keine Erde verwenden möchtest, kannst du deine Pflanzen auch in Hydrokultur anbauen. Dabei werden die Pflanzen in einem Nährstofflösung angebaut.
* Vertikaler Garten: Wenn du wenig Platz hast, kannst du einen vertikalen Garten anlegen.

Conclusion
So, there you have it! Transforming your living space into a thriving, miniature farm is not only achievable but incredibly rewarding. This DIY approach to indoor vegetable gardening unlocks a world of fresh, flavorful produce right at your fingertips, regardless of your outdoor space limitations. Forget those bland, store-bought vegetables that have traveled miles to reach your plate. Imagine the satisfaction of harvesting your own crisp lettuce, juicy tomatoes, or fragrant herbs, knowing exactly where they came from and how they were grown.
This isn’t just about convenience; it’s about reclaiming control over your food source, reducing your carbon footprint, and connecting with nature in a meaningful way. The vibrant green hues of your indoor garden will brighten your home, purify the air, and provide a calming, therapeutic effect. It’s a win-win-win!
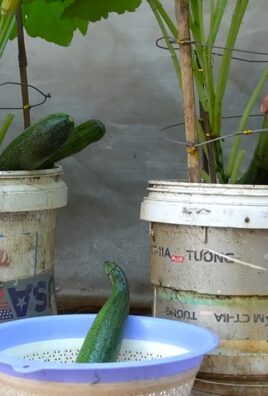
But the beauty of this DIY project lies in its adaptability. Feel free to experiment with different containers, from repurposed mason jars to stylish ceramic pots. Consider vertical gardening systems to maximize space and create a stunning living wall. And don’t be afraid to branch out beyond the basics. While leafy greens and herbs are excellent starting points, you can also try growing peppers, strawberries, or even dwarf varieties of tomatoes indoors.
For those seeking a more advanced challenge, explore hydroponics or aquaponics systems. These soilless methods can significantly boost yields and offer a fascinating glimpse into the science of plant growth. You can also customize your nutrient solutions to cater to the specific needs of your chosen vegetables, ensuring optimal health and flavor.
Remember, the key to successful indoor vegetable gardening is observation and adaptation. Pay close attention to your plants’ needs, adjusting light, water, and nutrients as necessary. Don’t be discouraged by initial setbacks; every gardener, even the most experienced, faces challenges along the way. The important thing is to learn from your mistakes and keep experimenting.
We wholeheartedly encourage you to embark on this exciting journey of indoor vegetable gardening. It’s a project that will not only enhance your culinary experiences but also enrich your life in countless other ways. So, gather your supplies, choose your seeds, and get ready to cultivate your own little slice of paradise indoors.
And most importantly, we want to hear about your experiences! Share your successes, your challenges, and your creative adaptations in the comments below. Let’s build a community of indoor gardeners, sharing tips and inspiration to help each other grow. Together, we can transform our homes into havens of fresh, healthy, and delicious food. Don’t forget to tag us in your social media posts using #IndoorVeggieGardenDIY – we can’t wait to see what you create!
Frequently Asked Questions (FAQ)
What are the easiest vegetables to grow indoors for beginners?
Starting with easy-to-grow vegetables is a great way to build confidence and learn the basics of indoor gardening. Leafy greens like lettuce, spinach, and kale are excellent choices because they are relatively low-maintenance and can tolerate lower light conditions. Herbs such as basil, mint, and chives are also beginner-friendly and add a burst of flavor to your meals. Radishes are another quick-growing option that can be harvested in just a few weeks. Avoid vegetables that require extensive pollination or large amounts of space initially, such as corn or pumpkins. Focus on mastering the basics with these easier options before moving on to more challenging crops.
How much light do my indoor vegetables need?
Light is crucial for photosynthesis, the process by which plants convert light energy into food. Most vegetables require at least 6-8 hours of direct sunlight per day. If you don’t have a south-facing window that provides sufficient sunlight, you’ll need to supplement with artificial grow lights. LED grow lights are a popular choice because they are energy-efficient and provide the full spectrum of light that plants need. Fluorescent grow lights are another option, but they are less energy-efficient than LEDs. The distance between the grow light and your plants will depend on the type of light and the specific needs of your vegetables. Generally, you should position the light close enough to provide adequate illumination without burning the leaves. Observe your plants closely for signs of insufficient light, such as leggy growth or pale leaves.
What kind of soil should I use for indoor vegetable gardening?
The right soil is essential for providing your plants with the nutrients and drainage they need to thrive. Avoid using garden soil, as it can be too heavy and may contain pests or diseases. Instead, opt for a high-quality potting mix specifically formulated for vegetables. These mixes typically contain a blend of peat moss, perlite, and vermiculite, which provide good drainage and aeration. You can also amend your potting mix with compost or other organic matter to improve its nutrient content. Consider using a soilless mix, such as coco coir, which is a sustainable alternative to peat moss. Regardless of the type of soil you choose, make sure it is well-draining to prevent root rot.
How often should I water my indoor vegetables?
Watering frequency depends on several factors, including the type of vegetable, the size of the container, the temperature, and the humidity. As a general rule, water your plants when the top inch of soil feels dry to the touch. Avoid overwatering, as this can lead to root rot. Use a watering can or a hose with a gentle spray nozzle to water your plants evenly. Water in the morning to allow the foliage to dry before nightfall, which can help prevent fungal diseases. Monitor your plants closely for signs of underwatering, such as wilting leaves, or overwatering, such as yellowing leaves. Adjust your watering schedule accordingly.
What are some common pests and diseases that affect indoor vegetable gardens, and how can I prevent them?
Indoor vegetable gardens are less susceptible to pests and diseases than outdoor gardens, but they are not immune. Common pests include aphids, spider mites, and whiteflies. These pests can suck the sap from your plants, causing them to weaken and die. To prevent pest infestations, inspect your plants regularly for signs of pests. If you find pests, you can try washing them off with a strong stream of water or using insecticidal soap or neem oil. Common diseases include powdery mildew and root rot. Powdery mildew is a fungal disease that causes a white, powdery coating on the leaves. Root rot is caused by overwatering and poor drainage. To prevent diseases, provide good air circulation, avoid overwatering, and use a well-draining potting mix.
Can I grow vegetables indoors year-round?
Yes, one of the biggest advantages of indoor vegetable gardening is that you can grow vegetables year-round, regardless of the weather outside. With proper lighting, temperature control, and nutrient management, you can enjoy fresh, homegrown produce even in the dead of winter. Consider succession planting, where you stagger your planting dates to ensure a continuous harvest throughout the year. You can also grow different vegetables depending on the season. For example, you might grow leafy greens and herbs in the winter and tomatoes and peppers in the summer.
How do I pollinate my indoor vegetables?
Some vegetables, such as tomatoes, peppers, and cucumbers, require pollination to produce fruit. In an outdoor garden, pollination is typically done by bees and other insects. However, in an indoor garden, you’ll need to pollinate your plants manually. One way to do this is to use a small paintbrush to transfer pollen from the male flowers to the female flowers. Another way is to gently shake the plants to release the pollen. You can also use a small fan to circulate the air and help with pollination.
What are the best containers for indoor vegetable gardening?
The best containers for indoor vegetable gardening are those that are appropriately sized for the vegetables you are growing and have good drainage. Clay pots, plastic pots, and fabric pots are all good options. Make sure the containers have drainage holes to prevent water from accumulating at the bottom. The size of the container will depend on the size of the plant. For example, leafy greens and herbs can be grown in smaller containers, while tomatoes and peppers will need larger containers. Consider using self-watering containers, which can help regulate moisture levels and reduce the risk of overwatering.
Leave a Comment