
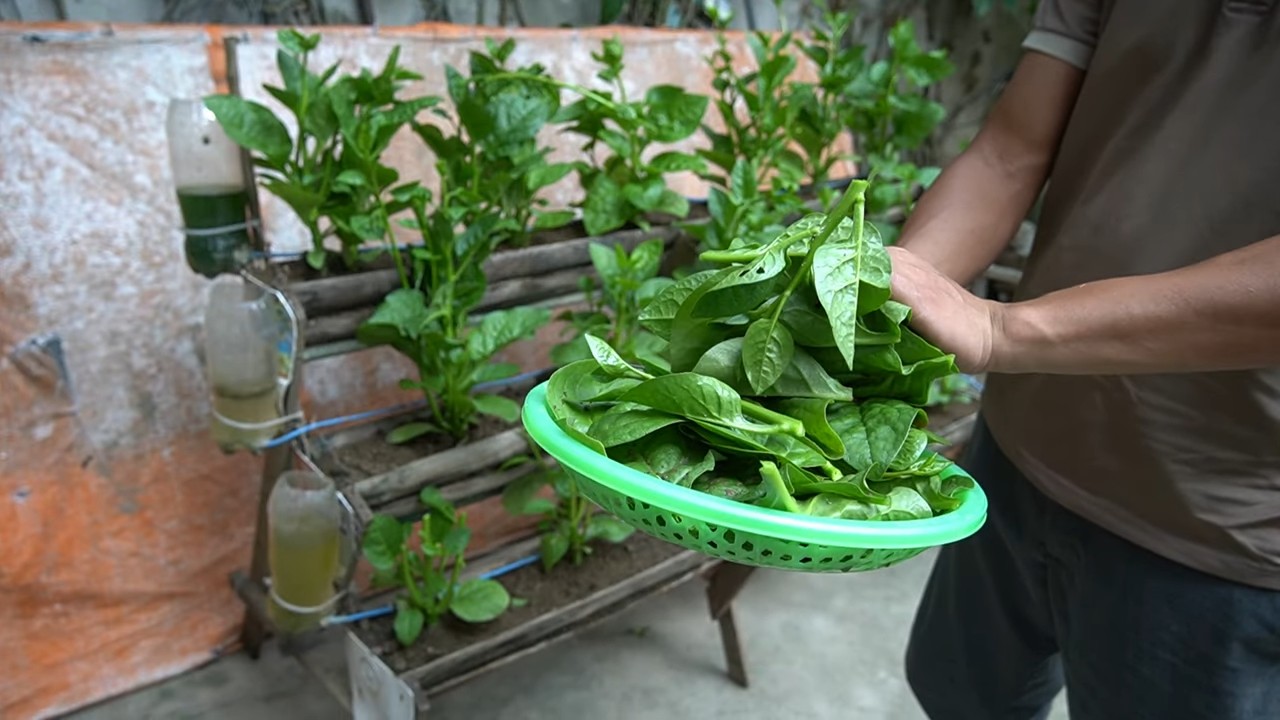
Homegrown Spinach Tiered Garden: Imagine stepping outside your back door and harvesting fresh, vibrant spinach, bursting with flavor, from your very own tiered garden. Sounds like a dream, right? Well, it doesn’t have to be! This DIY project will guide you through creating a stunning and productive tiered garden specifically designed for growing delicious homegrown spinach.
For centuries, cultivating our own food has been a cornerstone of human civilization. From ancient kitchen gardens to the victory gardens of wartime, the ability to nurture and harvest our own produce has provided sustenance, independence, and a deep connection to the earth. Even today, the simple act of growing your own food, especially something as nutritious as spinach, can be incredibly rewarding.
But let’s face it, not everyone has acres of land to dedicate to a sprawling vegetable patch. That’s where the magic of a tiered garden comes in! This DIY project is perfect for those with limited space, whether you have a small balcony, a patio, or just a sunny corner in your yard. A homegrown spinach tiered garden allows you to maximize your growing potential in a compact and visually appealing way. Plus, it’s a fantastic way to elevate your gardening game and impress your friends and family with your green thumb skills. So, are you ready to ditch the store-bought spinach and embark on a journey to fresh, flavorful, and homegrown goodness? Let’s get started!
Dein eigener Spinat-Turmgarten: So baust du ihn selbst!
Ich liebe frischen Spinat! Und was gibt es Besseres, als ihn direkt vor der Haustür zu ernten? Mit diesem DIY-Projekt zeige ich dir, wie du einen platzsparenden Spinat-Turmgarten baust, der nicht nur super praktisch ist, sondern auch noch richtig gut aussieht. Keine Angst, es ist einfacher als du denkst!
Was du brauchst:
* Pflanzgefäße: Ich habe drei unterschiedlich große Terrakotta-Töpfe verwendet (z.B. Durchmesser 30cm, 25cm und 20cm). Du kannst aber auch Plastiktöpfe nehmen, achte nur darauf, dass sie stabil sind.
* Drainagematerial: Blähton, Kies oder Tonscherben.
* Hochwertige Pflanzerde: Speziell für Gemüse oder Kräuter geeignet.
* Spinatsamen oder Jungpflanzen: Je nachdem, wie schnell du ernten möchtest.
* Gießkanne oder Schlauch: Zum Bewässern.
* Handschuhe: Um deine Hände sauber zu halten.
* Schaufel oder Kelle: Zum Befüllen der Töpfe mit Erde.
* Optional: Gartenvlies, um die Erde im Topf zu halten und das Auswaschen zu verhindern.
* Optional: Dünger für Blattgemüse (organisch oder mineralisch).
Schritt-für-Schritt-Anleitung:
1. Vorbereitung der Töpfe
1. Reinigung: Zuerst solltest du deine Töpfe gründlich reinigen. Entferne Erde, Staub und eventuelle Algen. Ein bisschen Seifenwasser hilft dabei.
2. Drainage: Lege eine Schicht Drainagematerial (Blähton, Kies oder Tonscherben) auf den Boden jedes Topfes. Das sorgt dafür, dass das Wasser gut ablaufen kann und die Wurzeln nicht faulen. Eine Schicht von etwa 5-7 cm ist ideal.
3. Gartenvlies (optional): Wenn du möchtest, kannst du ein Stück Gartenvlies über das Drainagematerial legen. Das verhindert, dass die Erde in die Drainageschicht gespült wird. Schneide das Vlies einfach passend zu und lege es hinein.
2. Befüllen der Töpfe mit Erde
1. Erste Schicht: Fülle den größten Topf mit Pflanzerde. Lass oben etwa 5-7 cm Platz, damit das Wasser beim Gießen nicht überläuft.
2. Zweiter Topf: Setze den zweitgrößten Topf mittig auf die Erde im größten Topf. Fülle den Zwischenraum zwischen den beiden Töpfen mit Erde. Drücke die Erde leicht an.
3. Dritter Topf: Wiederhole den Vorgang mit dem kleinsten Topf. Setze ihn mittig auf die Erde im zweitgrößten Topf und fülle den Zwischenraum mit Erde. Auch hier die Erde leicht andrücken.
4. Kontrolle: Überprüfe, ob die Töpfe stabil stehen und nicht wackeln. Gegebenenfalls kannst du noch etwas Erde hinzufügen, um sie zu stabilisieren.
3. Spinat säen oder pflanzen
1. Aussaat (wenn du Samen verwendest): Verteile die Spinatsamen gleichmäßig auf der Erde in den Töpfen. Bedecke sie leicht mit Erde (etwa 0,5 cm). Gieße die Erde vorsichtig an, damit die Samen nicht weggespült werden.
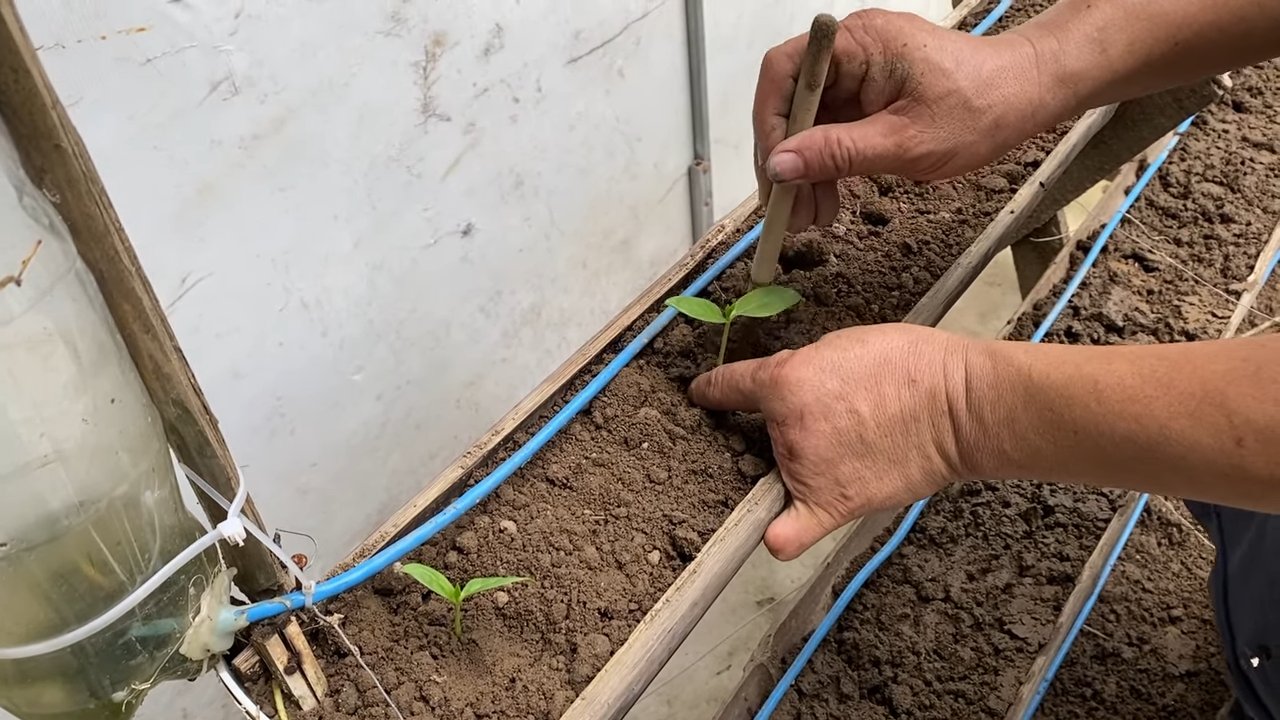
2. Pflanzen (wenn du Jungpflanzen verwendest): Grabe kleine Löcher in die Erde, die groß genug sind, um die Wurzelballen der Spinatpflanzen aufzunehmen. Setze die Pflanzen vorsichtig in die Löcher und fülle die Löcher mit Erde auf. Drücke die Erde leicht an. Achte darauf, dass die Pflanzen genügend Abstand zueinander haben (etwa 10-15 cm).
3. Gießen: Gieße die Erde gründlich an, egal ob du Samen gesät oder Pflanzen gesetzt hast.
4. Pflege deines Spinat-Turmgartens
1. Standort: Stelle deinen Spinat-Turmgarten an einen sonnigen bis halbschattigen Standort. Spinat mag es nicht zu heiß, daher ist ein halbschattiger Platz besonders im Sommer ideal.
2. Bewässerung: Gieße deinen Spinat regelmäßig, besonders wenn es trocken ist. Die Erde sollte immer leicht feucht sein, aber nicht nass. Vermeide Staunässe, da dies zu Wurzelfäule führen kann. Am besten testest du mit dem Finger, ob die Erde noch feucht genug ist.
3. Düngung (optional): Wenn du möchtest, kannst du deinen Spinat regelmäßig düngen. Verwende einen Dünger für Blattgemüse oder einen organischen Dünger. Befolge die Anweisungen auf der Verpackung. Ich dünge meinen Spinat meistens alle zwei Wochen mit einem organischen Flüssigdünger.
4. Schutz vor Schädlingen: Kontrolliere deinen Spinat regelmäßig auf Schädlinge wie Blattläuse oder Schnecken. Bei Bedarf kannst du natürliche Schädlingsbekämpfungsmittel verwenden. Ich habe gute Erfahrungen mit Brennnesseljauche gemacht.
5. Ernte: Du kannst deinen Spinat ernten, sobald die Blätter groß genug sind. Schneide die äußeren Blätter ab, damit die inneren Blätter weiterwachsen können. So kannst du über einen längeren Zeitraum ernten.
Zusätzliche Tipps und Tricks:
* Sortenwahl: Es gibt verschiedene Spinatsorten. Informiere dich, welche Sorte für deinen Standort und deine Bedürfnisse am besten geeignet ist. Es gibt beispielsweise Sorten, die besonders hitzebeständig sind oder besonders schnell wachsen.
* Fruchtfolge: Spinat gehört zu den Mittelzehrern. Das bedeutet, dass er dem Boden nicht allzu viele Nährstoffe entzieht. Trotzdem ist es sinnvoll, die Fruchtfolge zu beachten und Spinat nicht jedes Jahr am selben Standort anzubauen.
* Mulchen: Du kannst die Erde um den Spinat herum mulchen, um die Feuchtigkeit im Boden zu halten und das Wachstum von Unkraut zu unterdrücken. Verwende dafür beispielsweise Stroh oder Rasenschnitt.
* Überwinterung: Spinat ist relativ frosthart und kann in milden Wintern sogar überwintert werden. Schütze ihn bei starkem Frost mit einem Vlies oder Reisig.
* Kombination mit anderen Pflanzen: Spinat lässt sich gut mit anderen Pflanzen kombinieren, beispielsweise mit Erdbeeren, Radieschen oder Salat.
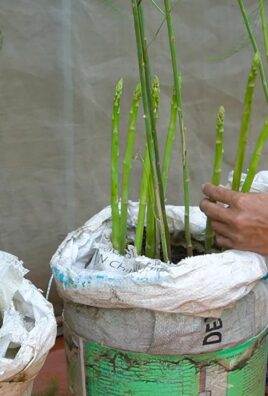
* Upcycling: Anstatt neue Töpfe zu kaufen, kannst du auch alte Eimer, Wannen oder andere Behälter verwenden. Achte nur darauf, dass sie Löcher im Boden haben, damit das Wasser ablaufen kann.
* Vertikale Erweiterung: Wenn du noch mehr Platz sparen möchtest, kannst du deinen Spinat-Turmgarten auch vertikal erweitern. Verwende dafür beispielsweise eine alte Palette oder ein Rankgitter.
Warum ein Spinat-Turmgarten?
* Platzsparend: Ideal für Balkone, Terrassen oder kleine Gärten.
* Erntefrischer Spinat: Immer frischer Spinat zur Hand, ohne lange Transportwege.
* Dekorativ: Ein echter Hingucker in deinem Garten oder auf deinem Balkon.
* Nachhaltig: Du reduzierst deinen ökologischen Fußabdruck, indem du deinen eigenen Spinat anbaust.
* Gesund: Spinat ist reich an Vitaminen und Mineralstoffen.
Ich hoffe, diese Anleitung hilft dir dabei, deinen eigenen Spinat-Turmgarten zu bauen. Es ist ein tolles Projekt, das nicht nur Spaß macht, sondern dir auch frischen und gesunden Spinat liefert. Viel Erfolg und guten Appetit!
Conclusion
So, there you have it! Creating your own tiered garden for homegrown spinach is not just a project; it’s an investment in fresh, healthy eating, a boost for your gardening skills, and a beautiful addition to your outdoor space. We’ve walked you through the steps, highlighted the benefits, and hopefully, inspired you to take the plunge.
Why is this DIY trick a must-try? Because it’s efficient, space-saving, and incredibly rewarding. Imagine stepping outside your door and harvesting crisp, vibrant spinach leaves whenever you need them. No more trips to the grocery store for wilted greens or worrying about pesticides. This tiered garden allows you to control the growing environment, ensuring your spinach thrives. Plus, the vertical design maximizes your yield, making it perfect for small patios, balconies, or even indoor spaces with adequate lighting.
But don’t stop there! Feel free to experiment with variations. Consider using different materials for your tiers – reclaimed wood, repurposed plastic containers, or even stacked terracotta pots. You can also customize the size and shape of your garden to fit your specific needs and aesthetic preferences. Try companion planting herbs like basil or chamomile alongside your spinach to deter pests and enhance flavor. For a truly unique touch, incorporate decorative elements like painted stones or small sculptures into your tiered structure.
Remember, the key to successful homegrown spinach is consistent watering, well-draining soil, and protection from extreme temperatures. Monitor your plants regularly for signs of pests or diseases, and address any issues promptly. With a little care and attention, your tiered garden will provide you with a bountiful harvest of delicious, nutritious spinach for months to come.
We are confident that this DIY project will transform the way you grow and enjoy spinach. It’s a simple, sustainable, and satisfying way to connect with nature and nourish your body. So, grab your tools, gather your materials, and get ready to create your own thriving spinach oasis.
We can’t wait to see your creations! Share your photos and experiences with us in the comments below. Let us know what worked well for you, what challenges you faced, and any tips you have for fellow gardeners. Together, we can build a community of passionate spinach growers and inspire others to embrace the joys of homegrown food. Happy gardening!
Frequently Asked Questions (FAQ)
What type of spinach grows best in a tiered garden?
While most spinach varieties will do well in a tiered garden, some are particularly well-suited due to their compact growth habit and resistance to bolting (going to seed prematurely). Consider varieties like ‘Baby’s Leaf Hybrid,’ ‘Bloomsdale Long Standing,’ or ‘Space’ spinach. These varieties are known for their high yields, disease resistance, and delicious flavor. ‘Baby’s Leaf Hybrid’ is a great choice for quick harvests of tender leaves, while ‘Bloomsdale Long Standing’ is more heat-tolerant and can withstand slightly warmer temperatures. ‘Space’ spinach is a reliable and versatile option that performs well in a variety of conditions. Ultimately, the best variety for you will depend on your local climate and personal preferences. Don’t be afraid to experiment with different types to see what thrives best in your tiered garden.
How often should I water my tiered spinach garden?
Watering frequency depends on several factors, including the weather, the type of soil you’re using, and the size of your containers. As a general rule, aim to keep the soil consistently moist but not waterlogged. Check the soil moisture level daily by sticking your finger about an inch into the soil. If it feels dry to the touch, it’s time to water. During hot, dry weather, you may need to water your spinach garden every day, or even twice a day. In cooler, wetter weather, you may only need to water every few days. When watering, be sure to water thoroughly, allowing the water to drain out of the bottom of the containers. Avoid overhead watering, as this can lead to fungal diseases. Instead, water at the base of the plants. A soaker hose or drip irrigation system can be a great way to provide consistent moisture to your spinach garden.
What kind of soil is best for growing spinach in a tiered garden?
Spinach thrives in well-draining, fertile soil that is rich in organic matter. A good potting mix specifically formulated for vegetables is an excellent choice. You can also create your own soil mix by combining equal parts of compost, peat moss (or coconut coir), and perlite (or vermiculite). Compost provides essential nutrients and improves soil structure, while peat moss (or coconut coir) helps retain moisture. Perlite (or vermiculite) improves drainage and aeration. Before planting, amend the soil with a slow-release fertilizer to provide your spinach plants with a steady supply of nutrients. Avoid using heavy clay soil, as it can become waterlogged and suffocate the roots. The ideal soil pH for spinach is between 6.5 and 7.0. You can test your soil pH using a soil testing kit and amend it accordingly.
How much sunlight does spinach need in a tiered garden?
Spinach prefers full sun to partial shade. Ideally, it should receive at least 4-6 hours of direct sunlight per day. However, in hot climates, providing some afternoon shade can help prevent bolting. If you’re growing your tiered garden indoors, you’ll need to supplement with artificial lighting. Grow lights specifically designed for plants are a great option. Place the lights about 6-12 inches above the plants and keep them on for 12-16 hours per day. Monitor your spinach plants closely for signs of stress, such as yellowing leaves or stunted growth. If you notice any problems, adjust the amount of sunlight or artificial light accordingly.
How do I protect my spinach from pests and diseases in a tiered garden?
Regularly inspect your spinach plants for signs of pests or diseases. Common pests that affect spinach include aphids, spider mites, and leaf miners. You can control these pests by spraying your plants with insecticidal soap or neem oil. You can also handpick pests off the plants. To prevent fungal diseases, avoid overhead watering and ensure good air circulation around your plants. If you notice any signs of disease, such as yellowing leaves or spots, remove the affected leaves immediately. You can also treat your plants with a fungicide. Companion planting can also help deter pests and diseases. Planting herbs like basil or chamomile alongside your spinach can help repel insects.
Can I grow spinach in a tiered garden during the winter?
Yes, you can grow spinach in a tiered garden during the winter, especially in mild climates. However, you’ll need to take some precautions to protect your plants from frost and cold temperatures. You can cover your tiered garden with a cold frame, row cover, or greenhouse to provide extra insulation. You can also move your tiered garden indoors to a sunny location. Choose cold-hardy spinach varieties that are specifically bred for winter growing. ‘Winter Bloomsdale’ and ‘Tyee’ are two popular choices. Reduce watering frequency during the winter, as the soil will dry out more slowly.
How long does it take for spinach to grow in a tiered garden?
Spinach is a fast-growing crop that can be harvested in as little as 4-6 weeks after planting. The exact time will depend on the variety, the growing conditions, and the size of the plants you want to harvest. You can start harvesting spinach leaves when they are about 4-6 inches long. Harvest the outer leaves first, leaving the inner leaves to continue growing. This will allow you to harvest spinach continuously for several weeks.
How do I harvest spinach from my tiered garden?
Harvest spinach by snipping off the outer leaves with scissors or a knife. Leave the inner leaves to continue growing. You can also harvest the entire plant by cutting it off at the base. Harvest spinach in the morning, when the leaves are crisp and cool. Avoid harvesting spinach during the heat of the day, as the leaves will be more likely to wilt. Wash the spinach leaves thoroughly before eating.
How do I prevent my spinach from bolting in a tiered garden?
Bolting is when spinach plants prematurely go to seed, making the leaves bitter and inedible. Bolting is often triggered by hot weather or long days. To prevent bolting, choose bolt-resistant spinach varieties. Provide your spinach plants with some afternoon shade during hot weather. Water your spinach plants regularly to keep the soil moist. Harvest the leaves regularly to encourage new growth.
What are some other plants I can grow in a tiered garden alongside spinach?
Spinach is a versatile plant that can be grown alongside a variety of other vegetables and herbs. Good companion plants for spinach include lettuce, radishes, carrots, onions, garlic, and chamomile. These plants can help deter pests, improve soil health, and enhance the flavor of your spinach. Avoid planting spinach near plants that are heavy feeders, such as tomatoes or corn, as they will compete for nutrients.


Leave a Comment