
Home life hacks are the secret sauce to a smoother, more enjoyable daily routine! Let’s face it, we all crave a little more ease and efficiency in our lives, right? I know I do! From decluttering tips to clever storage solutions, these ingenious tricks can transform your living space and free up precious time and energy.
Throughout history, people have sought ways to simplify their domestic tasks. Think about the evolution of tools and techniques passed down through generations – each innovation designed to make home management a little less daunting. These aren’t just modern inventions; they’re a continuation of that age-old quest for a better, more organized home life.
But why are home life hacks so essential today? Well, in our increasingly busy world, time is a luxury. These hacks offer practical solutions to common household challenges, helping you streamline chores, maximize space, and even save money. Imagine spending less time cleaning and more time doing the things you love! This article is packed with easy-to-implement DIY tricks that will revolutionize your home and your lifestyle. Get ready to unlock a world of clever solutions and transform your house into a haven of efficiency and comfort!
DIY Home Hack: Transforming Old T-Shirts into Reusable Shopping Bags
Okay, friends, let’s dive into a super easy and eco-friendly DIY project! We’re going to turn those old t-shirts that are just taking up space in your closet into reusable shopping bags. Not only will you be reducing waste, but you’ll also have some unique and personalized bags to carry your groceries or anything else you need. Trust me, it’s way easier than you think!
Materials You’ll Need:
* An old t-shirt (preferably cotton or a cotton blend – the thicker, the better!)
* Sharp scissors
* A ruler or measuring tape (optional, but helpful for straight lines)
* Pins (optional, but recommended for securing fabric)
* Sewing machine or needle and thread (for a more durable bag)
* Fabric marker or chalk (optional, for marking cutting lines)
* A circular object like a plate or bowl (for shaping the handles)
Choosing Your T-Shirt:
Before we get started, let’s talk about choosing the right t-shirt.
* Fabric: Cotton or cotton blends work best because they’re strong and easy to sew. Avoid super stretchy or thin fabrics, as they might not hold up well.
* Size: A larger t-shirt will obviously give you a bigger bag. Consider what you’ll primarily use the bag for when choosing the size.
* Design: This is where you can get creative! Choose a t-shirt with a cool graphic, a fun pattern, or even a plain color. Remember, the design will be on your bag, so pick something you love!
* Condition: Minor stains or small holes aren’t a deal-breaker, but avoid shirts with large tears or excessive wear.
Step-by-Step Instructions:
Alright, let’s get to the fun part! Here’s how to transform your old t-shirt into a reusable shopping bag:
1. Prepare the T-Shirt:
* Lay your t-shirt flat on a clean, even surface. Smooth out any wrinkles.
* If your t-shirt has any side seams, make sure they are aligned.
2. Cut Off the Sleeves:
* Using your scissors, carefully cut off both sleeves. Follow the seam line as closely as possible for a clean edge.
* Don’t throw away the sleeves! You can use them for other DIY projects, like cleaning rags or headbands.
3. Cut Off the Neckline:
* Now, we’re going to cut off the neckline. You can choose to cut a wide scoop neck or a deeper V-neck, depending on your preference.
* Use your scissors to carefully cut along the neckline, removing the collar.
* Again, save the scraps! You never know when they might come in handy.
4. Create the Handles:
* This is where the circular object comes in handy. Place your plate or bowl on the top edge of the t-shirt (where the neckline used to be).
* Trace around the object with your fabric marker or chalk to create a curved line. This will be the shape of your handles.
* Carefully cut along the traced line to create the handles. You should now have two curved openings on either side of the t-shirt.
* If you don’t have a circular object, you can freehand the handle shape. Just make sure the curves are symmetrical.
5. Prepare the Bottom Edge:
* Turn the t-shirt inside out. This will make it easier to sew the bottom seam.
* Make sure the bottom edge is aligned.
* Pin the bottom edge together to secure it. This will prevent the fabric from shifting while you sew.
6. Sew the Bottom Seam:
* This is where you’ll need your sewing machine or needle and thread.
* If using a sewing machine, set it to a straight stitch.
* Sew along the bottom edge of the t-shirt, about 1/2 inch from the edge.
* Backstitch at the beginning and end of the seam to secure the stitches.
* If sewing by hand, use a backstitch or a running stitch to create a strong seam.
* Reinforce the corners of the seam for extra durability.
7. Reinforce the Handles (Optional but Recommended):
* For extra strength, you can reinforce the handles by sewing around the edges.
* Turn the bag right side out.
* Fold the raw edges of the handles inward, about 1/4 inch.
* Pin the folded edges in place.
* Sew around the handles, close to the folded edge.
* This will prevent the handles from stretching or tearing under heavy weight.
8. Finishing Touches:
* Turn the bag right side out.
* Inspect the seams and handles for any loose threads or weak spots.
* Trim any excess fabric or threads.
* Give your new reusable shopping bag a good shake to remove any lint or debris.
Alternative Method: No-Sew Option
If you don’t have a sewing machine or don’t feel like sewing, you can still make a no-sew version of this bag! Here’s how:
1. Follow steps 1-4 above.
2. Fringe the Bottom Edge:
* Instead of sewing the bottom seam, we’re going to create a fringed edge.
* Cut strips along the bottom edge of the t-shirt, about 2-3 inches long and 1 inch wide.
* Make sure to cut through both layers of fabric.
3. Tie the Fringes:
* Take two adjacent strips of fringe and tie them together in a knot.
* Repeat this process all the way across the bottom edge of the t-shirt.
* For extra security, you can tie each knot twice.
4. Reinforce the Knots (Optional):
* Add a drop of fabric glue to each knot to prevent them from unraveling.
* Let the glue dry completely before using the bag.
Tips and Tricks for a Perfect Bag:
* Use a rotary cutter and cutting mat: If you have these tools, they can make cutting the fabric much easier and more precise.
* Iron the t-shirt before cutting: This will help to remove any wrinkles and ensure that your cuts are straight.
* Use a walking foot on your sewing machine: A walking foot helps to feed the fabric evenly, which is especially helpful when sewing multiple layers of fabric.
* Experiment with different handle shapes: Instead of using a circular object, try creating square or rectangular handles.
* Add embellishments: Once your bag is finished, you can add embellishments like fabric paint, embroidery, or patches to personalize it.
* Wash your bag inside out: This will help to protect the design and prevent fading.
* Don’t overload your bag: While these bags are surprisingly strong, they’re not designed to carry extremely heavy items.
Troubleshooting
* Seam Ripping: If your seam starts to rip, simply re-sew it, reinforcing the area around the tear.
* Uneven Handles: Don’t worry if your handles aren’t perfectly symmetrical. It adds character! But if it bothers you, you can trim them to even them out.
* Fringe Unraveling (No-Sew Method): If the fringe starts to unravel, simply re-tie the knots or add a dab of fabric glue.
Creative Variations
* Two-Toned Bag: Use two different t-shirts to create a bag with contrasting colors or patterns.
* Pocket Bag: Sew a pocket onto the front of the bag for storing small items like your keys or phone. You can use fabric scraps from the sleeves or neckline.
* Drawstring Bag: Instead of creating handles, add a drawstring closure to the top of the bag.
* Market Bag: Use a larger t-shirt and create a wider base to make a bag that’s perfect for carrying groceries from the farmer’s market.
* Kid-Sized Bag: Use a smaller t-shirt to make a bag that’s just the right size for kids.
Why This Hack is Awesome
* Eco-Friendly: You’re giving old t-shirts a new life and reducing textile waste.
* Cost-Effective: You’re saving money by making your own reusable shopping bags instead of buying them.
* Personalized: You can choose t-shirts with designs that reflect your personality and style.
* Easy and Fun: This

Conclusion
So, there you have it! This simple yet incredibly effective DIY trick is more than just a clever shortcut; it’s a game-changer for anyone looking to streamline their home life and save money. We’ve shown you how to transform readily available materials into something truly useful, reducing waste and boosting your resourcefulness. The beauty of this particular home life hack lies in its adaptability.
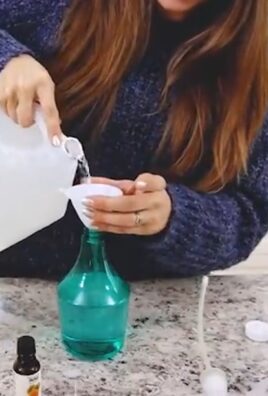
Think beyond the basic instructions. Consider variations that cater to your specific needs and aesthetic preferences. For example, if you’re crafting a cleaning solution, experiment with different essential oil blends to create a signature scent that invigorates your home. Lavender and lemon offer a calming and refreshing combination, while tea tree and eucalyptus provide powerful antibacterial properties. If you’re repurposing containers, get creative with paint, fabric scraps, or even decoupage to personalize them and seamlessly integrate them into your existing décor.
Don’t be afraid to experiment with different materials too. While we’ve suggested specific items, feel free to substitute them with what you have on hand. An old t-shirt can easily replace a microfiber cloth, and vinegar can often be used in place of more expensive cleaning agents. The key is to embrace the spirit of resourcefulness and find innovative ways to make the most of what you already own.
This DIY approach not only saves you money but also reduces your environmental impact. By repurposing items and creating your own solutions, you’re actively contributing to a more sustainable lifestyle. You’re minimizing waste, reducing your reliance on commercially produced products, and taking control of the ingredients that enter your home.
Why is this DIY trick a must-try? Because it’s simple, cost-effective, environmentally friendly, and incredibly versatile. It empowers you to take control of your home environment and create solutions that are tailored to your specific needs. It’s a small change that can make a big difference in your daily life.
We genuinely believe that this home life hack will simplify your routine and bring a sense of satisfaction to your everyday tasks. It’s about more than just saving time and money; it’s about fostering creativity, resourcefulness, and a deeper connection to your home.
Now, it’s your turn! We encourage you to try this DIY trick and experience the benefits for yourself. Don’t be afraid to get creative, experiment with variations, and personalize the process to suit your unique style.
And most importantly, we want to hear about your experience! Share your tips, tricks, and variations in the comments below. Let us know how this DIY hack has transformed your home life and inspired you to embrace a more resourceful and sustainable lifestyle. Your feedback will not only help us improve our instructions but also inspire other readers to embark on their own DIY adventures. Let’s build a community of resourceful homeowners who are passionate about creating a more efficient and enjoyable living space. So go ahead, give it a try, and let us know what you think! We can’t wait to hear from you.
Frequently Asked Questions
What if I don’t have all the exact ingredients or materials listed?
That’s perfectly fine! One of the best things about DIY projects is their flexibility. Don’t be afraid to substitute ingredients or materials based on what you have available. For example, if the recipe calls for a specific type of essential oil, you can use a different one with similar properties or even omit it altogether. If you don’t have the exact container size recommended, use a slightly larger or smaller one and adjust the recipe accordingly. The key is to understand the purpose of each ingredient or material and find a suitable alternative that serves the same function. Remember, resourcefulness is the name of the game!
Is this DIY trick safe for children and pets?
Safety is always a top priority. Before using any DIY solution, especially if it involves cleaning agents or essential oils, carefully consider the potential risks to children and pets. Store all DIY solutions out of reach of children and pets. If you’re using essential oils, research their safety profiles and avoid using any that are known to be toxic to animals. When cleaning, ensure that the area is well-ventilated and that children and pets are kept away until the solution has completely dried. If you have any concerns, consult with a healthcare professional or veterinarian before using the DIY solution.
How long will the DIY solution last?
The shelf life of your DIY solution will depend on the ingredients used. Solutions containing water or other perishable ingredients are more likely to spoil than those made with shelf-stable ingredients. To maximize the shelf life of your DIY solution, store it in an airtight container in a cool, dark place. Label the container with the date it was made so you can keep track of its age. If you notice any signs of spoilage, such as discoloration, odor, or mold growth, discard the solution immediately. As a general rule, it’s best to make DIY solutions in small batches so you can use them up before they expire.
Can I use this DIY trick for commercial purposes?
While you’re welcome to use this DIY trick for personal use, using it for commercial purposes may require additional considerations. Depending on the nature of the DIY trick and the ingredients involved, you may need to comply with certain regulations or obtain permits. It’s also important to consider liability issues and ensure that your products are safe for consumers. Before using this DIY trick for commercial purposes, consult with a legal professional or business advisor to ensure that you’re in compliance with all applicable laws and regulations.
What if the DIY trick doesn’t work as expected?
DIY projects don’t always go as planned, and that’s perfectly normal. If the DIY trick doesn’t work as expected, don’t get discouraged. Take a step back and try to identify the problem. Did you use the wrong ingredients or materials? Did you follow the instructions correctly? Sometimes, a simple adjustment can make all the difference. If you’re still having trouble, try searching online for troubleshooting tips or consulting with other DIY enthusiasts. Remember, learning from your mistakes is part of the DIY process.
How can I customize this DIY trick to better suit my needs?
Customization is key to making any DIY project your own. Think about your specific needs and preferences and look for ways to adapt the DIY trick accordingly. For example, if you have sensitive skin, you might want to use gentler ingredients or reduce the concentration of certain chemicals. If you prefer a different scent, you can experiment with different essential oil blends. If you need a larger or smaller quantity of the solution, you can adjust the recipe accordingly. The possibilities are endless! Don’t be afraid to get creative and experiment until you find a version of the DIY trick that works perfectly for you. This home life hack is all about making your life easier and more enjoyable, so tailor it to your specific needs and preferences.
Leave a Comment