
High Yield Tomatoes at Home – that’s the dream, isn’t it? Imagine baskets overflowing with juicy, sun-ripened tomatoes, all grown with your own two hands, right in your backyard or even on your balcony! Forget those bland, store-bought tomatoes; we’re talking about flavor explosions that will elevate your salads, sauces, and sandwiches to a whole new level.
For centuries, cultivating tomatoes has been a cherished tradition in many cultures. From the sun-drenched fields of Italy to the vibrant gardens of Mexico, tomatoes have been a staple, symbolizing abundance and the simple pleasures of life. But let’s face it, achieving a truly bountiful harvest can sometimes feel like a challenge. That’s where these DIY tricks and hacks come in!
Are you tired of seeing your tomato plants struggle, producing only a handful of fruits despite your best efforts? Do you dream of a garden bursting with vibrant red globes, enough to share with friends and neighbors? I know I was! That’s why I’ve compiled these easy-to-follow tips and tricks to help you unlock the secrets to high yield tomatoes at home. We’ll cover everything from soil preparation and watering techniques to pruning strategies and pest control, ensuring you have the knowledge and confidence to grow the tomato crop of your dreams. Get ready to roll up your sleeves and transform your garden into a tomato paradise!

Tomaten-Turbo: So erntest du eine Rekordernte im eigenen Garten!
Hallo liebe Gartenfreunde! Ich bin total begeistert, euch heute einen DIY-Hack zu zeigen, mit dem ihr eure Tomatenernte auf ein ganz neues Level heben könnt. Wir reden hier nicht von ein paar Tomaten mehr, sondern von einer wahren Tomaten-Explosion! Ich habe diese Techniken selbst ausprobiert und war überwältigt von den Ergebnissen. Also, krempeln wir die Ärmel hoch und legen los!
Die Grundlagen für eine üppige Tomatenernte
Bevor wir uns den eigentlichen Hacks widmen, müssen wir sicherstellen, dass die Basis stimmt. Eine gute Vorbereitung ist das A und O für gesunde und ertragreiche Tomatenpflanzen.
* Die richtige Sorte wählen: Nicht alle Tomatensorten sind gleich. Einige sind von Natur aus ertragreicher als andere. Informiert euch, welche Sorten in eurer Region gut gedeihen und besonders viele Früchte tragen. Ich persönlich liebe Cocktailtomaten und Fleischtomaten für ihre unterschiedlichen Geschmäcker und Erträge.
* Der perfekte Standort: Tomaten lieben die Sonne! Sucht einen Platz in eurem Garten, der mindestens 6-8 Stunden direkte Sonneneinstrahlung pro Tag bekommt. Ein windgeschützter Standort ist ebenfalls von Vorteil, um die Pflanzen vor Beschädigungen zu schützen.
* Der richtige Boden: Tomaten brauchen einen nährstoffreichen, gut durchlässigen Boden. Wenn euer Boden eher sandig oder lehmig ist, solltet ihr ihn mit Kompost oder anderem organischen Material verbessern. Das sorgt für eine bessere Drainage und speichert gleichzeitig Feuchtigkeit.
* Die richtige Bewässerung: Tomaten brauchen regelmäßige Bewässerung, besonders während der Fruchtbildung. Gießt am besten früh morgens, damit die Blätter tagsüber abtrocknen können. Vermeidet es, die Blätter direkt zu gießen, da dies Pilzkrankheiten fördern kann.
Hack 1: Das Geheimnis der Tiefpflanzung
Dieser Trick ist wirklich Gold wert! Tomatenpflanzen haben die geniale Fähigkeit, entlang des Stängels Wurzeln zu bilden. Indem wir sie tiefer pflanzen, geben wir ihnen die Möglichkeit, ein stärkeres Wurzelsystem zu entwickeln, was zu einer besseren Nährstoffaufnahme und somit zu mehr Früchten führt.
Schritt-für-Schritt-Anleitung:
1. Löcher vorbereiten: Grabt Löcher, die etwa doppelt so tief sind wie der Topf, in dem sich eure Tomatenpflanzen befinden.
2. Blätter entfernen: Entfernt die unteren Blätter der Tomatenpflanzen, so dass nur noch die oberen Blätter übrig bleiben.
3. Pflanzen: Setzt die Tomatenpflanzen in die Löcher und füllt sie mit Erde auf. Achtet darauf, dass der Stängel bis zu den untersten Blättern mit Erde bedeckt ist.
4. Angießen: Gießt die Pflanzen gründlich an.
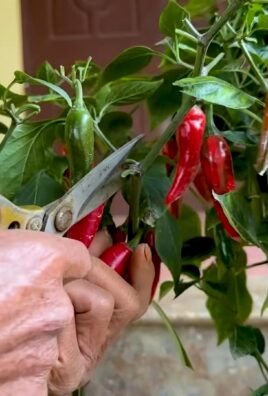
Hack 2: Geiztriebe entfernen für mehr Ertrag
Geiztriebe sind die kleinen Triebe, die in den Blattachseln (zwischen Hauptstamm und Seitentrieben) wachsen. Wenn man sie nicht entfernt, verbrauchen sie unnötig Energie und Nährstoffe, die sonst in die Fruchtbildung fließen könnten.
Schritt-für-Schritt-Anleitung:
1. Geiztriebe identifizieren: Sucht nach den kleinen Trieben, die in den Blattachseln wachsen. Sie sehen aus wie kleine Mini-Tomatenpflanzen.
2. Geiztriebe entfernen: Brecht die Geiztriebe vorsichtig mit den Fingern ab. Am besten macht man das, wenn sie noch klein sind (ca. 5-7 cm lang).
3. Regelmäßig kontrollieren: Kontrolliert eure Tomatenpflanzen regelmäßig (am besten einmal pro Woche) und entfernt alle neuen Geiztriebe.
Wichtiger Hinweis: Bei Buschtomaten (auch Determinate Sorten genannt) werden die Geiztriebe *nicht* entfernt, da sie für die Fruchtbildung wichtig sind. Informiert euch also, welche Sorte ihr habt, bevor ihr mit dem Ausgeizen beginnt!
Hack 3: Das Geheimnis der richtigen Düngung
Tomaten sind Starkzehrer und brauchen während der Wachstums- und Fruchtbildungsphase ausreichend Nährstoffe. Eine ausgewogene Düngung ist entscheidend für eine reiche Ernte.
Schritt-für-Schritt-Anleitung:
1. Grunddüngung: Bei der Pflanzung könnt ihr dem Pflanzloch etwas Kompost oder organischen Dünger (z.B. Hornspäne) hinzufügen.
2. Flüssigdünger: Während der Wachstumsphase solltet ihr eure Tomatenpflanzen regelmäßig mit einem Flüssigdünger düngen. Achtet darauf, dass der Dünger speziell für Tomaten geeignet ist und einen hohen Kaliumgehalt hat. Kalium fördert die Fruchtbildung.
3. Dosierung beachten: Haltet euch unbedingt an die Dosierungsanleitung auf der Verpackung des Düngers. Eine Überdüngung kann schädlich für die Pflanzen sein.
4. Alternative Düngemittel: Alternativ zu Flüssigdünger könnt ihr auch Brennnesseljauche oder Beinwelljauche verwenden. Diese sind reich an Nährstoffen und fördern das Wachstum und die Fruchtbildung.
Hack 4: Mulchen für gesunde Pflanzen und weniger Arbeit
Mulchen ist eine einfache, aber effektive Methode, um den Boden feucht zu halten, Unkraut zu unterdrücken und das Bodenleben zu fördern.
Schritt-für-Schritt-Anleitung:
1. Material auswählen: Zum Mulchen könnt ihr verschiedene Materialien verwenden, z.B. Stroh, Rasenschnitt, Holzhackschnitzel oder Kompost.
2. Mulchschicht auftragen: Tragt eine ca. 5-10 cm dicke Mulchschicht um die Tomatenpflanzen herum auf. Achtet darauf, dass der Stängel der Pflanzen frei bleibt.
3. Regelmäßig erneuern: Die Mulchschicht zersetzt sich im Laufe der Zeit. Erneuert sie regelmäßig, um ihre Wirkung aufrechtzuerhalten.
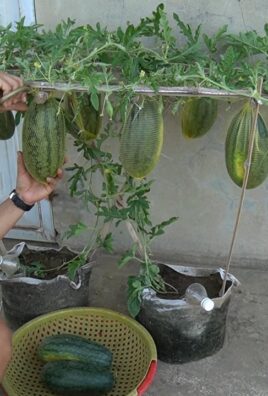
Hack 5: Tomaten richtig stützen
Tomatenpflanzen, besonders die hochwachsenden Sorten, brauchen eine Stütze, um nicht unter dem Gewicht der Früchte zusammenzubrechen.
Schritt-für-Schritt-Anleitung:
1. Stützmaterial auswählen: Ihr könnt verschiedene Materialien verwenden, z.B. Tomatenstäbe, Spiralstäbe oder ein Rankgitter.
2. Stütze anbringen: Bringt die Stütze so früh wie möglich an, am besten schon bei der Pflanzung.
3. Pflanze befestigen: Befestigt die Tomatenpflanze locker an der Stütze. Verwendet dafür weiches Material, z.B. Stoffstreifen oder spezielle Pflanzenbinder.
4. Regelmäßig kontrollieren: Kontrolliert regelmäßig, ob die Pflanze noch ausreichend gestützt wird und passt die Befestigung gegebenenfalls an.
Hack 6: Blüten bestäuben für mehr Früchte
Obwohl Tomatenpflanzen selbstbestäubend sind, kann man die Bestäubung durch leichtes Schütteln der Pflanzen oder durch den Einsatz eines kleinen Pinsels unterstützen. Das erhöht die Wahrscheinlichkeit, dass sich Früchte bilden.
Schritt-für-Schritt-Anleitung:
1. Blüten schütteln: Schüttelt die Tomatenpflanzen vorsichtig, besonders während der Blütezeit.
2. Pinsel verwenden: Alternativ könnt ihr mit einem kleinen Pinsel von Blüte zu Blüte gehen und den Pollen verteilen.
3. Bienen und Hummeln fördern: Lockt Bienen und Hummeln in euren Garten, indem ihr blühende Pflanzen in der Nähe der Tomatenpflanzen anpflanzt. Sie helfen bei der Bestäubung.
Hack 7: Das richtige Gießen – Weniger ist manchmal mehr!
Tomaten brauchen Wasser, aber zu viel Wasser kann zu Pilzkrankheiten und Wurzelfäule führen. Gießt lieber seltener, aber dafür gründlich.
Schritt-für-Schritt-Anleitung:
1. Boden prüfen: Bevor ihr gießt, prüft den Boden. Er sollte sich leicht feucht anfühlen.
2. Gießmenge anpassen: Passt die Gießmenge an die Wetterbedingungen an. An heißen Tagen brauchen die Pflanzen mehr Wasser als an kühlen Tagen.
3. Morgens gießen: Gießt am besten früh

Conclusion
So, there you have it! Unlocking the secret to high yield tomatoes at home is more achievable than you might think. This isn’t just about planting a seed and hoping for the best; it’s about actively creating an environment where your tomato plants can truly thrive and reward you with an abundance of delicious, juicy fruit. We’ve explored a simple yet incredibly effective DIY trick that can significantly boost your tomato production, transforming your garden into a tomato-lover’s paradise.
Why is this a must-try? Because it’s a game-changer. Imagine harvesting baskets overflowing with ripe tomatoes, enough to enjoy fresh, can for the winter, and share with friends and family. This DIY method addresses some of the most common challenges faced by home gardeners, such as nutrient deficiencies and inadequate support, leading to stronger, healthier plants and, ultimately, a much larger yield.
But don’t just take our word for it. The beauty of this technique lies in its adaptability. Feel free to experiment with variations to suit your specific needs and preferences. For instance, if you’re growing in containers, consider using a slightly smaller version of the support structure. If you live in an area with particularly poor soil, you might want to supplement the soil mixture with additional compost or organic fertilizer. You can also tailor the nutrient solution to your specific tomato variety; some varieties are heavier feeders than others.
Consider these variations to further enhance your tomato growing experience:
* Vertical Gardening Enhancement: Integrate this technique into a vertical gardening system for maximizing space in smaller gardens or balconies. Use the support structure to train the tomato plants upwards, creating a visually appealing and productive green wall.
* Companion Planting Integration: Plant basil, marigolds, or other companion plants around your tomato plants. These companions can help deter pests, attract beneficial insects, and even improve the flavor of your tomatoes.
* Grafting for Enhanced Resilience: For advanced gardeners, consider grafting your favorite tomato variety onto a disease-resistant rootstock. This can significantly improve the plant’s ability to withstand soilborne diseases and environmental stresses.
* Hydroponic Adaptation: Adapt the nutrient solution aspect of this DIY trick to a hydroponic system. This allows for precise control over nutrient delivery and can result in even faster growth and higher yields.
* Seed Starting Optimization: Start your tomato seeds indoors using a high-quality seed starting mix and a grow light. This will give your seedlings a head start and ensure that they are strong and healthy before transplanting them into the garden.
* Pruning Techniques: Learn and apply proper pruning techniques to your tomato plants. Removing suckers and excess foliage can improve air circulation, reduce the risk of disease, and encourage the plant to focus its energy on fruit production.
* Watering Strategies: Implement a consistent watering schedule, ensuring that your tomato plants receive adequate moisture, especially during hot and dry periods. Consider using a soaker hose or drip irrigation system to deliver water directly to the roots.
* Soil Testing and Amendment: Regularly test your soil to determine its pH and nutrient levels. Amend the soil as needed with compost, organic matter, or other soil amendments to create an optimal growing environment for your tomato plants.
* Sunlight Maximization: Ensure that your tomato plants receive at least 6-8 hours of direct sunlight per day. If you live in an area with limited sunlight, consider using supplemental grow lights to provide the necessary illumination.
The most important thing is to get started! Don’t be afraid to experiment and find what works best for you and your garden. We’re confident that this DIY trick will make a noticeable difference in your tomato harvest.
So, grab your gardening gloves, gather your supplies, and prepare to be amazed by the results. We encourage you to try this high yield tomatoes at home method and share your experiences with us. Let us know what variations you tried, what challenges you faced, and, most importantly, how many delicious tomatoes you harvested! Share your photos and stories in the comments below – we can’t wait to hear from you and learn from your successes. Happy gardening!
Frequently Asked Questions (FAQ)
Q: What type of tomatoes does this DIY trick work best for?
A: This DIY trick is beneficial for most tomato varieties, especially indeterminate varieties that tend to grow tall and require support. Indeterminate tomatoes, such as beefsteak, cherry, and Roma tomatoes, will particularly benefit from the support structure and nutrient boost provided by this method. Determinate varieties, which are bushier and more compact, can also benefit, although they may not require as much support. Experiment with different varieties to see what works best in your garden.
Q: How often should I apply the nutrient solution?
A: The frequency of applying the nutrient solution depends on several factors, including the weather, soil type, and the specific needs of your tomato plants. As a general guideline, apply the nutrient solution every 1-2 weeks during the active growing season. Monitor your plants closely for signs of nutrient deficiencies, such as yellowing leaves or stunted growth, and adjust the frequency accordingly. In hot, dry weather, you may need to apply the solution more frequently.
Q: Can I use store-bought fertilizer instead of making my own nutrient solution?
A: Yes, you can use store-bought fertilizer as an alternative to making your own nutrient solution. However, it’s important to choose a fertilizer that is specifically formulated for tomatoes and contains the appropriate balance of nutrients. Look for a fertilizer with a higher phosphorus content (the middle number in the N-P-K ratio), as phosphorus is essential for fruit development. Follow the instructions on the fertilizer package carefully to avoid over-fertilizing, which can damage your plants. Organic fertilizers, such as compost tea or fish emulsion, are also excellent options.
Q: What if I don’t have access to all the ingredients for the nutrient solution?
A: Don’t worry if you don’t have access to all the ingredients for the nutrient solution. You can still achieve good results by using a simplified version. For example, you can use Epsom salts (magnesium sulfate) as a source of magnesium and bone meal as a source of phosphorus. Compost tea is another excellent option that provides a wide range of nutrients. The key is to provide your plants with a balanced supply of essential nutrients.
Q: My tomato plants are already quite large. Is it too late to implement this DIY trick?
A: It’s never too late to implement this DIY trick, although it’s best to start early in the growing season. Even if your tomato plants are already large, you can still benefit from the support structure and nutrient boost. Carefully install the support structure around your plants, being mindful not to damage the stems or roots. Apply the nutrient solution as directed, and monitor your plants for signs of improvement.
Q: How do I know if my tomato plants are getting too much or too little of the nutrient solution?
A: Monitoring your tomato plants closely is crucial for determining whether they are getting the right amount of nutrient solution. Signs of nutrient deficiency include yellowing leaves, stunted growth, and poor fruit development. Signs of over-fertilization include leaf burn (browning of the leaf edges), excessive vegetative growth, and a lack of fruit production. If you notice any of these signs, adjust the frequency and concentration of the nutrient solution accordingly.
Q: Can I use this DIY trick for other vegetables besides tomatoes?
A: While this DIY trick is specifically designed for tomatoes, it can also be adapted for other vegetables that require support and benefit from a nutrient boost. For example, you can use a similar support structure for peppers, cucumbers, and eggplants. Adjust the nutrient solution to suit the specific needs of the vegetable you are growing.
Q: What are some common pests and diseases that affect tomato plants, and how can I prevent them?
A: Tomato plants are susceptible to a variety of pests and diseases, including aphids, whiteflies, tomato hornworms, early blight, and blossom end rot. To prevent these problems, practice good garden hygiene, such as removing weeds and debris, and rotate your crops each year. Use organic pest control methods, such as insecticidal soap or neem oil, to control pests. Choose disease-resistant tomato varieties and provide adequate air circulation to prevent fungal diseases. Blossom end rot is caused by a calcium deficiency, so ensure that your plants receive adequate calcium through the nutrient solution or by adding lime to the soil.
Q: How do I know when my tomatoes are ripe and ready to harvest?
A: The best way to determine when your tomatoes are ripe is to observe their color and texture. Ripe tomatoes will be fully colored (red, yellow, orange, or pink, depending on the variety) and slightly soft to the touch. Gently twist the tomato from the vine; if it comes off easily, it’s ripe. The aroma of a ripe tomato is also a good indicator.

Leave a Comment