
Harvest Radishes at Home – sounds like a dream, right? Imagine stepping out into your backyard and plucking crisp, peppery radishes straight from the soil. No more trips to the grocery store for these little root vegetables! This isn’t just a dream; it’s an achievable reality with a few simple tricks and a little DIY spirit.
Radishes have a surprisingly long and vibrant history, dating back to ancient Egypt and Greece. They were valued not only for their taste but also for their medicinal properties. Today, while we might not be relying on them to cure ailments, their fresh, zesty flavor makes them a welcome addition to salads, snacks, and even cooked dishes.
But why bother growing your own? Well, for starters, homegrown radishes taste infinitely better than store-bought ones. They’re fresher, crisper, and often less bitter. Plus, knowing exactly where your food comes from is incredibly satisfying. And let’s be honest, who doesn’t love a good DIY project that results in delicious, edible rewards? In this article, I’m going to share some easy-to-follow DIY tricks and hacks that will help you harvest radishes at home like a pro, even if you’re a complete beginner. Get ready to enjoy the freshest, most flavorful radishes you’ve ever tasted!
Harvesting Radishes: A Beginner’s Guide to Fresh, Crunchy Goodness
Okay, so you’ve decided to grow your own radishes! Awesome! They’re one of the fastest and easiest veggies to cultivate, making them perfect for beginner gardeners (like I was not too long ago!). But knowing *when* and *how* to harvest them is key to enjoying their crisp, peppery flavor. Harvest them too early, and they’ll be tiny and bland. Wait too long, and they’ll become woody and overly spicy. Don’t worry, I’m here to guide you through the process!
Knowing When Your Radishes Are Ready
The most crucial part of harvesting radishes is knowing when they’re ripe. Unlike some vegetables that require complex tests, radishes give you pretty clear signals.
* Check the Seed Packet: Your seed packet is your best friend! It will tell you the “days to maturity,” which is the approximate time from planting to harvest. Most radish varieties mature in 20-30 days. Keep this in mind as a general guideline.
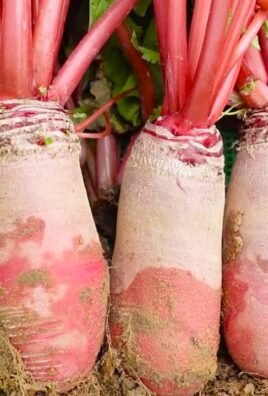
* Look at the Shoulders: The “shoulder” of the radish is the part where the root meets the leaves. As the radish matures, this shoulder will start to peek out of the soil. This is a good sign that it’s getting close to harvest time.
* Feel the Size: Gently brush away some soil around the base of a few radishes. You’re looking for a diameter of about 1 inch for most common varieties. Some larger varieties, like French Breakfast, can be a bit bigger.
* Don’t Wait Too Long: Radishes are best when they’re young and tender. If you leave them in the ground too long, they can become pithy, cracked, and overly spicy. It’s better to harvest a little early than too late.
* Succession Planting: To ensure a continuous harvest, plant radishes in succession, sowing a new batch every week or two. This way, you’ll have a steady supply of fresh radishes throughout the growing season.
Tools You’ll Need
You don’t need a ton of fancy equipment to harvest radishes. Here’s what I usually grab:
* Gloves: Gardening gloves will protect your hands from dirt and any potential irritants in the soil.
* Hand Trowel or Fork: This will help you loosen the soil around the radishes, making them easier to pull out.
* Water Hose or Bucket: For washing the radishes after you harvest them.
* Basket or Bucket: To collect your freshly harvested radishes.
* Sharp Knife or Scissors: For trimming the tops and roots.
Harvesting Your Radishes: Step-by-Step
Alright, let’s get down to the nitty-gritty! Here’s how I harvest my radishes:
1. Prepare the Area: Before you start pulling, water the soil around your radishes. This will help loosen the soil and make it easier to pull them out without breaking them.
2. Loosen the Soil (If Necessary): If the soil is compacted, use your hand trowel or fork to gently loosen the soil around the base of the radishes. Be careful not to damage the radish roots.
3. Grasp the Radish: Gently grasp the radish by the base of the leaves, close to the root.
4. Pull Gently but Firmly: Pull straight up with a gentle but firm motion. If the radish doesn’t come out easily, wiggle it slightly from side to side while pulling. Avoid yanking, as this can break the radish.
5. Inspect the Radish: Once you’ve pulled the radish out, inspect it for any signs of damage or pests. Discard any radishes that are rotten or heavily infested.
6. Repeat: Continue harvesting the radishes that are ready, leaving the smaller ones to mature.
7. Wash the Radishes: After you’ve harvested all the radishes, wash them thoroughly with water to remove any dirt or debris. I usually use a hose with a spray nozzle or a bucket of water.
8. Trim the Tops and Roots: Use a sharp knife or scissors to trim the tops and roots of the radishes. Leave about 1/2 inch of the tops attached. You can compost the trimmings.
9. Store the Radishes: Store the radishes in a plastic bag in the refrigerator. They will keep for about a week. For longer storage, you can remove the tops completely and store them in a separate bag.
Troubleshooting Common Issues
Sometimes, things don’t go exactly as planned. Here are a few common issues you might encounter when harvesting radishes and how to deal with them:
* Radishes are too small: This usually means you harvested them too early. Leave the remaining radishes in the ground for a few more days and check them again. Make sure they are getting enough sunlight and water.
* Radishes are cracked: Cracking can be caused by inconsistent watering. Try to keep the soil consistently moist, especially during hot, dry weather.
* Radishes are woody or pithy: This means you left them in the ground too long. Harvest the remaining radishes immediately and try to harvest earlier next time.
* Radishes are overly spicy: This can be caused by hot weather or dry soil. Make sure your radishes are getting enough water and consider providing some shade during the hottest part of the day.
* Pests: Flea beetles can be a common pest on radishes. Cover your plants with row covers to prevent them from reaching the plants. You can also use insecticidal soap if necessary.
Enjoying Your Harvest
Now for the best part – enjoying the fruits (or rather, roots!) of your labor! Radishes are incredibly versatile and can be used in a variety of dishes.
* Eat them raw: Slice them thinly and add them to salads, sandwiches, or tacos. They add a nice crunch and peppery flavor.
* Roast them: Roasting radishes mellows out their flavor and makes them surprisingly sweet. Toss them with olive oil, salt, and pepper and roast them in a 400°F oven for about 20 minutes.
* Pickle them: Pickled radishes are a delicious and tangy condiment.
* Use the greens: Don’t throw away the radish greens! They’re edible and nutritious. You can sauté them, add them to salads, or use them in pesto.
Tips for a Bountiful Radish Harvest
Here are a few extra tips to help you get the most out of your radish crop:
* Choose the right variety: There are many different varieties of radishes, each with its own unique flavor and characteristics. Experiment with different varieties to find your favorites.
* Prepare the soil properly: Radishes prefer well-drained soil that is rich in organic matter. Amend your soil with compost or other organic materials before planting.
* Plant in full sun: Radishes need at least 6 hours of sunlight per day.
* Water regularly: Keep the soil consistently moist, but not waterlogged.
* Thin your seedlings: Once your seedlings have emerged, thin them to about 1-2 inches apart. This will give them enough space to grow and develop.
* Protect from pests: As mentioned earlier, flea beetles can be a problem. Use row covers or insecticidal soap to protect your plants.
* Rotate your crops: Avoid planting radishes in the same spot year after year. This can help prevent soilborne diseases and pests.
Succession Planting for Continuous Radish Supply
As I mentioned earlier, succession planting is key to having a continuous supply of fresh radishes. Here’s how I do it:
* Plant a new batch every 1-2 weeks: Sow a small amount of radish seeds every week or two. This will ensure that you have a steady supply of radishes throughout the growing season.
* Choose fast-maturing varieties: Look for radish varieties that mature in 20-30 days. This will allow you to harvest them quickly and start a new batch.
* Keep track of your planting dates: Use a garden journal or calendar to keep track of when you planted each batch of radishes. This will help you estimate when they will be ready to harvest.
* Adjust your planting schedule based on the weather: In hot weather, radishes will mature more quickly. In cool weather, they will take longer. Adjust your planting schedule accordingly.
Radish Varieties to Try
There are so many different radish varieties to choose from! Here are a few of my favorites:
* Cherry Belle: A classic red radish that is crisp and mild.
* French Breakfast: An elongated radish with a mild, slightly sweet flavor.
* Easter Egg: A mix of colorful radishes in shades of red, pink, purple, and
Conclusion
So, there you have it! Mastering the art of harvesting radishes at home is not just about pulling a root vegetable from the ground; it’s about connecting with the food you eat, enjoying the freshest possible flavors, and minimizing waste. This simple DIY trick transforms your gardening experience and elevates your culinary creations.
Why is this a must-try? Because store-bought radishes simply can’t compare to the crisp, peppery bite of freshly harvested ones. The difference in taste and texture is remarkable. Plus, you control the entire process, ensuring your radishes are grown organically and free from harmful pesticides. You also harvest only what you need, when you need it, preventing spoilage and reducing food waste.
Beyond the basic method, there’s room for experimentation. Consider succession planting, sowing new seeds every couple of weeks to ensure a continuous harvest throughout the growing season. Try different radish varieties – from the classic Cherry Belle to the spicy French Breakfast or the colorful Easter Egg blend. Each variety offers a unique flavor profile and visual appeal. You can also experiment with companion planting, pairing radishes with carrots or lettuce to deter pests and improve soil health.
Don’t be afraid to get your hands dirty! Harvesting radishes at home is a rewarding experience that brings you closer to nature and provides you with delicious, healthy food. It’s a small step towards a more sustainable and fulfilling lifestyle.
We wholeheartedly encourage you to try this DIY trick. Plant some radish seeds, nurture them, and experience the joy of harvesting your own fresh radishes. And most importantly, share your experience with us! Let us know what varieties you tried, what challenges you faced, and what delicious dishes you created with your homegrown radishes. Your feedback will help other gardeners learn and grow, and together, we can cultivate a community of passionate radish enthusiasts. Share your photos and stories on social media using #HomegrownRadishes and inspire others to embrace the joys of gardening. This simple act of harvesting radishes at home can truly make a difference.
Frequently Asked Questions (FAQs)
Q: How do I know when my radishes are ready to harvest?
A: This is a crucial question! The best way to determine if your radishes are ready for harvesting is to check the size of the root. Most radish varieties are ready to harvest within 3-4 weeks of planting. Gently brush away some soil around the base of the plant to expose the top of the radish. If the root is about 1 inch in diameter (or the size specified for your particular variety), it’s likely ready to pick. You can also check the seed packet for specific maturity dates. Another indicator is the appearance of the greens; if they look healthy and vibrant, the radishes underneath are likely thriving. Don’t wait too long to harvest, as radishes can become woody and overly spicy if left in the ground for too long.
Q: What if my radish greens are growing, but the roots aren’t getting bigger?
A: This is a common issue, and several factors could be at play. First, ensure your radishes are getting enough sunlight. They need at least 6 hours of direct sunlight per day to develop properly. Second, check the soil. Radishes prefer loose, well-drained soil that is rich in organic matter. If the soil is compacted or heavy, it can restrict root growth. Amend the soil with compost or other organic materials to improve drainage and aeration. Overcrowding can also hinder root development. Thin your seedlings to ensure they have enough space to grow. Finally, inconsistent watering can stress the plants and affect root growth. Water regularly, keeping the soil consistently moist but not waterlogged.
Q: Can I eat the radish greens?
A: Absolutely! Radish greens are not only edible but also nutritious and delicious. They have a peppery flavor similar to the roots, but milder. You can use them in salads, stir-fries, soups, or as a garnish. They can also be sautéed with garlic and olive oil for a simple and flavorful side dish. Before using radish greens, wash them thoroughly to remove any dirt or debris. Choose young, tender greens for the best flavor and texture. Avoid using greens that are yellowed or wilted.
Q: How do I store harvested radishes to keep them fresh?
A: Proper storage is key to maintaining the crispness and flavor of your harvested radishes. First, remove the greens, leaving about an inch of stem attached. This will prevent the greens from drawing moisture from the roots. Wash the radishes thoroughly and pat them dry. Store them in a plastic bag or container in the refrigerator. You can also wrap them in a damp paper towel before placing them in the bag to help retain moisture. Stored properly, radishes can last for up to two weeks in the refrigerator.
Q: What are some creative ways to use my homegrown radishes?
A: Beyond the classic salad addition, there are countless ways to enjoy your homegrown radishes. Try pickling them for a tangy and crunchy snack. Roast them with other root vegetables for a sweet and savory side dish. Slice them thinly and use them as a garnish for tacos or sandwiches. Make a radish and butter sandwich on crusty bread for a simple and satisfying lunch. Add them to soups or stews for a peppery kick. You can even juice them for a healthy and refreshing drink. Don’t be afraid to experiment and discover your own favorite ways to use this versatile vegetable.
Q: My radishes are very spicy. Is there anything I can do to make them milder?
A: The spiciness of radishes can vary depending on the variety, growing conditions, and maturity. If your radishes are too spicy for your liking, there are a few things you can try. First, harvest them earlier. Younger radishes tend to be milder in flavor. Second, water them regularly. Consistent watering can help reduce the spiciness. Third, try soaking them in ice water for about 30 minutes before serving. This can help mellow out the flavor. Finally, consider growing milder varieties, such as French Breakfast or Easter Egg radishes.
Q: Can I grow radishes in containers?
A: Yes, absolutely! Radishes are well-suited for container gardening, making them a great option for those with limited space. Choose a container that is at least 6 inches deep and has drainage holes. Use a well-draining potting mix and ensure the container receives at least 6 hours of direct sunlight per day. Water regularly, keeping the soil consistently moist. You can even grow radishes indoors under grow lights.
Q: What are some common pests and diseases that affect radishes?
A: While radishes are relatively easy to grow, they can be susceptible to certain pests and diseases. Common pests include flea beetles, root maggots, and aphids. Flea beetles can be controlled with row covers or insecticidal soap. Root maggots can be prevented by using floating row covers and practicing crop rotation. Aphids can be controlled with a strong spray of water or insecticidal soap. Common diseases include damping-off and white rust. Damping-off can be prevented by using sterile potting mix and avoiding overwatering. White rust can be controlled by removing infected leaves and improving air circulation.
Q: How can I encourage children to eat radishes?
A: Getting kids to eat their vegetables can be a challenge, but there are ways to make radishes more appealing. Start by involving them in the gardening process. Let them help plant the seeds, water the plants, and harvest the radishes. This will give them a sense of ownership and make them more likely to try the vegetables they grew themselves. Serve radishes in fun and creative ways. Cut them into different shapes or use them to make radish roses. Pair them with dips like hummus or ranch dressing. Make radish and butter sandwiches on fun-shaped bread. You can also try roasting them with other vegetables and adding a touch of honey or maple syrup to sweeten them up.
Leave a Comment