
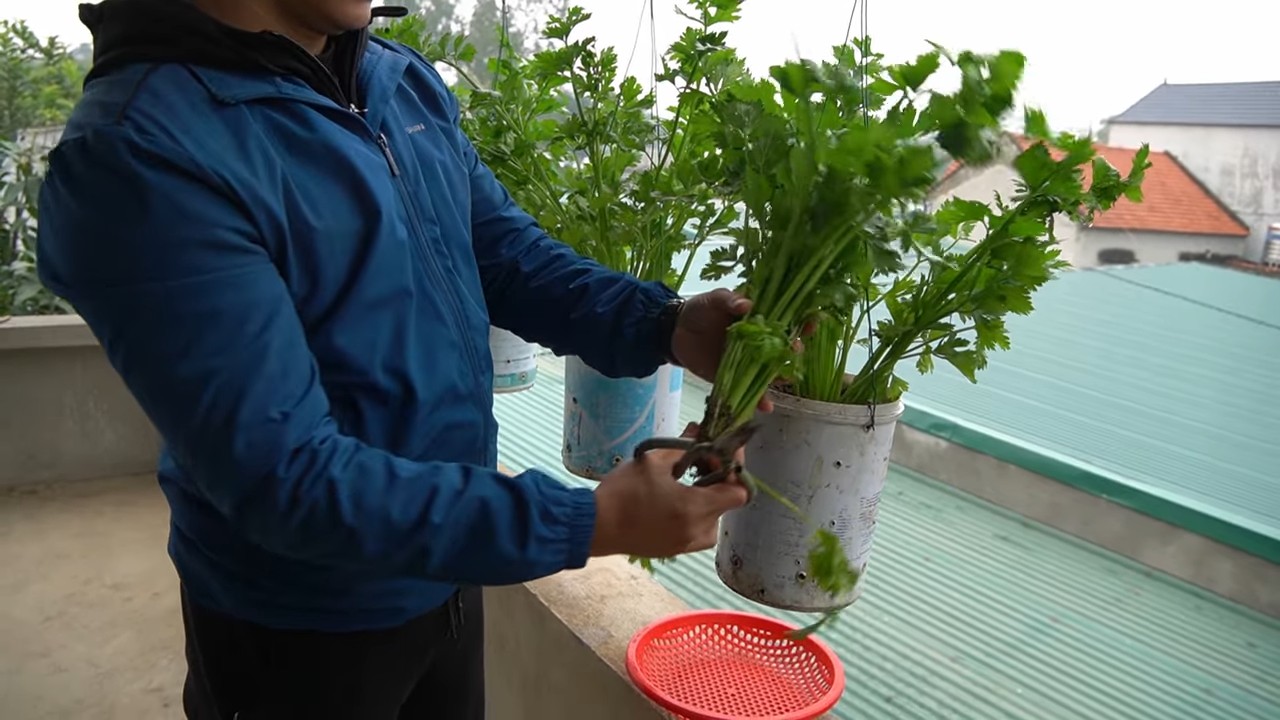
Harvest backyard celery like a pro! Have you ever dreamt of snipping fresh, crisp celery stalks straight from your own garden, ready to be crunched in a salad or dipped in your favorite hummus? I know I have! There’s something incredibly satisfying about growing your own food, and celery is no exception.
While celery cultivation dates back to ancient times, with evidence suggesting its use in ancient Greece and Rome for medicinal and culinary purposes, today, it’s a staple in kitchens worldwide. But let’s be honest, store-bought celery can sometimes be a bit… lackluster. Limp, flavorless, and often with a hefty price tag. That’s where the magic of home gardening comes in!
This DIY guide is your secret weapon to unlocking the freshest, most flavorful celery you’ve ever tasted. We’ll walk you through simple, effective tricks and hacks to ensure a bountiful harvest, even if you’re a complete beginner. Imagine the pride of serving a dish featuring celery you nurtured from seed to stalk. Plus, you’ll save money and reduce your reliance on grocery store produce. So, grab your gardening gloves, and let’s learn how to harvest backyard celery and transform your garden into a celery-lover’s paradise!
Sellerie aus dem eigenen Garten ernten: Eine Schritt-für-Schritt-Anleitung
Hallo liebe Gartenfreunde! Ich freue mich riesig, euch heute zu zeigen, wie ihr euren eigenen Sellerie im Garten ernten könnt. Es ist wirklich ein tolles Gefühl, Gemüse anzubauen und dann frisch auf den Tisch zu bringen. Sellerie ist nicht nur superlecker, sondern auch reich an Vitaminen und Mineralstoffen. Also, lasst uns loslegen!
Wann ist der richtige Zeitpunkt für die Ernte?
Der richtige Zeitpunkt für die Sellerieernte ist entscheidend für den Geschmack und die Qualität. Hier sind ein paar Anzeichen, auf die ihr achten solltet:
* Größe der Knolle: Die Knolle sollte einen Durchmesser von mindestens 8-10 cm haben. Das ist ein guter Richtwert, aber es hängt auch von der Sorte ab.
* Reifezeit: Die meisten Selleriesorten benötigen etwa 120-150 Tage von der Aussaat bis zur Ernte. Achtet auf die Angaben auf eurer Saatguttüte.
* Festigkeit: Die Knolle sollte sich fest anfühlen, wenn ihr sie leicht drückt. Wenn sie weich oder schwammig ist, ist sie wahrscheinlich überreif.
* Blätter: Die äußeren Blätter können gelblich werden, aber das ist kein Problem. Solange die inneren Blätter noch grün und knackig sind, ist alles in Ordnung.
* Ernte vor dem Frost: Sellerie verträgt keinen Frost. Erntet ihn also unbedingt, bevor die ersten Fröste kommen.
Benötigte Werkzeuge und Materialien
Bevor wir mit der Ernte beginnen, solltet ihr sicherstellen, dass ihr alles Notwendige zur Hand habt. Hier ist eine Liste:
* Spaten oder Grabegabel: Zum Ausgraben der Sellerieknollen.
* Gartenhandschuhe: Zum Schutz eurer Hände.
* Messer oder Gartenschere: Zum Abschneiden der Blätter und Wurzeln.
* Eimer oder Korb: Zum Sammeln der geernteten Sellerieknollen.
* Gießkanne (optional): Um den Boden vor der Ernte zu befeuchten.
* Bürste (optional): Zum Reinigen der Knollen.
Schritt-für-Schritt-Anleitung zur Sellerieernte
Jetzt kommt der spannende Teil: die Ernte selbst! Folgt diesen Schritten, um euren Sellerie erfolgreich zu ernten:
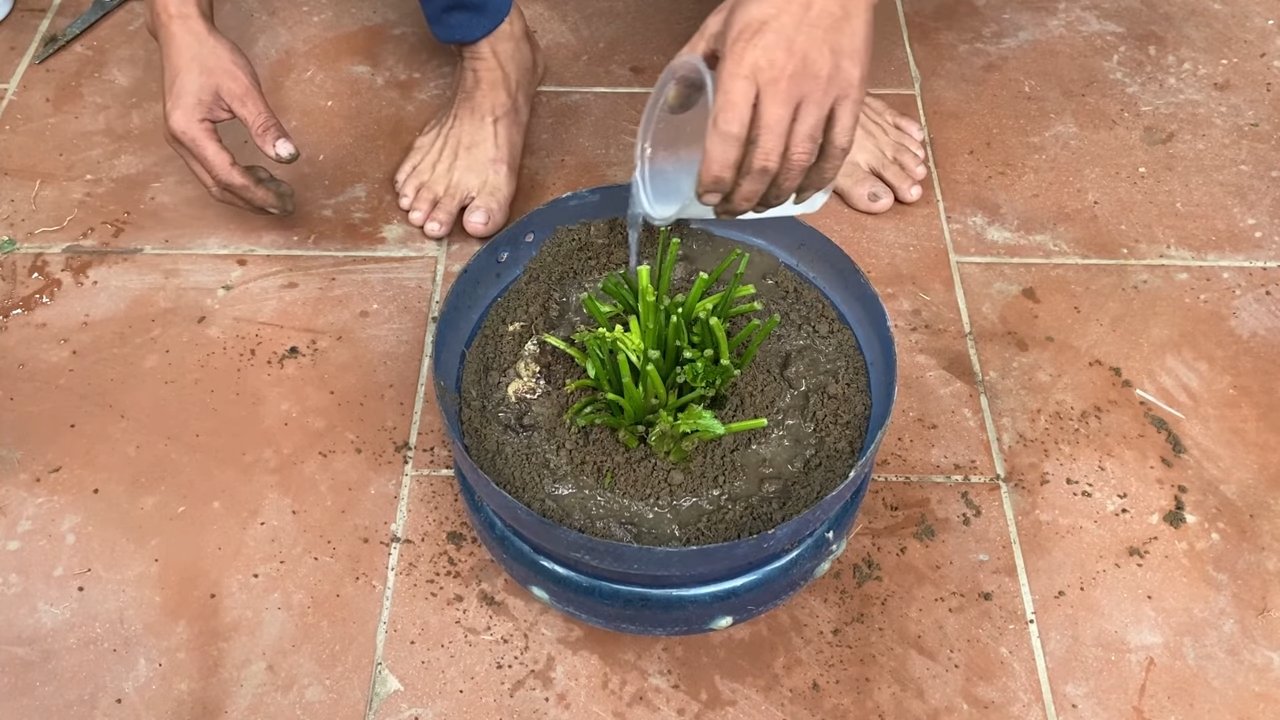
1. Boden vorbereiten: Wenn der Boden sehr trocken ist, gießt ihn am Tag vor der Ernte leicht an. Das erleichtert das Ausgraben der Knollen.
2. Knolle freilegen: Stecht mit dem Spaten oder der Grabegabel vorsichtig um die Selleriepflanze herum. Achtet darauf, die Knolle nicht zu beschädigen.
3. Knolle ausheben: Hebelt die Knolle vorsichtig aus dem Boden. Versucht, so viele Wurzeln wie möglich intakt zu lassen, um die Knolle nicht zu verletzen.
4. Blätter und Wurzeln entfernen: Schneidet die Blätter etwa 2-3 cm oberhalb der Knolle ab. Entfernt auch die feinen Wurzeln an der Unterseite der Knolle.
5. Reinigen: Bürstet die Knolle vorsichtig ab, um Erde und Schmutz zu entfernen. Ihr könnt sie auch kurz unter fließendem Wasser abspülen.
6. Sortieren und lagern: Sortiert die geernteten Knollen nach Größe und Zustand. Beschädigte oder angefressene Knollen solltet ihr zuerst verbrauchen.
Tipps zur Lagerung von Sellerie
Damit ihr lange Freude an eurem geernteten Sellerie habt, ist die richtige Lagerung wichtig. Hier sind ein paar Tipps:
* Kühlschrank: Sellerie hält sich im Kühlschrank am besten, wenn er in ein feuchtes Tuch eingewickelt oder in einem perforierten Plastikbeutel aufbewahrt wird. So bleibt er bis zu 2-3 Wochen frisch.
* Keller: Wenn ihr einen kühlen, dunklen Keller habt, könnt ihr den Sellerie auch dort lagern. Legt die Knollen in eine Kiste mit feuchtem Sand oder Sägemehl. So bleiben sie mehrere Monate haltbar.
* Einfrieren: Sellerie kann auch eingefroren werden. Schneidet ihn dazu in Würfel oder Scheiben und blanchiert ihn kurz in kochendem Wasser. Lasst ihn abkühlen und friert ihn dann in Gefrierbeuteln oder -dosen ein.
* Selleriegrün: Das Selleriegrün ist ebenfalls essbar und kann zum Würzen von Suppen und Eintöpfen verwendet werden. Ihr könnt es auch trocknen oder einfrieren.
Verwendungsmöglichkeiten für geernteten Sellerie
Sellerie ist unglaublich vielseitig und kann in vielen verschiedenen Gerichten verwendet werden. Hier sind ein paar Ideen:
* Roh: Sellerie kann roh als Snack gegessen werden, zum Beispiel mit Hummus oder Erdnussbutter.
* Salate: Sellerie ist eine tolle Zutat für Salate, zum Beispiel für Waldorf-Salat oder Sellerie-Apfel-Salat.
* Suppen und Eintöpfe: Sellerie ist ein wichtiger Bestandteil vieler Suppen und Eintöpfe, zum Beispiel für Gemüsesuppe oder Kartoffelsuppe.
* Gemüsebeilage: Sellerie kann gedünstet, gebraten oder gegrillt als Gemüsebeilage serviert werden.
* Selleriesaft: Selleriesaft ist ein beliebter Gesundheitstrend. Er soll entzündungshemmend und verdauungsfördernd wirken.
* Püree: Selleriepüree ist eine leckere und gesunde Alternative zu Kartoffelpüree.
Häufige Probleme und Lösungen
Manchmal gibt es bei der Sellerieernte oder -lagerung Probleme. Hier sind ein paar häufige Probleme und wie ihr sie lösen könnt:
* Sellerieknolle ist weich: Das kann an Überreife oder falscher Lagerung liegen. Verbraucht die Knolle so schnell wie möglich.
* Sellerieknolle ist angefressen: Das kann an Schädlingen wie Schnecken oder Mäusen liegen. Schützt eure Pflanzen mit Netzen oder Fallen.
* Sellerieblätter sind gelb: Das kann an Nährstoffmangel oder Wassermangel liegen. Düngt eure Pflanzen regelmäßig und gießt sie ausreichend.
* Sellerie schießt: Das bedeutet, dass die Pflanze Blüten bildet. Das kann an Stressfaktoren wie Trockenheit oder Hitze liegen. Erntet den Sellerie so schnell wie möglich, bevor er bitter wird.
Zusätzliche Tipps und Tricks
Hier sind noch ein paar zusätzliche Tipps und Tricks, die euch bei der Sellerieernte und -verarbeitung helfen können:
* Ernte bei trockenem Wetter: Erntet den Sellerie am besten an einem trockenen Tag. So vermeidet ihr, dass die Knollen zu feucht werden und schneller verderben.
* Verwendet scharfe Werkzeuge: Scharfe Werkzeuge erleichtern das Schneiden der Blätter und Wurzeln und verhindern, dass die Knolle beschädigt wird.
* Seid vorsichtig beim Ausgraben: Geht vorsichtig vor, um die Knolle nicht zu verletzen. Beschädigte Knollen verderben schneller.
* Probiert verschiedene Sorten aus: Es gibt viele verschiedene Selleriesorten mit unterschiedlichen Geschmacksrichtungen und Eigenschaften. Probiert verschiedene Sorten aus, um euren Favoriten zu finden.
* Kompostiert die Blätter und Wurzeln: Die Blätter und Wurzeln des Selleries sind ein wertvoller Dünger für euren Garten. Kompostiert sie oder verwendet sie als Mulch.
Ich hoffe, diese Anleitung hat euch geholfen, euren eigenen Sellerie erfolgreich zu ernten und zu verarbeiten. Viel Spaß beim Gärtnern und Genießen!
Conclusion
So, there you have it! Transforming your freshly harvested backyard celery into a vibrant, long-lasting ingredient is not only achievable but surprisingly simple. This DIY trick is a must-try for anyone looking to reduce food waste, save money, and enjoy the crisp, refreshing flavor of celery for weeks, not days. Forget limp, sad celery stalks languishing in your crisper drawer. With just a few minutes of effort, you can unlock the secret to keeping your celery at its peak freshness.
Why is this method so compelling? It’s more than just preservation; it’s about maximizing the potential of your garden bounty. Imagine the satisfaction of using celery you nurtured from seed to table, knowing you’re minimizing your environmental impact and enjoying the freshest possible flavor. This isn’t just about extending shelf life; it’s about elevating your culinary experience.
But don’t stop there! Feel free to experiment with variations on this technique. For example, if you prefer to use your celery primarily in soups and stews, consider chopping it into smaller pieces before storing it in water. This way, it’s ready to go whenever you need it. You could also add a squeeze of lemon juice to the water to further inhibit browning and enhance the flavor. Another option is to blanch the celery briefly before storing it, which can help to preserve its color and texture even longer.
Consider freezing your celery if you have an abundance. Chop it into usable sizes, blanch it for a minute or two, then flash freeze it on a baking sheet before transferring it to a freezer bag. Frozen celery is perfect for adding to soups, stews, and sauces.
We’ve focused on water storage here, but don’t underestimate the power of proper handling from the moment you harvest. Gently brush off any excess soil, avoid bruising the stalks, and get them into water as soon as possible. These small steps can make a big difference in the overall longevity of your celery.
Ultimately, the best way to discover the perfect method for preserving your backyard celery is to experiment and find what works best for you and your cooking style. The key is to be proactive and take steps to prevent spoilage before it starts.
We are confident that this DIY trick will revolutionize the way you store and use celery. It’s a game-changer for home cooks and gardeners alike. So, go ahead, give it a try! Harvest that beautiful backyard celery, follow our simple steps, and prepare to be amazed by the results.
And most importantly, we want to hear about your experience! Share your tips, tricks, and variations in the comments below. Let us know how this method worked for you, what challenges you encountered, and any creative ways you adapted it to your own needs. Your feedback will help us refine this technique and make it even better for everyone. Let’s build a community of celery-loving gardeners and cooks who are passionate about reducing food waste and maximizing the flavor of fresh, homegrown ingredients. Embrace the power of DIY and unlock the full potential of your backyard celery harvest!
Frequently Asked Questions (FAQ)
1. How long will celery last using this DIY storage method?
When stored properly using the water submersion method, your harvested backyard celery can last for up to 2-4 weeks in the refrigerator. This is significantly longer than the typical 1-2 weeks you might get with conventional storage methods. The key is to change the water every few days to prevent bacterial growth and keep the celery hydrated. Monitor the celery regularly and discard any stalks that show signs of spoilage.
2. What kind of container is best for storing celery in water?
The ideal container is tall enough to fully submerge the celery stalks in water. A large mason jar, a pitcher, or even a plastic container with a lid will work well. The container should be clean and food-safe. If you’re using a container with a wide opening, you may want to cover the top with plastic wrap or a reusable lid to help prevent evaporation and keep the celery fresh.
3. Can I store celery that I bought from the grocery store using this method?
Yes, absolutely! This DIY trick works just as well for store-bought celery as it does for homegrown celery. In fact, it can be a great way to revive celery that’s already starting to wilt. Simply trim the ends, submerge the stalks in water, and store them in the refrigerator. You’ll be amazed at how quickly the celery perks up and regains its crispness.
4. What if my celery starts to turn brown or develop a slimy texture?
If you notice your celery turning brown or developing a slimy texture, it’s a sign that it’s starting to spoil. Remove any affected stalks immediately to prevent the spoilage from spreading to the rest of the celery. If only a small portion of the celery is affected, you may be able to salvage the remaining stalks by trimming away the damaged areas and rinsing them thoroughly. However, if the spoilage is widespread, it’s best to discard the entire batch.
5. Is it necessary to trim the ends of the celery before storing it?
Yes, trimming the ends of the celery is an important step in this DIY storage method. The cut ends are more susceptible to drying out and browning, so trimming them helps to prevent this. Use a sharp knife to trim off about an inch from the bottom of the stalks. This will also help the celery absorb water more efficiently.
6. Can I store celery leaves using this method?
While the water submersion method is primarily designed for storing the celery stalks, you can also store the leaves using a similar technique. Wrap the leaves in a damp paper towel and store them in a plastic bag or container in the refrigerator. The leaves will typically last for about a week using this method. Alternatively, you can chop the leaves and freeze them for later use in soups, stews, and other dishes.
7. Does the type of water I use matter?
Using filtered water is generally recommended, as it’s free from chlorine and other chemicals that can affect the flavor and quality of the celery. However, tap water is also fine to use, especially if you let it sit for a few minutes to allow the chlorine to dissipate. Avoid using distilled water, as it lacks minerals that can help to keep the celery hydrated.
8. Can I add anything to the water to help preserve the celery?
Yes, there are a few things you can add to the water to help preserve the celery and enhance its flavor. A squeeze of lemon juice can help to inhibit browning and add a subtle citrusy note. A pinch of salt can also help to prevent bacterial growth. Some people also like to add a few drops of vinegar to the water, which can help to keep the celery crisp.
9. What are some creative ways to use up celery before it goes bad?
If you find yourself with a surplus of celery, there are plenty of creative ways to use it up before it goes bad. Celery is a versatile ingredient that can be used in a wide variety of dishes. You can add it to soups, stews, salads, stir-fries, and even smoothies. Celery juice is also a popular and healthy beverage. You can also use celery to make homemade vegetable broth or stock.
10. How does this method compare to other celery storage methods?
Compared to simply storing celery in the crisper drawer, the water submersion method significantly extends its shelf life. Other methods, such as wrapping celery in aluminum foil, can also help to keep it fresh, but they are not as effective as the water submersion method. The key advantage of the water submersion method is that it keeps the celery hydrated, which prevents it from drying out and becoming limp.

Leave a Comment