
Hanging garden DIY setup: Imagine transforming your balcony, patio, or even a sunny corner indoors into a lush, vibrant oasis overflowing with greenery and blooms. Sounds dreamy, right? Well, it’s more achievable than you think! Forget expensive landscaping or complicated gardening projects. This article is your ultimate guide to creating your very own stunning hanging garden, and trust me, it’s easier than baking a cake!
The concept of hanging gardens isn’t new. In fact, the most famous example, the Hanging Gardens of Babylon, were one of the Seven Wonders of the Ancient World! While we might not be building anything quite *that* grand, the principle remains the same: bringing beauty and nature into our lives in innovative and space-saving ways. For centuries, cultures around the globe have utilized vertical gardening techniques, from cascading flower baskets in European villages to intricate vine trellises in Asian courtyards.
But why should *you* embark on a hanging garden DIY setup? In today’s world, many of us are living in smaller spaces, apartments, or urban environments where traditional gardening is simply not an option. A hanging garden allows you to maximize your limited space, bringing the joy of gardening to even the tiniest balcony. Plus, it’s a fantastic way to add a touch of personality and style to your home, improve air quality, and even grow your own herbs and vegetables! I’m going to show you some simple, affordable, and incredibly rewarding DIY tricks and hacks that will have you enjoying your own little slice of paradise in no time. Let’s get started!
DIY Hängegarten: Dein grünes Paradies zum Selbermachen
Hey Pflanzenfreunde! Ich zeige euch heute, wie ihr euren eigenen Hängegarten kreiert. Egal ob Balkon, Terrasse oder sogar drinnen – ein Hängegarten bringt Leben und Farbe in jeden Raum. Und das Beste: Es ist einfacher, als ihr denkt! Wir werden verschiedene Optionen durchgehen, von einfachen Varianten mit Makramee bis hin zu etwas aufwendigeren Konstruktionen mit Paletten. Lasst uns loslegen!
Materialien, die du brauchst
Bevor wir starten, hier eine Liste der Materialien, die du wahrscheinlich benötigen wirst. Die genaue Menge und Art hängt natürlich von der Art des Hängegartens ab, den du bauen möchtest.
* Pflanzen: Wähle Pflanzen, die für den Standort geeignet sind (Sonne, Schatten, etc.) und die dir gefallen. Hängepflanzen wie Efeu, Erdbeeren oder Petunien sind ideal.
* Töpfe oder Behälter: Achte darauf, dass sie Löcher für den Wasserabfluss haben. Du kannst Terrakotta, Plastik oder sogar recycelte Dosen verwenden.
* Erde: Verwende hochwertige Blumenerde, die auf die Bedürfnisse deiner Pflanzen abgestimmt ist.
* Seil oder Kordel: Für die Aufhängung. Makramee-Garn, Jute-Seil oder sogar alte T-Shirts, die du zu Garn verarbeitest, sind tolle Optionen.
* Haken oder Befestigungsmaterial: Je nachdem, wo du deinen Hängegarten aufhängen möchtest, brauchst du Haken, Dübel, Schrauben oder eine stabile Stange.
* Werkzeug: Schere, Bohrmaschine (falls nötig), Maßband, Bleistift, eventuell eine Heißklebepistole.
* Optionale Materialien: Holzpaletten, Farbe oder Lasur (für Paletten-Hängegärten), Draht, Kokosfaser-Matten (für Auskleidung von Behältern).
Hängegarten-Ideen: Von einfach bis raffiniert
Hier sind ein paar Ideen, die dir als Inspiration dienen können. Wir werden uns später genauer ansehen, wie du sie umsetzen kannst.
* Makramee-Pflanzenhänger: Ein Klassiker, der einfach zu machen ist und einen Boho-Touch verleiht.
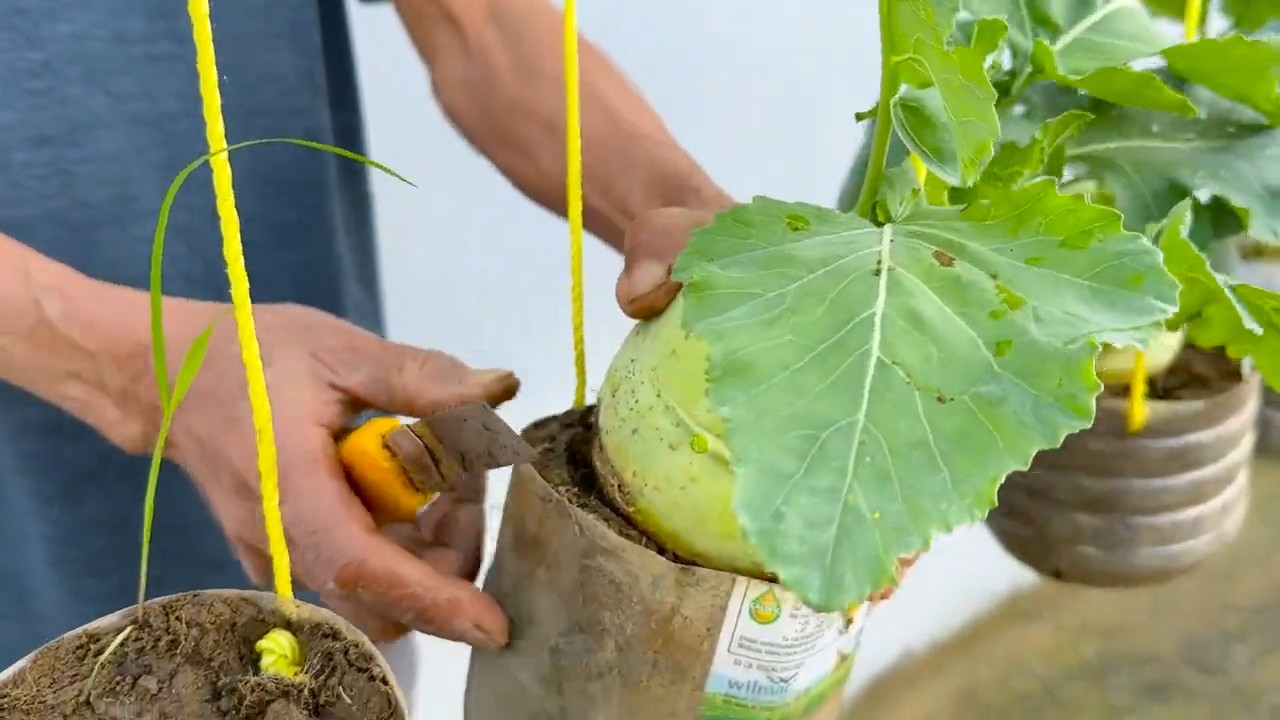
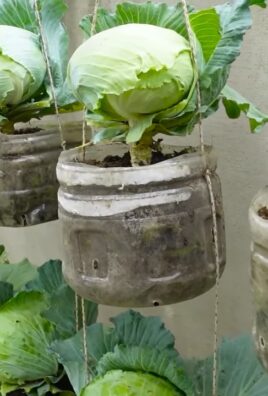
* Hängegarten mit recycelten Dosen: Eine nachhaltige und kostengünstige Option.
* Paletten-Hängegarten: Ideal für größere Balkone oder Terrassen.
* Hängegarten mit alten Leitern: Ein rustikaler Hingucker.
* Vertikaler Garten mit Stofftaschen: Perfekt für kleine Räume.
Anleitung: Makramee-Pflanzenhänger selber machen
Makramee ist eine tolle Technik, um individuelle Pflanzenhänger zu gestalten. Es ist gar nicht so schwer, wie es aussieht!
1. Material vorbereiten: Schneide vier Seilstücke zu. Die Länge hängt davon ab, wie tief dein Pflanzenhänger hängen soll. Rechne aber lieber etwas mehr ein, da du beim Knüpfen Seil verbrauchst. Ich empfehle, mit etwa 4-5 Metern pro Seil zu beginnen.
2. Seile zusammenbinden: Falte die vier Seile in der Mitte und binde sie mit einem einfachen Knoten zusammen. Achte darauf, dass der Knoten fest sitzt. Dieser Knoten bildet den oberen Teil deines Pflanzenhängers.
3. Seile aufteilen: Teile die acht Seilenden in vier Paare auf.
4. Knoten knüpfen: Knüpfe mit jedem Seilpaar einen Knoten. Der Abstand zum oberen Knoten sollte etwa 5-10 cm betragen. Achte darauf, dass alle Knoten auf gleicher Höhe sind.
5. Nächste Knotenreihe: Nimm nun von jedem Knotenpaar ein Seil und knüpfe es mit dem Seil des benachbarten Paares zusammen. So entsteht eine neue Reihe von Knoten. Der Abstand zur vorherigen Knotenreihe sollte wieder etwa 5-10 cm betragen.
6. Wiederholen: Wiederhole Schritt 5 so oft, bis du die gewünschte Länge für deinen Pflanzenhänger erreicht hast. Die Anzahl der Knotenreihen hängt von der Größe deines Topfes ab.
7. Topf einsetzen: Setze deinen Topf in den Hängegarten ein. Die Knoten sollten den Topf gut stützen.
8. Seile zusammenbinden: Binde die Seilenden unterhalb des Topfes zusammen. Achte darauf, dass der Knoten fest sitzt und den Topf sicher hält.
9. Aufhängen: Hänge deinen Makramee-Pflanzenhänger an einem Haken oder einer Stange auf. Fertig!
Anleitung: Hängegarten mit recycelten Dosen
Diese Variante ist super nachhaltig und bringt Farbe in deinen Garten.
1. Dosen vorbereiten: Sammle leere Konservendosen oder Getränkedosen. Reinige sie gründlich und entferne alle Etiketten.
2. Löcher bohren: Bohre mit einer Bohrmaschine oder einem Nagel Löcher in den Boden der Dosen, damit das Wasser ablaufen kann. Bohre außerdem zwei Löcher an den Seiten der Dosen, durch die du später das Seil ziehen kannst.
3. Dosen bemalen (optional): Wenn du möchtest, kannst du die Dosen mit Farbe oder Sprühlack bemalen. Lass deiner Kreativität freien Lauf!
4. Seil befestigen: Schneide Seilstücke zu. Die Länge hängt davon ab, wie tief die Dosen hängen sollen. Ziehe das Seil durch die Löcher an den Seiten der Dosen und verknote es fest.
5. Dosen aufhängen: Hänge die Dosen an einem Haken oder einer Stange auf. Du kannst sie in unterschiedlichen Höhen aufhängen, um einen interessanten Effekt zu erzielen.
6. Bepflanzen: Fülle die Dosen mit Erde und bepflanze sie mit deinen Lieblingspflanzen. Achte darauf, dass die Pflanzen genügend Platz haben.
Anleitung: Paletten-Hängegarten
Ein Paletten-Hängegarten ist ideal für größere Balkone oder Terrassen und bietet viel Platz für Pflanzen.
Vorbereitung der Palette
1. Palette auswählen: Suche dir eine Europalette aus. Achte darauf, dass sie in gutem Zustand ist und keine scharfen Kanten oder Splitter hat.
2. Palette reinigen: Reinige die Palette gründlich mit Wasser und Seife. Du kannst auch einen Hochdruckreiniger verwenden.
3. Palette schleifen: Schleife die Palette ab, um raue Stellen zu entfernen.
4. Palette streichen oder lasieren (optional): Wenn du möchtest, kannst du die Palette mit Farbe oder Lasur streichen. Das schützt das Holz und verleiht der Palette einen individuellen Look. Lass die Farbe oder Lasur gut trocknen.
Gestaltung des Hängegartens
1. Pflanzkästen vorbereiten: Du kannst entweder fertige Pflanzkästen kaufen oder sie selbst bauen. Wenn du sie selbst baust, achte darauf, dass sie wasserdicht sind. Du kannst sie mit Folie auskleiden oder mit Holzschutzmittel behandeln.
2. Pflanzkästen befestigen: Befestige die Pflanzkästen an der Palette. Du kannst sie entweder mit Schrauben oder mit Winkeln befestigen. Achte darauf, dass sie stabil befestigt sind.
3. Haken befestigen: Befestige Haken an der Oberseite der Palette, um sie aufzuhängen. Du kannst entweder spezielle Palettenhaken kaufen oder stabile Haken aus dem Baumarkt verwenden.
4. Palette aufhängen: Hänge die Palette an einem stabilen Haken oder einer Stange auf. Achte darauf, dass die Palette sicher hängt und nicht herunterfallen kann.
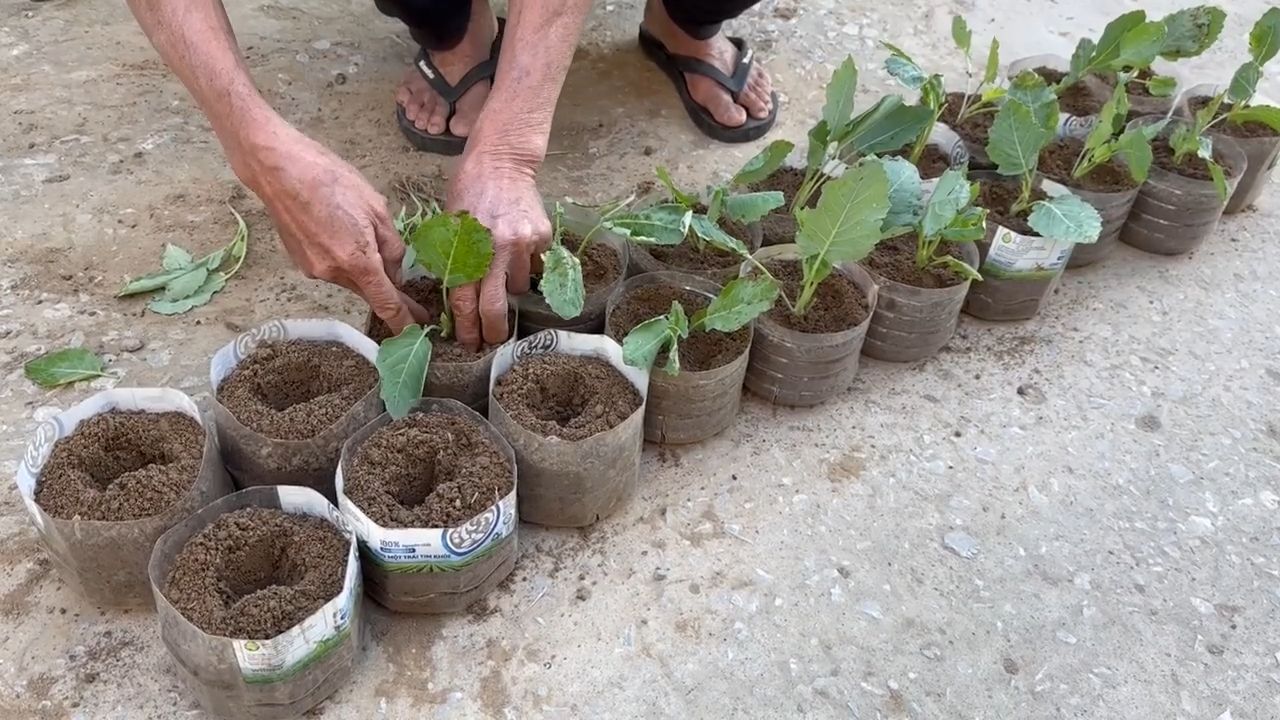
5. Bepflanzen: Fülle die Pflanzkästen mit Erde und bepflanze sie mit deinen Lieblingspflanzen. Achte darauf, dass die Pflanzen genügend Platz haben und für den Standort geeignet sind.
Tipps und Tricks für deinen Hängegarten
* Bewässerung: Achte darauf, dass deine Pflanzen regelmäßig gegossen werden. Hängepflanzen trocknen oft schneller aus als Pflanzen in normalen Töpfen.
* Düngen: Dünge deine Pflanzen regelmäßig, um sie mit Nährstoffen zu versorgen.
* Sonnenschutz: Wenn dein Hängegarten in der prallen Sonne hängt, solltest du deine Pflanzen vor Verbrennungen schützen. Du kannst sie zum Beispiel mit einem Sonnensegel beschatten.
*
Conclusion
So, there you have it! Creating your own hanging garden DIY setup isn’t just a fun project; it’s a transformative experience that brings nature closer to you, regardless of your space constraints. We’ve walked through the steps, highlighted the benefits, and hopefully, inspired you to embark on this green adventure.
Why is this DIY trick a must-try? Because it’s more than just aesthetics. It’s about reclaiming your space, fostering a connection with nature, and enjoying the therapeutic benefits of gardening. Imagine stepping onto your balcony or patio and being greeted by a vibrant cascade of flowers, herbs, or even vegetables. It’s a mood booster, a conversation starter, and a testament to your creativity. Plus, in a world increasingly dominated by concrete and technology, a hanging garden offers a refreshing oasis of tranquility.
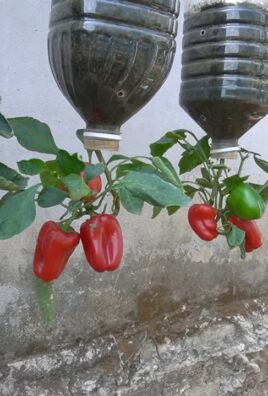
But the beauty of this DIY project lies in its adaptability. Feel free to experiment with different container types. Instead of traditional pots, consider repurposing old buckets, baskets, or even plastic bottles. Just ensure they have adequate drainage. For a rustic touch, use macrame hangers or create your own from jute rope. If you’re short on time, pre-made hanging planters are readily available at most garden centers.
Consider the plants you choose. For sunny spots, succulents, petunias, and geraniums thrive. In shadier areas, impatiens, ferns, and begonias are excellent choices. If you’re interested in edible gardening, herbs like mint, basil, and thyme are perfect for hanging gardens, providing fresh ingredients right at your fingertips. Strawberries also do exceptionally well in hanging baskets, offering a sweet treat throughout the growing season.
Don’t be afraid to get creative with the arrangement. Group plants with similar needs together and consider the overall color scheme. A mix of textures and heights will add visual interest and create a dynamic display. You can even incorporate trailing plants like ivy or creeping Jenny to create a cascading effect.
Remember, the key to a successful hanging garden is proper maintenance. Regular watering is essential, especially during hot weather. Check the soil moisture daily and water when the top inch feels dry. Fertilize your plants regularly with a balanced liquid fertilizer to promote healthy growth and abundant blooms. Prune regularly to remove dead or yellowing leaves and encourage bushier growth.
We truly believe that anyone can create a stunning hanging garden, regardless of their gardening experience. It’s a rewarding project that brings joy and beauty to any space. So, gather your materials, unleash your creativity, and get started on your own hanging garden DIY setup today!
We’re eager to hear about your experiences! Share your photos, tips, and challenges in the comments below. Let’s create a community of hanging garden enthusiasts and inspire each other to grow! What plants did you choose? What challenges did you face? What tips did you discover along the way? Your feedback is invaluable and will help others create their own thriving hanging gardens. Let’s get growing!
Frequently Asked Questions (FAQ)
What are the best plants for a hanging garden?
The best plants for a hanging garden depend on the amount of sunlight your space receives. For sunny locations, consider succulents, petunias, geraniums, calibrachoa (million bells), and verbena. These plants thrive in full sun and offer a vibrant display of colors. For shadier areas, impatiens, begonias, fuchsias, and ferns are excellent choices. These plants prefer partial shade and will add a touch of elegance to your hanging garden. If you’re interested in edible gardening, herbs like mint, basil, thyme, oregano, and rosemary are perfect for hanging gardens. Strawberries and cherry tomatoes also do well in hanging baskets, providing fresh produce right at your fingertips. Consider the mature size of the plants when making your selection to ensure they have enough space to grow.
How often should I water my hanging garden?
Watering frequency depends on several factors, including the type of plants, the weather, and the type of container you’re using. Generally, hanging gardens dry out faster than ground-level gardens due to increased air circulation. Check the soil moisture daily by sticking your finger about an inch into the soil. If the soil feels dry, it’s time to water. During hot weather, you may need to water your hanging garden every day, or even twice a day. Use a watering can or hose with a gentle spray nozzle to avoid damaging the plants. Water thoroughly until water drains out of the bottom of the container. Avoid overwatering, as this can lead to root rot. Consider using self-watering planters or adding water-retaining crystals to the soil to help retain moisture.
What type of soil should I use for my hanging garden?
Use a lightweight potting mix specifically formulated for containers. This type of soil is designed to drain well and retain moisture, which is essential for hanging gardens. Avoid using garden soil, as it can be too heavy and compact, leading to poor drainage and root problems. You can also add perlite or vermiculite to the potting mix to improve drainage and aeration. Consider adding slow-release fertilizer to the soil to provide nutrients to your plants over time.
How do I fertilize my hanging garden?
Fertilize your hanging garden regularly with a balanced liquid fertilizer. Follow the instructions on the fertilizer package for proper dilution and application. Fertilize every two to four weeks during the growing season (spring and summer). You can also use slow-release fertilizer granules, which will provide nutrients to your plants over a longer period. Avoid over-fertilizing, as this can burn the roots of your plants. Look for fertilizers specifically formulated for flowering plants or herbs, depending on the type of plants you’re growing.
How do I prevent my hanging garden from drying out?
There are several ways to prevent your hanging garden from drying out. First, choose containers that are made of materials that retain moisture, such as plastic or ceramic. Avoid using terracotta pots, as they tend to dry out quickly. Add water-retaining crystals to the soil to help retain moisture. Mulch the top of the soil with organic materials like shredded bark or straw to help reduce evaporation. Group plants with similar watering needs together to make watering more efficient. Consider using a drip irrigation system or self-watering planters to provide consistent moisture to your plants. Place your hanging garden in a location that is protected from strong winds, as wind can dry out the soil quickly.
How do I protect my hanging garden from pests and diseases?
Regularly inspect your plants for signs of pests or diseases. Common pests that affect hanging gardens include aphids, spider mites, and whiteflies. Treat infestations with insecticidal soap or neem oil. Remove any diseased leaves or stems to prevent the spread of disease. Ensure good air circulation around your plants to help prevent fungal diseases. Avoid overwatering, as this can create a favorable environment for fungal growth. Use a well-draining potting mix to prevent root rot. Consider using companion planting to deter pests and attract beneficial insects. For example, planting marigolds near your herbs can help repel aphids.
How do I choose the right size container for my hanging garden?
The size of the container depends on the type of plants you’re growing. For small plants like herbs and succulents, a 6-8 inch container is sufficient. For larger plants like petunias and geraniums, a 10-12 inch container is recommended. Choose a container that is deep enough to accommodate the root system of your plants. Ensure the container has adequate drainage holes to prevent waterlogging. Consider the weight of the container when choosing a hanging mechanism.
How do I hang my hanging garden securely?
Use sturdy hooks or brackets that are designed to support the weight of the container. Ensure the hooks or brackets are securely attached to a solid structure, such as a beam or stud. Use strong chains or ropes to hang the container. Check the weight capacity of the hanging mechanism before hanging the container. Consider using multiple hanging points for added stability. Avoid hanging your hanging garden in a location where it could be easily knocked over or damaged.
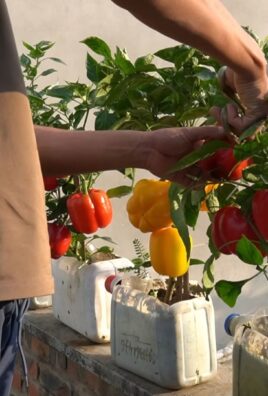
Can I grow vegetables in a hanging garden?
Yes, you can grow vegetables in a hanging garden! Some vegetables that do well in hanging baskets include cherry tomatoes, strawberries, peppers, and lettuce. Choose compact varieties that are well-suited for containers. Ensure the container is large enough to accommodate the root system of the vegetables. Provide adequate sunlight and water. Fertilize regularly with a fertilizer specifically formulated for vegetables. Support the plants with stakes or trellises if necessary.
How do I overwinter my hanging garden?
The best way to overwinter your hanging garden depends on the type of plants you’re growing. Tender perennials and annuals will need to be brought indoors before the first frost. Place them in a sunny location and water them sparingly. Hardy perennials can be left outdoors, but they may need some protection from the cold. Mulch the base of the plants with organic materials like straw or leaves to insulate the roots. Wrap the containers with burlap or bubble wrap to protect them from freezing temperatures. Water the plants occasionally during the winter months to prevent them from drying out completely.
Leave a Comment