
Growing Sweet Potatoes in Bags: Imagine harvesting a bounty of delicious, homegrown sweet potatoes right from your patio or balcony! No sprawling garden needed. For centuries, sweet potatoes have been a staple crop, deeply rooted in cultures around the globe, from South America to Asia. Their versatility and nutritional value have made them a beloved food source. But what if you don’t have acres of land to dedicate to this vining beauty?
That’s where this DIY trick comes in! I’m going to show you how to cultivate these vibrant tubers in the most unexpected of places: bags! Many people are intimidated by the idea of growing their own food, especially root vegetables. They think it requires vast amounts of space and specialized knowledge. But I’m here to tell you that growing sweet potatoes in bags is surprisingly easy, even for beginners.
This method is perfect for urban dwellers, apartment residents, or anyone with limited garden space. Plus, it’s a fantastic way to recycle old burlap sacks or even heavy-duty plastic bags. Get ready to ditch the grocery store sweet potatoes and enjoy the unparalleled flavor of your own homegrown harvest. Let’s get started and unlock the secrets to successfully growing sweet potatoes in bags!
Growing Sweet Potatoes in Bags: A Gardener’s Guide
Hey there, fellow gardening enthusiasts! I’m so excited to share my experience with growing sweet potatoes in bags. It’s a fantastic way to cultivate these delicious tubers, especially if you’re short on space or have challenging soil conditions. Trust me, it’s easier than you think, and the reward of harvesting your own homegrown sweet potatoes is incredibly satisfying. Let’s dive in!
Why Grow Sweet Potatoes in Bags?
Before we get started, let’s quickly touch on why growing sweet potatoes in bags is such a great idea:
* Space-Saving: Perfect for balconies, patios, or small gardens. You don’t need a huge plot of land!
* Soil Control: You can create the ideal growing medium for your sweet potatoes, regardless of your native soil.
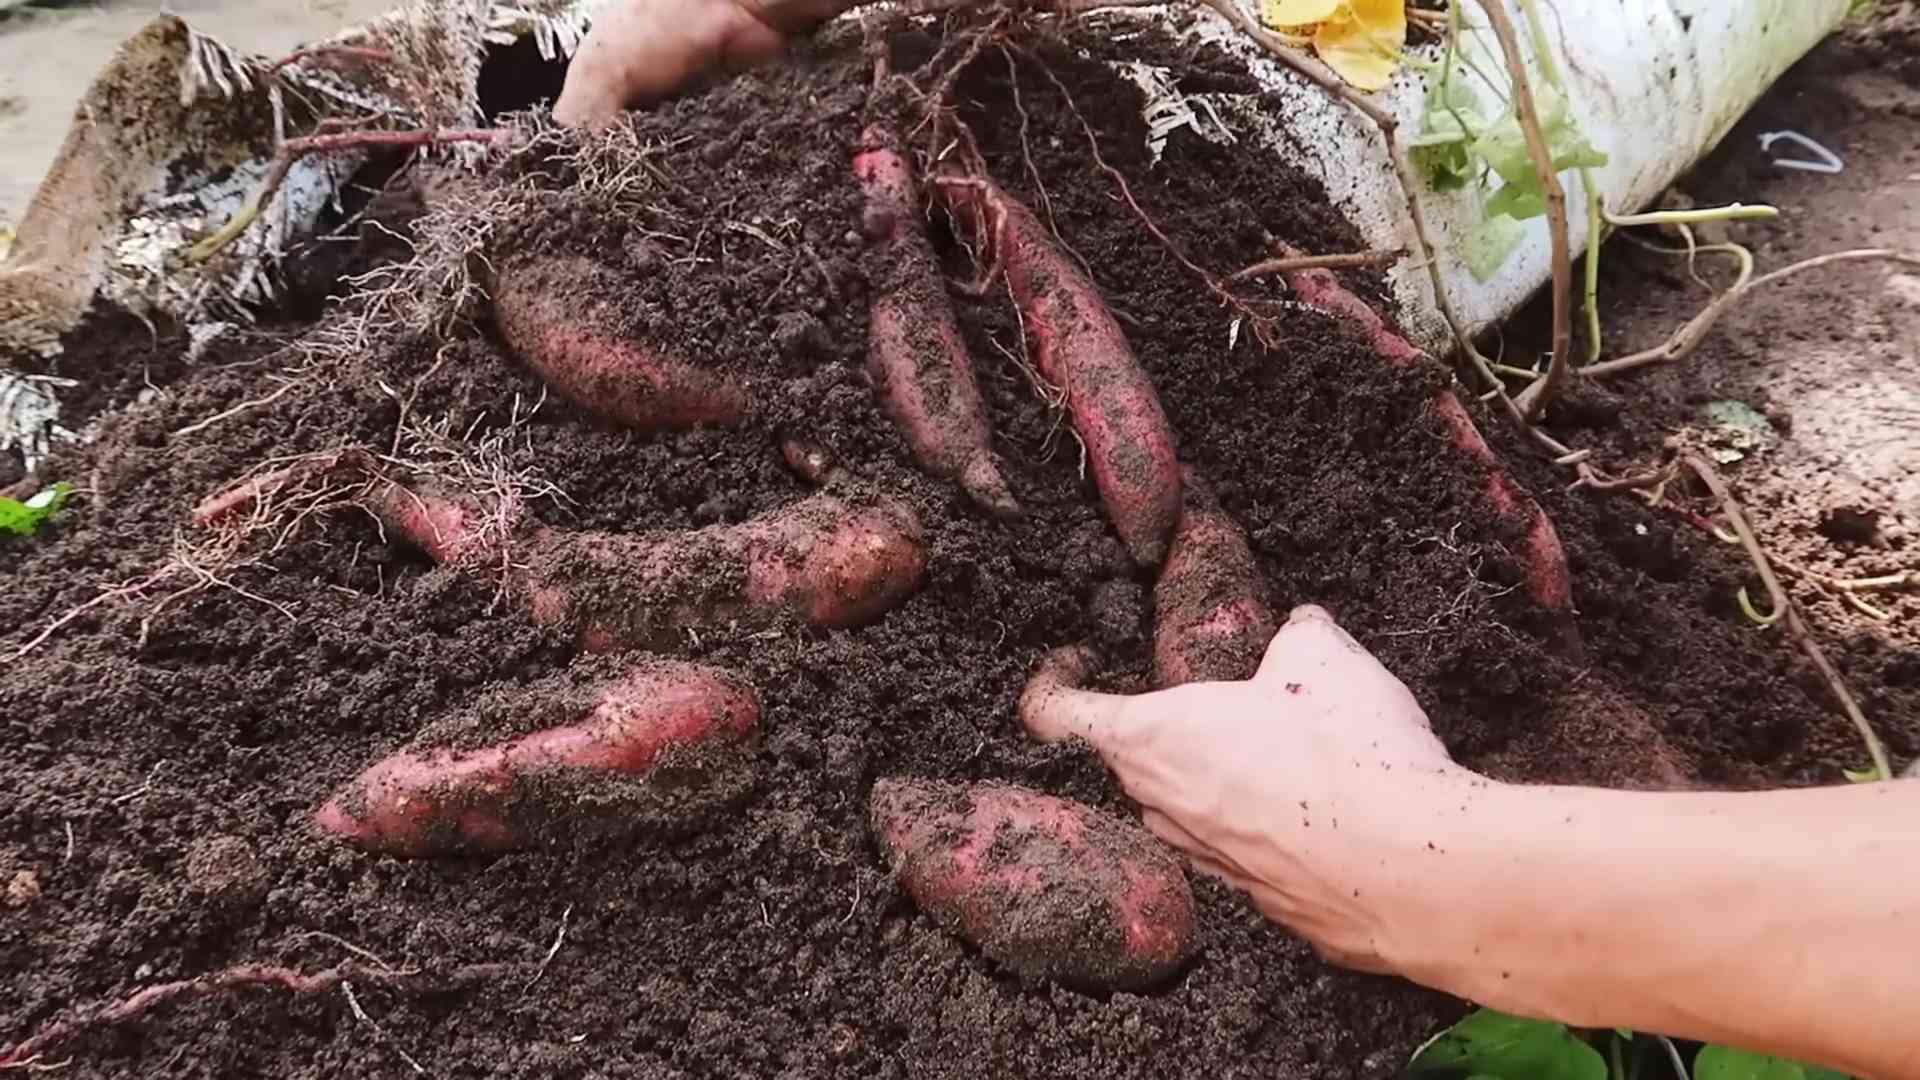
* Easy Harvesting: No more back-breaking digging! Simply tip the bag over to reveal your bounty.
* Pest Control: Bags can help protect your sweet potatoes from soil-borne pests and diseases.
* Portability: You can move your bags to follow the sun or protect them from harsh weather.
What You’ll Need
Okay, let’s gather our supplies. Here’s what you’ll need to get started:
* Large Grow Bags: I recommend using bags that are at least 20 gallons in size. Fabric grow bags are ideal because they allow for good drainage and aeration.
* Sweet Potato Slips: These are sprouts grown from sweet potatoes. You can purchase them online or from your local garden center. You can also grow your own (more on that later!).
* Potting Mix: A well-draining potting mix is crucial. I like to use a mix of compost, peat moss (or coco coir), and perlite.
* Compost: This will provide essential nutrients for your sweet potatoes.
* Slow-Release Fertilizer: A balanced slow-release fertilizer will give your plants a steady supply of nutrients throughout the growing season.
* Watering Can or Hose: For, well, watering!
* Trowel or Shovel: For filling the bags with soil.
* Gloves: To keep your hands clean.
* Optional: Mulch (straw or wood chips) to help retain moisture.
Getting Started: Preparing Your Sweet Potato Slips
You have two main options here: buying slips or growing your own. Buying is definitely the easier route, but growing your own is a fun project!
Buying Sweet Potato Slips
If you’re buying slips, make sure they look healthy and vibrant. Avoid slips that are wilted, yellowed, or have any signs of disease. Once you get them home, keep them moist until you’re ready to plant.
Growing Your Own Sweet Potato Slips
This is a bit more involved, but totally doable! Here’s how I do it:
1. Choose a Sweet Potato: Select a healthy, organic sweet potato.
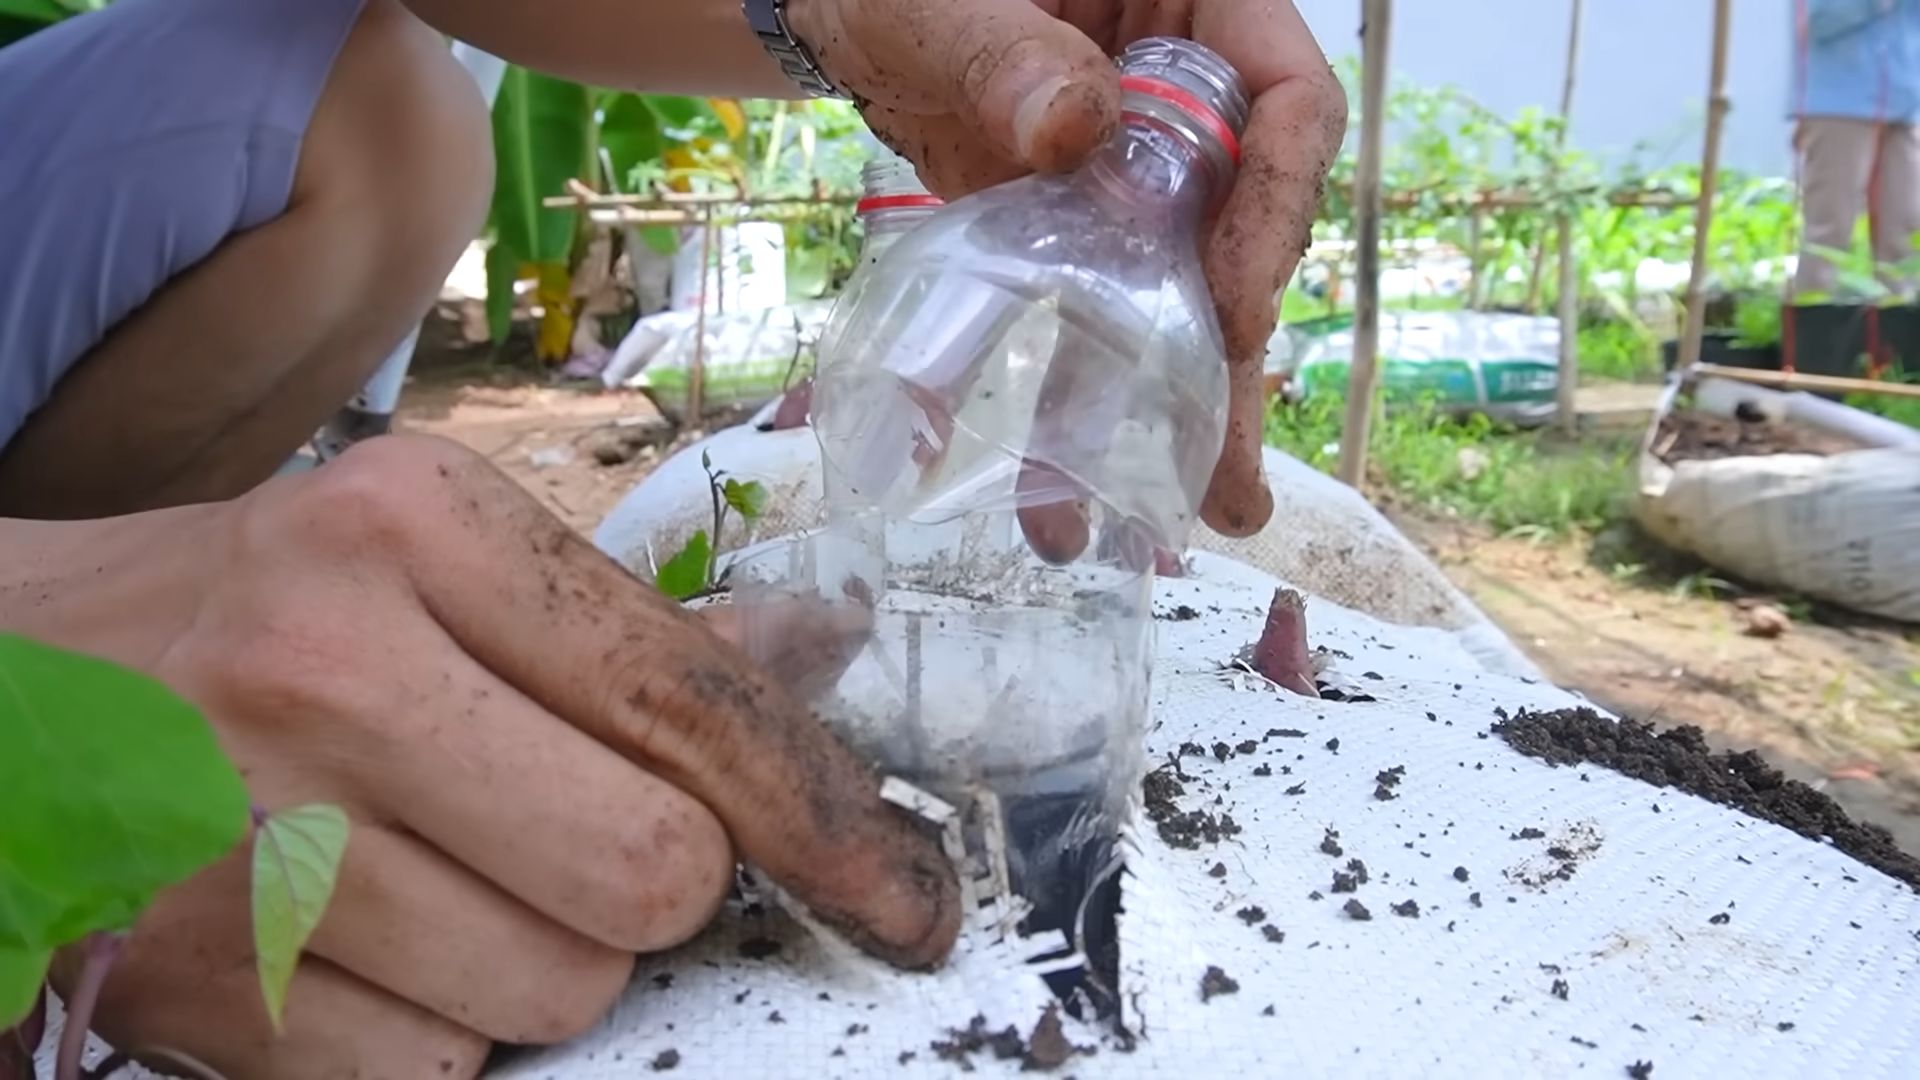
2. Prepare the Potato: You can either suspend the sweet potato in a jar of water (using toothpicks to hold it in place) or bury it horizontally in a container of moist potting mix.
3. Provide Warmth and Light: Place the jar or container in a warm, sunny location.
4. Wait and Watch: In a few weeks, you should start to see sprouts (slips) emerging from the sweet potato.
5. Harvest the Slips: Once the slips are about 6-8 inches long, gently twist them off the sweet potato.
6. Root the Slips: Place the slips in a glass of water, making sure the bottom inch or two is submerged. In a few days, they should start to develop roots.
7. Plant the Slips: Once the roots are about an inch long, they’re ready to be planted in your grow bags.
Planting Your Sweet Potato Slips
Now for the fun part! Let’s get those slips in the bags.
1. Fill the Grow Bags: Fill your grow bags with the potting mix, leaving about 4-6 inches of space at the top.
2. Add Compost and Fertilizer: Mix in a generous amount of compost and the slow-release fertilizer according to the package directions.
3. Create Planting Holes: Dig small holes in the soil, spaced about 12 inches apart.
4. Plant the Slips: Gently remove the slips from the water and plant them in the holes, burying the roots and the bottom part of the stem.
5. Water Thoroughly: Water the bags thoroughly after planting.
6. Mulch (Optional): Add a layer of mulch around the plants to help retain moisture and suppress weeds.
Caring for Your Sweet Potato Plants
Sweet potatoes are relatively low-maintenance, but here are a few things to keep in mind:
1. Watering: Water regularly, especially during hot, dry weather. Sweet potatoes need consistent moisture, but avoid overwatering, which can lead to root rot. I usually check the soil moisture by sticking my finger about an inch deep. If it feels dry, it’s time to water.
2. Sunlight: Sweet potatoes need at least 6-8 hours of sunlight per day. Make sure your bags are placed in a sunny location.
3. Fertilizing: You can supplement with a liquid fertilizer every few weeks, especially if you notice the leaves turning yellow.
4. Weeding: Keep the bags free of weeds, which can compete with your sweet potatoes for nutrients and water.
5. Pest Control: Keep an eye out for pests like aphids and sweet potato weevils. If you spot any, treat them with an appropriate insecticide or organic pest control method. I personally prefer using neem oil for most pests.
6. Vine Management: Sweet potato vines can get quite long and unruly. You can either let them sprawl on the ground or train them to climb a trellis or support. I usually let them sprawl, but if space is limited, a trellis is a good option.
Harvesting Your Sweet Potatoes
This is the moment we’ve all been waiting for! Sweet potatoes are typically ready to harvest about 90-120 days after planting. Here’s how to tell when they’re ready:
* Check the Foliage: The leaves will start to turn yellow and die back.
* Test Dig: Gently dig around the base of one plant to check the size of the sweet potatoes. If they’re a good size (about 4-6 inches long), it’s time to harvest.
To harvest, simply tip the bag over and gently remove the sweet potatoes from the soil. Be careful not to bruise them.
Curing Your Sweet Potatoes
Curing is an important step that improves the flavor and storage life of your sweet potatoes. Here’s how to do it:
1. Gently Clean: Brush off any excess soil from the sweet potatoes, but don’t wash them.
2. Cure in a Warm, Humid Place: Place the sweet potatoes in a warm (80-85°F), humid (85-90% humidity) location for about 7-10 days. A garage or shed often works well. You can increase the humidity by placing a pan of water in the curing area.
3. Store Properly: After curing, store the sweet potatoes in a cool (55-60°F), dry, and well-ventilated place. They should keep for several months.
Troubleshooting
Even with the best planning, things can sometimes go wrong. Here are a few common problems and how to fix them:
* Yellowing Leaves: This could be a sign of nutrient deficiency. Try fertilizing with a balanced fertilizer.
* Slow Growth: Make sure your plants are getting enough sunlight and water. Also, check the soil pH. Sweet potatoes prefer a slightly acidic soil (pH 6.0-6.5).
* Root Rot: This is usually caused by overwatering. Make sure your bags have good drainage and avoid watering too frequently.
* Pests: Regularly inspect your plants for pests and treat them promptly.
Varieties to Try
There are many different varieties of sweet potatoes to choose from. Here are a few of my favorites:
* Beauregard: A classic orange-fleshed variety that’s sweet and versatile.
* Jewel: Another popular orange-fleshed variety with a slightly drier texture.
* Garnet: A deep red-skinned variety with a moist, sweet flesh.
* Japanese Sweet Potato (Muraski): A purple-skinned variety with a white flesh that’s sweet and nutty.
* Okinawan Sweet Potato: A purple-fleshed variety that’s less sweet than other varieties.
Conclusion
So, there you have it! Growing sweet potatoes in bags is not just a gardening trend; it’s a game-changer for anyone with limited space, challenging soil, or simply a desire for a more controlled and rewarding harvest. This method offers a unique opportunity to witness the entire growth process, from the initial slips to the bountiful tubers nestled beneath the surface. Forget back-breaking digging and unpredictable yields – with bag gardening, you’re in control every step of the way.
Why is this DIY trick a must-try? Because it democratizes sweet potato cultivation! No longer is this delicious and nutritious root vegetable confined to sprawling farms or meticulously prepared garden beds. Now, even apartment dwellers with a sunny balcony can enjoy the satisfaction of harvesting their own homegrown sweet potatoes. The convenience, the control, and the sheer joy of nurturing life from a simple slip make this method irresistible.
But the beauty of this technique lies not only in its simplicity but also in its adaptability. Feel free to experiment with different bag sizes to tailor your harvest to your needs. Larger bags will generally yield larger sweet potatoes, while smaller bags are perfect for those who prefer a more manageable crop. Consider using different types of potting mix to see which blend produces the best results in your specific climate. Some gardeners swear by a mix rich in compost and well-rotted manure, while others prefer a lighter, more airy blend. Don’t be afraid to add slow-release fertilizer to the bag at planting time to provide a steady stream of nutrients throughout the growing season.
And the variations don’t stop there! You can also explore different sweet potato varieties to find your personal favorite. From the classic orange Beauregard to the vibrant purple Okinawan, the possibilities are endless. Each variety offers a unique flavor profile and texture, allowing you to customize your harvest to suit your culinary preferences. Imagine the satisfaction of serving a sweet potato pie made with sweet potatoes you grew yourself, each bite bursting with homegrown goodness.
We wholeheartedly encourage you to try this DIY trick for growing sweet potatoes in bags. It’s a rewarding experience that connects you with nature, provides you with fresh, healthy food, and adds a touch of green to your living space. Once you’ve experienced the joy of harvesting your own sweet potatoes, you’ll never look at store-bought ones the same way again.
But don’t just take our word for it! We want to hear about your experiences. Share your photos, tips, and triumphs with us in the comments section below. Let’s create a community of bag-gardening enthusiasts and learn from each other’s successes and challenges. Together, we can unlock the full potential of this simple yet powerful technique and bring the joy of homegrown sweet potatoes to everyone. So, grab your bags, your slips, and your potting mix, and get ready to embark on a sweet potato adventure!
Frequently Asked Questions (FAQ)
What size bag is best for growing sweet potatoes?
The ideal bag size depends on the variety of sweet potato you’re growing and the size of tubers you desire. Generally, a bag that holds at least 10 gallons of potting mix is recommended. Larger bags, such as 20-gallon or even 30-gallon bags, will provide more space for the roots to develop and potentially yield larger sweet potatoes. However, keep in mind that larger bags will also be heavier and require more potting mix. If you’re limited on space or prefer smaller sweet potatoes, a 10-gallon bag should suffice. Experiment with different sizes to find what works best for you.
What kind of potting mix should I use?
Sweet potatoes thrive in well-draining, nutrient-rich soil. A good potting mix for growing sweet potatoes in bags should be a blend of peat moss, perlite, and vermiculite. You can also add compost or well-rotted manure to improve drainage and fertility. Avoid using garden soil, as it can be too heavy and compact, hindering root development. Look for a potting mix specifically formulated for vegetables or create your own blend using high-quality ingredients. Ensure the mix is loose and airy to allow for proper drainage and aeration.
How often should I water my sweet potato plants in bags?
Watering frequency depends on several factors, including the weather, the size of the bag, and the type of potting mix you’re using. Generally, you should water your sweet potato plants whenever the top inch of soil feels dry to the touch. During hot, dry weather, you may need to water daily, while during cooler, wetter periods, you may only need to water every few days. Avoid overwatering, as this can lead to root rot. Ensure the bag has adequate drainage holes to prevent water from pooling at the bottom. A good rule of thumb is to water deeply until water drains out of the bottom of the bag.
How much sunlight do sweet potato plants need?
Sweet potatoes are sun-loving plants and require at least 6-8 hours of direct sunlight per day to thrive. Choose a location for your bags that receives ample sunlight throughout the day. If you live in a particularly hot climate, you may need to provide some afternoon shade to prevent the plants from overheating. If you’re growing sweet potatoes indoors, supplement with grow lights to ensure they receive adequate light. Insufficient sunlight can result in stunted growth and reduced yields.
When is the best time to harvest sweet potatoes grown in bags?
Sweet potatoes typically take 90-120 days to mature, depending on the variety and growing conditions. You can start harvesting when the foliage begins to yellow and die back. To harvest, gently tip the bag over and carefully remove the sweet potatoes from the soil. Avoid damaging the tubers during harvest. Cure the sweet potatoes by placing them in a warm, humid place for 7-10 days to allow the skins to harden. This will improve their flavor and storage life.
Can I reuse the potting mix from my sweet potato bags?
While you can technically reuse potting mix, it’s generally not recommended for growing sweet potatoes. Sweet potatoes are heavy feeders and deplete the soil of nutrients. Reusing potting mix can also increase the risk of disease and pests. If you choose to reuse potting mix, amend it with fresh compost, fertilizer, and other organic matter to replenish nutrients and improve soil structure. It’s generally best to start with fresh potting mix each year for optimal results.
What are some common pests and diseases that affect sweet potato plants?
Sweet potatoes can be susceptible to various pests and diseases, including sweet potato weevils, wireworms, flea beetles, and fungal diseases like fusarium wilt and black rot. To prevent pest and disease problems, start with healthy slips, use disease-free potting mix, and practice good sanitation. Inspect your plants regularly for signs of pests or diseases and take action promptly. Organic pest control methods, such as neem oil and insecticidal soap, can be effective for controlling many common pests. Ensure proper drainage and avoid overwatering to prevent fungal diseases.
Can I grow sweet potatoes in bags indoors?
Yes, you can grow sweet potatoes in bags indoors, but it requires providing them with adequate light and warmth. Place the bags in a sunny window that receives at least 6-8 hours of direct sunlight per day. Supplement with grow lights if necessary. Maintain a consistent temperature of 70-80°F (21-27°C). Ensure the bags have adequate drainage and water regularly. Indoor-grown sweet potatoes may not produce as large of a yield as those grown outdoors, but you can still enjoy a rewarding harvest.
How do I get sweet potato slips?
Sweet potato slips are the sprouts that grow from sweet potatoes and are used to propagate new plants. You can purchase slips from a nursery or garden center, or you can grow your own. To grow your own slips, place a sweet potato in a jar of water, with the bottom half submerged. Place the jar in a warm, sunny location. Within a few weeks, sprouts will begin to emerge from the sweet potato. Once the sprouts are 4-6 inches long, gently twist them off and plant them in your bags.
What are the benefits of growing sweet potatoes in bags compared to traditional gardening?
Growing sweet potatoes in bags offers several advantages over traditional gardening, including:
* **Space-saving:** Ideal for small gardens, balconies, and patios.
* **Improved drainage:** Bags provide excellent drainage, preventing root rot.
* **Controlled environment:** Allows you to control the soil composition and growing conditions.
* **Easy harvesting:** Simply tip the bag over to harvest the sweet potatoes.
* **Portability:** Bags can be easily moved to different locations as needed.
* **Reduced weeding:** Bags minimize weed growth compared to traditional gardens.
Leave a Comment