
Growing Sweet Potatoes in Bags: Imagine harvesting a bounty of sweet potatoes right from your patio or balcony! It sounds too good to be true, right? Well, get ready to be amazed because this DIY guide will show you exactly how to make it happen. Forget sprawling garden beds – we’re taking sweet potato cultivation to a whole new level of convenience and accessibility.
The sweet potato, with its vibrant orange flesh and earthy sweetness, has a rich history, dating back thousands of years in Central and South America. It’s a staple crop in many cultures, prized for its nutritional value and versatility. But traditionally, growing them required ample space, making it a challenge for urban dwellers or those with limited gardening areas. That’s where this ingenious DIY trick comes in!
Let’s be honest, who wouldn’t want fresh, homegrown sweet potatoes? Store-bought varieties often lack the flavor and freshness of those you can harvest yourself. Plus, knowing exactly where your food comes from is incredibly satisfying. This method of growing sweet potatoes in bags is perfect for anyone with limited space, time, or gardening experience. It’s a simple, cost-effective way to enjoy the taste of homegrown goodness, and I’m excited to share all the secrets with you. So, grab your supplies, and let’s get started on this exciting gardening adventure!
Süßkartoffeln im Sack anbauen: Eine DIY-Anleitung für den Gartenfreund
Hallo liebe Gartenfreunde! Habt ihr Lust, etwas Neues auszuprobieren und eure eigenen Süßkartoffeln anzubauen? Ich zeige euch, wie ihr das ganz einfach in Säcken machen könnt – auch wenn ihr keinen großen Garten habt! Es ist ein super Projekt, um Platz zu sparen und trotzdem eine reiche Ernte zu erzielen. Los geht’s!
Was ihr für den Anbau von Süßkartoffeln im Sack benötigt:
* Süßkartoffel-Setzlinge (Slips): Diese könnt ihr online bestellen oder in einem Gartencenter kaufen. Achtet darauf, dass sie gesund und kräftig aussehen.
* Große, stabile Säcke: Ich empfehle Jutesäcke, Kartoffelsäcke oder robuste Pflanzsäcke. Sie sollten mindestens 40 Liter Fassungsvermögen haben, besser noch 60-80 Liter.
* Hochwertige Pflanzerde: Eine Mischung aus Gartenerde, Kompost und etwas Sand ist ideal. Süßkartoffeln mögen lockeren, gut durchlässigen Boden.
* Kompost oder organischer Dünger: Für eine gute Nährstoffversorgung.
* Wasser: Zum Gießen, natürlich!
* Geduld: Süßkartoffeln brauchen etwas Zeit, um zu wachsen.
Schritt-für-Schritt-Anleitung: Süßkartoffeln im Sack pflanzen
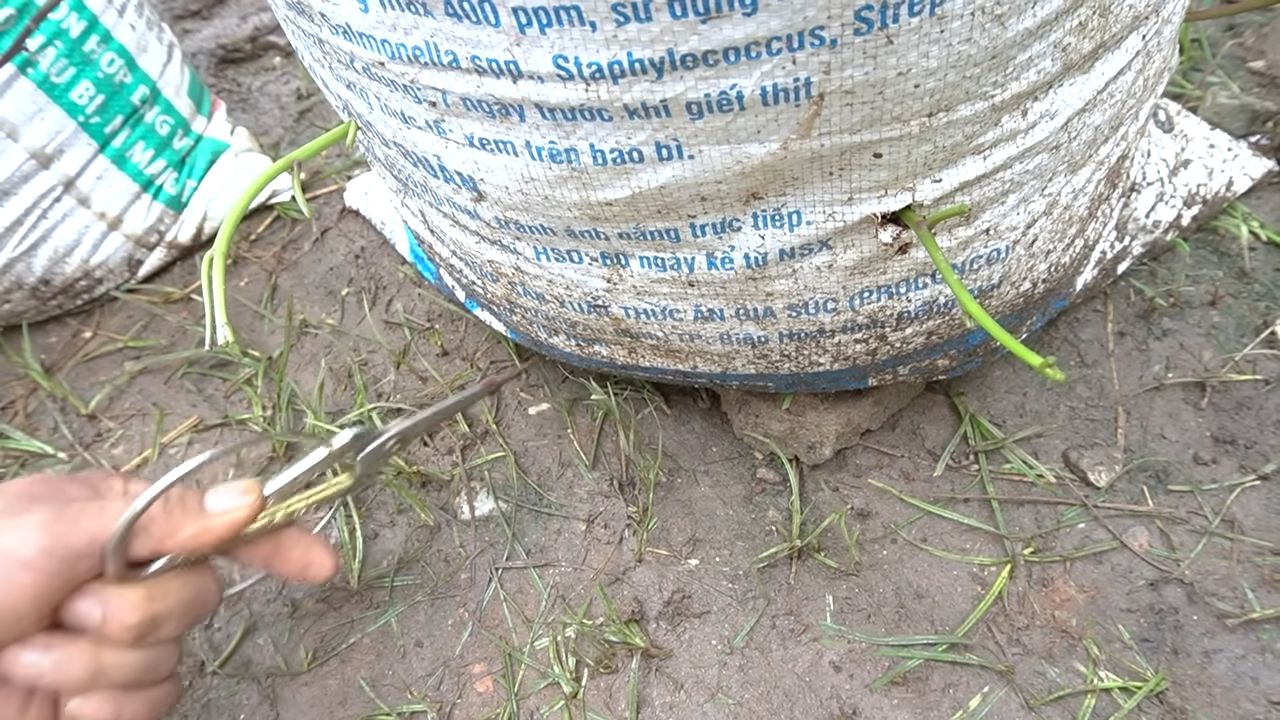
1. Die Säcke vorbereiten:
* Zuerst solltet ihr die Säcke gründlich reinigen, falls sie gebraucht sind.
* Rollt die Oberkante der Säcke ein paar Mal nach unten, damit sie stabiler stehen und das Befüllen einfacher ist.
* Stecht am Boden der Säcke ein paar Löcher, damit überschüssiges Wasser ablaufen kann und Staunässe vermieden wird. Das ist super wichtig!
2. Die Erde mischen:
* Mischt eure Pflanzerde mit Kompost oder organischem Dünger. Ich nehme meistens etwa ein Drittel Kompost und zwei Drittel Erde. Das gibt den Süßkartoffeln einen guten Start.
* Achtet darauf, dass die Mischung locker und luftig ist. Wenn die Erde zu schwer ist, könnt ihr noch etwas Sand hinzufügen.
3. Die Säcke befüllen:
* Füllt die Säcke etwa zu zwei Dritteln mit der vorbereiteten Erde.
* Drückt die Erde leicht an, aber nicht zu fest. Sie sollte locker bleiben, damit die Wurzeln gut wachsen können.
4. Die Süßkartoffel-Setzlinge pflanzen:
* Macht in jeden Sack 2-3 Pflanzlöcher, etwa 10-15 cm tief.
* Setzt die Süßkartoffel-Setzlinge vorsichtig in die Löcher und bedeckt die Wurzeln mit Erde.
* Drückt die Erde leicht an und gießt die Setzlinge gut an.
5. Die Säcke platzieren:
* Sucht einen sonnigen Standort für eure Süßkartoffelsäcke. Süßkartoffeln lieben die Sonne!
* Stellt die Säcke an einen Ort, wo sie vor starkem Wind geschützt sind.
Pflege der Süßkartoffeln im Sack
1. Gießen:
* Gießt die Süßkartoffeln regelmäßig, besonders in trockenen Perioden. Die Erde sollte immer leicht feucht sein, aber nicht nass.
* Achtet darauf, dass das Wasser gut ablaufen kann, um Staunässe zu vermeiden.
2. Düngen:
* Düngt die Süßkartoffeln alle 2-3 Wochen mit einem organischen Dünger oder Komposttee. Das fördert das Wachstum und die Knollenbildung.
* Ich verwende gerne Brennnesseljauche, die ich selbst herstelle. Das ist ein super natürlicher Dünger!
3. Unkraut entfernen:
* Entfernt regelmäßig Unkraut, das in den Säcken wächst. Unkraut kann den Süßkartoffeln Nährstoffe und Licht wegnehmen.
4. Ranken leiten:
* Süßkartoffeln bilden lange Ranken. Ihr könnt sie entweder auf dem Boden liegen lassen oder an einem Rankgitter oder einer Stütze hochleiten. Das spart Platz und sorgt für eine bessere Belüftung.
Erntezeit: Wann sind die Süßkartoffeln reif?
1. Der richtige Zeitpunkt:
* Süßkartoffeln sind in der Regel nach 3-4 Monaten reif. Das genaue Erntefenster hängt von der Sorte und den Wetterbedingungen ab.
* Ein Zeichen für die Reife ist, wenn die Blätter gelb werden und absterben.
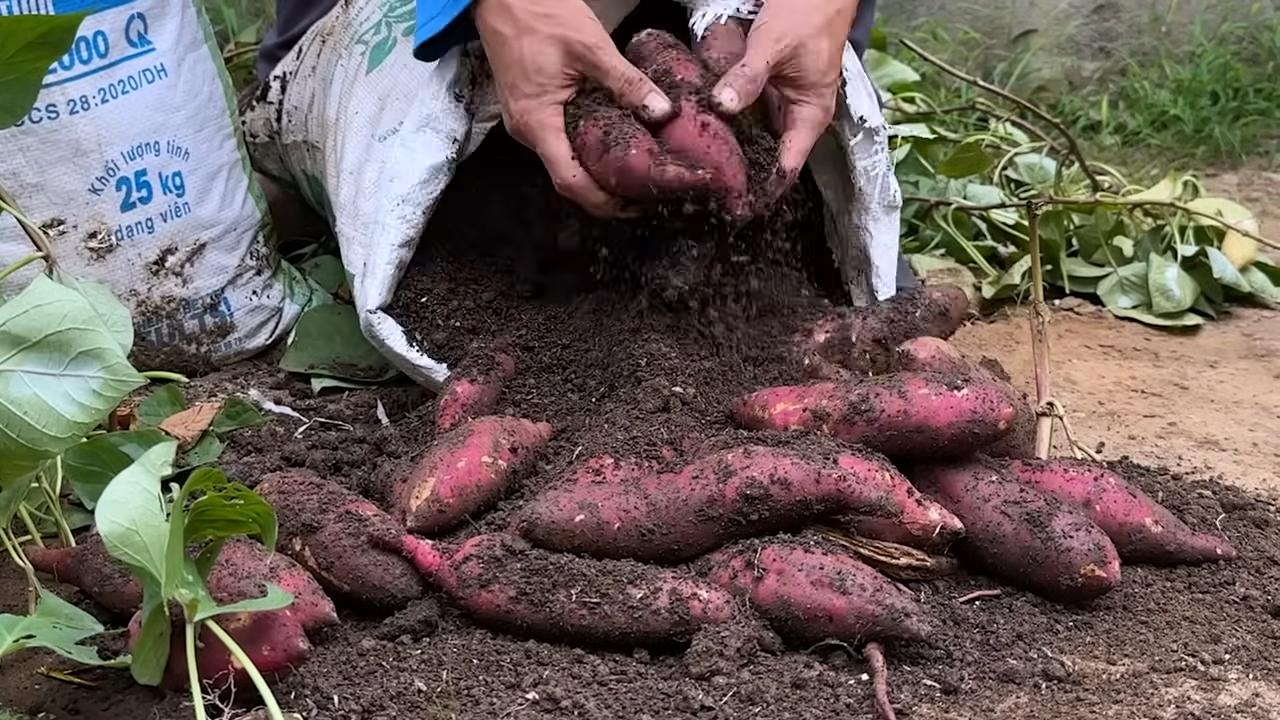
2. Die Ernte:
* Stellt das Gießen ein paar Tage vor der Ernte ein. Das erleichtert die Ernte und verbessert die Lagerfähigkeit der Süßkartoffeln.
* Schneidet die Ranken ab und kippt den Sack vorsichtig aus.
* Sucht die Süßkartoffeln aus der Erde. Sie sollten eine schöne, feste Schale haben.
3. Die Lagerung:
* Lasst die Süßkartoffeln nach der Ernte ein paar Tage an einem warmen, trockenen Ort trocknen. Das härtet die Schale und verlängert die Lagerfähigkeit.
* Lagert die Süßkartoffeln dann an einem kühlen, dunklen und trockenen Ort. Sie halten sich so mehrere Monate.
Häufige Probleme und Lösungen
1. Schädlinge:
* Süßkartoffeln sind relativ resistent gegen Schädlinge, aber manchmal können Blattläuse oder Schnecken auftreten.
* Blattläuse könnt ihr mit einem Wasserstrahl oder einer Seifenlauge bekämpfen.
* Schnecken sammelt ihr am besten ab oder stellt Schneckenfallen auf.
2. Krankheiten:
* Manchmal können Pilzkrankheiten auftreten, besonders bei feuchtem Wetter.
* Achtet auf eine gute Belüftung und entfernt befallene Blätter.
* In schweren Fällen könnt ihr ein Fungizid verwenden.
3. Gelbe Blätter:
* Gelbe Blätter können ein Zeichen für Nährstoffmangel sein. Düngt die Süßkartoffeln dann mit einem organischen Dünger.
* Es kann aber auch ein Zeichen für Staunässe sein. Achtet darauf, dass das Wasser gut ablaufen kann.
Zusätzliche Tipps und Tricks
* Sortenwahl: Wählt Süßkartoffelsorten, die für euer Klima geeignet sind. Es gibt viele verschiedene Sorten mit unterschiedlichen Farben und Geschmacksrichtungen.
* Vorziehen: Ihr könnt die Süßkartoffel-Setzlinge auch selbst vorziehen. Legt dazu eine Süßkartoffel in eine Schale mit Wasser und wartet, bis sie Wurzeln und Triebe bildet.
* Mulchen: Mulcht die Säcke mit Stroh oder Rasenschnitt. Das hält die Erde feucht und unterdrückt Unkraut.
* Kombination mit anderen Pflanzen: Ihr könnt die Süßkartoffeln auch mit anderen Pflanzen kombinieren, z.B. mit Ringelblumen oder Kapuzinerkresse. Diese Pflanzen halten Schädlinge fern.
Warum Süßkartoffeln im Sack anbauen?
* Platzsparend: Ideal für Balkone, Terrassen oder kleine Gärten.
* Flexibel: Die Säcke können leicht umgestellt werden, um den besten Standort zu finden.
* Einfache Ernte: Die Ernte ist viel einfacher als im Beet.
* Weniger Unkraut: Die Säcke sind weniger anfällig für Unkraut als Beete.
* Gesunde Ernährung: Selbst angebaute Süßkartoffeln sind super lecker und gesund!
Ich hoffe, diese Anleitung hilft euch dabei, eure eigenen Süßkartoffeln im Sack anzubauen. Es ist ein tolles Projekt, das viel Spaß macht und euch mit einer reichen Ernte belohnt. Viel Erfolg und guten Appetit!
Conclusion
So, there you have it! Growing sweet potatoes in bags is not just a gardening trend; it’s a game-changer for anyone with limited space, challenging soil, or simply a desire for a more controlled and rewarding harvest. We’ve walked you through the entire process, from selecting the right bag and preparing the perfect soil mix to nurturing your slips and anticipating that glorious harvest.
But why is this DIY trick a must-try? Let’s recap. First and foremost, it’s incredibly accessible. You don’t need acres of land or expensive equipment. A simple grow bag, some quality soil, and a sunny spot are all you need to embark on this adventure. Second, it offers unparalleled control over the growing environment. You can tailor the soil composition to the specific needs of your sweet potatoes, ensuring optimal drainage and nutrient availability. This translates to healthier plants and a more abundant yield. Third, it’s a fantastic way to extend your growing season. By starting your slips indoors and moving the bags outdoors when the weather warms up, you can get a head start on the growing season and enjoy a longer harvest period. Finally, and perhaps most importantly, it’s incredibly satisfying! There’s nothing quite like the feeling of digging into a bag and unearthing a treasure trove of homegrown sweet potatoes.
Now, let’s talk about variations and suggestions. Feel free to experiment with different types of grow bags. Fabric pots are excellent for aeration and drainage, while plastic bags can help retain moisture in drier climates. You can also try different soil amendments, such as compost tea or bone meal, to boost nutrient levels. Consider companion planting with herbs like basil or rosemary to deter pests and attract beneficial insects. For those in cooler climates, consider using dark-colored bags to absorb more heat and warm the soil. And if you’re feeling adventurous, why not try growing different varieties of sweet potatoes? From the classic orange Beauregard to the purple-fleshed Okinawan, there’s a sweet potato variety to suit every taste.
Growing sweet potatoes in bags is a rewarding and accessible way to enjoy fresh, homegrown produce, even if you have limited space. It’s a project that’s perfect for beginners and experienced gardeners alike.
We wholeheartedly encourage you to give this DIY trick a try. Don’t be afraid to experiment, adapt the techniques to your specific environment, and most importantly, have fun! And once you’ve harvested your bounty, we’d love to hear about your experience. Share your photos, tips, and stories in the comments below. Let’s create a community of sweet potato enthusiasts and inspire others to embrace the joys of homegrown food. Happy gardening!
Frequently Asked Questions (FAQ)
What size grow bag is best for sweet potatoes?
The ideal size grow bag for sweet potatoes is typically between 10 and 20 gallons. A 15-gallon bag is a good starting point, providing ample space for the roots to develop and the tubers to form. Smaller bags may restrict root growth, leading to smaller yields, while excessively large bags can be difficult to manage and may not drain as effectively. Consider the variety of sweet potato you’re growing; bushier varieties might benefit from a slightly larger bag.
What type of soil mix should I use for growing sweet potatoes in bags?
Sweet potatoes thrive in well-draining, nutrient-rich soil. A good soil mix consists of equal parts of the following:
* **Garden soil:** Provides structure and essential minerals. Ensure it’s free from pests and diseases.
* **Compost:** Adds organic matter, improves drainage, and provides a slow-release source of nutrients.
* **Peat moss or coco coir:** Helps retain moisture and improves soil aeration.
You can also add a slow-release fertilizer specifically formulated for root vegetables to boost nutrient levels. Avoid using heavy clay soil, as it can impede root growth and lead to rot.
How often should I water sweet potatoes grown in bags?
Water sweet potatoes regularly, especially during hot and dry weather. The frequency of watering will depend on the climate, soil type, and size of the bag. As a general rule, water deeply whenever the top inch of soil feels dry to the touch. Avoid overwatering, as this can lead to root rot. Ensure the bag has adequate drainage to prevent waterlogging. During periods of heavy rain, you may need to protect the bags from excessive moisture.
How much sunlight do sweet potatoes need?
Sweet potatoes require at least 6-8 hours of direct sunlight per day to thrive. Choose a location that receives ample sunlight throughout the growing season. If you live in a particularly hot climate, some afternoon shade may be beneficial to prevent the plants from overheating. Insufficient sunlight can lead to leggy growth and reduced yields.
When is the best time to plant sweet potato slips in bags?
The best time to plant sweet potato slips in bags is after the last frost, when the soil has warmed up to at least 65°F (18°C). In most regions, this is typically in late spring or early summer. You can start your slips indoors 6-8 weeks before the last frost to get a head start on the growing season. Harden off the slips gradually before transplanting them into the bags.
How do I know when my sweet potatoes are ready to harvest?
Sweet potatoes are typically ready to harvest 90-120 days after planting. The leaves will start to turn yellow and the vines will begin to die back. You can also gently dig around the base of the plant to check the size of the tubers. Harvest before the first frost, as frost can damage the sweet potatoes.
How do I cure sweet potatoes after harvesting?
Curing sweet potatoes is essential for improving their flavor and storage life. After harvesting, gently brush off any excess soil and allow the sweet potatoes to dry in a warm, humid place (80-85°F or 27-29°C) for 7-10 days. This process allows the skins to harden and any minor cuts or bruises to heal. After curing, store the sweet potatoes in a cool, dry, and well-ventilated place (55-60°F or 13-16°C).
Can I reuse the soil from my grow bags for sweet potatoes next year?
While you can reuse the soil from your grow bags, it’s important to amend it with fresh compost and other organic matter to replenish nutrients. Sweet potatoes are heavy feeders and can deplete the soil of essential nutrients. You may also want to sterilize the soil to kill any potential pests or diseases. Alternatively, you can use the old soil for other less demanding plants and start with fresh soil for your sweet potatoes next year.
Are there any common pests or diseases that affect sweet potatoes grown in bags?
Sweet potatoes can be susceptible to certain pests and diseases, including sweet potato weevils, wireworms, and fungal diseases like fusarium wilt. Regularly inspect your plants for signs of infestation or disease. Use organic pest control methods, such as neem oil or insecticidal soap, to control pests. Ensure good air circulation and avoid overwatering to prevent fungal diseases.
Can I grow sweet potatoes in bags indoors?
While it’s possible to grow sweet potatoes in bags indoors, it can be challenging to provide them with the necessary sunlight and space. You’ll need a very sunny location or grow lights to provide adequate illumination. You’ll also need a large enough bag to accommodate the root system. Indoor-grown sweet potatoes may not produce as large or as many tubers as those grown outdoors.

Leave a Comment