
Growing Sprouts at Home is easier than you think, and I’m here to show you how! Forget those expensive, pre-packaged sprouts from the grocery store that might be days old. Imagine having a constant supply of fresh, crunchy, and incredibly nutritious sprouts right on your kitchen counter. Sounds amazing, right?
Sprouting, in fact, isn’t a new-fangled health trend. It’s been around for centuries! Cultures across the globe, particularly in Asia, have long recognized the power of sprouts as a readily available and nutrient-dense food source, especially during times of scarcity. Think of it as nature’s original fast food – packed with vitamins, minerals, and enzymes, all ready to boost your well-being.
But why should *you* bother growing sprouts at home? Well, for starters, it’s incredibly cost-effective. A small bag of seeds can yield a surprising amount of sprouts. Plus, you have complete control over the process, ensuring they’re grown organically and free from any unwanted additives. In today’s world, where we’re all looking for ways to eat healthier, save money, and connect with nature, sprouting is a perfect solution. It’s a simple, rewarding, and delicious way to add a burst of freshness to your meals. So, let’s dive in and discover the secrets to successful home sprouting!

Growing Sprouts at Home: A Beginner’s Guide
Hey there, fellow food enthusiasts! Ever thought about growing your own food, but felt intimidated by gardening? Well, I’ve got the perfect solution for you: sprouts! They’re incredibly easy to grow indoors, require minimal space, and are packed with nutrients. Plus, they add a fresh, crunchy element to salads, sandwiches, and just about anything else you can imagine. Let’s dive into how you can become a sprout-growing pro in your own kitchen!
What You’ll Need
Before we get started, let’s gather our supplies. The beauty of sprouting is that you probably already have most of these items at home.
* Sprouting Seeds: This is the most important part! You can find sprouting seeds online or at your local health food store. Some popular choices include alfalfa, broccoli, radish, mung beans, lentils, and clover. Make sure you buy seeds specifically labeled for sprouting, as regular garden seeds may be treated with chemicals.
* Sprouting Jar or Container: A wide-mouth mason jar works perfectly. You can also use a plastic container, but make sure it’s food-grade and BPA-free.
* Sprouting Lid or Mesh Cover: You’ll need something to cover the jar while allowing air circulation and drainage. A sprouting lid with a mesh screen is ideal, but you can also use cheesecloth or a piece of nylon screen secured with a rubber band.
* Water: Clean, filtered water is best.
* A Dark Place: Sprouts prefer darkness during the initial germination phase. A cupboard or drawer works well.
* A Well-Lit Area: Once the sprouts have germinated, they need light to develop their green color. A windowsill or countertop away from direct sunlight is perfect.
Choosing Your Seeds
Okay, so you’re ready to pick your seeds. This is where the fun begins! There are so many different types of sprouts to choose from, each with its own unique flavor and nutritional profile.
* Alfalfa Sprouts: These are probably the most common type of sprouts. They have a mild, slightly nutty flavor and are a good source of vitamins A, C, and K.
* Broccoli Sprouts: These sprouts have a slightly peppery flavor and are packed with antioxidants. They’re also a good source of sulforaphane, a compound that has been linked to various health benefits.
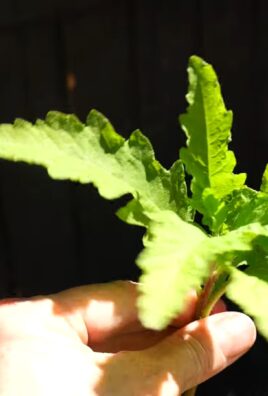
* Radish Sprouts: These sprouts have a spicy, radish-like flavor. They’re a good source of vitamin C and antioxidants.
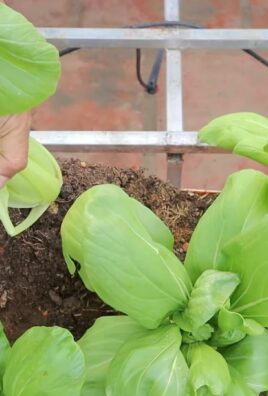
* Mung Bean Sprouts: These are the sprouts you often see in Asian cuisine. They have a mild, slightly sweet flavor and are a good source of protein and fiber.
* Lentil Sprouts: These sprouts have a slightly earthy flavor and are a good source of protein and iron.
* Clover Sprouts: These sprouts have a mild, slightly sweet flavor and are a good source of vitamins and minerals.
When choosing your seeds, make sure they are specifically labeled for sprouting. Regular garden seeds may be treated with chemicals that are not safe for consumption. Also, start with small quantities. A tablespoon or two of seeds will yield a surprising amount of sprouts!
The Sprouting Process: Step-by-Step
Alright, let’s get down to the nitty-gritty. Here’s how to grow your own sprouts at home:
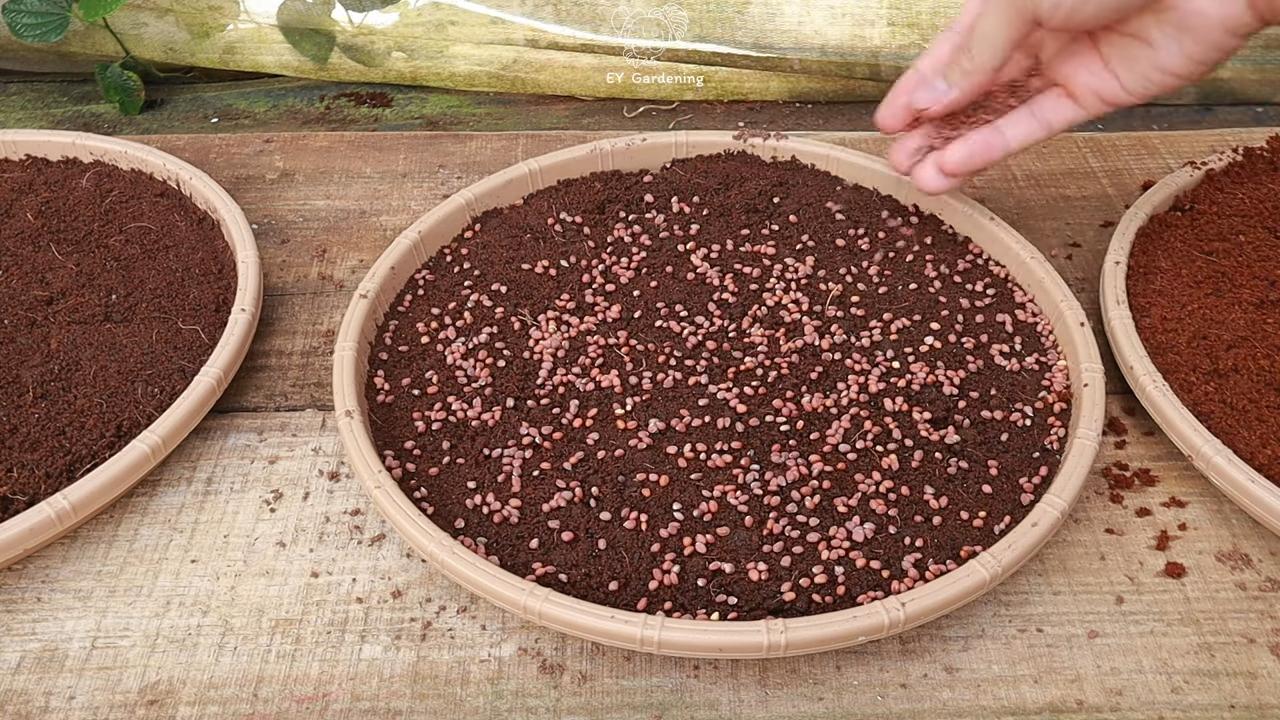
1. Rinse the Seeds: Place your seeds in a strainer and rinse them thoroughly under cool water. This will remove any debris or dust.
2. Soak the Seeds: Transfer the rinsed seeds to your sprouting jar or container. Add enough cool water to cover the seeds by at least two to three times their volume. The seeds will expand as they soak.
3. Soaking Time: The soaking time varies depending on the type of seed. Here’s a general guideline:
* Alfalfa, clover, radish, and broccoli: 4-8 hours
* Mung beans and lentils: 8-12 hours
I usually soak my seeds overnight for convenience.
4. Drain and Rinse: After the soaking period, drain the water completely using your sprouting lid or mesh cover. Rinse the seeds thoroughly with cool water.
5. Invert and Drain: Invert the jar or container at an angle to allow excess water to drain out. This is crucial to prevent the seeds from becoming waterlogged and developing mold.
6. Dark Storage: Place the jar or container in a dark, well-ventilated place, such as a cupboard or drawer. The sprouts need darkness to germinate properly.
7. Rinse and Drain (Twice Daily): This is the most important step! Rinse and drain the sprouts twice a day (morning and evening) with cool water. This keeps them hydrated and prevents mold growth. Make sure to drain the water thoroughly each time.
8. Light Exposure (After Germination): After a few days (usually 2-4 days, depending on the seed), you’ll start to see tiny sprouts emerging. At this point, move the jar or container to a well-lit area, such as a windowsill or countertop. Avoid direct sunlight, as it can overheat the sprouts.
9. Green Up: Exposing the sprouts to light will help them develop their green color. Continue to rinse and drain them twice a day.
10. Harvesting: Your sprouts are ready to harvest when they have reached your desired length and have developed their characteristic flavor. This usually takes 3-7 days, depending on the type of seed and your growing conditions.
11. Final Rinse: Before eating, give your sprouts a final rinse under cool water.
12. Storage: Store your harvested sprouts in a clean, airtight container in the refrigerator. They should last for up to a week.
Troubleshooting
Even with the best intentions, sometimes things can go wrong. Here are a few common problems and how to fix them:
* Mold: Mold is the biggest enemy of sprouts. It usually appears as fuzzy, white or gray patches. If you see mold, discard the entire batch of sprouts. To prevent mold, make sure you’re rinsing and draining the sprouts thoroughly twice a day. Good air circulation is also important. Don’t overcrowd the jar with too many seeds.
* Unpleasant Odor: A foul smell is another sign of spoilage. Discard the sprouts immediately. Again, proper rinsing and drainage are key to preventing this.
* Slow Germination: If your seeds aren’t sprouting, it could be due to several factors. The seeds might be old or of poor quality. The temperature might be too cold. Make sure you’re using fresh, high-quality seeds and that the temperature is between 65-75°F (18-24°C).
* Dry Sprouts: If your sprouts look dry and wilted, you’re probably not rinsing them often enough. Increase the frequency of rinsing to three times a day.
Tips and Tricks for Sprouting Success
Here are a few extra tips to help you become a sprouting master:
* Use a Sprouting Lid: A sprouting lid with a mesh screen makes rinsing and draining much easier.
* Rotate the Jar: When the sprouts are in the light, rotate the jar or container regularly to ensure even greening.
* Don’t Overcrowd: Don’t put too many seeds in the jar. They need room to expand and grow.
* Experiment with Different Seeds: Try different types of seeds to find your favorites.
* Keep it Clean: Always use clean jars, containers, and utensils to prevent contamination.
* Enjoy Your Sprouts! Add them to salads, sandwiches, soups, stir-fries, or eat them as a snack.
Cleaning Your Sprouting Equipment
Keeping your sprouting equipment clean is essential to prevent the growth of mold and bacteria. After each batch of sprouts, thoroughly wash your jar or container, sprouting lid, and any other utensils you used with hot, soapy water. You can also sanitize them by soaking them in a solution of 1 tablespoon of bleach per gallon of water for 10 minutes. Rinse them thoroughly with clean water before using them again.
Sprout Recipes to Try
Now that you’ve got a batch of fresh sprouts, let’s talk about how to use them! Here are a few of my favorite ways to enjoy sprouts:
* Sprout Salad: Combine sprouts with your favorite vegetables, such as cucumbers, tomatoes, carrots, and bell peppers. Dress with a light vinaigrette.
* Sprout Sandwich: Add sprouts to your favorite sandwich for a crunchy and nutritious boost. They’re especially good on avocado toast or turkey sandwiches.
* Sprout Stir-Fry: Toss sprouts into your favorite stir-fry during the last few minutes of cooking. They add a nice crunch and freshness.
* Sprout Soup: Sprinkle sprouts on top of your favorite soup for added texture and flavor.
*
Conclusion
So, there you have it! Growing sprouts at home is not only incredibly easy and cost-effective, but it’s also a fantastic way to inject fresh, vibrant nutrients into your diet all year round. Forget those limp, expensive sprouts from the grocery store. With just a few simple supplies and a little patience, you can cultivate a thriving mini-garden right in your kitchen.
The beauty of this DIY project lies in its versatility. Experiment with different types of seeds – alfalfa, broccoli, radish, mung beans, lentils, and even sunflower seeds all offer unique flavors and textures. Try creating your own sprout mixes for a personalized culinary experience. Imagine a spicy radish and broccoli sprout blend to top your tacos, or a mild alfalfa and lentil mix for a refreshing salad.
Beyond the variety of seeds, you can also play around with the sprouting method. While the jar method is a classic and reliable choice, consider exploring other options like sprouting trays or even hemp mats for a slightly different approach. Each method offers its own advantages, so find what works best for you and your lifestyle.
Growing sprouts at home is a game-changer. It’s a sustainable way to access fresh produce, reduces your reliance on store-bought options, and empowers you to take control of your food source. Plus, it’s incredibly rewarding to watch those tiny seeds transform into nutrient-packed sprouts in just a matter of days.
Don’t be intimidated if you’ve never tried sprouting before. It’s a forgiving process, and even if your first batch isn’t perfect, you’ll learn something valuable. The key is to maintain consistent moisture and ensure proper drainage to prevent mold growth.
We wholeheartedly encourage you to give this DIY trick a try. It’s a simple yet profound way to enhance your health, connect with nature, and add a burst of flavor to your meals. Once you experience the satisfaction of harvesting your own homegrown sprouts, you’ll be hooked!
We’d love to hear about your sprouting adventures! Share your experiences, tips, and favorite sprout combinations in the comments below. Let’s build a community of home sprouters and inspire others to embrace this healthy and sustainable practice. Happy sprouting!
Frequently Asked Questions (FAQ)
What types of seeds are best for sprouting?
The best seeds for sprouting are those specifically labeled for sprouting or microgreens. These seeds have been tested for pathogens and are more likely to germinate successfully. Popular choices include alfalfa, broccoli, radish, mung beans, lentils, clover, and sunflower seeds. Avoid using seeds intended for planting in the garden, as they may be treated with chemicals that are not safe for consumption. Always purchase your seeds from a reputable source to ensure quality and safety.
How long does it take for sprouts to grow?
The sprouting time varies depending on the type of seed. Generally, most sprouts are ready to harvest within 3 to 7 days. Alfalfa and clover sprouts typically take 5 to 6 days, while radish and broccoli sprouts may be ready in as little as 3 to 4 days. Mung beans, often used for bean sprouts, can take 5 to 7 days. Keep a close eye on your sprouts and harvest them when they reach your desired length and flavor.
How do I prevent mold from growing on my sprouts?
Mold growth is a common concern when sprouting, but it can be easily prevented with proper technique. The most important factor is ensuring adequate drainage and ventilation. Rinse your sprouts thoroughly at least twice a day, and make sure to drain all excess water. Avoid overcrowding the sprouting container, as this can restrict airflow. If you notice any signs of mold, such as a fuzzy or slimy texture, discard the entire batch immediately. Using clean equipment and high-quality seeds can also help minimize the risk of mold growth.
How do I store sprouts after harvesting?
Once your sprouts are ready to harvest, rinse them thoroughly and drain them well. Pat them dry with a clean paper towel or use a salad spinner to remove excess moisture. Store the sprouts in an airtight container in the refrigerator. They should last for up to a week, but it’s best to consume them within a few days for optimal freshness and flavor.
Are there any health benefits to eating sprouts?
Yes, sprouts are packed with nutrients and offer numerous health benefits. They are a rich source of vitamins, minerals, enzymes, and antioxidants. Sprouts are also a good source of fiber, which aids in digestion. The sprouting process increases the bioavailability of nutrients, making them easier for the body to absorb. Eating sprouts can boost your immune system, improve digestion, and protect against chronic diseases.
Can I grow sprouts without a special sprouting jar?
Absolutely! While sprouting jars are convenient, you can easily grow sprouts using other household items. A wide-mouth mason jar with a cheesecloth or mesh lid secured with a rubber band works perfectly well. You can also use a colander lined with cheesecloth or a sprouting tray with drainage holes. The key is to ensure proper drainage and ventilation, regardless of the container you use.
What if my sprouts don’t germinate?
If your sprouts aren’t germinating, there could be several reasons. First, make sure your seeds are viable and specifically intended for sprouting. Old or damaged seeds may not germinate properly. Second, ensure that the seeds are receiving adequate moisture. They should be consistently moist but not waterlogged. Third, check the temperature. Most sprouts prefer a temperature range of 65-75°F (18-24°C). Finally, avoid exposing the sprouts to direct sunlight, as this can inhibit germination.
Can I eat the roots of sprouts?
Yes, the roots of most sprouts are perfectly edible and nutritious. They are often the most flavorful part of the sprout. However, some people may find the texture of the roots slightly different from the rest of the sprout. Ultimately, it’s a matter of personal preference.
Are there any sprouts I should avoid eating?
While most sprouts are safe to eat, there are a few exceptions. Avoid eating sprouts from nightshade plants, such as tomatoes, potatoes, and eggplants, as they contain toxins. Also, be cautious with sprouts that have a bitter or unpleasant taste, as this could indicate the presence of harmful compounds. Always purchase your seeds from a reputable source and follow proper sprouting techniques to minimize the risk of contamination.
How can I incorporate sprouts into my diet?
There are countless ways to enjoy sprouts! Add them to salads, sandwiches, wraps, and tacos for a boost of flavor and nutrients. Use them as a topping for soups, stews, and stir-fries. Blend them into smoothies or juices for a healthy and refreshing drink. You can even use sprouts as a garnish for your favorite dishes. Get creative and experiment with different ways to incorporate sprouts into your meals.
Leave a Comment