
Growing Purple Bush Beans: Ever dreamt of strolling through your backyard, basket in hand, and harvesting vibrant, jewel-toned beans? I know I have! There’s something incredibly satisfying about nurturing your own food, and growing purple bush beans is a fantastic way to add a splash of color and nutrition to your garden and plate.
For centuries, beans have been a staple crop in cultures worldwide, providing essential protein and nutrients. While the common green bean is a familiar sight, purple bush beans offer a unique twist. Their striking color isn’t just for show; it’s packed with anthocyanins, powerful antioxidants that are great for your health. Think of them as nature’s little superheroes!
But why should *you* consider growing purple bush beans? Well, beyond their nutritional benefits and stunning appearance, they’re incredibly easy to cultivate, even for beginner gardeners. This DIY guide is packed with simple tricks and hacks to ensure a bountiful harvest. I’ll walk you through everything from selecting the right seeds to protecting your plants from pests, so you can enjoy fresh, delicious purple bush beans all season long. Forget those bland supermarket veggies – let’s get our hands dirty and start growing purple bush beans like a pro!
Growing Purple Bush Beans: A DIY Guide for a Vibrant Garden
Hey there, fellow gardening enthusiasts! I’m so excited to share my experience growing purple bush beans. They’re not only delicious but also add a beautiful splash of color to your garden. Trust me, watching those vibrant purple pods emerge is incredibly rewarding. This guide will walk you through every step, from choosing the right seeds to harvesting your bountiful crop. Let’s get started!
Choosing Your Purple Bush Bean Variety
Before we dive into the planting process, let’s talk about choosing the right variety. There are several types of purple bush beans, each with its own unique characteristics. Here are a few popular options:
* Royal Burgundy: This is a classic choice, known for its deep purple pods and excellent flavor. It’s also relatively early-maturing, which is great if you’re impatient like me!
* Purple Queen: Another reliable variety with beautiful purple pods. It’s known for its high yields and resistance to certain diseases.
* Amethyst: This variety boasts long, slender purple pods and a slightly sweeter flavor.
I personally love ‘Royal Burgundy’ because of its rich color and consistent performance. But feel free to experiment and find the variety that suits your taste and climate best.
Preparing Your Garden Bed
Proper soil preparation is crucial for healthy bean plants. Beans need well-drained soil that’s rich in organic matter. Here’s how I prepare my garden bed:
1. Choose a Sunny Location: Purple bush beans need at least 6-8 hours of direct sunlight per day. Find a spot in your garden that gets plenty of sunshine.
2. Clear the Area: Remove any weeds, rocks, or debris from the planting area. I like to use a garden fork to loosen the soil and make it easier to work with.
3. Amend the Soil: This is where the magic happens! Amend the soil with compost, well-rotted manure, or other organic matter. This will improve drainage, fertility, and water retention. I usually add a generous layer of compost, about 2-3 inches thick, and mix it thoroughly into the soil.
4. Check the Soil pH: Beans prefer a slightly acidic to neutral soil pH, around 6.0 to 7.0. You can use a soil testing kit to check the pH and amend it accordingly. If your soil is too acidic, add lime. If it’s too alkaline, add sulfur.
5. Create Raised Rows (Optional): If your soil is heavy or poorly drained, consider creating raised rows. This will improve drainage and prevent root rot. I usually make my rows about 6-8 inches high and 12 inches wide.
Planting Your Purple Bush Beans
Now for the fun part – planting! Here’s my step-by-step guide:
1. Wait for Warm Weather: Purple bush beans are sensitive to frost, so wait until the danger of frost has passed before planting. The soil temperature should be at least 60°F (15°C). I usually plant my beans about 2 weeks after the last expected frost.
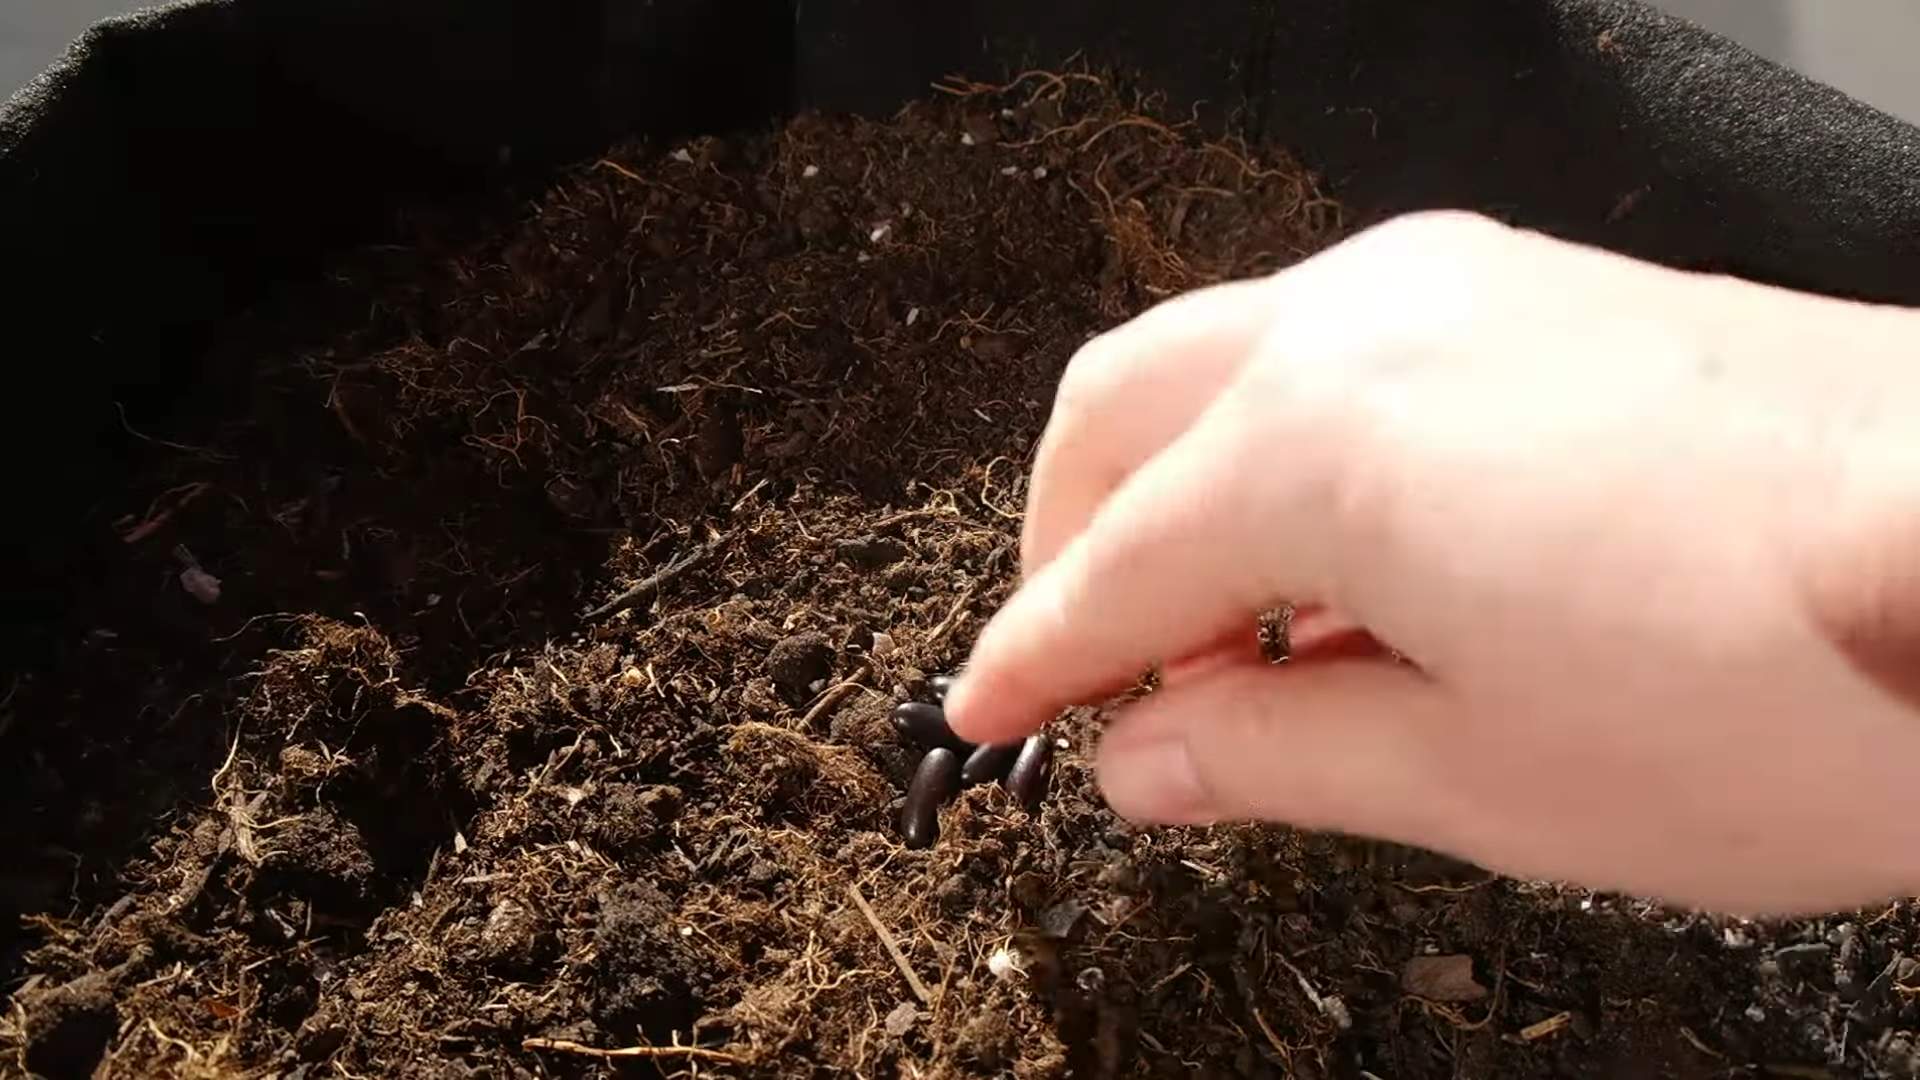
2. Sow the Seeds Directly: Beans are best sown directly into the garden, as they don’t transplant well.
3. Planting Depth and Spacing: Sow the seeds about 1 inch deep and 2-3 inches apart in rows. Space the rows about 18-24 inches apart. I like to use a dibber or my finger to make small holes for the seeds.
4. Cover the Seeds: Gently cover the seeds with soil and pat it down lightly.
5. Water Thoroughly: Water the planting area thoroughly after sowing. This will help the seeds germinate and establish roots.
Caring for Your Purple Bush Beans
Once your beans are planted, it’s important to provide them with the care they need to thrive. Here’s what I do:
1. Watering: Keep the soil consistently moist, but not waterlogged. Water deeply whenever the top inch of soil feels dry. I usually water my beans every 2-3 days, depending on the weather.
2. Weeding: Keep the garden bed free of weeds, which can compete with the beans for nutrients and water. I like to hand-pull weeds regularly or use a hoe to cultivate the soil.
3. Fertilizing: Beans are nitrogen-fixing plants, meaning they can convert atmospheric nitrogen into a form that plants can use. However, they still benefit from a balanced fertilizer. I usually apply a side dressing of compost tea or a diluted liquid fertilizer every few weeks.
4. Pest Control: Keep an eye out for common bean pests, such as aphids, bean beetles, and slugs. I prefer to use organic pest control methods, such as insecticidal soap, neem oil, or diatomaceous earth.
5. Support (Optional): While bush beans don’t require staking like pole beans, providing some support can help keep the plants upright and prevent the pods from touching the soil. I sometimes use small tomato cages or bean towers to support my plants.
Harvesting Your Purple Bush Beans
Harvesting is the most rewarding part of growing purple bush beans! Here’s how I do it:
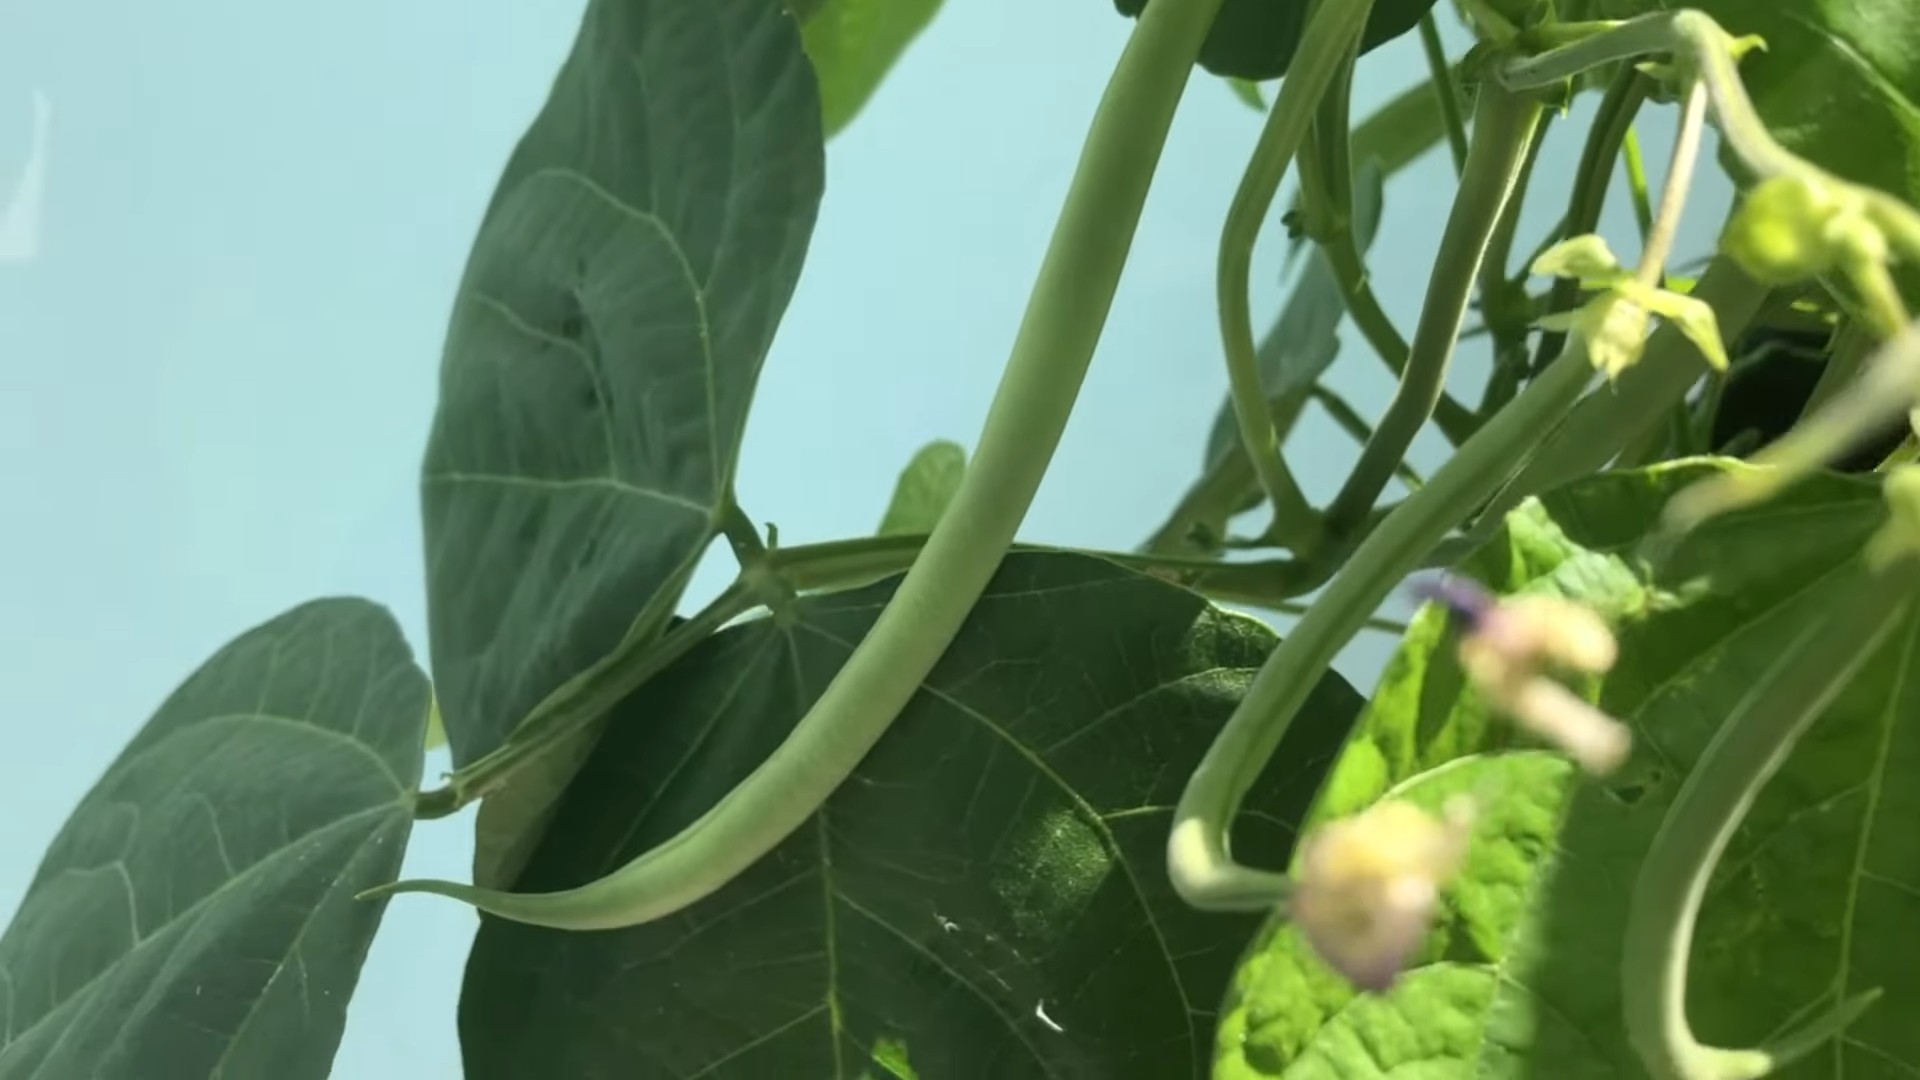
1. Harvest Time: Purple bush beans are typically ready to harvest about 50-60 days after planting. The pods should be firm, plump, and about 4-6 inches long.
2. Check the Color: The pods should be a deep, vibrant purple color. If they start to turn green or yellow, they’re overripe.
3. Harvesting Technique: Gently snap the pods off the plant, being careful not to damage the stems. I like to use two hands – one to hold the stem and the other to pull the pod.
4. Harvest Regularly: Harvest the beans regularly, every 2-3 days, to encourage continued production. The more you harvest, the more beans the plants will produce.
5. Enjoy Your Harvest: Purple bush beans are delicious steamed, sautéed, or added to salads. They can also be frozen or canned for later use.
Troubleshooting Common Problems
Even with the best care, you may encounter some problems while g
Hey there, fellow gardening enthusiasts! I’m so excited to share my experience growing purple bush beans. They’re not only delicious but also add a beautiful splash of color to your garden. Trust me, watching those vibrant purple pods emerge is incredibly rewarding. This guide will walk you through every step, from choosing the right seeds to harvesting your bountiful crop. Let’s get started!
Choosing Your Purple Bush Bean Variety
Before we dive into the planting process, let’s talk about choosing the right variety. There are several types of purple bush beans, each with its own unique characteristics. Here are a few popular options:
* Royal Burgundy: This is a classic choice, known for its deep purple pods and excellent flavor. It’s also relatively early-maturing, which is great if you’re impatient like me!
* Purple Queen: Another reliable variety with beautiful purple pods. It’s known for its high yields and resistance to certain diseases.
* Amethyst: This variety boasts long, slender purple pods and a slightly sweeter flavor.
I personally love ‘Royal Burgundy’ because of its rich color and consistent performance. But feel free to experiment and find the variety that suits your taste and climate best.
Preparing Your Garden Bed
Proper soil preparation is crucial for healthy bean plants. Beans need well-drained soil that’s rich in organic matter. Here’s how I prepare my garden bed:
1. Choose a Sunny Location: Purple bush beans need at least 6-8 hours of direct sunlight per day. Find a spot in your garden that gets plenty of sunshine.
2. Clear the Area: Remove any weeds, rocks, or debris from the planting area. I like to use a garden fork to loosen the soil and make it easier to work with.
3. Amend the Soil: This is where the magic happens! Amend the soil with compost, well-rotted manure, or other organic matter. This will improve drainage, fertility, and water retention. I usually add a generous layer of compost, about 2-3 inches thick, and mix it thoroughly into the soil.
4. Check the Soil pH: Beans prefer a slightly acidic to neutral soil pH, around 6.0 to 7.0. You can use a soil testing kit to check the pH and amend it accordingly. If your soil is too acidic, add lime. If it’s too alkaline, add sulfur.
5. Create Raised Rows (Optional): If your soil is heavy or poorly drained, consider creating raised rows. This will improve drainage and prevent root rot. I usually make my rows about 6-8 inches high and 12 inches wide.
Planting Your Purple Bush Beans
Now for the fun part – planting! Here’s my step-by-step guide:
1. Wait for Warm Weather: Purple bush beans are sensitive to frost, so wait until the danger of frost has passed before planting. The soil temperature should be at least 60°F (15°C). I usually plant my beans about 2 weeks after the last expected frost.
2. Sow the Seeds Directly: Beans are best sown directly into the garden, as they don’t transplant well.
3. Planting Depth and Spacing: Sow the seeds about 1 inch deep and 2-3 inches apart in rows. Space the rows about 18-24 inches apart. I like to use a dibber or my finger to make small holes for the seeds.
4. Cover the Seeds: Gently cover the seeds with soil and pat it down lightly.
5. Water Thoroughly: Water the planting area thoroughly after sowing. This will help the seeds germinate and establish roots.
Caring for Your Purple Bush Beans
Once your beans are planted, it’s important to provide them with the care they need to thrive. Here’s what I do:
1. Watering: Keep the soil consistently moist, but not waterlogged. Water deeply whenever the top inch of soil feels dry. I usually water my beans every 2-3 days, depending on the weather.
2. Weeding: Keep the garden bed free of weeds, which can compete with the beans for nutrients and water. I like to hand-pull weeds regularly or use a hoe to cultivate the soil.
3. Fertilizing: Beans are nitrogen-fixing plants, meaning they can convert atmospheric nitrogen into a form that plants can use. However, they still benefit from a balanced fertilizer. I usually apply a side dressing of compost tea or a diluted liquid fertilizer every few weeks.
4. Pest Control: Keep an eye out for common bean pests, such as aphids, bean beetles, and slugs. I prefer to use organic pest control methods, such as insecticidal soap, neem oil, or diatomaceous earth.
5. Support (Optional): While bush beans don’t require staking like pole beans, providing some support can help keep the plants upright and prevent the pods from touching the soil. I sometimes use small tomato cages or bean towers to support my plants.
Harvesting Your Purple Bush Beans
Harvesting is the most rewarding part of growing purple bush beans! Here’s how I do it:
1. Harvest Time: Purple bush beans are typically ready to harvest about 50-60 days after planting. The pods should be firm, plump, and about 4-6 inches long.
2. Check the Color: The pods should be a deep, vibrant purple color. If they start to turn green or yellow, they’re overripe.
3. Harvesting Technique: Gently snap the pods off the plant, being careful not to damage the stems. I like to use two hands – one to hold the stem and the other to pull the pod.
4. Harvest Regularly: Harvest the beans regularly, every 2-3 days, to encourage continued production. The more you harvest, the more beans the plants will produce.
5. Enjoy Your Harvest: Purple bush beans are delicious steamed, sautéed, or added to salads. They can also be frozen or canned for later use.
Troubleshooting Common Problems
Even with the best care, you may encounter some problems while growing purple bush beans. Here are a few common issues and how to address them:
* Poor Germination: If your bean seeds aren’t germinating, it could be due to cold soil, poor soil drainage, or old seeds. Make sure the soil temperature is at least 60°F (15°C), improve drainage by amending the soil with compost, and use fresh seeds.
* Yellowing Leaves: Yellowing leaves can be a sign of nutrient deficiency, overwatering, or disease. Check the soil pH and nutrient levels, adjust your watering schedule, and treat any diseases with appropriate fungicides or organic remedies.
* Pest Infestations: As mentioned earlier, beans are susceptible to various pests. Regularly inspect your plants for signs of infestation and take action promptly.
* Blossom Drop: Blossom drop, where the flowers fall off the plant without producing pods, can be caused by hot weather, lack of pollination, or nutrient deficiency. Ensure adequate watering, provide shade during the hottest part of the day, and fertilize with a balanced fertilizer.
Saving Seeds for Next Year
If you want to save seeds from your purple bush beans for next year, here’s how:
1. Select Healthy Plants: Choose healthy, vigorous plants with desirable traits.
2. Allow Pods to Mature: Allow some of the pods to mature fully on the plant. The pods will turn brown and dry out.
3. Harvest the Pods: Harvest the dry pods and remove the seeds.
4. Dry the Seeds: Spread the seeds out on a tray and allow them to dry completely in a cool, dry place.
5. Store the Seeds: Store the dried seeds in an airtight container in a cool, dark, and dry place. They should remain viable for several years.
Enjoying the Fruits (or Beans!) of Your Labor
Growing purple bush beans is a truly rewarding experience. Not only will you have a beautiful and productive garden, but you’ll also enjoy the delicious and nutritious beans you’ve grown yourself. So, get out there, get your hands dirty, and start growing! Happy gardening!
Conclusion
So, there you have it! Growing purple bush beans isn’t just about adding a splash of vibrant color to your garden; it’s about unlocking a world of flavor, nutrition, and gardening satisfaction. This DIY trick, focusing on optimal soil preparation and consistent watering, is a game-changer for anyone looking to maximize their yield of these beautiful and delicious beans. Forget the bland, store-bought varieties – imagine the burst of freshness and the satisfying crunch of homegrown purple bush beans gracing your dinner table.
This method isn’t just a suggestion; it’s a must-try for several reasons. First, it addresses the specific needs of purple bush beans, ensuring they receive the nutrients and moisture they require to thrive. Second, it’s incredibly cost-effective. You’re utilizing readily available resources and simple techniques to achieve professional-level results. Third, it’s empowering! Taking control of your food source and nurturing these plants from seed to harvest is an incredibly rewarding experience.
But don’t stop there! Feel free to experiment with variations to personalize your growing experience. Try companion planting with herbs like rosemary or thyme to deter pests and enhance the flavor of your beans. Consider using different types of organic mulch to retain moisture and suppress weeds. If you’re growing in containers, ensure they have adequate drainage and are large enough to accommodate the bush bean’s root system. You can even try succession planting, sowing new seeds every few weeks, to enjoy a continuous harvest throughout the growing season.
The key to success lies in consistent care and attention. Regularly check your plants for pests and diseases, and address any issues promptly. Remember, healthy plants are more resistant to problems. And most importantly, don’t be afraid to get your hands dirty! Gardening is a learning process, and every season brings new opportunities to refine your techniques and improve your results.
We’re confident that this DIY trick will transform your purple bush bean growing experience. It’s a simple, effective, and rewarding way to cultivate these delightful vegetables. Now, it’s your turn! We encourage you to give it a try and share your experiences with us. Let us know how it worked for you, what variations you experimented with, and any tips you discovered along the way. Your feedback will help us refine this method and empower other gardeners to achieve success. Share your photos and stories on our social media channels using #PurpleBushBeanMagic. We can’t wait to see your vibrant harvests! Happy gardening!
Frequently Asked Questions (FAQ)
What exactly are purple bush beans, and why should I grow them?
Purple bush beans are a variety of common bean (Phaseolus vulgaris) characterized by their distinctive purple pods. They are a bush-type bean, meaning they grow in a compact, upright form rather than as a climbing vine. Growing them offers several advantages:
* **Unique Flavor:** They have a slightly sweeter and more delicate flavor than green beans.
* **Nutritional Value:** They are packed with vitamins, minerals, and antioxidants. The purple color comes from anthocyanins, powerful antioxidants that offer various health benefits.
* **Visual Appeal:** The vibrant purple color adds a beautiful touch to your garden and your plate.
* **Easy to Grow:** Bush beans are generally easier to grow than pole beans, making them a great choice for beginner gardeners.
* **Space-Saving:** Their compact growth habit makes them ideal for small gardens or container gardening.
What kind of soil is best for growing purple bush beans?
Purple bush beans thrive in well-drained soil that is rich in organic matter. The ideal soil pH is between 6.0 and 7.0. Before planting, amend your soil with compost or well-rotted manure to improve its fertility and drainage. Avoid heavy clay soils, as they can become waterlogged and hinder root growth. If you have clay soil, consider adding sand or other amendments to improve drainage. A soil test can help you determine the pH and nutrient levels of your soil and guide you on what amendments to add.
How often should I water my purple bush beans?
Consistent watering is crucial for successful purple bush bean cultivation. Water deeply and regularly, especially during hot, dry weather. Aim to keep the soil consistently moist but not waterlogged. A good rule of thumb is to water when the top inch of soil feels dry to the touch. Mulching around the plants can help retain moisture and reduce the need for frequent watering. Avoid overhead watering, as it can promote fungal diseases. Instead, water at the base of the plants.
What are some common pests and diseases that affect purple bush beans, and how can I prevent them?
Several pests and diseases can affect purple bush beans, including:
* **Bean Beetles:** These beetles can damage leaves and pods. Handpicking, insecticidal soap, or neem oil can help control them.
* **Aphids:** These small insects suck sap from plants, causing stunted growth. A strong spray of water, insecticidal soap, or neem oil can help control them.
* **Powdery Mildew:** This fungal disease appears as a white, powdery coating on leaves. Ensure good air circulation, avoid overhead watering, and use a fungicide if necessary.
* **Root Rot:** This fungal disease can occur in poorly drained soil. Ensure good drainage and avoid overwatering.
To prevent pests and diseases, practice good garden hygiene, such as removing plant debris and weeds. Rotate your crops each year to prevent the buildup of soilborne diseases. Consider using companion planting to deter pests and attract beneficial insects.
When is the best time to harvest purple bush beans?
Purple bush beans are typically ready to harvest about 50-60 days after planting. Harvest them when the pods are firm, plump, and about the size of a pencil. Avoid letting the pods become too large or tough. Regular harvesting encourages continued production. Snap the beans off the plant carefully to avoid damaging the stems.
Can I grow purple bush beans in containers?
Yes, purple bush beans can be successfully grown in containers. Choose a container that is at least 12 inches deep and wide to accommodate the root system. Use a well-draining potting mix and ensure the container has drainage holes. Place the container in a sunny location that receives at least 6-8 hours of sunlight per day. Water regularly and fertilize as needed.
How do I store purple bush beans after harvesting?
Freshly harvested purple bush beans can be stored in the refrigerator for up to a week. Place them in a plastic bag or container to prevent them from drying out. You can also freeze them for longer storage. To freeze, blanch the beans in boiling water for 2-3 minutes, then transfer them to an ice bath to stop the cooking process. Drain the beans thoroughly and freeze them in a single layer on a baking sheet. Once frozen, transfer them to a freezer bag or container.
Will the purple color of the beans disappear when cooked?
Yes, the vibrant purple color of the beans will typically fade to green when cooked. This is due to the heat breaking down the anthocyanins, the pigments responsible for the purple color. However, the flavor and nutritional value of the beans remain the same.
Can I save seeds from my purple bush beans to plant next year?
Yes, you can save seeds from your purple bush beans, but keep in mind that they may not come true to type if cross-pollination has occurred with other bean varieties. To save seeds, allow some of the pods to mature fully on the plant until they are dry and brown. Remove the seeds from the pods and allow them to dry completely before storing them in an airtight container in a cool, dark, and dry place.
What are some creative ways to use my homegrown purple bush beans in recipes?
Purple bush beans are incredibly versatile and can be used in a variety of dishes. Here are a few ideas:
* **Steamed or Sautéed:** Simply steam or sauté the beans with a little olive oil, garlic, and herbs for a simple and delicious side dish.
* **Salads:** Add the beans to salads for a pop of color and flavor.
* **Stir-fries:** Incorporate the beans into stir-fries with other vegetables and protein.
* **Soups and Stews:** Add the beans to soups and stews for added nutrition and texture.
* **Pickled:** Pickle the beans for a tangy and flavorful condiment.
Leave a Comment