
Growing Potatoes in Containers: Imagine harvesting a bounty of fresh, homegrown potatoes right from your patio or balcony! No sprawling garden needed. Sounds too good to be true? It’s not! For centuries, potatoes have been a staple food source, cultivated across diverse cultures from the Andes Mountains to the Irish countryside. Now, you can join this rich agricultural tradition, even with limited space, thanks to the magic of container gardening.
I know what you’re thinking: “Potatoes? In pots?” Absolutely! This DIY guide will unlock the secrets to successfully growing potatoes in containers, offering a practical and rewarding experience for both novice and seasoned gardeners. Forget back-breaking digging and endless weeding. Container gardening brings the joy of fresh produce right to your doorstep.
Why is this DIY trick a must-try? Well, besides the sheer satisfaction of nurturing your own food, growing potatoes in containers offers several advantages. It’s perfect for urban dwellers with limited space, allows for better soil control, and minimizes the risk of soilborne diseases. Plus, harvesting is a breeze! So, grab your containers, some seed potatoes, and let’s embark on this exciting journey to grow your own delicious, homegrown potatoes!
Growing Potatoes in Containers: A Bountiful Harvest on Your Patio!
Hey there, fellow gardening enthusiasts! I’m so excited to share my experience with growing potatoes in containers. It’s a fantastic way to enjoy fresh, homegrown potatoes even if you don’t have a sprawling garden. Plus, it’s surprisingly easy and rewarding. Let’s dive in!
Choosing the Right Potato Variety
First things first, you need to pick the right potato variety. Not all potatoes are created equal when it comes to container gardening. Here are a few of my favorites that have consistently performed well:
* Yukon Gold: These are buttery, flavorful, and mature relatively quickly. They’re a great all-around choice.
* Red Pontiac: These red-skinned potatoes are known for their smooth texture and slightly sweet taste. They also store well.
* Fingerling Potatoes: These unique, elongated potatoes are perfect for salads and roasting. They come in various colors and flavors.
* ‘Irish Cobbler’: An early-maturing variety, great for a quick harvest.
Important Note: Never use potatoes from the grocery store as seed potatoes. They are often treated to prevent sprouting and may carry diseases. Always purchase certified seed potatoes from a reputable garden center.
Preparing Your Seed Potatoes
Before planting, you’ll need to “chit” your seed potatoes. Chitting encourages them to sprout, giving them a head start. Here’s how I do it:
1. Inspect Your Seed Potatoes: Make sure your seed potatoes are firm and healthy. Discard any that are soft, shriveled, or show signs of disease.
2. Cut Large Seed Potatoes (Optional): If your seed potatoes are larger than a golf ball, you can cut them into smaller pieces. Each piece should have at least one or two “eyes” (the little buds where sprouts will emerge). Let the cut surfaces dry for a day or two to prevent rotting.
3. Place in a Bright, Cool Location: Arrange your seed potatoes in a single layer in an egg carton or tray. Place them in a cool, bright location (but not direct sunlight) for about 2-3 weeks. You’ll see small, green sprouts emerging from the eyes.
4. Handle with Care: Be careful not to break off the sprouts when handling the seed potatoes.
Selecting the Right Container and Soil
The container and soil you choose are crucial for success. Here’s what I recommend:
* Container Size: Choose a container that is at least 15 gallons in size. A larger container is even better, as it will give the potatoes more room to grow. I’ve had great results with 20-gallon grow bags.
* Drainage: Make sure your container has excellent drainage. Potatoes don’t like to sit in soggy soil. Drill extra drainage holes if necessary.
* Material: You can use plastic pots, terracotta pots, or grow bags. Grow bags are my personal favorite because they allow for good air circulation and drainage.
* Soil Mix: Use a well-draining potting mix that is rich in organic matter. Avoid using garden soil, as it can become compacted in containers. I like to mix equal parts of potting mix, compost, and perlite.
Planting Your Potatoes
Now for the fun part – planting! Here’s my step-by-step guide:
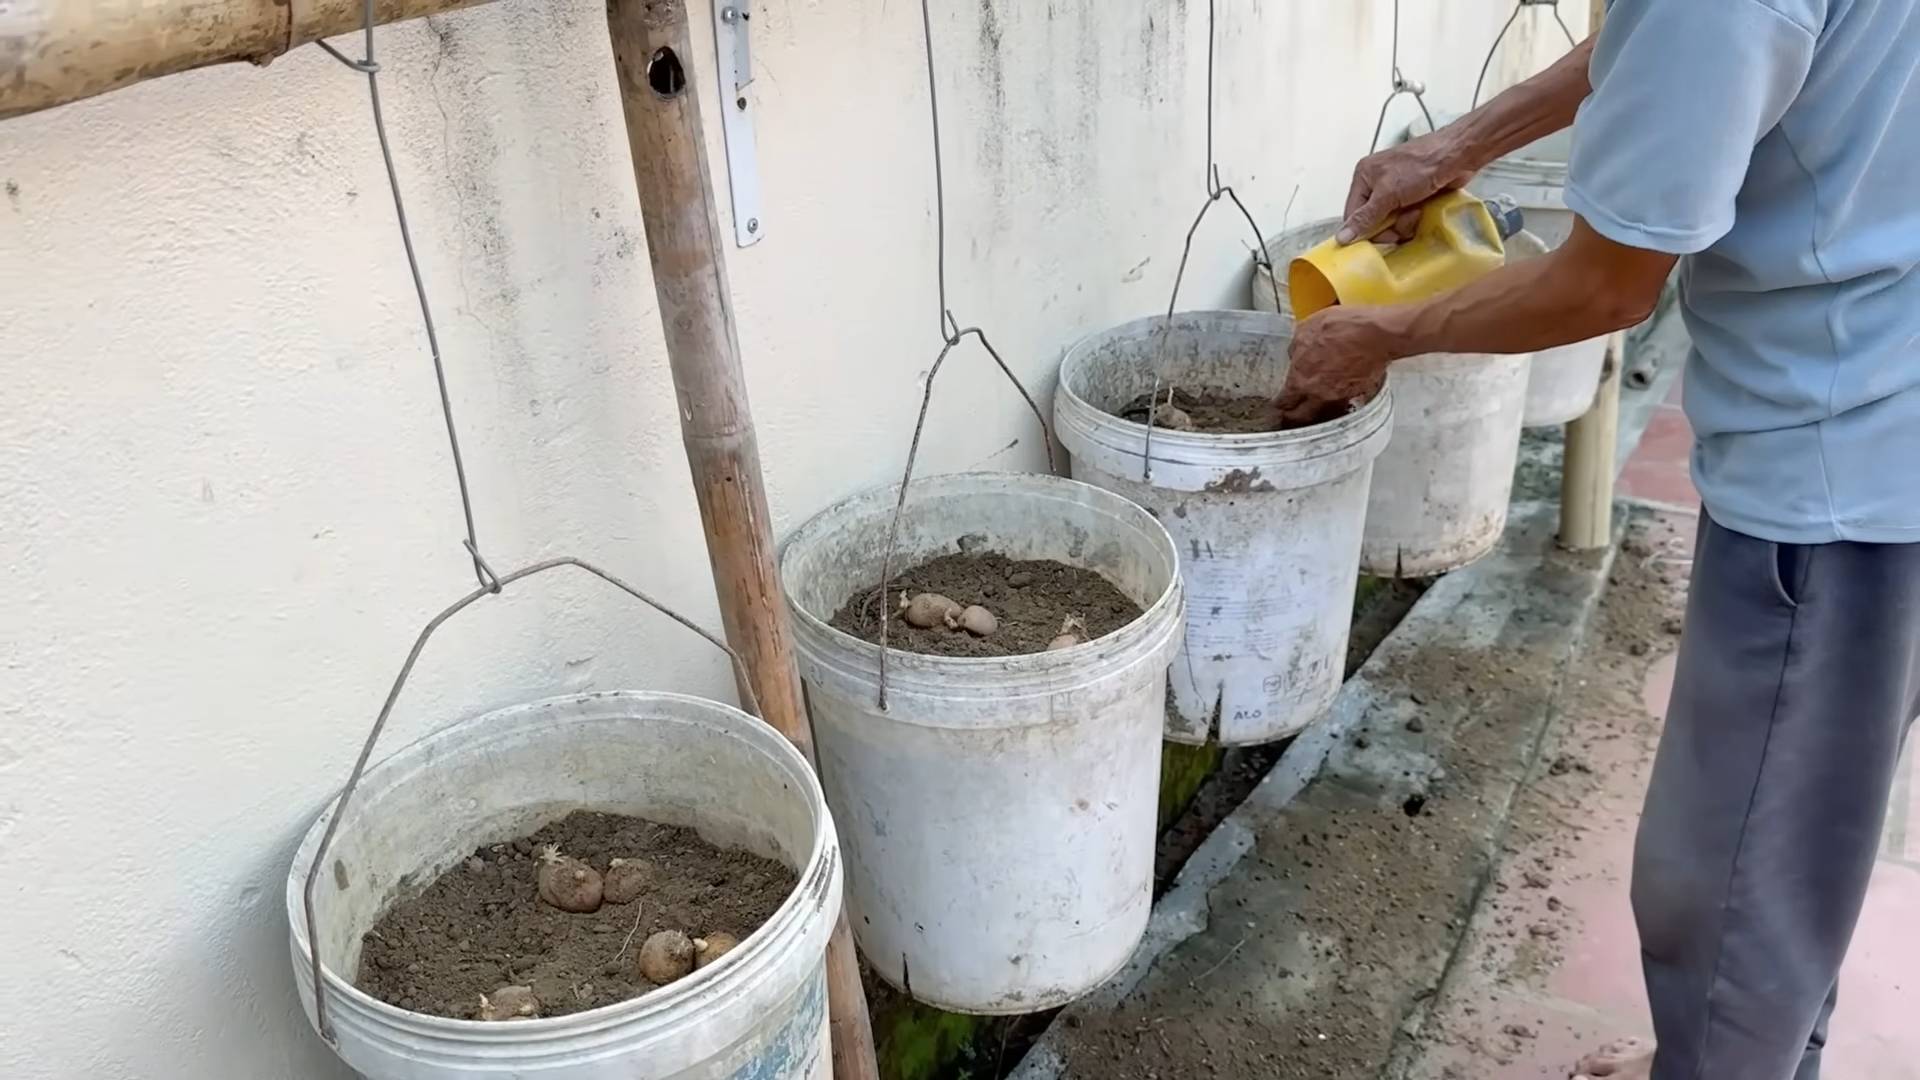
1. Fill the Container: Fill the container with about 4-6 inches of your potting mix.
2. Place the Seed Potatoes: Place the seed potatoes on top of the soil, with the sprouts facing upwards. Space them about 10-12 inches apart if you’re planting multiple seed potatoes in the same container.
3. Cover with Soil: Cover the seed potatoes with another 4-6 inches of soil.
4. Water Thoroughly: Water the soil thoroughly until it is evenly moist.
“Hilling” Your Potatoes
“Hilling” is a crucial technique for growing potatoes in containers. As the potato plants grow, you’ll need to add more soil to the container to encourage the formation of more potatoes along the stems. Here’s how I do it:
1. Wait for Growth: Wait until the potato plants are about 6-8 inches tall.
2. Add More Soil: Add more soil to the container, covering the stems up to the bottom set of leaves. Leave the top leaves exposed.
3. Repeat: Repeat this process every 2-3 weeks as the plants continue to grow, until the container is almost full.
4. Water After Hilling: Water the soil thoroughly after each hilling.
Caring for Your Potato Plants
Proper care is essential for a bountiful harvest. Here’s what I do to keep my potato plants happy and healthy:
1. Watering: Water the potato plants regularly, especially during hot, dry weather. The soil should be consistently moist, but not waterlogged. Check the soil moisture by sticking your finger into the soil. If the top inch feels dry, it’s time to water.
2. Fertilizing: Fertilize the potato plants every 2-3 weeks with a balanced liquid fertilizer. Follow the instructions on the fertilizer label. I like to use a fertilizer that is high in potassium, as this promotes tuber development.
3. Sunlight: Potato plants need at least 6-8 hours of sunlight per day. Place your containers in a sunny location.
4. Pest Control: Keep an eye out for pests such as aphids, potato beetles, and flea beetles. Handpick any pests you find or use an organic insecticide if necessary. I’ve found that neem oil is effective against many common potato pests.
5. Disease Prevention: Prevent fungal diseases by providing good air circulation and avoiding overhead watering. If you notice any signs of disease, such as leaf spots or wilting, remove the affected leaves immediately.
Harvesting Your Potatoes
The moment you’ve been waiting for! Here’s how to harvest your container-grown potatoes:
1. Timing: The timing of your harvest will depend on the potato variety you’re growing. Generally, early-maturing varieties can be harvested about 70-80 days after planting, while late-maturing varieties may take 100-120 days.
2. Signs of Maturity: Look for signs that the potato plants are nearing maturity. The leaves will start to turn yellow and brown, and the plants may start to die back.
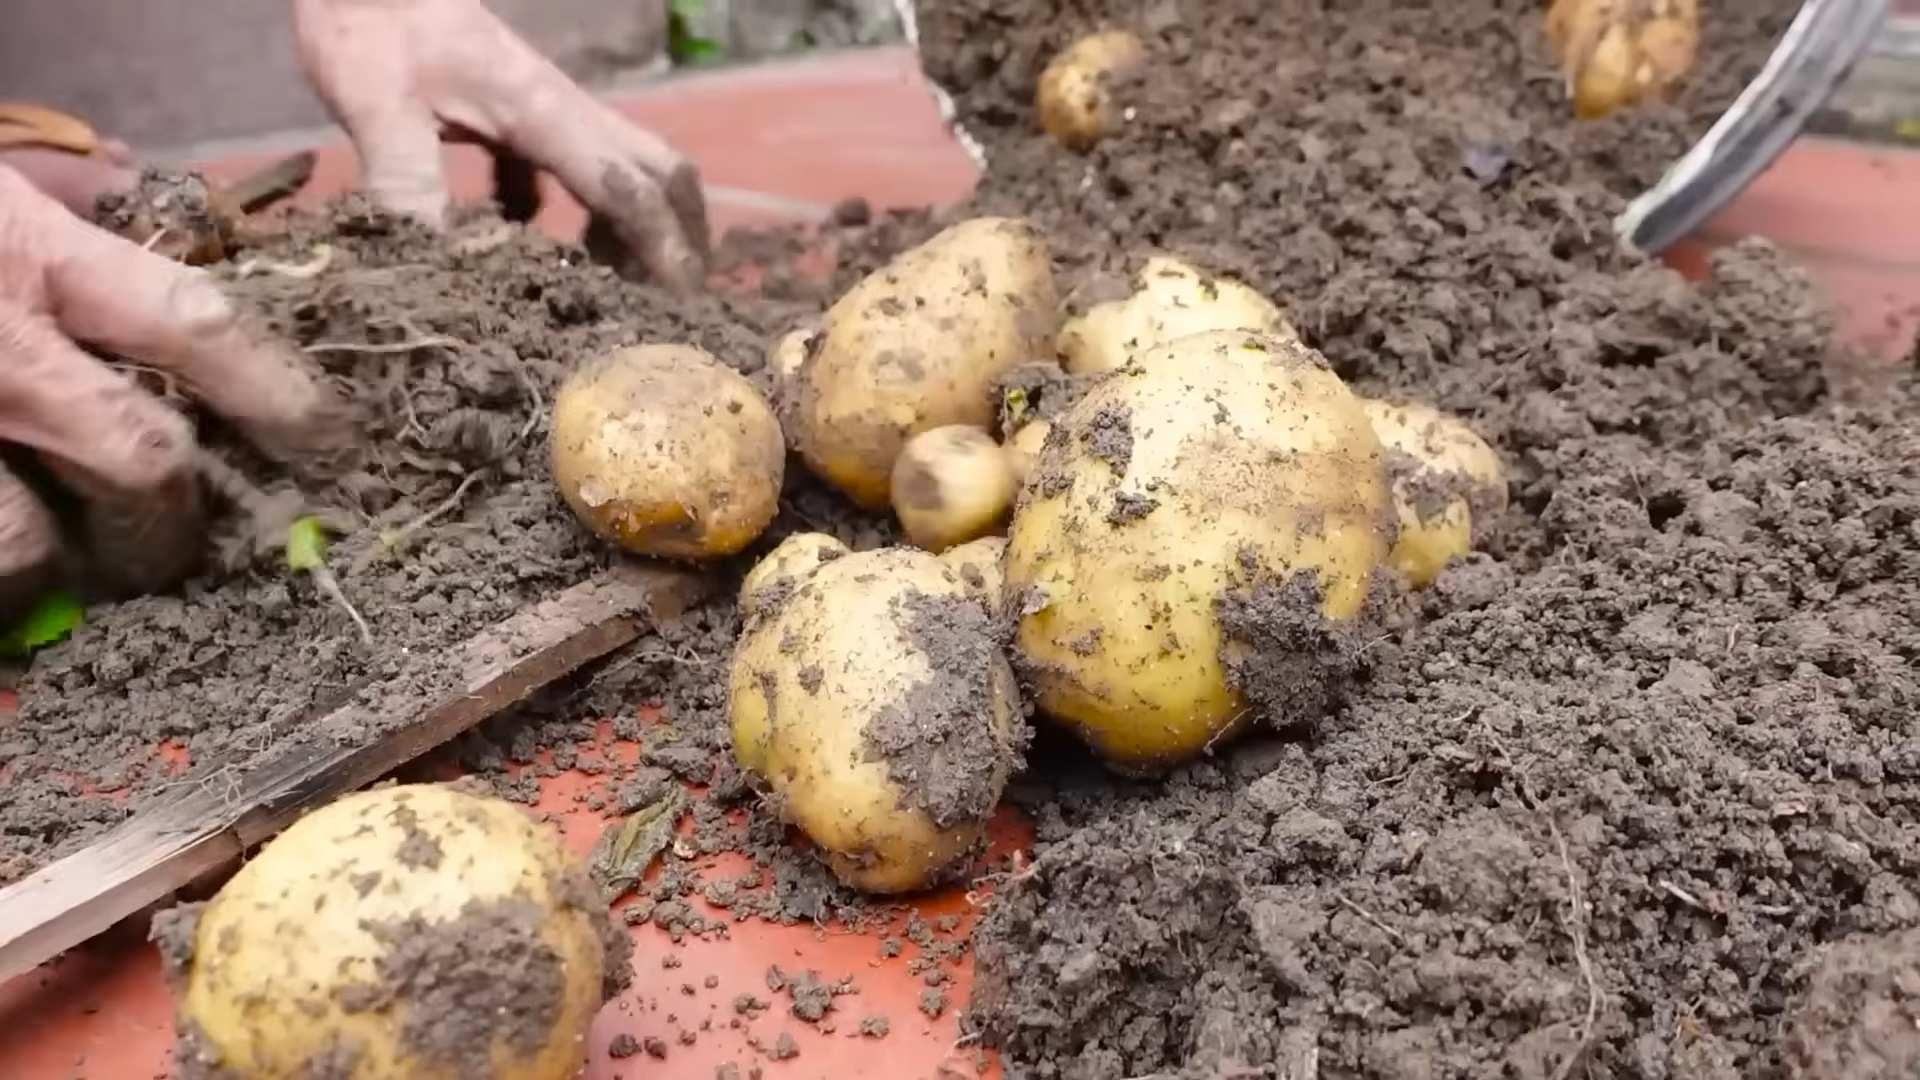
3. Gentle Digging: Stop watering when the foliage starts to die back. Gently tip the container onto its side and carefully remove the soil, being careful not to damage the potatoes. You can also reach into the container and feel around for the potatoes.
4. Harvesting “New” Potatoes: If you want to harvest “new” potatoes (small, tender potatoes), you can start harvesting them a few weeks before the plants are fully mature. Simply reach into the container and carefully remove a few potatoes, leaving the rest to continue growing.
5. Curing (Optional): If you plan to store your potatoes for a longer period, you’ll need to cure them. Spread the potatoes out in a single layer in a cool, dark, and well-ventilated place for about 1-2 weeks. This will help to toughen the skins and prevent rotting.
Troubleshooting Common Problems
Even with the best care, you may encounter some problems when growing potatoes in containers. Here are a few common issues and how to address them:
* Lack of Potatoes: If your potato plants are growing well but not producing many potatoes, it could be due to a lack of sunlight, insufficient watering, or a nutrient deficiency. Make sure your plants are getting enough sunlight, water regularly, and fertilize with a balanced fertilizer.
* Green Potatoes: Potatoes that are exposed to sunlight will turn green. Green potatoes contain solanine, a toxic compound that can cause illness. Discard any green potatoes. To prevent greening, make sure the potatoes are completely covered with soil.
* Potato Scab: Potato scab is a common fungal disease that causes rough, scabby patches on the potato skins. It is more common in alkaline soils. To prevent potato scab, use a slightly acidic potting mix and avoid overwatering.
* Pests: As mentioned earlier, potato plants can be susceptible to various pests. Regularly inspect your plants for pests and take action promptly if you find any.
Enjoying Your Homegrown Potatoes
Congratulations! You’ve successfully grown potatoes in containers. Now it’s time to enjoy the fruits (or rather, tubers) of your labor. There are endless ways to prepare and enjoy your homegrown potatoes. Here are a few of my favorites:
* Roasted Potatoes: Toss the potatoes with olive oil, herbs, and spices, and roast them in the oven until they are golden brown and crispy.
* Mashed Potatoes: Boil the potatoes until they are tender, then mash them with butter, milk, and seasonings.
*
Conclusion
So, there you have it! Growing potatoes in containers is not just a gardening trend; it’s a game-changer for anyone, regardless of space or experience. We’ve walked through the simple steps, highlighted the benefits, and hopefully, inspired you to ditch the grocery store spuds (at least some of the time!) and cultivate your own homegrown goodness.
Why is this DIY trick a must-try? Because it puts the power of fresh, flavorful potatoes directly into your hands. Imagine the satisfaction of harvesting your own crop, knowing exactly where it came from and how it was grown. No more wondering about pesticides or long transportation routes. Just pure, unadulterated potato perfection. Plus, it’s incredibly rewarding to witness the entire life cycle of a plant, from seed potato to bountiful harvest.
But the beauty of container gardening lies in its adaptability. Feel free to experiment! Try different potato varieties to discover your personal favorite. Russets, Yukon Golds, fingerlings – the possibilities are endless. Consider adding companion plants like marigolds or basil to your containers to deter pests and attract beneficial insects. You can even adjust the size of your container to suit your available space. A smaller container is perfect for a balcony, while a larger one can yield a more substantial harvest.
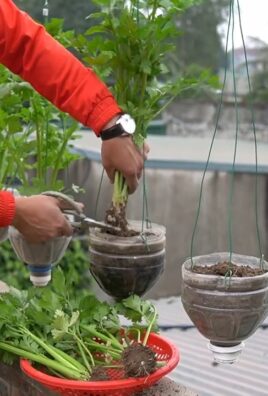
And don’t be afraid to get creative with your container choices! While plastic pots are perfectly functional, you can also use repurposed items like old buckets, laundry baskets (with drainage holes, of course!), or even grow bags. The key is to ensure adequate drainage and enough space for the potatoes to develop.
Growing potatoes in containers is also a fantastic way to introduce children to the wonders of gardening. It’s a hands-on learning experience that teaches them about plant life cycles, responsibility, and the importance of healthy eating. They’ll be amazed to see how a simple seed potato can transform into a thriving plant, producing a delicious and nutritious crop.
Beyond the practical benefits, growing your own potatoes is simply a fun and fulfilling hobby. It’s a chance to connect with nature, de-stress, and enjoy the simple pleasures of life. There’s something incredibly therapeutic about tending to your plants, watching them grow, and ultimately harvesting the fruits (or rather, tubers!) of your labor.
We wholeheartedly encourage you to give this DIY trick a try. It’s easier than you might think, and the rewards are well worth the effort. So, grab some seed potatoes, a container, some soil, and get ready to embark on your own potato-growing adventure!
Once you’ve harvested your first crop, we’d love to hear about your experience. Share your photos, tips, and tricks in the comments section below. Let’s create a community of container potato growers and inspire others to join the fun! What variety did you grow? What challenges did you face? What were your biggest successes? Your insights can help others learn and grow (pun intended!).
Don’t delay – start planning your potato garden today! You’ll be amazed at how easy and rewarding it is to grow your own delicious, homegrown potatoes in containers. Happy gardening!
Frequently Asked Questions (FAQ)
What kind of container is best for growing potatoes?
The ideal container for growing potatoes should be at least 15-20 gallons in size to allow ample room for the tubers to develop. Good drainage is crucial, so ensure your container has drainage holes. You can use plastic pots, grow bags, fabric pots, or even repurposed containers like old buckets or laundry baskets (with drainage holes added). Dark-colored containers can heat up quickly in direct sunlight, so consider using lighter colors or providing shade during the hottest part of the day. The material of the container isn’t as important as the size and drainage capabilities.
What type of soil should I use for growing potatoes in containers?
Potatoes thrive in well-draining, slightly acidic soil. A good potting mix specifically formulated for vegetables is ideal. Avoid using garden soil, as it can be too heavy and compact, hindering tuber development. You can also create your own mix by combining equal parts of compost, peat moss (or coconut coir), and perlite or vermiculite. This mixture provides good drainage, aeration, and nutrient retention. Ensure the soil is loose and crumbly to allow the potatoes to easily expand.
How often should I water my container potatoes?
Watering frequency depends on the weather, the size of your container, and the type of soil you’re using. Generally, you should water your potatoes when the top inch of soil feels dry to the touch. Avoid overwatering, as this can lead to root rot. During hot, dry weather, you may need to water daily. In cooler, wetter weather, you may only need to water every few days. Check the soil moisture regularly and adjust your watering schedule accordingly. A good rule of thumb is to water deeply until water drains out of the drainage holes.
How much sunlight do potatoes need when grown in containers?
Potatoes need at least 6-8 hours of direct sunlight per day to thrive. Choose a location that receives plenty of sunlight throughout the day. If you live in a particularly hot climate, you may need to provide some afternoon shade to prevent the plants from overheating. If you don’t have access to enough natural sunlight, you can supplement with grow lights. Rotate the containers regularly to ensure all sides of the plant receive adequate sunlight.
When is the best time to plant potatoes in containers?
The best time to plant potatoes in containers is in early spring, after the last frost. You can start seed potatoes indoors a few weeks before the last frost to get a head start. The soil temperature should be at least 45°F (7°C) for optimal germination. In warmer climates, you can plant potatoes in the fall for a winter harvest. Check your local planting calendar for specific dates.
How do I “hill” potatoes in containers?
“Hilling” is the process of adding more soil to the container as the potato plants grow. This encourages the development of more tubers along the stem. When the potato plants are about 6-8 inches tall, add a few inches of soil to the container, covering the lower part of the stems. Repeat this process every few weeks as the plants grow, until the container is almost full. Be careful not to bury the leaves.
What are common pests and diseases that affect container potatoes?
Common pests that can affect container potatoes include aphids, potato beetles, and flea beetles. You can control these pests with insecticidal soap, neem oil, or by handpicking them off the plants. Common diseases include early blight, late blight, and potato scab. To prevent these diseases, use disease-resistant potato varieties, ensure good air circulation, and avoid overwatering. If you notice any signs of disease, remove the affected leaves immediately.
How do I know when my potatoes are ready to harvest?
Potatoes are typically ready to harvest 70-100 days after planting, depending on the variety. You can harvest “new potatoes” (small, immature potatoes) earlier, about 2-3 weeks after flowering. For mature potatoes, wait until the foliage starts to turn yellow and die back. To harvest, gently tip the container over and remove the potatoes from the soil. Be careful not to damage the tubers.
Can I reuse the soil from my potato containers?
Yes, you can reuse the soil from your potato containers, but it’s important to amend it with fresh compost and fertilizer to replenish the nutrients. Potatoes are heavy feeders and deplete the soil of nutrients. You should also sterilize the soil to kill any potential pests or diseases. You can do this by baking the soil in the oven at 180°F (82°C) for 30 minutes or by solarizing it in a black plastic bag for several weeks.
What are some good potato varieties to grow in containers?
Some good potato varieties to grow in containers include:
* Yukon Gold: A popular all-purpose potato with a buttery flavor.
* Red Pontiac: A red-skinned potato with a creamy texture.
* Fingerling Potatoes: Small, elongated potatoes with a unique flavor.
* Irish Cobbler: An early-maturing potato with a floury texture.
* Kennebec: A versatile potato that’s good for baking, frying, and mashing.
Choose varieties that are well-suited to your climate and growing conditions.
Leave a Comment