
Growing Potatoes in Buckets: Unlock the secrets to a bountiful harvest, even without a sprawling garden! Have you ever dreamed of enjoying freshly dug, homegrown potatoes but thought you lacked the space? Well, dream no more! This DIY guide is your passport to potato paradise, right on your balcony, patio, or even a sunny windowsill. We’re diving deep into the surprisingly simple and incredibly rewarding world of container gardening, specifically focusing on how to cultivate delicious potatoes in humble buckets.
The history of potato cultivation is rich and fascinating, dating back thousands of years to the Andes Mountains of South America. From its humble beginnings as a staple food for indigenous populations, the potato has journeyed across continents, becoming a global culinary icon. Now, you can participate in this legacy, bringing the joy of potato farming to your own home, regardless of your space constraints.
Why should you embrace this DIY trick? Because growing potatoes in buckets is not only space-saving but also incredibly efficient. It allows for better control over soil conditions, reduces the risk of pests and diseases, and makes harvesting a breeze. Imagine the satisfaction of digging into a bucket overflowing with your own homegrown potatoes – fluffy, flavorful, and bursting with freshness. Plus, it’s a fantastic way to get your hands dirty, connect with nature, and impress your friends and family with your green thumb. So, grab your buckets, some seed potatoes, and let’s get growing!

Growing Potatoes in Buckets: A Beginner’s Guide to Bountiful Harvests
Hey there, fellow gardening enthusiasts! I’m so excited to share one of my favorite gardening hacks with you: growing potatoes in buckets! It’s a fantastic way to enjoy fresh, homegrown potatoes even if you have limited space, like a balcony or small patio. Plus, it’s incredibly rewarding to watch those little seed potatoes transform into a bucketful of deliciousness. Let’s dive in!
Why Grow Potatoes in Buckets?
Before we get started, let’s talk about why this method is so awesome:
* Space-Saving: Perfect for small gardens, balconies, or patios.
* Easy Harvesting: No more digging around in the dirt! Just tip the bucket over.
* Pest Control: Easier to manage pests and diseases compared to in-ground planting.
* Portability: Move your potato plants to the sunniest spot as needed.
* Fun and Educational: A great project for kids and adults alike!
What You’ll Need
Here’s a list of everything you’ll need to get started. Don’t worry, most of it is pretty easy to find:
* Buckets: 5-gallon buckets are ideal. Make sure they have drainage holes. You can drill some if they don’t. I prefer using dark-colored buckets as they absorb more heat, which potatoes love.
* Seed Potatoes: These are potatoes specifically grown for planting. You can find them at your local garden center or online. Choose certified disease-free varieties. I personally love Yukon Gold and Russet potatoes for their flavor and versatility.
* Potting Mix: A well-draining potting mix is crucial. Avoid using garden soil, as it can compact and hinder growth. I usually mix equal parts of compost, peat moss (or coco coir), and perlite for excellent drainage and aeration.
* Fertilizer: A slow-release fertilizer formulated for vegetables will provide your potatoes with the nutrients they need. Look for a balanced formula like 10-10-10 or 14-14-14.
* Watering Can or Hose: For keeping your potato plants hydrated.
* Trowel or Shovel: For planting and adding soil.
* Optional:
* Gloves: To keep your hands clean.
* Eye protection: When drilling drainage holes.
* Potato fertilizer spikes: For easy feeding.
Step-by-Step Instructions: Planting Your Potatoes
Okay, let’s get our hands dirty! Here’s how to plant your seed potatoes in buckets:
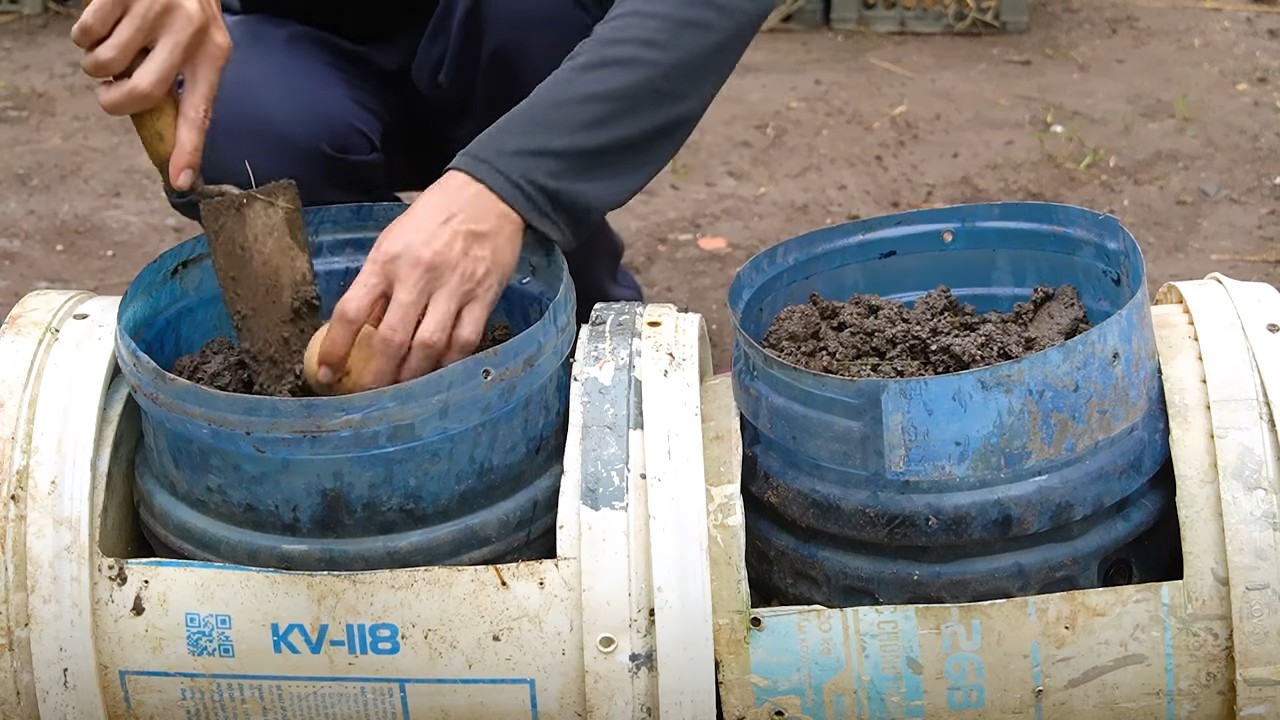
1. Prepare the Buckets:
* If your buckets don’t have drainage holes, drill several (about 1/2 inch in diameter) in the bottom. This is essential to prevent waterlogging, which can rot your potatoes.
* Clean the buckets thoroughly to remove any dirt or debris.
2. Prepare the Seed Potatoes:
* A week or two before planting, “chit” your seed potatoes. This means encouraging them to sprout. Place them in a cool, bright location (but not direct sunlight) until they develop short, green sprouts (eyes).
* If your seed potatoes are large (bigger than an egg), you can cut them into smaller pieces, ensuring each piece has at least one or two eyes. Let the cut pieces dry for a day or two to callous over, which helps prevent rot.
3. Planting the First Layer:
* Fill the bottom of each bucket with about 4-6 inches of potting mix.
* Place 2-3 seed potato pieces (or whole small seed potatoes) on top of the soil, with the eyes facing upwards. Space them evenly around the bucket.
* Cover the seed potatoes with another 4-6 inches of potting mix.
* Water the soil thoroughly until it’s moist but not soggy.
4. Initial Care:
* Place the buckets in a sunny location that receives at least 6-8 hours of direct sunlight per day.
* Keep the soil consistently moist, but avoid overwatering. Check the soil moisture by sticking your finger about an inch deep. If it feels dry, it’s time to water.
Hilling: Encouraging More Potatoes
This is where the magic happens! Hilling is the process of adding more soil to the bucket as the potato plants grow. This encourages the plant to produce more potatoes along the buried stem.
1. Waiting for Growth:
* Wait until the potato plants have grown about 6-8 inches tall.
2. Adding More Soil:
* Carefully add more potting mix to the bucket, burying the stems up to the bottom set of leaves. Leave the top leaves exposed.
* Water the soil thoroughly.
3. Repeating the Process:
* Continue hilling every 2-3 weeks as the plants grow taller. Each time, add enough soil to bury the stems up to the bottom leaves.
* Eventually, the bucket will be almost completely filled with soil.
Watering and Fertilizing
Proper watering and fertilization are essential for healthy potato growth and a bountiful harvest.
1. Watering:
* Water deeply whenever the top inch of soil feels dry.
* Avoid overwatering, as this can lead to root rot.
* Water early in the morning to allow the foliage to dry before nightfall, which helps prevent fungal diseases.
2. Fertilizing:
* Apply a slow-release fertilizer at planting time, following the package instructions.
* You can also supplement with a liquid fertilizer every 2-3 weeks during the growing season. A balanced fertilizer or one slightly higher in phosphorus (the middle number) is ideal.
* If you’re using potato fertilizer spikes, insert them into the soil according to the package directions.
Pest and Disease Control
Keep an eye out for common potato pests and diseases. Early detection and treatment are key to preventing serious problems.
1. Common Pests:
* Potato Beetles: Handpick them off the plants or use an organic insecticide like neem oil or insecticidal soap.
* Aphids: Spray them off with a strong stream of water or use insecticidal soap.
* Flea Beetles: Cover the plants with row covers to prevent them from reaching the foliage.
2. Common Diseases:
* Early Blight: This fungal disease causes dark spots on the leaves. Remove infected leaves and apply a fungicide if necessary.
* Late Blight: This is a more serious fungal disease that can quickly kill potato plants. Remove infected plants immediately and dispose of them properly.
* Scab: This disease causes rough, scabby patches on the potatoes. Avoid overwatering and ensure good drainage to prevent scab.
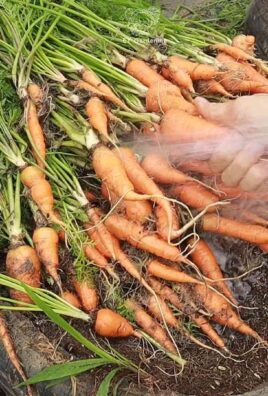
Harvesting Your Potatoes
The most exciting part! Here’s how to harvest your bucket-grown potatoes:
1. When to Harvest:
* You can harvest “new potatoes” (small, tender potatoes) about 2-3 weeks after the plants flower.
* For mature potatoes, wait until the foliage starts to turn yellow and die back. This usually takes about 80-100 days from planting.
2. Harvesting:
* Stop watering the plants a week or two before harvesting.
* Simply tip the bucket over and gently sift through the soil to find your potatoes!
* Be careful not to damage the potatoes during harvesting.
3. Curing and Storing:
* After harvesting, cure the potatoes by spreading them out in a cool, dark, and well-ventilated place for about a week. This allows the skins to harden, which helps them store longer.
* Store cured potatoes in a cool, dark, and dry place, such as a root cellar or basement. Avoid storing them near apples or bananas, as these fruits release ethylene gas, which can cause potatoes to sprout prematurely.
Troubleshooting
Sometimes things don’t go exactly as planned. Here are a few common problems and how to fix them:
* Yellowing Leaves: Could be caused by overwatering, underwatering, nutrient deficiency, or disease. Check the soil moisture and fertilize if necessary.
* No Potatoes: Could be due to insufficient sunlight, poor soil, or improper hilling. Make sure your plants are getting enough sun, use a good quality potting mix, and hill regularly.
* Small Potatoes: Could be caused by overcrowding, insufficient watering, or nutrient deficiency. Thin out the plants if necessary, water regularly, and fertilize as needed.
Choosing the Right Potato Variety
The type of potato you choose to grow will impact the flavor, texture, and storage capabilities of your harvest. Here are a few popular choices:
*
Conclusion
So, there you have it! Growing potatoes in buckets is not just a gardening trend; it’s a game-changer for anyone, regardless of space or experience. We’ve walked through the simple steps, highlighting the benefits of this method, and hopefully, dispelled any doubts you might have had.
Why is this DIY trick a must-try? Because it offers an accessible, manageable, and incredibly rewarding way to cultivate your own fresh, delicious potatoes. Imagine the satisfaction of harvesting your own spuds, knowing exactly where they came from and how they were grown. No more wondering about pesticides or questionable farming practices. You’re in control, from seed potato to dinner plate.
Beyond the control and convenience, growing potatoes in buckets is also incredibly space-efficient. Whether you have a sprawling garden, a small balcony, or just a sunny patio, you can enjoy a bountiful potato harvest. This method is perfect for urban gardeners, apartment dwellers, and anyone looking to maximize their yield in a limited space.
But the benefits don’t stop there. Bucket gardening also simplifies pest control and weed management. The contained environment makes it easier to monitor your plants and address any issues before they become major problems. Plus, harvesting is a breeze! No more digging around in the dirt, hoping to unearth hidden treasures. Simply tip the bucket and collect your potatoes.
Ready to take your potato growing to the next level? Consider these variations:
* Experiment with different potato varieties: From Yukon Golds to Russets to fingerling potatoes, each variety offers a unique flavor and texture. Try growing a few different types to find your favorites.
* Add companion plants: Marigolds, basil, and other herbs can help deter pests and attract beneficial insects. Plant them around the base of your buckets to create a thriving ecosystem.
* Use different types of containers: While buckets are a popular choice, you can also use grow bags, trash cans, or even repurposed containers. Just make sure they have drainage holes.
* Try vertical gardening: Stack multiple buckets on top of each other to create a vertical potato tower. This is a great way to maximize space and add visual interest to your garden.
Don’t be afraid to experiment and adapt the method to suit your own needs and preferences. The most important thing is to have fun and enjoy the process.
We wholeheartedly encourage you to try this DIY trick and experience the joy of growing your own potatoes. It’s a rewarding and educational experience that will connect you with nature and provide you with a delicious, homegrown harvest.
Once you’ve given it a try, we’d love to hear about your experience! Share your photos, tips, and stories in the comments below. Let’s create a community of bucket potato growers and learn from each other. What worked for you? What challenges did you face? What are your favorite potato recipes?
Growing potatoes in buckets is more than just a gardening technique; it’s a journey of discovery, a celebration of nature, and a testament to the power of DIY. So, grab a bucket, some seed potatoes, and get ready to grow!
Frequently Asked Questions (FAQ)
What kind of potatoes should I use for growing in buckets?
You’ll want to use seed potatoes, which are potatoes specifically grown for planting. These are different from the potatoes you buy at the grocery store, which may have been treated to prevent sprouting. You can purchase seed potatoes from garden centers or online retailers. Choose varieties that are well-suited to your climate and growing conditions. Popular choices for bucket growing include Yukon Gold, Red Pontiac, and fingerling potatoes.
How big should the bucket be?
A 5-gallon bucket is generally considered the minimum size for growing potatoes. However, larger buckets (10-gallon or larger) will provide more room for the potatoes to grow and can result in a larger harvest. The bigger the bucket, the more soil and nutrients are available to the plant. Make sure the bucket has drainage holes to prevent waterlogging.
What kind of soil should I use?
Use a well-draining potting mix that is rich in organic matter. Avoid using garden soil, as it can be too heavy and compacted for container gardening. You can also amend your potting mix with compost or other organic materials to improve its fertility and drainage. A mix of equal parts potting soil, compost, and perlite or vermiculite is a good starting point.
How often should I water my potato plants?
Water your potato plants regularly, especially during hot, dry weather. The soil should be consistently moist but not waterlogged. Check the soil moisture by sticking your finger into the soil. If the top inch feels dry, it’s time to water. Avoid overwatering, as this can lead to root rot.
How much sunlight do potato plants need?
Potato plants need at least six hours of sunlight per day to thrive. Choose a location that receives full sun for best results. If you live in a hot climate, you may need to provide some afternoon shade to prevent the plants from overheating.
How do I “hill” the potatoes in a bucket?
“Hilling” is the process of adding more soil to the bucket as the potato plants grow. This encourages the plants to produce more potatoes along the buried stem. Start by filling the bucket about one-third full with soil. Plant your seed potatoes and cover them with a few inches of soil. As the plants grow, gradually add more soil to the bucket, burying the stem up to the bottom leaves. Continue hilling until the bucket is almost full.
How long does it take to grow potatoes in buckets?
It typically takes 70-100 days from planting to harvest, depending on the variety of potato and the growing conditions. You’ll know your potatoes are ready to harvest when the plants start to flower and the foliage begins to die back.
How do I harvest potatoes from a bucket?
Harvesting potatoes from a bucket is easy! Simply tip the bucket over and gently remove the potatoes from the soil. You can also reach into the bucket and carefully dig around the plants to unearth the potatoes. Be careful not to damage the potatoes during harvesting.
What are some common problems when growing potatoes in buckets?
Some common problems include pests (such as aphids and potato beetles), diseases (such as blight), and nutrient deficiencies. Monitor your plants regularly and take action to address any problems as soon as they arise. Organic pest control methods, such as insecticidal soap and neem oil, can be effective for controlling pests. Ensure your plants have adequate drainage to prevent diseases. Fertilize regularly with a balanced fertilizer to prevent nutrient deficiencies.
Can I reuse the soil from my potato buckets?
It’s generally not recommended to reuse the soil from your potato buckets, as it may contain pests or diseases that could affect future crops. However, if you choose to reuse the soil, you should sterilize it first by baking it in the oven or microwaving it. You should also amend the soil with fresh compost or other organic materials to replenish its nutrients. It’s often easier and more effective to simply use fresh potting mix each year.

Leave a Comment