
Growing Peppers at Home can seem daunting, but trust me, it’s more achievable (and rewarding!) than you might think. Have you ever bitten into a perfectly ripe, sun-warmed pepper straight from your garden? The flavor is simply unmatched 鈥?a world away from anything you’ll find in the grocery store. That’s the magic we’re chasing!
For centuries, peppers have been cultivated across the globe, adding spice and vibrancy to cuisines from South America, where they originated, to Asia and beyond. Think of the fiery curries of India, the smoky flavors of Mexican salsas, or the bright tang of Italian peperonata 鈥?all thanks to the humble pepper. But you don’t need to be a seasoned farmer to enjoy these flavors fresh from your own backyard.
In today’s busy world, taking control of our food sources is more important than ever. Knowing exactly where your food comes from, and how it’s grown, offers peace of mind and a connection to nature that’s incredibly fulfilling. Plus, growing peppers at home is a fantastic way to save money, reduce your carbon footprint, and impress your friends with your green thumb. This DIY guide will equip you with simple, effective tricks and hacks to cultivate a thriving pepper patch, even if you’re a complete beginner. Let’s get started!
Growing Peppers at Home: A Beginner’s Guide to Spicy Success
Hey there, fellow gardening enthusiasts! I’m so excited to share my pepper-growing secrets with you. Growing your own peppers at home is incredibly rewarding, and trust me, even if you think you have a “brown thumb,” you can totally do this! This guide will walk you through everything you need to know, from choosing the right peppers to harvesting your fiery bounty.
Choosing Your Pepper Varieties
Before we dive into the nitty-gritty, let’s talk peppers! The sheer variety can be overwhelming, but don’t worry, I’ll help you narrow it down. Consider these factors:
* Heat Level: This is the big one! Do you want mild bell peppers, a medium jalape帽o kick, or face-melting habanero heat? The Scoville scale measures pepper heat, so do some research before you buy.
* Size and Shape: Peppers come in all shapes and sizes, from tiny ornamental peppers to large bell peppers perfect for stuffing. Think about how you plan to use them.
* Growing Conditions: Some peppers are more tolerant of cooler temperatures or shorter growing seasons than others. Check the seed packet or plant label for specific requirements.
* Color: Peppers aren’t just red and green! You can find them in yellow, orange, purple, brown, and even black. A colorful pepper patch is a happy pepper patch!
Some popular and easy-to-grow varieties include:
* Bell Peppers (various colors)
* Jalape帽os
* Serranos
* Anaheims
* Poblano
* Cayenne
Starting Your Peppers: Seeds vs. Seedlings
You have two main options for starting your pepper plants: from seed or from seedlings (small plants you buy at a nursery).
* Starting from Seed: This gives you the widest variety of choices and is generally more economical. However, it requires more time and effort, as you’ll need to start the seeds indoors 6-8 weeks before the last expected frost.
* Buying Seedlings: This is the easier option, especially for beginners. You’ll get a head start on the growing season, and the plants are already established. Just make sure to choose healthy-looking seedlings with no signs of disease or pests.
Starting Peppers from Seed: A Step-by-Step Guide
If you’re feeling adventurous (and I hope you are!), here’s how to start your peppers from seed:
1. Gather Your Supplies: You’ll need:
* Pepper seeds
* Seed starting trays or small pots
* Seed starting mix (a sterile, lightweight potting mix)
* A spray bottle
* A heat mat (optional, but highly recommended)
* A grow light (also optional, but helpful)
* A clear plastic dome or plastic wrap
2. Sow the Seeds: Fill your seed starting trays or pots with seed starting mix. Moisten the mix with the spray bottle until it’s damp but not soggy. Sow the seeds about 1/4 inch deep, placing 2-3 seeds per cell or pot.
3. Cover and Warm: Gently cover the seeds with more seed starting mix. Mist the surface again with the spray bottle. Cover the trays or pots with a clear plastic dome or plastic wrap to create a humid environment. Place the trays on a heat mat, if using. The ideal soil temperature for pepper seed germination is 80-85掳F (27-29掳C).
4. Provide Light: Place the trays under a grow light or in a sunny window. If using a grow light, keep it a few inches above the trays and provide 14-16 hours of light per day.
5. Keep Moist: Check the soil moisture daily and mist with the spray bottle as needed to keep the soil consistently moist. Avoid overwatering, which can lead to damping off (a fungal disease that kills seedlings).
6. Germination: Pepper seeds can take anywhere from 7 to 21 days to germinate, depending on the variety and temperature. Be patient!
7. Thin Seedlings: Once the seedlings have emerged and have a few sets of true leaves (the leaves that look like miniature pepper leaves), thin them to one plant per cell or pot. Choose the strongest, healthiest-looking seedling and snip off the others at the soil line.
8. Harden Off: Before transplanting your seedlings outdoors, you’ll need to “harden them off.” This process gradually acclimates the plants to outdoor conditions. Start by placing the trays outdoors in a sheltered location for an hour or two each day, gradually increasing the amount of time they spend outside over the course of a week or two. Protect them from strong winds and direct sunlight during this process.
Transplanting Your Peppers Outdoors
Once the danger of frost has passed and the soil has warmed up, it’s time to transplant your pepper plants outdoors!
1. Choose a Sunny Location: Peppers need at least 6-8 hours of sunlight per day to thrive. Choose a location in your garden that get
Hey there, fellow gardening enthusiasts! I’m so excited to share my pepper-growing secrets with you. Growing your own peppers at home is incredibly rewarding, and trust me, even if you think you have a “brown thumb,” you can totally do this! This guide will walk you through everything you need to know, from choosing the right peppers to harvesting your fiery bounty.
Choosing Your Pepper Varieties
Before we dive into the nitty-gritty, let’s talk peppers! The sheer variety can be overwhelming, but don’t worry, I’ll help you narrow it down. Consider these factors:
* Heat Level: This is the big one! Do you want mild bell peppers, a medium jalape帽o kick, or face-melting habanero heat? The Scoville scale measures pepper heat, so do some research before you buy.
* Size and Shape: Peppers come in all shapes and sizes, from tiny ornamental peppers to large bell peppers perfect for stuffing. Think about how you plan to use them.
* Growing Conditions: Some peppers are more tolerant of cooler temperatures or shorter growing seasons than others. Check the seed packet or plant label for specific requirements.
* Color: Peppers aren’t just red and green! You can find them in yellow, orange, purple, brown, and even black. A colorful pepper patch is a happy pepper patch!
Some popular and easy-to-grow varieties include:
* Bell Peppers (various colors)
* Jalape帽os
* Serranos
* Anaheims
* Poblano
* Cayenne
Starting Your Peppers: Seeds vs. Seedlings
You have two main options for starting your pepper plants: from seed or from seedlings (small plants you buy at a nursery).
* Starting from Seed: This gives you the widest variety of choices and is generally more economical. However, it requires more time and effort, as you’ll need to start the seeds indoors 6-8 weeks before the last expected frost.
* Buying Seedlings: This is the easier option, especially for beginners. You’ll get a head start on the growing season, and the plants are already established. Just make sure to choose healthy-looking seedlings with no signs of disease or pests.
Starting Peppers from Seed: A Step-by-Step Guide
If you’re feeling adventurous (and I hope you are!), here’s how to start your peppers from seed:
1. Gather Your Supplies: You’ll need:
* Pepper seeds
* Seed starting trays or small pots
* Seed starting mix (a sterile, lightweight potting mix)
* A spray bottle
* A heat mat (optional, but highly recommended)
* A grow light (also optional, but helpful)
* A clear plastic dome or plastic wrap
2. Sow the Seeds: Fill your seed starting trays or pots with seed starting mix. Moisten the mix with the spray bottle until it’s damp but not soggy. Sow the seeds about 1/4 inch deep, placing 2-3 seeds per cell or pot.
3. Cover and Warm: Gently cover the seeds with more seed starting mix. Mist the surface again with the spray bottle. Cover the trays or pots with a clear plastic dome or plastic wrap to create a humid environment. Place the trays on a heat mat, if using. The ideal soil temperature for pepper seed germination is 80-85掳F (27-29掳C).
4. Provide Light: Place the trays under a grow light or in a sunny window. If using a grow light, keep it a few inches above the trays and provide 14-16 hours of light per day.
5. Keep Moist: Check the soil moisture daily and mist with the spray bottle as needed to keep the soil consistently moist. Avoid overwatering, which can lead to damping off (a fungal disease that kills seedlings).
6. Germination: Pepper seeds can take anywhere from 7 to 21 days to germinate, depending on the variety and temperature. Be patient!
7. Thin Seedlings: Once the seedlings have emerged and have a few sets of true leaves (the leaves that look like miniature pepper leaves), thin them to one plant per cell or pot. Choose the strongest, healthiest-looking seedling and snip off the others at the soil line.
8. Harden Off: Before transplanting your seedlings outdoors, you’ll need to “harden them off.” This process gradually acclimates the plants to outdoor conditions. Start by placing the trays outdoors in a sheltered location for an hour or two each day, gradually increasing the amount of time they spend outside over the course of a week or two. Protect them from strong winds and direct sunlight during this process.
Transplanting Your Peppers Outdoors
Once the danger of frost has passed and the soil has warmed up, it’s time to transplant your pepper plants outdoors!
1. Choose a Sunny Location: Peppers need at least 6-8 hours of sunlight per day to thrive. Choose a location in your garden that gets plenty of sun.
2. Prepare the Soil: Peppers prefer well-drained soil that is rich in organic matter. Amend the soil with compost or aged manure before planting.
3. Dig Holes: Dig holes that are slightly larger than the root balls of your pepper plants. Space the plants 18-24 inches apart, depending on the variety.
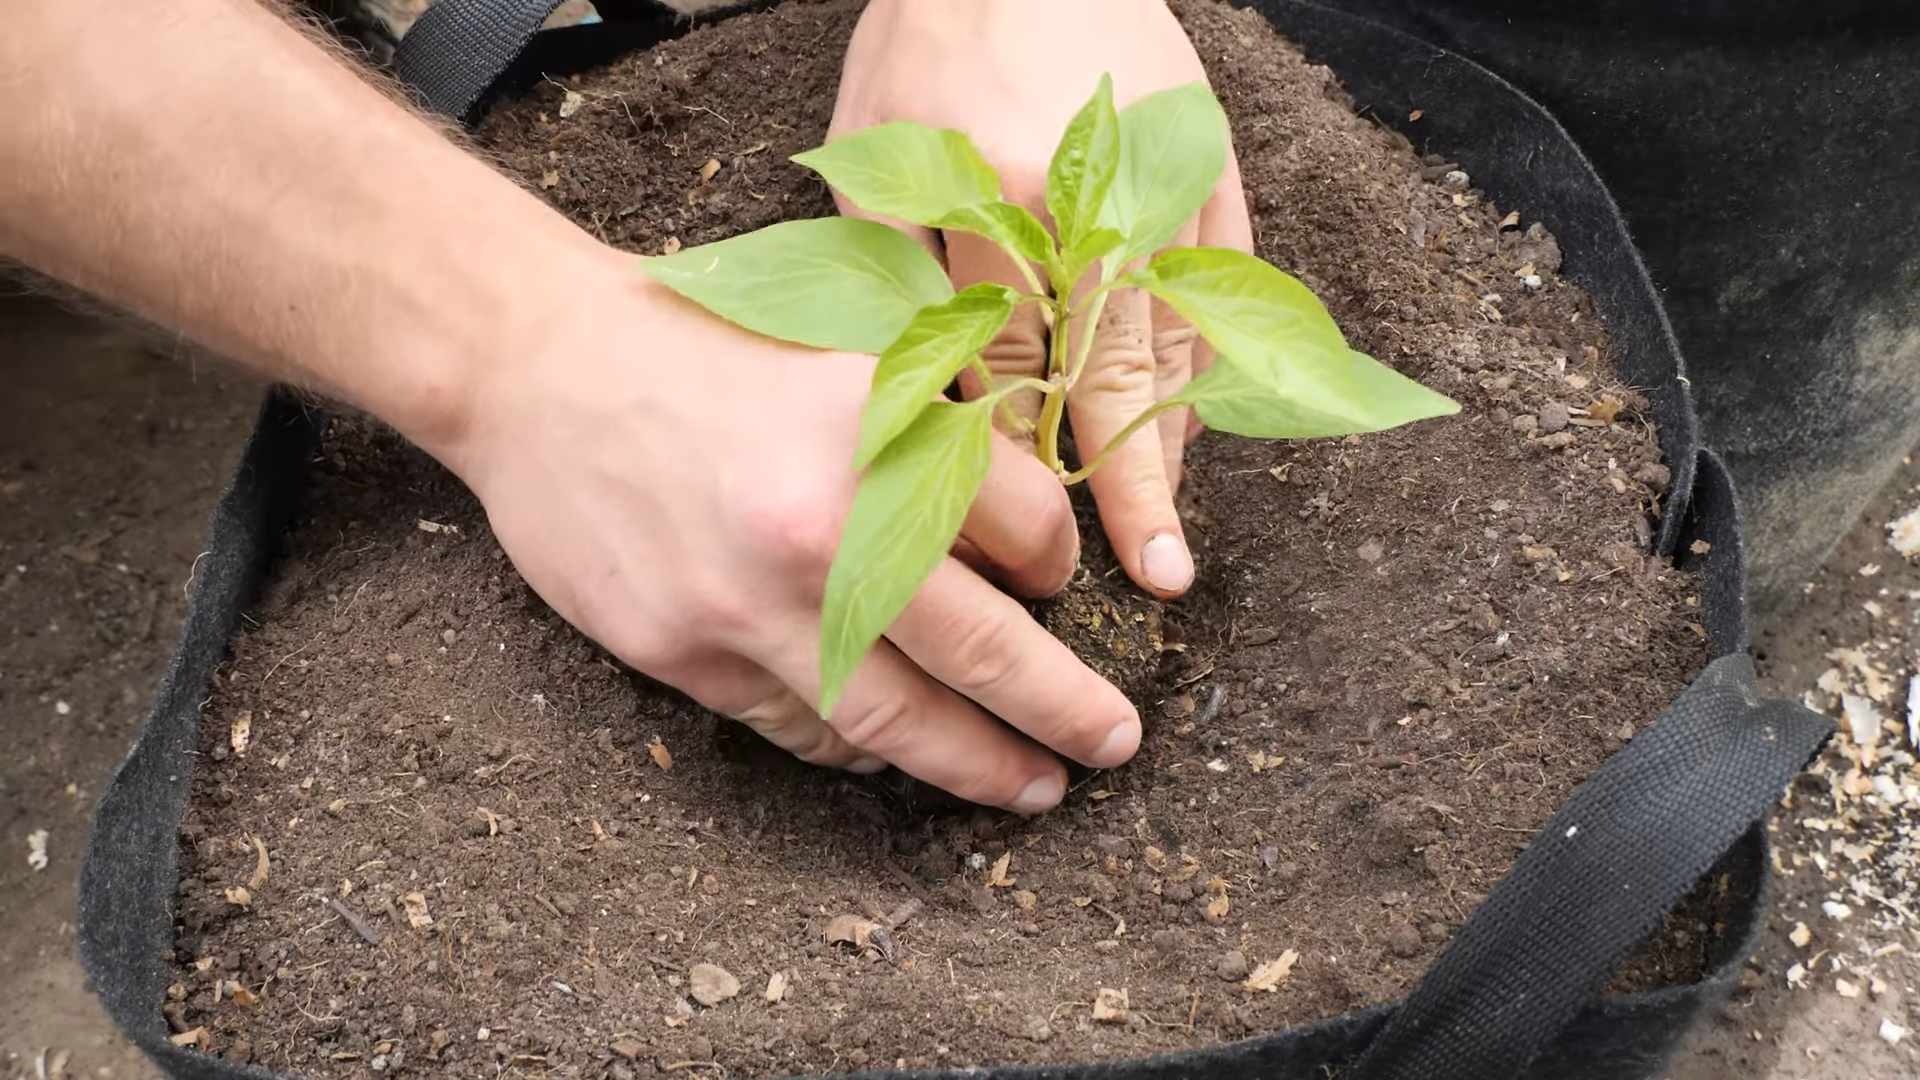
4. Transplant Carefully: Gently remove the pepper plants from their pots or trays. Loosen the roots slightly and place the plants in the holes. Backfill with soil and gently firm around the base of the plants.
5. Water Thoroughly: Water the newly transplanted peppers thoroughly to help them settle in.
6. Mulch: Apply a layer of mulch around the base of the plants to help retain moisture, suppress weeds, and regulate soil temperature. Straw, wood chips, or shredded leaves are all good options.
Caring for Your Pepper Plants
Now that your peppers are in the ground, it’s time to provide them with the care they need to thrive.
* Watering: Water your pepper plants regularly, especially during hot, dry weather. Aim to keep the soil consistently moist but not soggy. Water deeply and less frequently, rather than shallowly and often.
* Fertilizing: Peppers are heavy feeders and benefit from regular fertilization. Use a balanced fertilizer (e.g., 10-10-10) or a fertilizer specifically formulated for vegetables. Follow the instructions on the fertilizer label. You can also side-dress your plants with compost or aged manure throughout the growing season.
* Pruning: Pruning peppers isn’t strictly necessary, but it can help improve air circulation and encourage bushier growth. You can remove any suckers (small shoots that grow from the base of the plant) or yellowing leaves.
* Support: Taller pepper varieties may need support to prevent them from falling over, especially when they’re loaded with fruit. Use stakes, cages, or trellises to provide support.
* Pest and Disease Control: Keep an eye out for pests and diseases. Common pepper pests include aphids, flea beetles, and spider mites. Common diseases include blossom end rot, fungal leaf spots, and viruses. Treat any problems promptly with appropriate organic or chemical controls.
Dealing with Common Pepper Problems
Even with the best care, you might encounter some problems while growing peppers. Here are a few common issues and how to address them:
* Blossom End Rot: This is a common problem caused by calcium deficiency. The bottom of the pepper develops a dark, sunken spot. To prevent blossom end rot, ensure your soil is rich in calcium and water your plants consistently. You can also add calcium to the soil by mixing in crushed eggshells or bone meal.
* Aphids: These tiny insects suck the sap from pepper plants, causing them to weaken and distort. You can control aphids by spraying them with a strong stream of water, using insecticidal soap, or introducing beneficial insects like ladybugs.
* Flea Beetles: These small beetles chew tiny holes in pepper leaves. You can control flea beetles by using row covers, applying diatomaceous earth, or spraying with neem oil.
* Sunscald: This occurs when peppers are exposed to too much direct sunlight, causing them to develop white or yellow patches. To prevent sunscald, provide some shade during the hottest part of the day or choose pepper varieties that are more resistant to sunscald.
Harvesting Your Peppers
The moment you’ve been waiting for! Harvesting your peppers is the most rewarding part of the process.
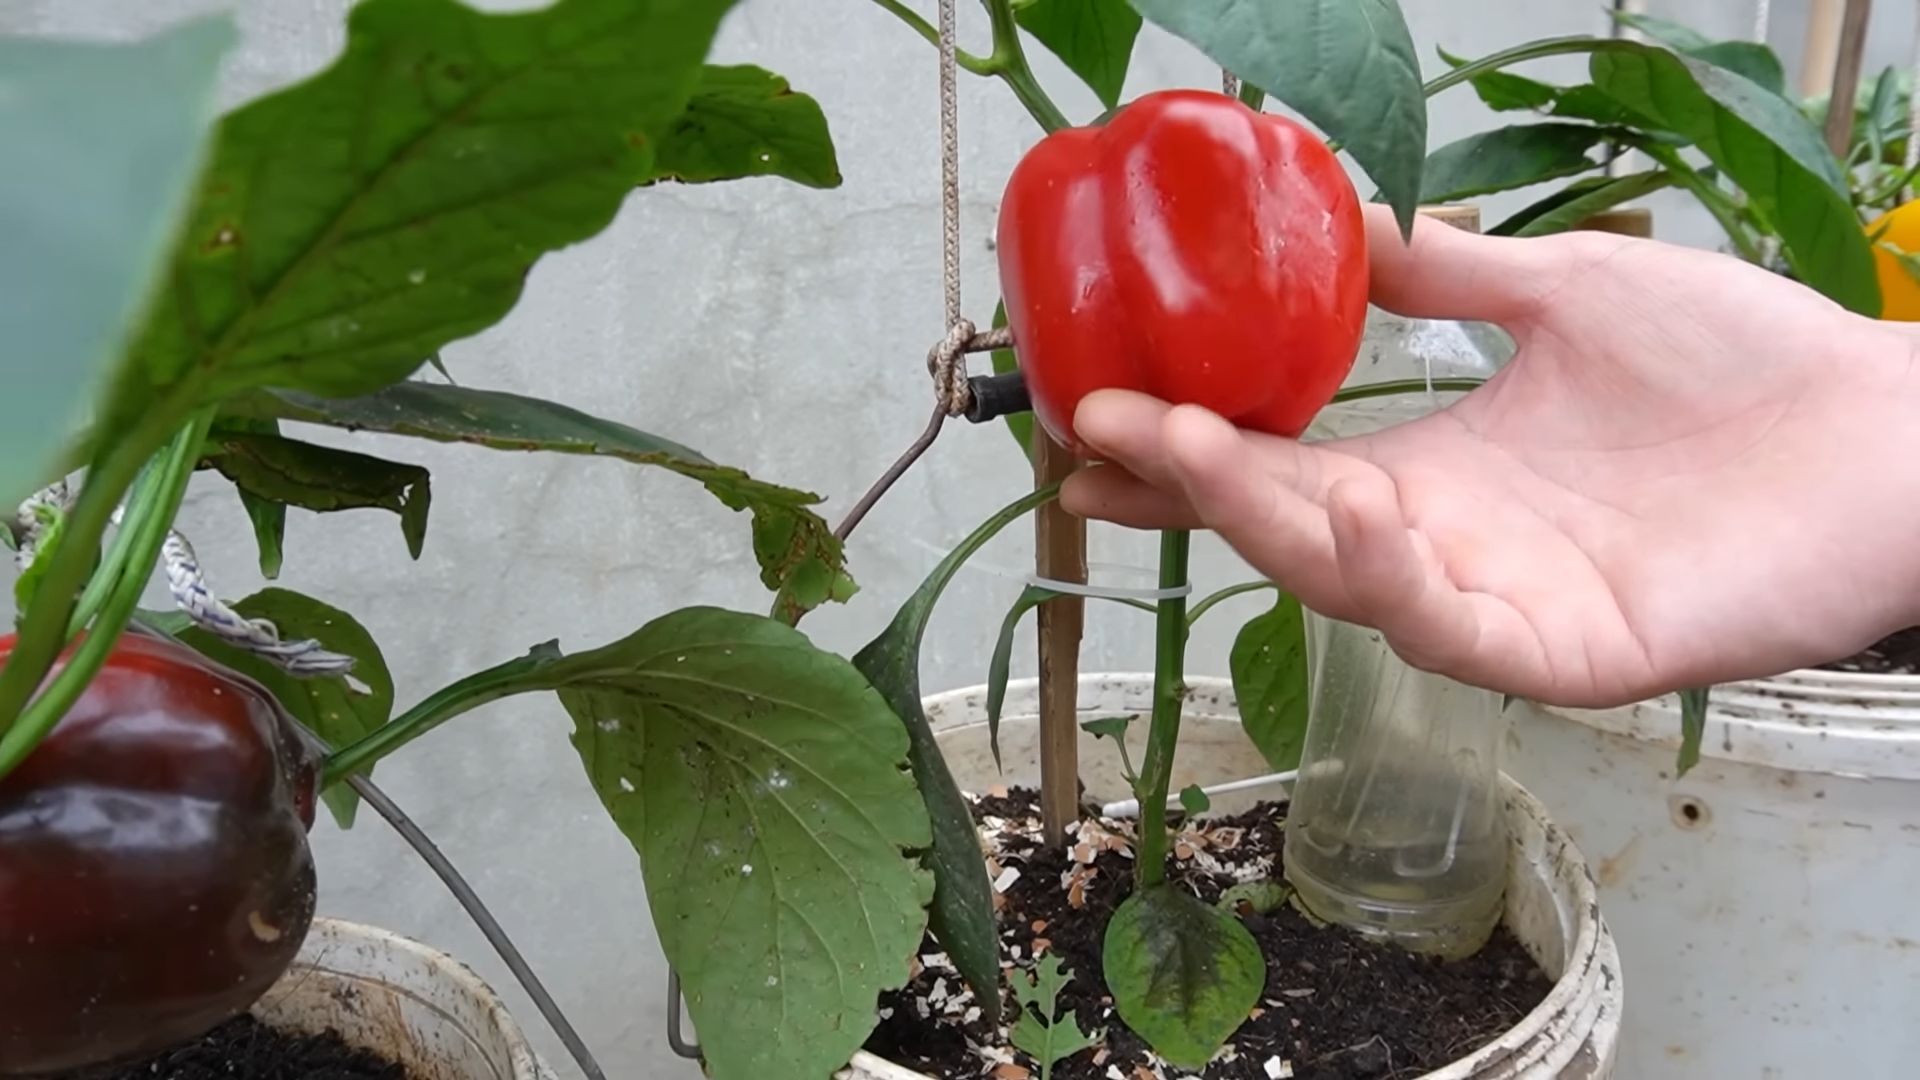
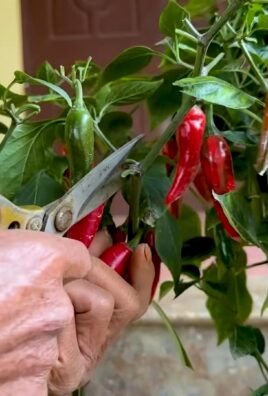
* When to Harvest: The timing of harvest depends on the pepper variety and your personal preference. Bell peppers are typically harvested when they are fully colored and firm. Hot peppers can be harvested when they are green or when they have turned their mature color (usually red, orange, or yellow).
* How to Harvest: Use a
Conclusion
So, there you have it! Growing peppers at home, especially with these simple DIY tricks, is not just a rewarding experience, it’s a gateway to fresher, more flavorful meals and a deeper connection with the food you eat. We’ve covered everything from seed starting to pest control, focusing on methods that are accessible, affordable, and effective for gardeners of all skill levels.
The beauty of growing your own peppers lies in the control you have over the entire process. You know exactly what goes into nurturing your plants, ensuring they are free from harmful chemicals and grown with love. This translates to peppers that are bursting with flavor and packed with nutrients, far surpassing anything you can find at the grocery store.
But the benefits extend beyond just taste and health. Gardening is a therapeutic activity that can reduce stress, improve your mood, and provide a sense of accomplishment. Watching your pepper plants grow from tiny seedlings to vibrant, fruit-bearing bushes is an incredibly satisfying experience.
And don’t be afraid to experiment! Try different varieties of peppers to discover your favorites. From the mild sweetness of bell peppers to the fiery heat of habaneros, there’s a pepper out there for everyone. You can also explore different growing methods, such as container gardening, raised beds, or even hydroponics.
Consider these variations to elevate your pepper-growing game:
* Companion Planting: Plant basil, marigolds, or carrots near your pepper plants to deter pests and attract beneficial insects.
* Pepper Tea: Use diluted pepper tea (made from boiling hot peppers) as a natural insecticide to combat aphids and other unwanted visitors. Be cautious when handling hot peppers and always wear gloves.
* Fermented Pepper Sauce: Once you have a bountiful harvest, try fermenting your peppers to create a delicious and probiotic-rich hot sauce.
* Sun Drying: Preserve your peppers by sun-drying them for use in soups, stews, and spice blends.
Ultimately, the best way to learn is by doing. So, grab some seeds, get your hands dirty, and start growing your own peppers today! We’re confident that you’ll be amazed by the results.
We encourage you to try these DIY tricks for growing peppers at home and share your experiences with us. What varieties are you growing? What challenges have you faced, and how have you overcome them? What are your favorite ways to use your homegrown peppers? Share your tips, photos, and stories in the comments below. Let’s build a community of pepper-loving gardeners!
Frequently Asked Questions (FAQ)
What is the best time to start pepper seeds indoors?
The ideal time to start pepper seeds indoors is typically 6-8 weeks before the last expected frost in your area. This allows the seedlings to develop a strong root system before being transplanted outdoors. Check your local weather forecasts and gardening resources to determine the average last frost date for your region. Starting too early can result in leggy, weak seedlings, while starting too late may delay your harvest.
What type of soil is best for growing peppers?
Peppers thrive in well-draining, fertile soil that is rich in organic matter. A slightly acidic to neutral pH (around 6.0-7.0) is ideal. You can amend your garden soil with compost, aged manure, or other organic materials to improve its drainage, fertility, and water-holding capacity. If you’re growing peppers in containers, use a high-quality potting mix specifically formulated for vegetables. Avoid using garden soil in containers, as it can become compacted and restrict root growth.
How often should I water my pepper plants?
Pepper plants need consistent moisture, but they don’t like to be waterlogged. Water deeply and thoroughly when the top inch of soil feels dry to the touch. The frequency of watering will depend on factors such as the weather, soil type, and size of your plants. During hot, dry periods, you may need to water daily. Mulching around your pepper plants can help to retain moisture and reduce the need for frequent watering.
What are some common pests and diseases that affect pepper plants?
Common pests that attack pepper plants include aphids, spider mites, whiteflies, and pepper hornworms. Diseases that can affect peppers include blossom end rot, fungal leaf spots, and viral diseases. Regularly inspect your plants for signs of pests or diseases. Use organic pest control methods such as insecticidal soap, neem oil, or hand-picking to manage pests. Ensure good air circulation around your plants to prevent fungal diseases. Blossom end rot is often caused by calcium deficiency, so amend your soil with calcium-rich amendments or use a calcium foliar spray.
How much sunlight do pepper plants need?
Pepper plants require at least 6-8 hours of direct sunlight per day to thrive. Choose a sunny location in your garden or on your patio where your plants will receive ample sunlight. If you’re growing peppers indoors, use grow lights to supplement natural sunlight. Insufficient sunlight can result in stunted growth, reduced fruit production, and poor flavor.
How do I prevent blossom end rot on my peppers?
Blossom end rot is a common problem in peppers, characterized by a dark, sunken spot on the blossom end of the fruit. It’s typically caused by a calcium deficiency, which can be exacerbated by inconsistent watering or high soil salinity. To prevent blossom end rot, ensure your soil is well-draining and has a pH of around 6.0-7.0. Amend your soil with calcium-rich amendments such as bone meal or crushed eggshells before planting. Water your plants consistently and deeply, avoiding both overwatering and underwatering. You can also use a calcium foliar spray to provide a quick boost of calcium to your plants.
When should I harvest my peppers?
The timing of pepper harvest depends on the variety and your personal preference. Bell peppers are typically harvested when they are fully colored and firm to the touch. Hot peppers can be harvested at various stages of maturity, depending on the desired level of heat. Some hot peppers turn red when fully ripe, while others remain green or yellow. Use pruning shears or a sharp knife to cut the peppers from the plant, leaving a small stem attached.
Can I grow peppers in containers?
Yes, peppers can be successfully grown in containers. Choose a container that is at least 12 inches in diameter and has drainage holes. Use a high-quality potting mix specifically formulated for vegetables. Container-grown peppers may require more frequent watering and fertilization than those grown in the ground. Place your containers in a sunny location and provide support for your plants as they grow.
How do I overwinter my pepper plants?
In colder climates, you can overwinter your pepper plants indoors to extend their lifespan. Before the first frost, prune your plants back to about 6-8 inches tall and dig them up carefully, preserving as much of the root system as possible. Pot your plants in containers filled with potting mix and water them thoroughly. Place your plants in a sunny window or under grow lights. Water sparingly during the winter months, allowing the soil to dry out slightly between waterings. In the spring, gradually acclimate your plants to outdoor conditions before transplanting them back into the garden.
Leave a Comment