
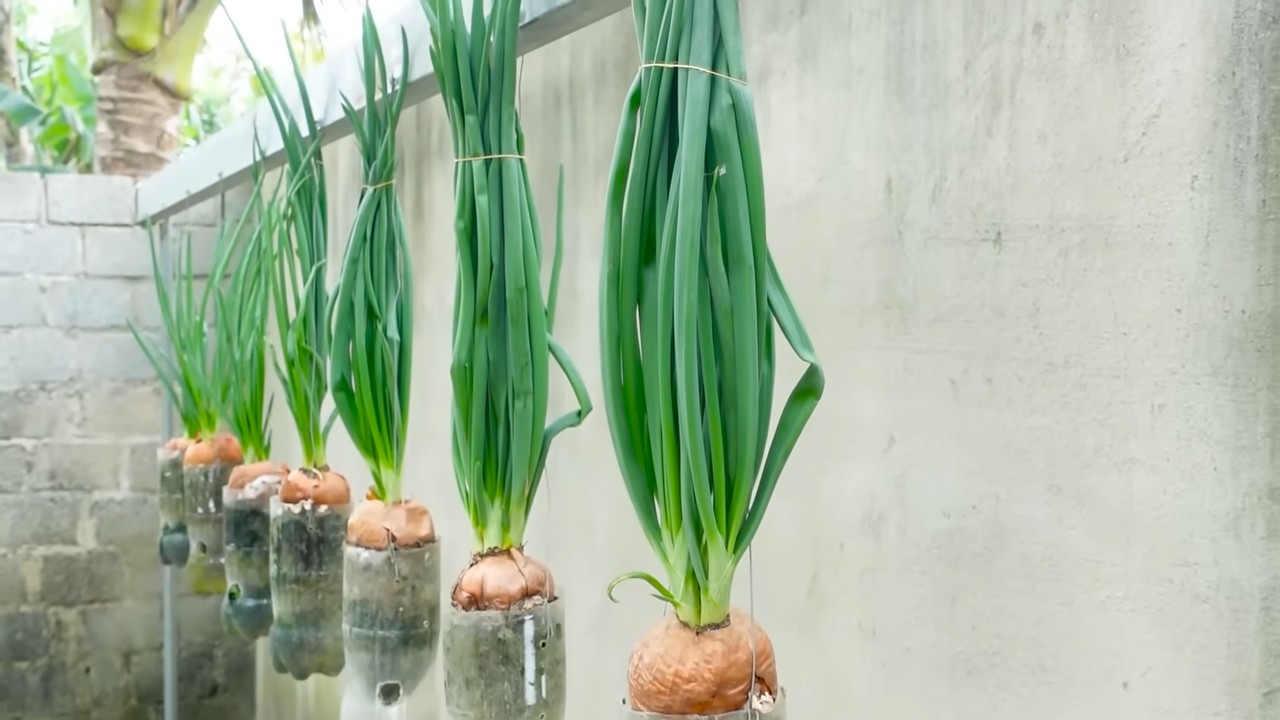
Growing Onions in Plastic Bottles: Sounds a little unconventional, right? But trust me, this simple DIY trick can revolutionize your home garden and bring a tear (of joy!) to your eye when you see the results. For centuries, humans have cultivated onions, from the fertile crescent where they were first domesticated to the meticulously planned gardens of ancient Egypt, where they were even worshipped! Now, you can participate in this rich history, even if you have limited space.
Are you dreaming of fresh, homegrown onions but lack the sprawling garden space? Or perhaps you’re tired of battling pests and unpredictable weather that can decimate your precious onion crop? That’s where this ingenious hack comes in. Growing Onions in Plastic Bottles is not just about saving space; it’s about creating a controlled environment, maximizing your yield, and minimizing the common challenges faced by home gardeners. I’m going to show you how to turn those discarded plastic bottles into mini onion paradises, ensuring a bountiful harvest of flavorful onions right at your fingertips. Get ready to unleash your inner gardener and discover the magic of vertical onion farming!
Zwiebeln ziehen in Plastikflaschen: Ein DIY-Gartenprojekt für kleine Räume
Hallo Gartenfreunde! Habt ihr auch wenig Platz, aber trotzdem Lust auf frische, selbstgezogene Zwiebeln? Dann habe ich hier genau das Richtige für euch: Zwiebeln ziehen in Plastikflaschen! Das ist nicht nur super platzsparend, sondern auch eine tolle Möglichkeit, Plastikmüll zu recyceln. Ich zeige euch, wie es geht – Schritt für Schritt.
Was ihr braucht:
* Plastikflaschen (am besten 1,5 oder 2 Liter)
* Ein scharfes Messer oder eine Schere
* Erde (am besten Anzuchterde oder Gemüseerde)
* Zwiebeln (entweder Steckzwiebeln oder Zwiebeln, die bereits ausgetrieben haben)
* Kies oder Blähton (für die Drainage)
* Wasser
* Optional: Flüssigdünger für Gemüse
Vorbereitung der Plastikflaschen
Bevor wir loslegen, müssen wir die Plastikflaschen vorbereiten. Das ist aber ganz einfach:
1. Reinigung: Zuerst solltet ihr die Plastikflaschen gründlich reinigen. Entfernt alle Etiketten und spült sie mit warmem Wasser und etwas Spülmittel aus. Achtet darauf, dass keine Spülmittelreste zurückbleiben.
2. Schneiden: Jetzt kommt der spannende Teil: das Schneiden der Flaschen. Es gibt verschiedene Möglichkeiten, wie ihr das machen könnt. Ich zeige euch zwei Varianten:
* Variante 1: Horizontaler Schnitt: Schneidet die Flasche etwa 10-15 cm vom Boden entfernt horizontal durch. Der untere Teil wird später als Topf dienen, der obere Teil als eine Art Mini-Gewächshaus.
* Variante 2: Vertikaler Schnitt: Schneidet die Flasche der Länge nach auf, aber nicht ganz durch. Lasst am Flaschenhals ein Stück ungeschnitten, sodass die Flasche noch zusammenhält. So könnt ihr die Flasche aufklappen und später wieder zuklappen.
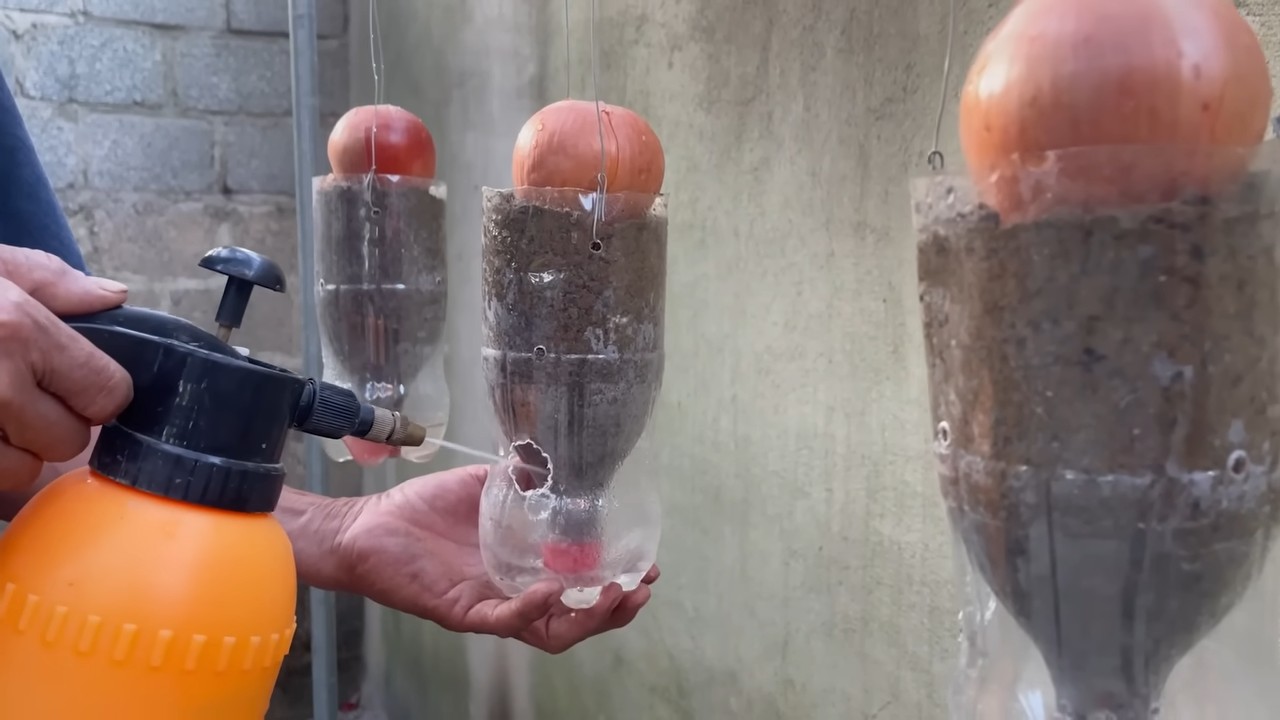
3. Drainagelöcher: Egal für welche Variante ihr euch entscheidet, ihr müsst unbedingt Drainagelöcher in den Boden der Flasche bohren oder schneiden. Das ist wichtig, damit überschüssiges Wasser ablaufen kann und die Zwiebeln nicht faulen.
Pflanzen der Zwiebeln
Jetzt geht es ans Eingemachte: das Pflanzen der Zwiebeln.
1. Drainage: Füllt zuerst eine Schicht Kies oder Blähton in den Boden der Flasche. Das sorgt für eine gute Drainage und verhindert Staunässe.
2. Erde: Füllt die Flasche mit Erde auf. Lasst etwa 2-3 cm Platz bis zum Rand.
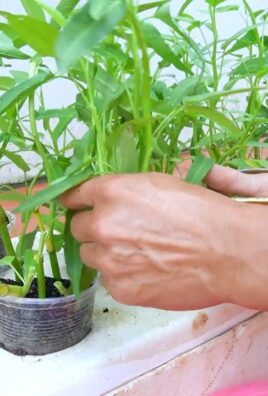
3. Zwiebeln setzen: Setzt die Zwiebeln in die Erde. Achtet darauf, dass die Spitze der Zwiebeln noch aus der Erde herausschaut. Der Abstand zwischen den Zwiebeln sollte etwa 5-7 cm betragen.
4. Angießen: Gießt die Zwiebeln vorsichtig an. Die Erde sollte gut durchfeuchtet sein, aber nicht nass.
Pflege der Zwiebeln
Die Pflege der Zwiebeln in Plastikflaschen ist eigentlich ganz einfach. Hier sind ein paar Tipps:
* Standort: Stellt die Flaschen an einen sonnigen Standort. Zwiebeln brauchen viel Licht, um gut zu wachsen.
* Gießen: Gießt die Zwiebeln regelmäßig, aber nicht zu viel. Die Erde sollte immer leicht feucht sein. Vermeidet Staunässe.
* Düngen: Düngt die Zwiebeln alle 2-3 Wochen mit einem Flüssigdünger für Gemüse. Das sorgt für ein kräftiges Wachstum.
* Belüftung: Wenn ihr die Variante mit dem horizontalen Schnitt gewählt habt, solltet ihr den oberen Teil der Flasche regelmäßig abnehmen, um die Zwiebeln zu belüften. Das verhindert Schimmelbildung.
* Schutz vor Schädlingen: Achtet auf Schädlinge wie Blattläuse oder Zwiebelfliegen. Bei Bedarf könnt ihr die Zwiebeln mit einem biologischen Schädlingsbekämpfungsmittel behandeln.
Ernte der Zwiebeln
Je nach Sorte und Standort könnt ihr die Zwiebeln nach etwa 3-4 Monaten ernten. Ihr erkennt, dass die Zwiebeln reif sind, wenn das Laub gelb wird und umknickt.
1. Ernten: Zieht die Zwiebeln vorsichtig aus der Erde.
2. Trocknen: Lasst die Zwiebeln ein paar Tage an einem trockenen und luftigen Ort trocknen.
3. Lagern: Lagert die getrockneten Zwiebeln an einem kühlen und dunklen Ort. So halten sie sich mehrere Monate.
Zusätzliche Tipps und Tricks
* Verschiedene Sorten: Probiert verschiedene Zwiebelsorten aus. Es gibt gelbe, rote und weiße Zwiebeln. Jede Sorte hat ihren eigenen Geschmack.
* Frühlingszwiebeln: Ihr könnt auch Frühlingszwiebeln in Plastikflaschen ziehen. Diese sind besonders schnellwüchsig und können schon nach wenigen Wochen geerntet werden.
* Kräuter: Kombiniert die Zwiebeln mit anderen Kräutern wie Petersilie oder Schnittlauch. Das spart Platz und sieht toll aus.
* Upcycling: Verwendet alte Plastikflaschen, die ihr sonst weggeworfen hättet. Das ist gut für die Umwelt und spart Geld.
* Beschriftung: Beschriftet die Flaschen mit dem Namen der Zwiebelsorte und dem Pflanzdatum. So behaltet ihr den Überblick.
* Dekoration: Bemalt die Plastikflaschen oder beklebt sie mit bunten Aufklebern. So werden sie zu einem echten Hingucker auf eurem Balkon oder eurer Terrasse.
Häufige Probleme und Lösungen
* Gelbe Blätter: Gelbe Blätter können ein Zeichen für zu viel oder zu wenig Wasser sein. Überprüft die Feuchtigkeit der Erde und passt die Wassermenge entsprechend an.
* Schimmelbildung: Schimmelbildung kann durch zu hohe Luftfeuchtigkeit entstehen. Sorgt für eine gute Belüftung und entfernt befallene Blätter.
* Schädlinge: Schädlinge wie Blattläuse oder Zwiebelfliegen können die Zwiebeln befallen. Behandelt die Zwiebeln mit einem biologischen Schädlingsbekämpfungsmittel.
* Kein Wachstum: Wenn die Zwiebeln nicht wachsen, kann das an zu wenig Licht oder Nährstoffen liegen. Stellt die Flaschen an einen sonnigeren Standort und düngt die Zwiebeln regelmäßig.
Fazit
Zwiebeln in Plastikflaschen zu ziehen ist ein einfaches und platzsparendes DIY-Projekt, das auch Anfängern gelingt. Mit ein paar einfachen Handgriffen könnt ihr eure eigenen frischen Zwiebeln anbauen und gleichzeitig Plastikmüll recyceln. Probiert es aus und lasst euch von dem Ergebnis überraschen! Ich wünsche euch viel Spaß beim Gärtnern!
Conclusion
So, there you have it! Growing onions in plastic bottles isn’t just a quirky gardening experiment; it’s a genuinely effective and space-saving method that can bring the joy of fresh, homegrown onions to even the smallest of apartments. We’ve walked you through the process, from preparing your bottles and soil to planting and nurturing your onion seedlings.
But why should you actually try this? Beyond the sheer satisfaction of upcycling and reducing plastic waste, this method offers several compelling advantages. Firstly, it’s incredibly space-efficient. Forget needing a sprawling garden; a sunny balcony or even a well-lit windowsill is all you need. Secondly, it allows for better control over the growing environment. You can easily move your bottle gardens indoors during harsh weather or adjust the soil composition to perfectly suit your onions’ needs. Thirdly, it’s a fantastic way to introduce children to the wonders of gardening and teach them about sustainability.
This DIY onion-growing trick is a game-changer for urban gardeners and anyone looking to maximize their yield in a limited space.
Don’t be afraid to experiment with variations! Try using different types of plastic bottles – larger ones for bigger onion varieties or smaller ones for scallions. You can also explore different soil mixes to see what works best in your local climate. Consider adding companion plants like marigolds or basil to your bottle gardens to deter pests and enhance the flavor of your onions. You can even create a vertical onion garden by hanging your bottle planters from a wall or railing, adding a touch of greenery and visual interest to your space.
We’ve covered the basics, but the real magic happens when you put your own spin on things. Remember to monitor your onions regularly, providing them with adequate water and sunlight. Be patient, as growing takes time, but the reward of harvesting your own fresh, flavorful onions will be well worth the effort.
Now, it’s your turn! We wholeheartedly encourage you to give this DIY onion-growing method a try. It’s a fun, rewarding, and sustainable way to enjoy fresh produce, regardless of your living situation. Once you’ve harvested your first batch of homegrown onions, we’d love to hear about your experience. Share your photos, tips, and any variations you’ve tried in the comments below. Let’s build a community of bottle-gardening enthusiasts and inspire others to embrace this innovative approach to growing their own food. Happy gardening!
Frequently Asked Questions (FAQ)
What type of onions are best suited for growing in plastic bottles?
While you can technically grow any type of onion in a plastic bottle, smaller varieties tend to thrive best. Scallions (green onions), shallots, and smaller bulb onions like pearl onions are excellent choices. These varieties don’t require as much space for their root systems to develop, making them ideal for the confined environment of a plastic bottle. Larger onion varieties, such as yellow or red onions, can still be grown, but you’ll need to use larger bottles and provide more support as they mature. Consider starting with onion sets (small, immature bulbs) rather than seeds, as they tend to establish themselves more quickly in bottle gardens.
How often should I water my onions grown in plastic bottles?
Watering frequency depends on several factors, including the size of the bottle, the type of soil, the climate, and the stage of growth. Generally, you should water your onions when the top inch of soil feels dry to the touch. Avoid overwatering, as this can lead to root rot. Ensure that your bottles have adequate drainage holes to prevent water from accumulating at the bottom. During hot, dry weather, you may need to water more frequently, perhaps even daily. In cooler, more humid conditions, you can reduce the watering frequency. A good rule of thumb is to check the soil moisture level regularly and adjust your watering schedule accordingly.
What kind of soil should I use for growing onions in plastic bottles?
The ideal soil for growing onions in plastic bottles is a well-draining, nutrient-rich potting mix. Avoid using garden soil, as it can be too heavy and compact, hindering root growth. A good potting mix will provide adequate drainage, aeration, and nutrients for your onions to thrive. You can also amend your potting mix with compost or other organic matter to further enhance its fertility. Consider adding a slow-release fertilizer to provide a steady supply of nutrients throughout the growing season. A slightly acidic to neutral pH (around 6.0 to 7.0) is ideal for onions.
How much sunlight do onions need when grown in plastic bottles?
Onions require at least 6-8 hours of direct sunlight per day to thrive. When growing them in plastic bottles, ensure that they are placed in a location that receives ample sunlight. A south-facing window or balcony is often ideal. If you don’t have access to enough natural sunlight, you can supplement with artificial grow lights. Position the grow lights a few inches above the plants and provide them with 14-16 hours of light per day. Rotate your bottles regularly to ensure that all sides of the plants receive adequate sunlight.
How do I prevent pests and diseases from affecting my onions in plastic bottles?
Prevention is key when it comes to pests and diseases. Start by using clean, sterilized bottles and fresh potting mix. Avoid overcrowding your plants, as this can create a humid environment that is conducive to fungal diseases. Regularly inspect your onions for signs of pests or diseases, such as aphids, thrips, or fungal spots. If you detect any problems, take action immediately. You can try using organic pest control methods, such as insecticidal soap or neem oil. Ensure good air circulation around your plants to prevent fungal diseases. Remove any dead or decaying leaves promptly.
When and how do I harvest my onions grown in plastic bottles?
The harvesting time depends on the type of onion you are growing. Scallions can be harvested when they are about 6-8 inches tall. Simply snip them off at the base. Bulb onions are ready to harvest when their tops begin to turn yellow and fall over. Gently pull the onions from the soil, being careful not to damage the bulbs. Allow the onions to cure in a warm, dry place for a week or two before storing them. Curing helps to dry out the outer layers of the onions, making them less susceptible to rot.
Can I reuse the plastic bottles for growing onions again?
Yes, you can reuse the plastic bottles for growing onions again, but it’s important to clean and sterilize them thoroughly before each use. Wash the bottles with soap and water to remove any dirt or debris. Then, soak them in a solution of bleach and water (1 part bleach to 9 parts water) for about 30 minutes to kill any bacteria or fungi. Rinse the bottles thoroughly with clean water before using them again. This will help to prevent the spread of diseases to your new onion plants.
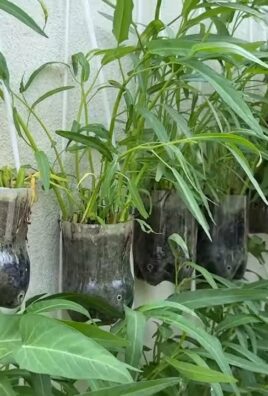
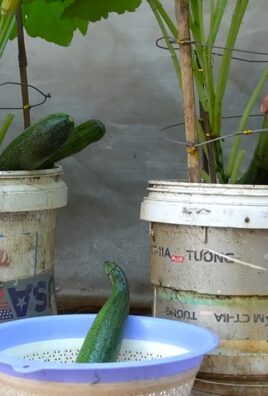
What are some other plants I can grow in plastic bottles besides onions?
Plastic bottles are versatile containers that can be used to grow a variety of other plants, including herbs (basil, mint, oregano), leafy greens (lettuce, spinach, kale), strawberries, and even some smaller vegetables like peppers and tomatoes. The key is to choose plants that are well-suited to the size of the bottle and provide them with the appropriate growing conditions.
How can I improve drainage in my plastic bottle planters?
Proper drainage is crucial for preventing root rot. Ensure that you have drilled several drainage holes in the bottom of your plastic bottles. You can also add a layer of gravel or pebbles to the bottom of the bottle before adding the soil to improve drainage further. Avoid using saucers or trays that will trap water beneath the bottles.
Is growing onions in plastic bottles environmentally friendly?
Yes, growing onions in plastic bottles is an environmentally friendly practice. It promotes upcycling by repurposing plastic bottles that would otherwise end up in landfills. It also reduces the need for commercially grown onions, which often require transportation and packaging, contributing to carbon emissions. By growing your own onions, you can reduce your environmental footprint and enjoy fresh, homegrown produce.
Leave a Comment