
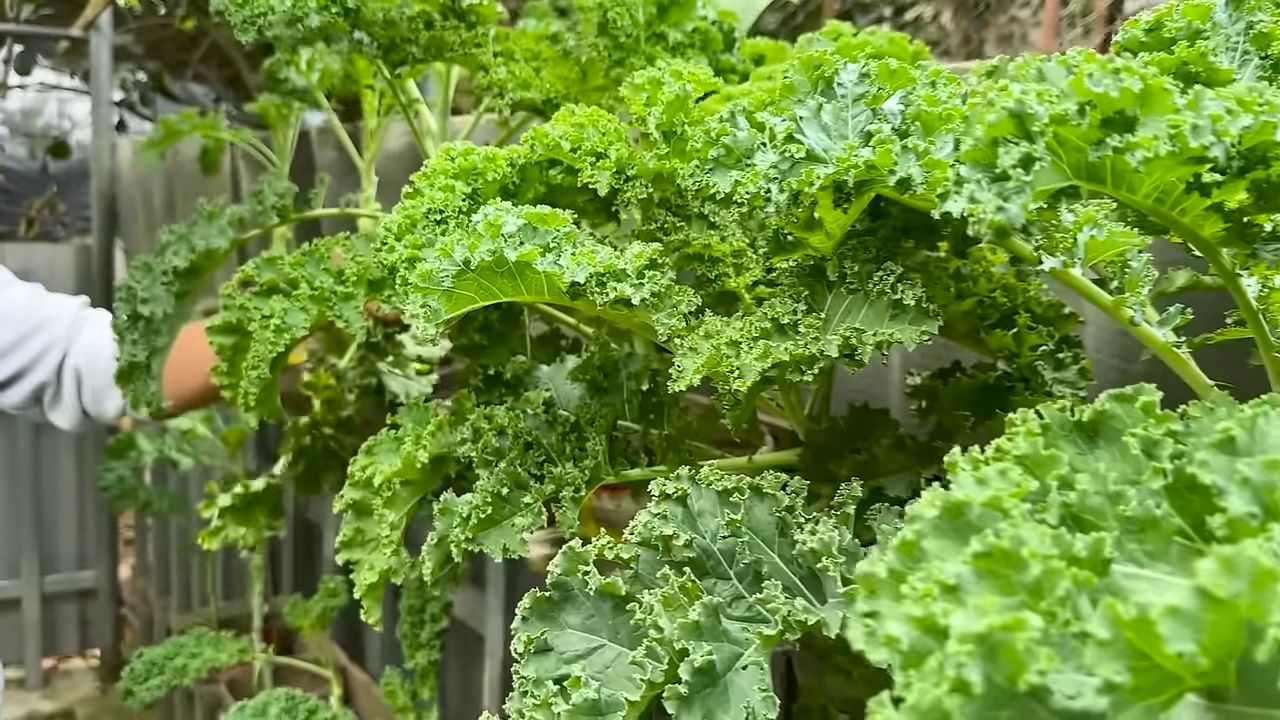
Growing kale in plastic bottles might sound a little unconventional, but trust me, it’s a game-changer for anyone looking to maximize their garden space and enjoy fresh, homegrown greens! Are you tired of battling garden pests, limited by a tiny balcony, or simply seeking a fun and eco-friendly gardening project? Then you’ve come to the right place. I’m excited to share this simple yet effective DIY trick that will have you harvesting delicious kale in no time.
The concept of container gardening, including using recycled materials, has roots stretching back centuries. From ancient hanging gardens to resourceful communities repurposing everyday items during times of scarcity, the spirit of making the most of limited resources has always been a driving force. Today, with growing concerns about sustainability and food security, the practice of growing kale in plastic bottles and other upcycled containers is experiencing a major resurgence.
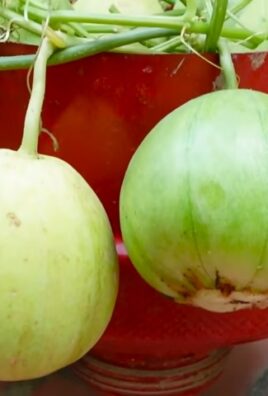
But why kale, and why plastic bottles? Kale is a nutritional powerhouse, packed with vitamins and antioxidants, making it a fantastic addition to any diet. And plastic bottles? Well, they’re readily available, often ending up in landfills. By repurposing them, we’re not only creating a mini-garden but also contributing to a more sustainable lifestyle. This DIY project is perfect for beginners, apartment dwellers, or anyone wanting to add a touch of green to their lives. Let’s dive in and discover how easy it is to transform those discarded bottles into thriving kale gardens!
Kohl Anbauen in Plastikflaschen: Dein DIY-Garten für Zuhause
Hey Leute! Habt ihr auch genug von teurem Gemüse aus dem Supermarkt? Oder vielleicht einfach keinen Platz für einen riesigen Garten? Keine Sorge, ich hab da was für euch: Wir bauen Kohl in Plastikflaschen an! Ja, richtig gelesen. Das ist super einfach, kostengünstig und perfekt für kleine Balkone, Terrassen oder sogar Fensterbänke. Los geht’s!
Was du brauchst:
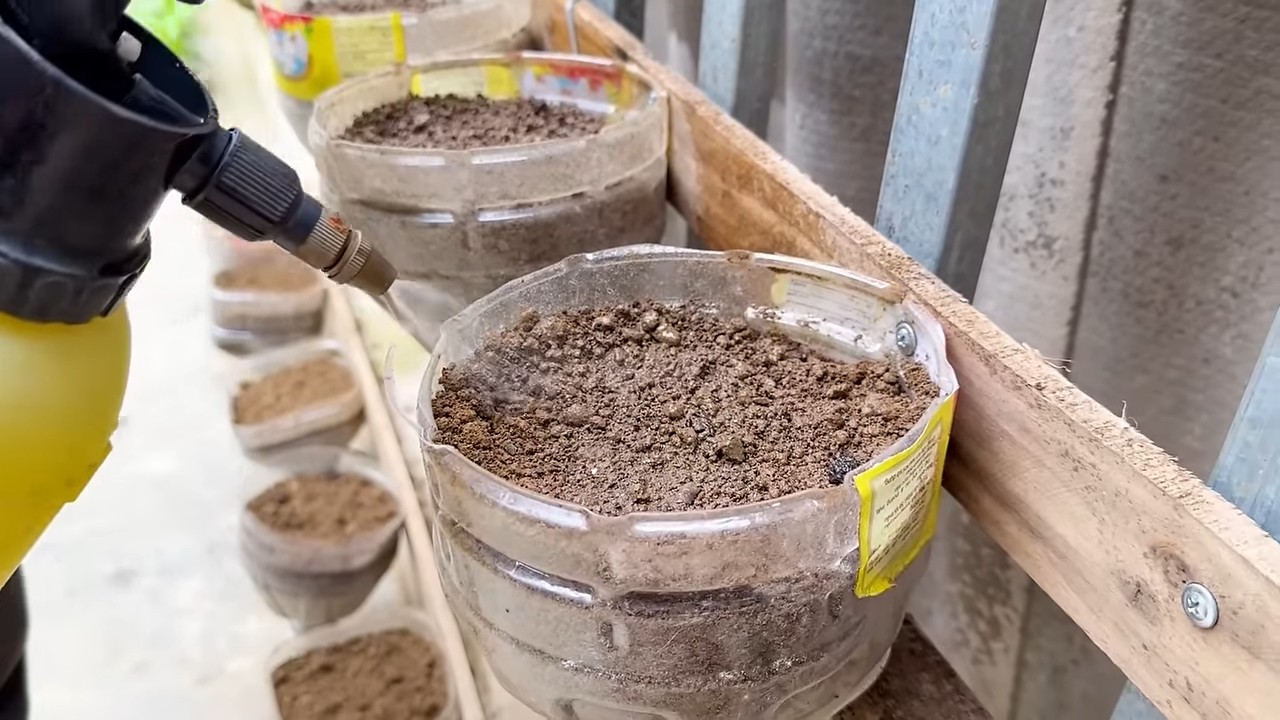
* Plastikflaschen: Am besten 1,5- oder 2-Liter-Flaschen. Je größer, desto besser für den Kohl. Denk dran, sie gründlich zu reinigen!
* Kohl-Samen oder Jungpflanzen: Du kannst entweder mit Samen starten (dauert etwas länger) oder direkt kleine Kohlpflanzen kaufen. Ich persönlich finde Jungpflanzen einfacher für den Anfang.
* Erde: Gute Blumenerde oder Gemüseerde ist wichtig. Du kannst auch deine eigene Erde mischen (Kompost, Gartenerde, Sand).
* Schere oder Messer: Zum Schneiden der Flaschen. Sei vorsichtig!
* Bohrer oder Nagel: Für die Entwässerungslöcher.
* Gießkanne oder Sprühflasche: Zum Bewässern.
* Optional: Kieselsteine oder Tonscherben für die Drainage.
* Optional: Pflanzschilder, um den Kohl zu beschriften.
Die Vorbereitung der Plastikflaschen
1. Reinigung: Zuerst müssen die Plastikflaschen gründlich gereinigt werden. Entferne alle Etiketten und spüle sie mit warmem Wasser und etwas Spülmittel aus. Achte darauf, dass keine Spülmittelreste zurückbleiben.
2. Schneiden: Jetzt kommt der spannende Teil: das Schneiden der Flaschen. Es gibt verschiedene Möglichkeiten, je nachdem, wie du deinen “Topf” gestalten möchtest.
* Variante 1: Horizontaler Topf: Schneide die Flasche horizontal durch, etwa 10-15 cm vom Boden entfernt. Der untere Teil wird zum Topf, der obere Teil kann als Mini-Gewächshaus dienen (später mehr dazu).
* Variante 2: Vertikaler Topf: Schneide ein großes Rechteck in die Seite der Flasche. Das Rechteck sollte groß genug sein, um die Kohlpflanze bequem hineinzusetzen. Diese Variante eignet sich gut, wenn du mehrere Pflanzen nebeneinander anbauen möchtest.
* Variante 3: Hängender Topf: Schneide die Flasche horizontal durch, wie bei Variante 1. Bohre dann Löcher in den oberen Rand des unteren Teils, um Schnüre oder Draht zum Aufhängen zu befestigen.
3. Entwässerungslöcher: Unbedingt Entwässerungslöcher bohren! Sonst ertrinken die Wurzeln. Bohre oder steche mit einem Nagel mehrere Löcher in den Boden der Flasche.
4. Optional: Drainage: Eine Drainage hilft, Staunässe zu vermeiden. Fülle eine Schicht Kieselsteine oder Tonscherben auf den Boden der Flasche, bevor du die Erde einfüllst.
Das Einpflanzen des Kohls
1. Erde einfüllen: Fülle die vorbereiteten Flaschen mit Erde. Lass oben etwa 2-3 cm Platz.
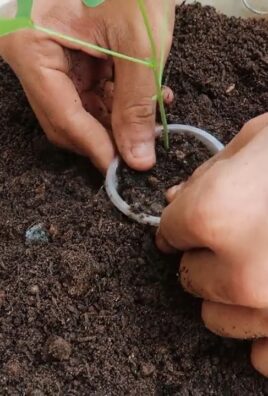
2. Pflanzen vorbereiten: Wenn du Jungpflanzen verwendest, lockere vorsichtig den Wurzelballen auf. Das hilft den Wurzeln, sich besser in der neuen Erde zu etablieren.
3. Einpflanzen: Setze die Kohlpflanze in die Erde. Achte darauf, dass der Wurzelballen vollständig bedeckt ist. Drücke die Erde leicht an.
4. Gießen: Gieße die Pflanzen gründlich an. Die Erde sollte gut durchfeuchtet sein, aber nicht nass.
Die Pflege des Kohls
1. Standort: Kohl braucht viel Sonne! Stelle die Flaschen an einen sonnigen Standort, idealerweise mit mindestens 6 Stunden Sonne pro Tag.
2. Bewässerung: Gieße regelmäßig, aber vermeide Staunässe. Die Erde sollte immer leicht feucht sein. An heißen Tagen musst du möglicherweise täglich gießen.
3. Düngung: Kohl ist ein Starkzehrer. Dünge die Pflanzen regelmäßig mit einem organischen Dünger oder Gemüsedünger. Befolge die Anweisungen auf der Verpackung.
4. Schutz vor Schädlingen: Kohl ist leider anfällig für Schädlinge wie Kohlweißlinge oder Blattläuse. Kontrolliere die Pflanzen regelmäßig und entferne Schädlinge manuell oder verwende ein biologisches Schädlingsbekämpfungsmittel.
5. Mini-Gewächshaus (optional): Wenn du die obere Hälfte der Flasche aufgehoben hast (Variante 1), kannst du sie als Mini-Gewächshaus verwenden, um die Pflanzen in den ersten Wochen zu schützen. Schneide einfach den Flaschenhals ab und setze die obere Hälfte umgekehrt auf den unteren Teil. Achte darauf, dass genügend Luftzirkulation vorhanden ist, um Schimmelbildung zu vermeiden.
Erntezeit!
Je nach Kohlsorte und Wachstumsbedingungen kannst du nach etwa 6-8 Wochen mit der Ernte beginnen. Ernte die äußeren Blätter, wenn sie groß genug sind. Die inneren Blätter wachsen weiter und du kannst über einen längeren Zeitraum ernten.
Zusätzliche Tipps und Tricks
* Sortenwahl: Es gibt viele verschiedene Kohlsorten. Wähle Sorten, die für den Anbau in Töpfen geeignet sind, z.B. Palmkohl, Grünkohl oder Schwarzkohl.
* Vertikaler Garten: Wenn du mehrere Flaschen hast, kannst du einen vertikalen Garten bauen. Befestige die Flaschen an einer Wand oder einem Zaun. Das spart Platz und sieht toll aus!
* Upcycling: Verwende alte T-Shirts oder Stoffreste, um die Flaschen zu dekorieren. Das macht deinen DIY-Garten noch individueller.
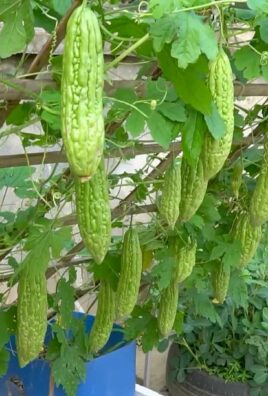
* Kombination mit anderen Pflanzen: Kohl verträgt sich gut mit anderen Pflanzen wie Ringelblumen oder Kapuzinerkresse. Diese Pflanzen können Schädlinge abwehren.
* Aussaatzeitpunkt: Die beste Zeit für die Aussaat von Kohl ist im Frühjahr (März/April) oder im Spätsommer (August/September).
* Bodenverbesserung: Mische etwas Kompost oder Hornspäne unter die Erde, um die Nährstoffversorgung zu verbessern.
* Schnecken: Schnecken lieben Kohl! Schütze deine Pflanzen mit Schneckenkorn oder Schneckenzäunen.
* Regelmäßige Kontrolle: Kontrolliere deine Pflanzen regelmäßig auf Krankheiten und Schädlinge. Je früher du Probleme erkennst, desto besser kannst du sie bekämpfen.
* Erde austauschen: Tausche die Erde in den Flaschen regelmäßig aus, um die Nährstoffversorgung zu gewährleisten.
* Beschriftung: Beschrifte die Flaschen mit dem Namen der Kohlsorte. So behältst du den Überblick.
* Experimentieren: Probiere verschiedene Kohlsorten und Anbaumethoden aus. So findest du heraus, was für dich am besten funktioniert.
Häufige Probleme und Lösungen
* Gelbe Blätter: Gelbe Blätter können ein Zeichen für Nährstoffmangel sein. Dünge die Pflanzen mit einem geeigneten Dünger.
* Blattläuse: Blattläuse können mit einem Wasserstrahl abgespült oder mit einem biologischen Schädlingsbekämpfungsmittel bekämpft werden.
* Kohlweißlinge: Kohlweißlinge legen ihre Eier auf die Blätter. Sammle die Eier und Raupen ab oder verwende ein Netz, um die Pflanzen zu schützen.
* Schimmel: Schimmelbildung kann durch zu hohe Luftfeuchtigkeit entstehen. Sorge für eine gute Belüftung und vermeide Staunässe.
* Wachstumsstörungen: Wachstumsstörungen können durch Nährstoffmangel, Wassermangel oder Schädlingsbefall verursacht werden. Überprüfe die Pflanzen sorgfältig und behebe die Ursache.
Fazit
Kohl in Plastikflaschen anzubauen ist eine tolle Möglichkeit, frisches Gemüse auf kleinem Raum zu ernten. Es ist einfach, kostengünstig und umweltfreundlich. Mit ein wenig Pflege und Aufmerksamkeit kannst du deinen eigenen kleinen Kohl-Garten auf dem Balkon, der Terrasse oder sogar auf der Fensterbank anlegen. Viel Spaß beim Gärtnern! Ich
Conclusion
So, there you have it! Growing kale in plastic bottles isn’t just a quirky gardening experiment; it’s a game-changer for urban gardeners, budget-conscious foodies, and anyone looking to reduce their environmental footprint. We’ve explored how this method transforms discarded plastic into thriving vertical gardens, offering a sustainable and space-saving solution for cultivating fresh, nutritious kale.
Why is this DIY trick a must-try? Because it’s accessible, affordable, and incredibly rewarding. Imagine harvesting vibrant, leafy greens right from your balcony, patio, or even a sunny windowsill. No sprawling garden required! This method democratizes gardening, making it possible for anyone, regardless of their living situation, to enjoy the benefits of homegrown produce. Plus, you’re actively participating in recycling and reducing plastic waste, contributing to a more sustainable lifestyle.
But the benefits don’t stop there. Growing kale in plastic bottles allows for better control over the growing environment. You can easily move your kale plants to optimize sunlight exposure, protect them from harsh weather, and even bring them indoors during colder months to extend the growing season. The individual containers also help prevent the spread of soilborne diseases, ensuring healthier and more productive plants.
Looking for variations? Absolutely! Consider experimenting with different types of plastic bottles – larger bottles can accommodate more mature plants, while smaller bottles are perfect for starting seedlings. You can also customize your growing medium by adding compost, worm castings, or other organic amendments to enrich the soil and boost nutrient availability. Another exciting variation is to create a tiered vertical garden by stacking the plastic bottle planters, maximizing space and creating a visually stunning display. You can even paint the bottles to add a splash of color and personalize your garden. Think about using different colors for different varieties of kale to easily identify them.
Don’t be afraid to get creative with your setup. You can hang the bottles from a fence, railing, or even a repurposed pallet. Just make sure the bottles are securely fastened and can withstand the weight of the soil and plants. You can also add a simple drip irrigation system to automate watering and ensure consistent moisture levels.
The key to success with this method is consistent care and attention. Regularly check the soil moisture, provide adequate sunlight, and fertilize your kale plants as needed. With a little effort, you’ll be rewarded with a bountiful harvest of fresh, delicious kale that you can use in salads, smoothies, soups, and countless other dishes.
We wholeheartedly encourage you to try this DIY trick and experience the joy of growing your own kale in plastic bottles. It’s a fun, educational, and environmentally friendly activity that the whole family can enjoy. Once you’ve given it a try, we’d love to hear about your experience! Share your photos, tips, and challenges in the comments section below. Let’s build a community of bottle-gardening enthusiasts and inspire others to embrace sustainable living. Let’s all get growing kale in plastic bottles!
Frequently Asked Questions (FAQ)
What type of plastic bottles are best for growing kale?
Ideally, you should use food-grade plastic bottles, such as those that previously contained water, juice, or soda. Avoid using bottles that held harsh chemicals or cleaning products, as these may contaminate the soil and affect the quality of your kale. PET (Polyethylene Terephthalate) bottles, commonly used for water and soda, are a good choice. Make sure to thoroughly clean and rinse the bottles before using them to remove any residue. Consider the size of the bottle as well. Larger bottles (2-3 liters) are better suited for mature kale plants, while smaller bottles (500ml-1 liter) are ideal for starting seedlings or growing smaller varieties of kale.
What kind of soil should I use for growing kale in plastic bottles?
A well-draining potting mix is essential for growing healthy kale in plastic bottles. Avoid using garden soil, as it can be too heavy and compact, hindering root growth and drainage. A good potting mix should consist of a blend of peat moss, perlite, and vermiculite. You can also add compost or other organic matter to enrich the soil and provide essential nutrients. Consider adding a slow-release fertilizer to the potting mix to provide a steady supply of nutrients throughout the growing season. Ensure the pH of the soil is slightly acidic to neutral (around 6.0-7.0) for optimal kale growth.
How often should I water my kale plants in plastic bottles?
The frequency of watering depends on several factors, including the size of the bottle, the type of soil, the weather conditions, and the stage of growth of the kale plants. As a general rule, you should water your kale plants when the top inch of soil feels dry to the touch. Avoid overwatering, as this can lead to root rot. When watering, make sure to thoroughly saturate the soil until water drains out of the drainage holes. During hot and dry weather, you may need to water your kale plants more frequently. Conversely, during cool and rainy weather, you may need to water less often.
How much sunlight do kale plants need when grown in plastic bottles?
Kale plants thrive in full sun, requiring at least 6-8 hours of direct sunlight per day. When growing kale in plastic bottles, make sure to place them in a location that receives ample sunlight. If you don’t have access to a sunny outdoor space, you can supplement with artificial lighting, such as grow lights. Rotate the bottles regularly to ensure that all sides of the plants receive adequate sunlight. Insufficient sunlight can lead to leggy growth and reduced yields.
How do I fertilize kale plants grown in plastic bottles?
Kale plants are heavy feeders and require regular fertilization to thrive. You can use a balanced liquid fertilizer or a slow-release granular fertilizer. Follow the instructions on the fertilizer packaging for application rates. Fertilize your kale plants every 2-3 weeks during the growing season. You can also amend the soil with compost or other organic matter to provide a steady supply of nutrients. Avoid over-fertilizing, as this can lead to nutrient burn.
How do I protect my kale plants from pests and diseases when grown in plastic bottles?
Growing kale in plastic bottles can help reduce the risk of pests and diseases, but it’s still important to take preventative measures. Regularly inspect your plants for signs of pests, such as aphids, cabbage worms, and flea beetles. You can remove pests by hand or use insecticidal soap or neem oil. To prevent diseases, ensure good air circulation around the plants and avoid overwatering. Remove any diseased leaves promptly to prevent the spread of infection. Consider using organic pest control methods to minimize the use of harmful chemicals.
How do I harvest kale from plastic bottles?
You can start harvesting kale leaves when they are about 4-6 inches long. Harvest the outer leaves first, leaving the inner leaves to continue growing. Avoid harvesting more than one-third of the plant at a time to allow it to recover. You can harvest kale leaves continuously throughout the growing season. Simply snip off the leaves with scissors or a knife. Wash the harvested leaves thoroughly before using them.
Can I grow different varieties of kale in plastic bottles?
Yes, you can grow different varieties of kale in plastic bottles. Some popular varieties include Curly Kale, Lacinato Kale (also known as Dinosaur Kale), Red Russian Kale, and Redbor Kale. Choose varieties that are well-suited to your climate and growing conditions. Consider the size of the mature plants when selecting varieties, as some varieties can grow quite large. Label each bottle with the variety of kale you are growing to easily identify them.
What do I do with the plastic bottles after I’m done growing kale?
After you’re done growing kale, you can reuse the plastic bottles for other gardening projects, such as growing herbs, flowers, or other vegetables. You can also recycle the bottles if they are no longer needed. Consider donating the bottles to local schools or community gardens for educational purposes. Alternatively, you can repurpose the bottles for other household uses, such as storage containers or craft projects.
Leave a Comment