
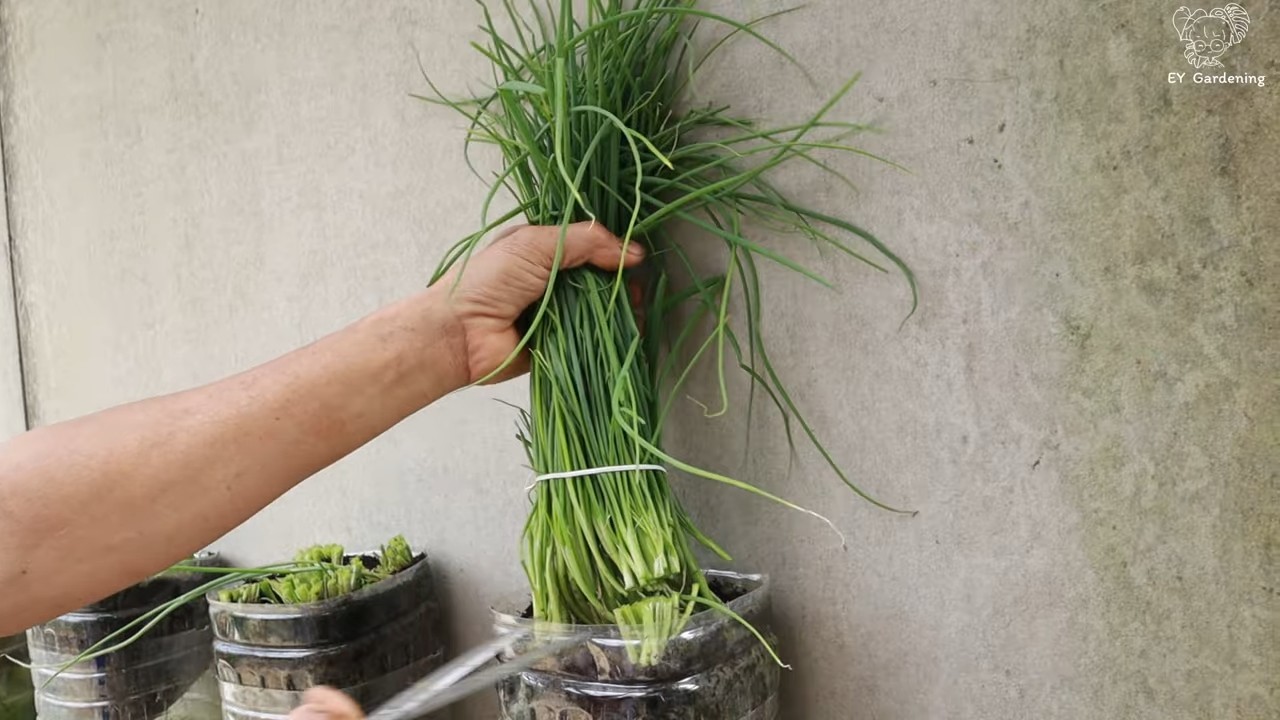
Growing green onions from plastic bottles might sound like something out of a futuristic garden, but trust me, it’s a surprisingly simple and incredibly rewarding DIY project! Are you tired of buying green onions only to use a tiny bit and watch the rest wilt away in your fridge? I know I was! That’s why I dove headfirst into this clever little hack, and I’m excited to share all the secrets with you.
The beauty of this method lies in its resourcefulness. For centuries, resourceful gardeners have sought ways to maximize their yields and minimize waste. While the specific technique of using plastic bottles might be relatively modern, the spirit of upcycling and sustainable gardening is deeply rooted in human history. Think about the ancient hanging gardens of Babylon or the meticulously planned kitchen gardens of medieval monasteries – people have always found innovative ways to cultivate food in limited spaces.
But why should you try growing green onions from plastic bottles? Well, besides being a fantastic way to recycle those pesky plastic containers, it’s also incredibly convenient. Imagine having a constant supply of fresh, flavorful green onions right at your fingertips, ready to add a zesty kick to your favorite dishes. No more last-minute grocery store runs or wasted produce! Plus, it’s a fun and educational project for the whole family. So, let’s get started and transform those empty bottles into miniature green onion farms!
DIY: Never Buy Green Onions Again! Growing Them in a Plastic Bottle
Hey everyone! Are you tired of buying green onions only to use a few and watch the rest wilt away in your fridge? I know I was! That’s why I decided to try this super easy and rewarding DIY project: growing green onions from a plastic bottle. It’s a fantastic way to recycle, save money, and always have fresh green onions on hand. Plus, it’s surprisingly simple!
Here’s what you’ll need:
* An empty plastic bottle (2-liter soda bottles work great!)
* A sharp knife or scissors
* Potting soil
* Green onion scraps (the white bulb ends with roots attached)
* Water
* A sunny spot
Preparing the Plastic Bottle Planter
Okay, let’s get started by prepping our plastic bottle. This is where we’ll create the perfect little home for our green onions.
1. Clean the Bottle: First things first, make sure your plastic bottle is clean. Rinse it out thoroughly with soap and water to remove any residue. This will help prevent mold or bacteria from growing later on.
2. Cut the Bottle: Now, grab your knife or scissors. We’re going to cut the bottle horizontally. You have two options here:
* Option 1 (Single Planter): Cut the bottle about 4-5 inches from the bottom. You’ll be using the bottom portion as your planter. Discard the top part (or save it for another project!).
* Option 2 (Stacked Planter): Cut the bottle in half. Then, cut the top half again, about 2-3 inches from the bottle cap. Invert the top portion (the part with the bottle cap) into the bottom half. This creates a self-watering system! The bottle cap should be removed to allow water to wick up into the soil. I personally prefer this method because it requires less watering.
3. Drainage Holes (If Needed): If you’re using the single planter method (Option 1), you’ll need to create drainage holes. Carefully poke 4-5 small holes in the bottom of the bottle. This will prevent the soil from becoming waterlogged, which can rot your green onions. If you’re using the stacked planter (Option 2), you don’t need drainage holes in the bottom half, as the water will be contained in the reservoir.
Planting the Green Onion Scraps
Alright, our planter is ready! Now comes the fun part: planting those green onion scraps.
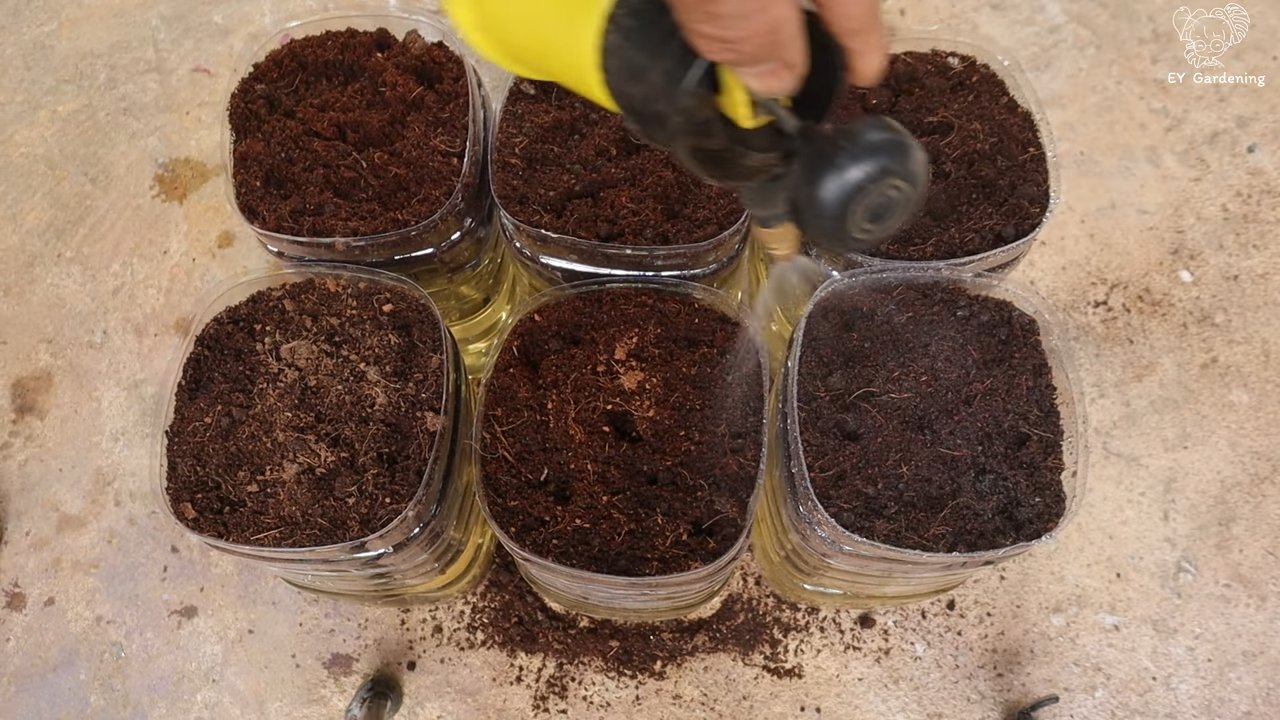
1. Fill with Soil: Fill your plastic bottle planter with potting soil, leaving about an inch of space at the top. Don’t pack the soil too tightly; you want it to be loose and airy so the roots can breathe.
2. Prepare the Green Onion Scraps: Take your green onion scraps (the white bulb ends with the roots). Make sure the roots are still attached. If the roots are very long, you can trim them slightly, but don’t cut them off completely.
3. Plant the Scraps: Now, gently push the green onion scraps into the soil, root-end down. Space them about an inch or two apart. You want the white part of the bulb to be buried in the soil, but the green part should be sticking out.
4. Water Thoroughly: Once all the scraps are planted, water the soil thoroughly. Make sure the water drains out of the drainage holes (if you have them). If you’re using the stacked planter, pour water into the bottom half until it reaches just below the soil level in the top half.
Caring for Your Green Onions
Now that your green onions are planted, it’s time to give them some TLC!
1. Find a Sunny Spot: Green onions need plenty of sunlight to thrive. Place your plastic bottle planter in a sunny spot, like a windowsill or balcony. Aim for at least 6 hours of sunlight per day.
2. Water Regularly: Keep the soil consistently moist, but not soggy. Water when the top inch of soil feels dry to the touch. If you’re using the stacked planter, check the water level in the bottom half regularly and refill as needed.
3. Fertilize (Optional): While not essential, fertilizing your green onions can help them grow faster and stronger. You can use a diluted liquid fertilizer every few weeks. Follow the instructions on the fertilizer packaging.
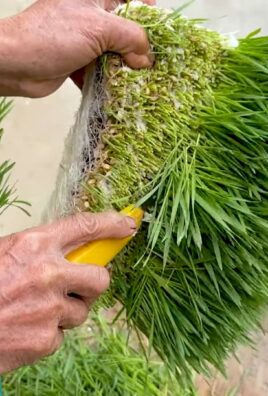
4. Harvesting: The best part! You can start harvesting your green onions as soon as they’re a few inches tall. Simply snip off the green tops with scissors, leaving about an inch or two of the green part intact. The green onions will continue to grow back, so you can harvest them multiple times.
Troubleshooting
Sometimes, things don’t go exactly as planned. Here are a few common issues you might encounter and how to fix them:
* Yellowing Leaves: Yellowing leaves can be a sign of overwatering or underwatering. Check the soil moisture and adjust your watering accordingly. It could also indicate a lack of nutrients, so try fertilizing.
* Slow Growth: Slow growth can be caused by insufficient sunlight or poor soil. Make sure your green onions are getting enough sunlight and that the soil is well-draining.
* Rotting Bulbs: Rotting bulbs are usually a sign of overwatering. Make sure your planter has adequate drainage and that you’re not watering too frequently.
Advanced Tips and Tricks
Want to take your green onion growing to the next level? Here are a few extra tips and tricks:
* Succession Planting: To ensure a continuous supply of green onions, plant new scraps every few weeks. This way, you’ll always have some ready to harvest.
* Different Varieties: Experiment with different varieties of green onions. Some varieties are milder, while others are more pungent.
* Indoor vs. Outdoor: Green onions can be grown indoors or outdoors, depending on your climate. If you live in a cold climate, you’ll need to bring your planter indoors during the winter months.
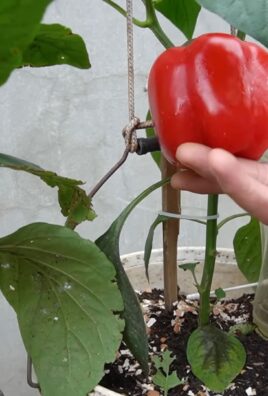
* Companion Planting: Green onions are great companion plants for many vegetables, such as tomatoes, peppers, and carrots. They can help repel pests and improve the flavor of your vegetables.
* Using Other Containers: While plastic bottles are a great option for recycling, you can also use other containers, such as yogurt cups, tin cans, or even old shoes! Just make sure the container has drainage holes.
* Hydroponics: For a more advanced project, you can try growing green onions hydroponically. This involves growing them in water without soil. There are many tutorials online that can guide you through the process.
* Saving Seeds: If you let your green onions flower, they will produce seeds. You can collect these seeds and use them to grow new green onions. However, keep in mind that the seeds may not produce plants that are identical to the parent plant.
* Pest Control: Green onions are generally pest-resistant, but they can sometimes be attacked by aphids or other small insects. If you notice any pests, you can try spraying them with insecticidal soap or neem oil.
* Soil Amendments: Adding compost or other organic matter to the soil can improve its fertility and drainage. This will help your green onions grow stronger and healthier.
* Rotating Crops: If you’re growing green onions in the same container year after year, it’s a good idea to rotate the soil. This will help prevent the buildup of pests and diseases.
I hope you found this guide helpful! Growing green onions from plastic bottles is a fun, easy, and rewarding project that anyone can do. So, grab a plastic bottle, some green onion scraps, and get growing! You’ll be amazed at how quickly your green onions will sprout and how much money you’ll save. Happy gardening!
Conclusion
So, there you have it! Transforming a humble plastic bottle into a thriving green onion garden is not just a fun project; it’s a game-changer for your kitchen and your wallet. We’ve walked you through the simple steps, highlighting how easy it is to recycle, reduce waste, and enjoy a constant supply of fresh, flavorful green onions right at your fingertips.
But why is this DIY trick a must-try? Beyond the obvious cost savings and environmental benefits, it’s about convenience and control. Imagine never having to run to the store for a bunch of green onions again. Picture the satisfaction of snipping off exactly what you need, knowing it’s pesticide-free and bursting with freshness. This method allows you to cultivate your own little urban farm, regardless of your outdoor space. Even if you live in an apartment with no balcony, you can still enjoy the taste of homegrown goodness.
This is more than just growing green onions; it’s about embracing a sustainable lifestyle.
Now, let’s talk variations. While we’ve focused on the basic method, feel free to experiment! Try using different types of plastic bottles – just ensure they are clean and have adequate drainage. You can also explore different growing mediums. While soil works perfectly well, you could also try coco coir or even a hydroponic setup for faster growth. Consider adding a slow-release fertilizer to the soil to boost your green onion production.
Another exciting variation is to create a vertical green onion garden. By stacking multiple bottle planters, you can maximize your space and create a visually appealing display. Get creative with how you arrange the bottles – a simple tower, a cascading wall, or even a whimsical sculpture. The possibilities are endless!
Don’t be afraid to experiment with different varieties of green onions, too. Some varieties are milder, while others have a more pungent flavor. Try growing several different types to find your favorites.
And remember, this method isn’t limited to green onions! You can also try growing other herbs and vegetables in plastic bottles, such as lettuce, spinach, or even strawberries. With a little creativity, you can transform your home into a miniature edible landscape.
We wholeheartedly encourage you to give this DIY green onion growing project a try. It’s a simple, rewarding, and sustainable way to add fresh flavor to your meals. Once you’ve experienced the joy of harvesting your own homegrown green onions, you’ll never look at a plastic bottle the same way again.
But the real magic happens when you share your experience. We want to hear your stories, see your photos, and learn from your successes (and even your failures!). Share your tips and tricks, your variations, and your favorite ways to use your homegrown green onions. Let’s create a community of DIY gardeners who are passionate about sustainability and fresh, flavorful food.
So, grab a plastic bottle, some soil, and a handful of green onion scraps, and get growing! Don’t forget to share your journey with us using #DIYGreenOnions and #PlasticBottleGardening. We can’t wait to see what you create!
Frequently Asked Questions (FAQ)
What kind of plastic bottle is best for growing green onions?
Ideally, you want to use a food-grade plastic bottle that is clean and free of any harmful chemicals. A standard water bottle or soda bottle works well. Make sure to thoroughly wash the bottle with soap and water before using it. Avoid using bottles that have contained harsh chemicals or cleaning products. The size of the bottle will depend on how many green onions you want to grow. A larger bottle will allow you to grow more green onions, but a smaller bottle is easier to handle and move around.
How often should I water my green onions grown in a plastic bottle?
The frequency of watering will depend on several factors, including the climate, the type of soil you’re using, and the size of the bottle. As a general rule, you should water your green onions whenever the top inch of soil feels dry to the touch. Avoid overwatering, as this can lead to root rot. Make sure the bottle has adequate drainage holes to prevent water from accumulating at the bottom. During hot weather, you may need to water your green onions more frequently.
What kind of soil should I use for growing green onions in a plastic bottle?
A well-draining potting mix is ideal for growing green onions in a plastic bottle. You can purchase a pre-made potting mix from your local garden center, or you can make your own by mixing equal parts of peat moss, perlite, and vermiculite. Avoid using garden soil, as it can be too heavy and may not drain well. You can also add some compost to the soil to provide extra nutrients for your green onions.
How much sunlight do green onions need when grown in a plastic bottle?
Green onions need at least six hours of sunlight per day to thrive. Place your plastic bottle garden in a sunny location, such as a windowsill or a balcony. If you don’t have access to enough natural sunlight, you can supplement with artificial light. A grow light or even a fluorescent light can provide the necessary light for your green onions to grow.
How long does it take for green onions to regrow in a plastic bottle?
Green onions typically regrow within a week or two after being cut. The exact time will depend on the variety of green onion, the growing conditions, and how much of the green onion you cut off. To encourage faster regrowth, make sure to provide your green onions with plenty of sunlight, water, and nutrients. You can also add a small amount of fertilizer to the soil to boost growth.
Can I grow green onions indoors in a plastic bottle during the winter?
Yes, you can absolutely grow green onions indoors in a plastic bottle during the winter. In fact, this is a great way to have a constant supply of fresh green onions even when the weather outside is cold and dreary. Just make sure to provide your green onions with enough sunlight or artificial light, and keep the soil moist but not soggy. You may also need to adjust your watering schedule depending on the humidity levels in your home.
How do I harvest green onions from my plastic bottle garden?
Harvesting green onions is easy! Simply use a pair of scissors or a sharp knife to cut off the green tops of the onions, leaving about an inch or two of the white base intact. This will allow the green onions to regrow. You can harvest green onions as needed, whenever you need a fresh burst of flavor for your meals.
What if my green onions start to turn yellow or brown?
Yellowing or browning of the green onion leaves can be a sign of several problems, including overwatering, underwatering, nutrient deficiency, or pest infestation. Check the soil moisture to make sure you’re not overwatering or underwatering. If the soil is dry, water thoroughly. If the soil is soggy, allow it to dry out before watering again. You can also add a small amount of fertilizer to the soil to provide extra nutrients. If you suspect a pest infestation, inspect the plants carefully and treat with an appropriate insecticide.
Can I use this method to grow other vegetables or herbs?
Absolutely! The plastic bottle gardening method is versatile and can be used to grow a variety of other vegetables and herbs, such as lettuce, spinach, basil, mint, and parsley. Just make sure to choose plants that are well-suited to growing in containers and provide them with the appropriate growing conditions.
How do I prevent my plastic bottle green onion garden from smelling bad?
A foul odor from your plastic bottle green onion garden is usually a sign of overwatering or poor drainage. Make sure the bottle has adequate drainage holes to prevent water from accumulating at the bottom. You can also add some activated charcoal to the soil to help absorb odors. Avoid using tap water that contains chlorine, as this can also contribute to unpleasant smells. Instead, use filtered water or rainwater.
Leave a Comment