
Growing Gourds in Bags: Unlock the secrets to a bountiful harvest, even without a sprawling garden! Have you ever dreamt of adorning your home with unique, handcrafted decorations made from your own homegrown gourds? Or perhaps you’re simply looking for a space-saving solution to cultivate these fascinating fruits? Well, you’re in the right place! This DIY guide will reveal how you can successfully grow gourds in bags, transforming even the smallest balcony or patio into a thriving gourd patch.
Gourds have a rich history, dating back thousands of years. Ancient civilizations across the globe, from the Americas to Africa, utilized gourds for everything from utensils and musical instruments to decorative art. Their versatility and natural beauty have made them a cherished part of many cultures. Today, the tradition continues, with gardeners and crafters alike embracing the joy of cultivating and crafting with these amazing plants.
But why grow gourds in bags? Let’s face it, not everyone has the luxury of a large garden. This DIY trick is perfect for apartment dwellers, urban gardeners, or anyone with limited space. Plus, growing gourds in bags offers better control over soil conditions and drainage, leading to healthier plants and a more abundant yield. I’m excited to share these simple yet effective techniques that will empower you to experience the satisfaction of growing gourds in bags, regardless of your gardening experience. Get ready to unleash your inner gardener and create something truly special!
Growing Gourds in Bags: A DIY Guide for Bountiful Harvests
Hey there, fellow gardening enthusiasts! I’m so excited to share my experience with growing gourds in bags. It’s a fantastic way to cultivate these fascinating plants, especially if you’re short on space or have challenging soil conditions. Plus, it’s a really fun and rewarding project! Let’s dive in!
Why Grow Gourds in Bags?
Before we get started, you might be wondering why grow gourds in bags instead of directly in the ground. Well, there are several advantages:
* Space Saving: Bags are perfect for patios, balconies, or small gardens. You can easily move them around to optimize sunlight exposure.
* Soil Control: You have complete control over the soil composition, ensuring your gourds get the nutrients they need. This is especially helpful if your native soil is poor or compacted.
* Improved Drainage: Bags typically offer better drainage than heavy clay soil, preventing root rot and promoting healthy growth.
* Pest and Disease Management: It’s easier to monitor and manage pests and diseases when your plants are contained in bags.
* Earlier Harvest: The soil in bags tends to warm up faster in the spring, giving your gourds a head start.
Choosing Your Gourds
The first step is selecting the type of gourd you want to grow. There are so many varieties to choose from, each with its own unique shape, size, and color. Here are a few popular options:
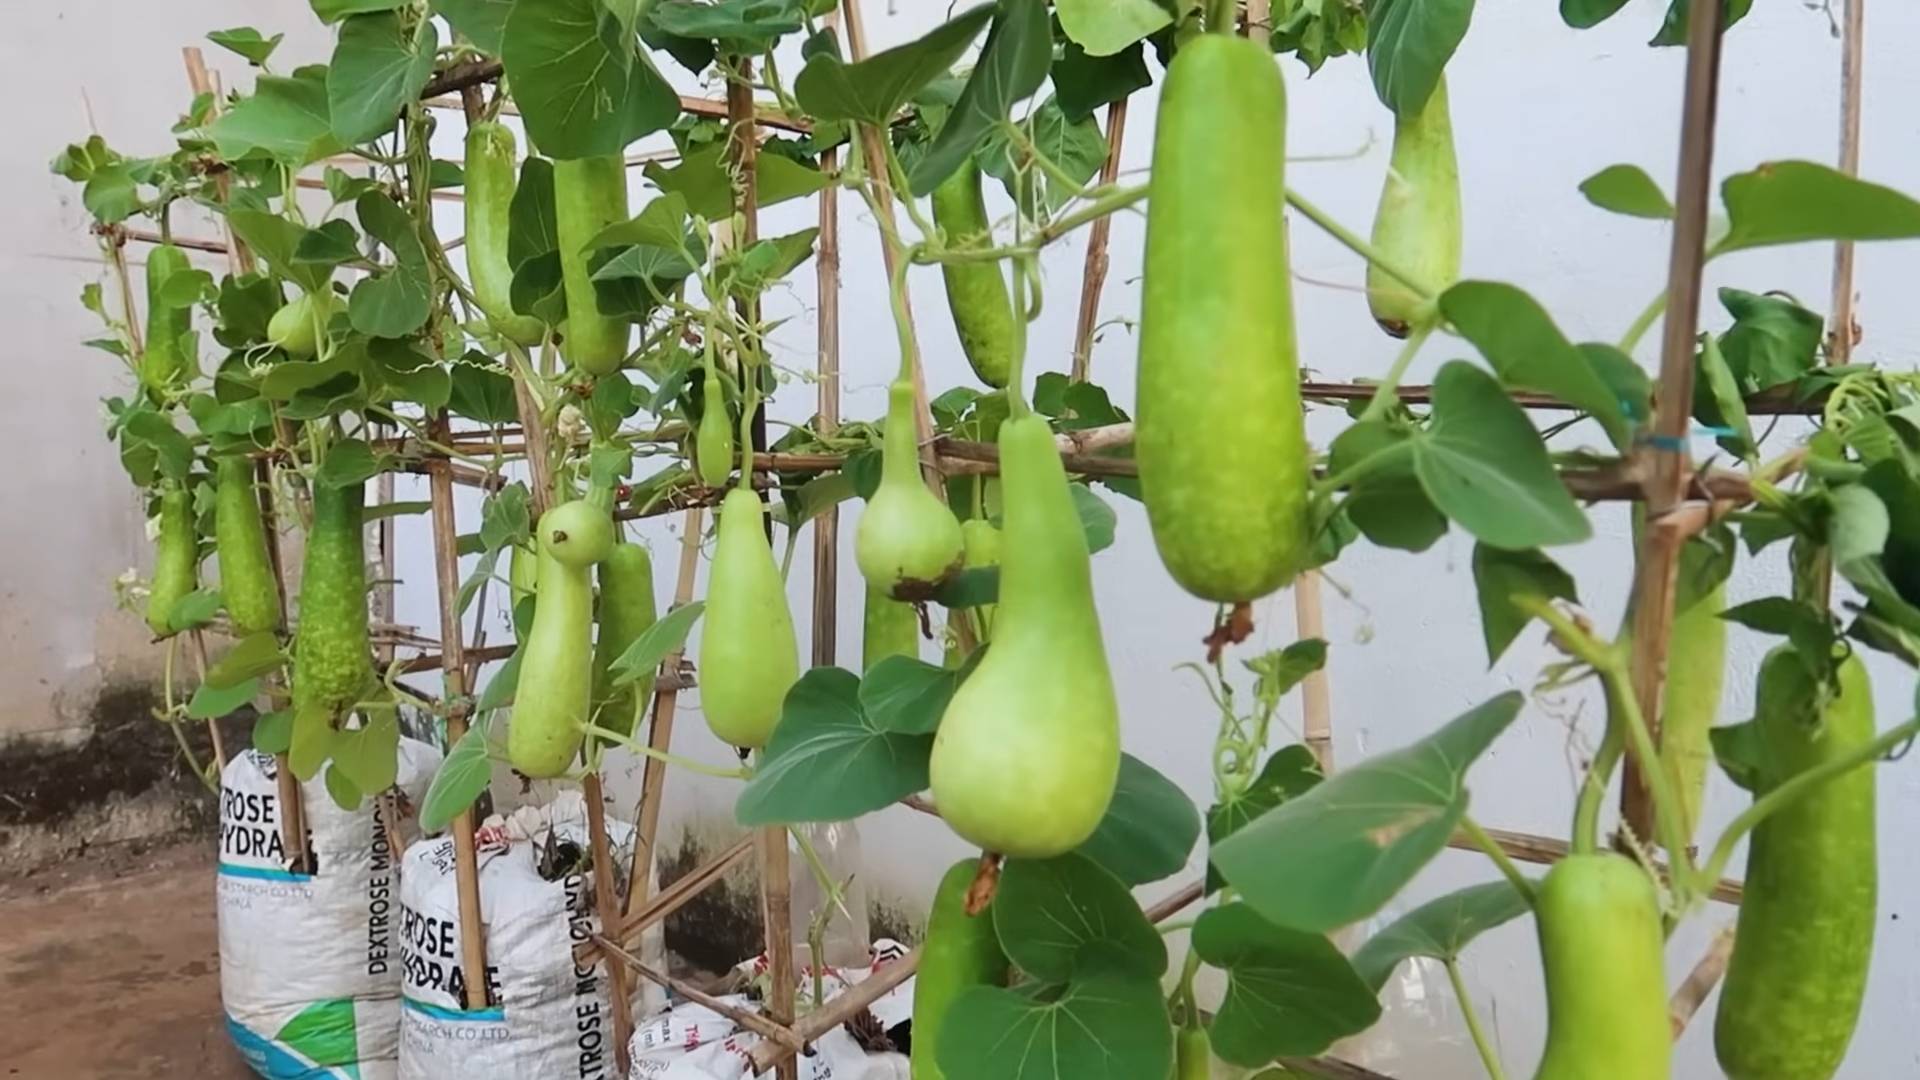
* Birdhouse Gourds: These are large, round gourds that can be dried and used to create charming birdhouses.
* Dipper Gourds: These have a long handle and a rounded body, perfect for scooping water or other liquids.
* Ornamental Gourds: These come in a wide range of shapes, sizes, and colors, making them ideal for decorative purposes.
* Luffa Gourds: These are grown for their fibrous interior, which can be used as a natural exfoliating sponge.
Consider your available space and what you plan to do with the gourds after harvest when making your selection. I personally love growing birdhouse gourds because they add so much character to my garden.
Materials You’ll Need
Okay, let’s gather our supplies! Here’s what you’ll need to grow gourds in bags:
* Grow Bags: Choose bags that are at least 15-20 gallons in size. Fabric grow bags are ideal because they allow for good drainage and aeration.
* Potting Mix: Use a high-quality potting mix that is well-draining and rich in organic matter. Avoid using garden soil, as it can become compacted in bags.
* Gourd Seeds: Purchase seeds from a reputable source to ensure good germination rates.
* Trellis or Support System: Gourds are vining plants and need a trellis or other support system to climb on. You can use a tomato cage, a wooden trellis, or even a sturdy fence.
* Fertilizer: Use a balanced fertilizer (e.g., 10-10-10) or a fertilizer specifically formulated for vegetables.
* Watering Can or Hose: For watering your plants.
* Gloves: To protect your hands.
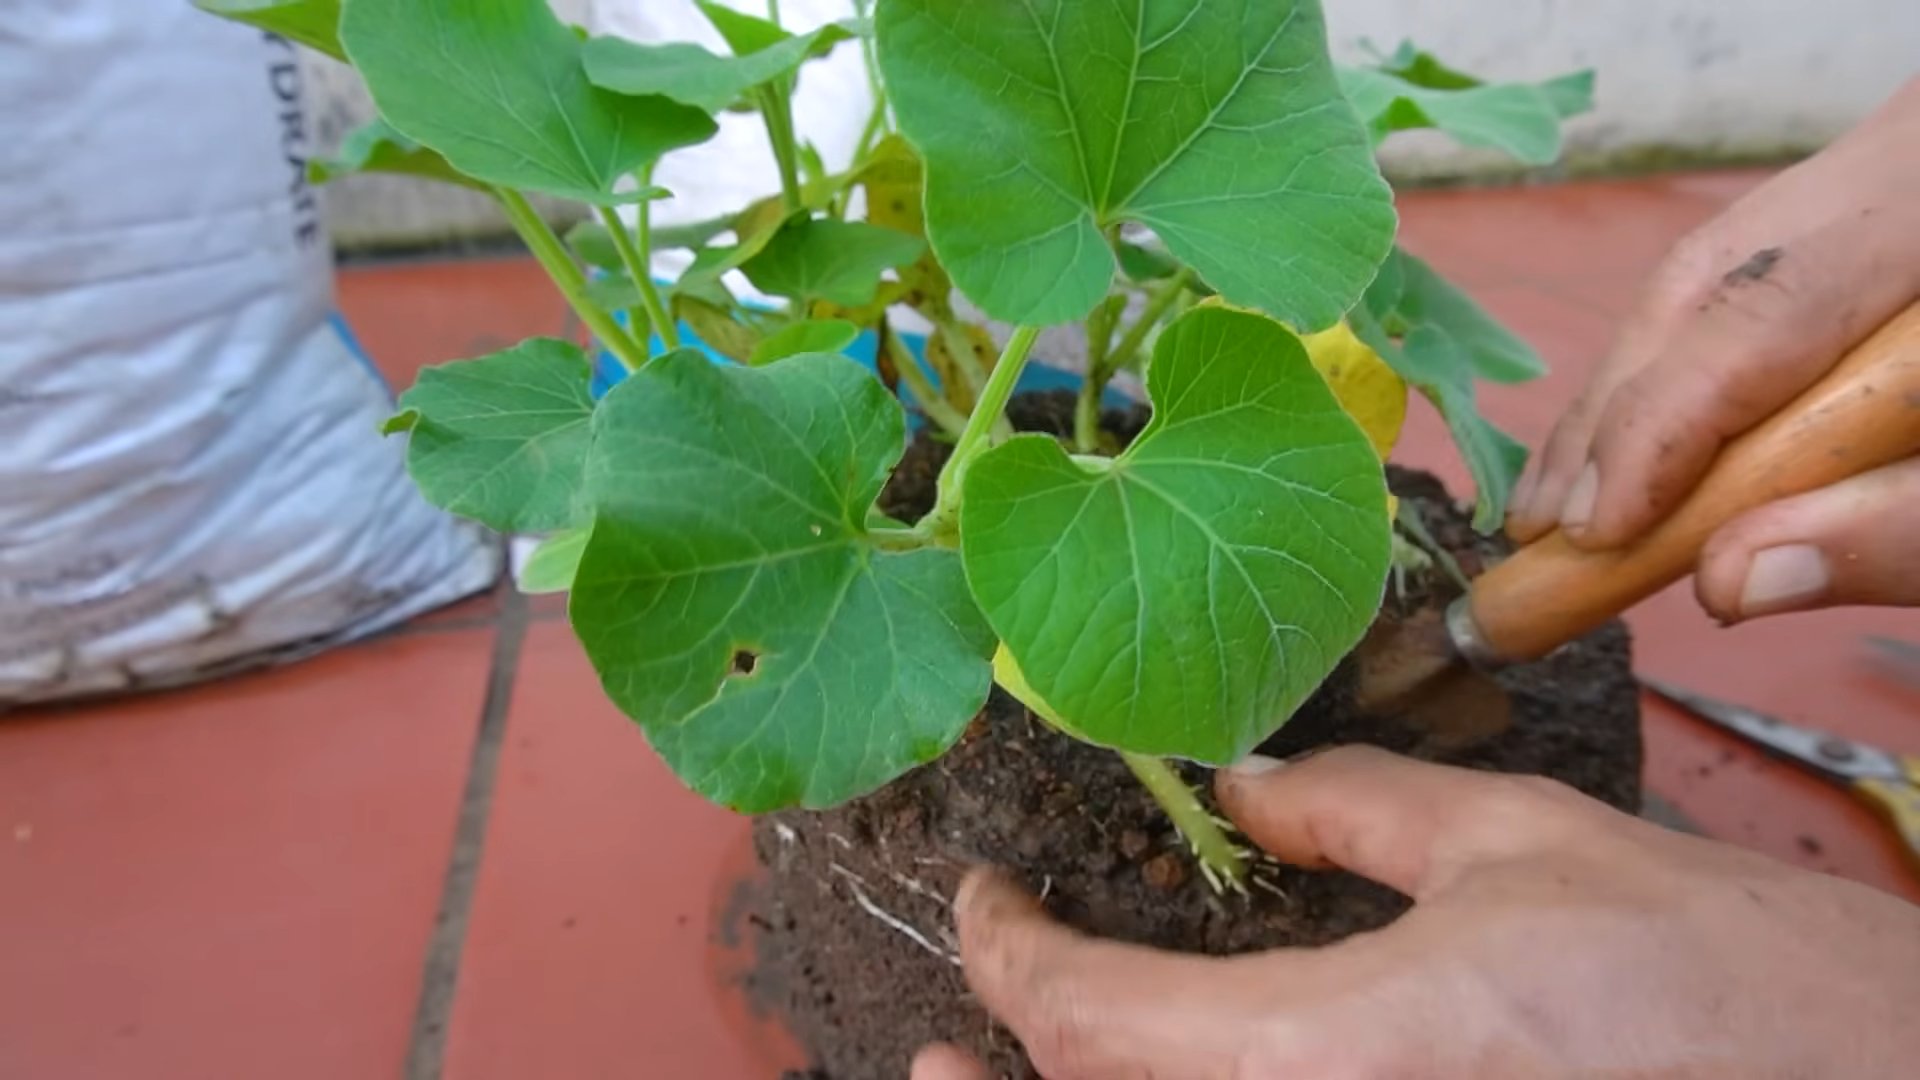
* Hand Trowel: For planting seeds or seedlings.
* Pruning Shears: For trimming vines and removing dead leaves.
* Mulch: To help retain moisture and suppress weeds.
Step-by-Step Instructions: Planting and Growing Your Gourds
Alright, let’s get our hands dirty! Here’s a detailed guide to planting and growing gourds in bags:
1. Preparing the Grow Bags
* Choose a Sunny Location: Gourds need at least 6-8 hours of direct sunlight per day. Select a location that receives plenty of sun.
* Place the Grow Bags: Position the grow bags in your chosen location. Make sure they are stable and won’t tip over easily.
* Fill the Bags with Potting Mix: Fill the grow bags with potting mix, leaving about 2-3 inches of space at the top.
* Water the Soil: Thoroughly water the potting mix until it is evenly moist but not soggy.
2. Planting the Gourd Seeds
* Sowing Seeds Directly: You can sow gourd seeds directly into the grow bags after the last frost.
* Make Small Holes: Create small holes about 1 inch deep and 2-3 inches apart.
* Place Seeds in Holes: Place 2-3 seeds in each hole.
* Cover with Soil: Gently cover the seeds with potting mix.
* Water Gently: Water the soil gently to avoid disturbing the seeds.
* Starting Seeds Indoors (Optional): You can also start gourd seeds indoors 4-6 weeks before the last frost.
* Use Seed Starting Trays: Plant the seeds in seed starting trays filled with seed starting mix.
* Keep Soil Moist: Keep the soil moist and warm.
* Transplant Seedlings: Once the seedlings have developed a few true leaves, transplant them into the grow bags.
3. Providing Support
* Install Trellis or Support System: Install a trellis or other support system near the grow bags. This will give the gourd vines something to climb on.
* Guide the Vines: As the vines grow, gently guide them onto the trellis. You may need to tie them to the trellis with soft twine or plant ties.
4. Watering and Fertilizing
* Water Regularly: Water the gourds regularly, especially during hot, dry weather. Check the soil moisture by sticking your finger into the soil. If the top inch of soil is dry, it’s time to water.
* Avoid Overwatering: Be careful not to overwater, as this can lead to root rot.
* Fertilize Regularly: Fertilize the gourds every 2-3 weeks with a balanced fertilizer. Follow the instructions on the fertilizer package.
* Foliar Feeding (Optional): You can also apply a foliar feed by spraying the leaves with a diluted fertilizer solution.
5. Pruning and Training
* Prune Vines: Prune the vines to encourage branching and fruit production. Remove any dead or yellowing leaves.
* Pinch Off Suckers: Pinch off any suckers (small shoots that grow from the base of the plant) to direct energy to the main vines.
* Train Vines: Train the vines to grow along the trellis in a way that maximizes sunlight exposure and air circulation.
6. Pest and Disease Management
* Monitor for Pests: Regularly inspect the plants for pests such as aphids, squash bugs, and vine borers.
* Use Organic Pest Control: If you find pests, use organic pest control methods such as insecticidal soap or neem oil.
* Prevent Diseases: To prevent diseases, ensure good air circulation around the plants and avoid overhead watering.
* Remove Infected Leaves: If you see any signs of disease, such as powdery mildew or leaf spot, remove the infected leaves immediately.
7. Pollination
* Hand Pollination (If Necessary): Gourds have separate male and female flowers. If you’re not seeing many gourds developing, you may need to hand-pollinate the flowers.
* Identify Male and Female Flowers: Male flowers have a long stem, while female flowers have a small gourd-like structure at the base.
* Transfer Pollen: Use a small paintbrush to transfer pollen from the male flower to the female flower.
* Pollinate in the Morning: Pollinate the flowers in the morning, when the pollen is most viable.
Harvesting Your Gourds
Harvesting time is the most exciting part! Here’s how to know when your gourds are ready to be picked:
* Check for Maturity: Gourds are typically ready to harvest in the fall, after the vines have died back and the gourds have hardened.
* Tap the Gourd: Tap the gourd with your knuckles. If it sounds hollow, it’s ready to harvest.
* Cut the Gourd from the Vine: Use pruning shears to cut the gourd from the vine, leaving a few inches of stem attached.
* Handle with Care: Handle the gourds carefully to avoid bruising or damaging them.
Curing Your Gourds
After harvesting, you’ll need to cure your gourds to ensure they dry properly and last for a long time.
* Clean the Gourds: Wash the gourds with soapy water to remove any dirt or debris.
* Dry the Gourds: Place the gourds in a well-ventilated area, such as a garage or shed.
* Elevate
Conclusion
So, there you have it! Growing gourds in bags is not just a viable option; it’s a game-changer for gardeners with limited space, challenging soil conditions, or simply a desire for greater control over their growing environment. We’ve explored the ins and outs of this method, from selecting the right bag size and gourd variety to providing optimal care and support.
Why is this DIY trick a must-try? Because it unlocks the potential for anyone, regardless of their gardening experience or property size, to cultivate these fascinating and versatile plants. Imagine the satisfaction of harvesting your own unique gourds, ready to be transformed into birdhouses, bowls, decorations, or even musical instruments. The possibilities are truly endless!
Beyond the practical benefits, growing gourds in bags offers a unique opportunity to experiment and personalize your gardening experience. Consider trying different soil mixes to see which yields the best results for your chosen gourd variety. You could also experiment with different trellising systems to create visually stunning displays. For example, a sturdy A-frame trellis can support heavier gourds, while a simple vertical trellis is perfect for smaller, ornamental varieties.
Don’t be afraid to get creative with your bag selection, too. While burlap and grow bags are excellent choices, you could also repurpose large plastic containers or even old feed sacks, ensuring they have adequate drainage holes. Remember, the key is to provide a stable and well-draining environment for your gourd’s roots to thrive.
We encourage you to embrace this DIY trick and embark on your own gourd-growing adventure. The rewards are well worth the effort, from the joy of watching your plants flourish to the satisfaction of creating something beautiful and functional with your own hands.
And remember, the journey doesn’t end with the harvest. Share your experiences, successes, and challenges with us! We’d love to hear about your favorite gourd varieties, your innovative trellising solutions, and any tips or tricks you’ve discovered along the way. Together, we can build a community of gourd enthusiasts and inspire others to discover the magic of growing these amazing plants in bags. So, get your hands dirty, embrace the challenge, and prepare to be amazed by the bounty of your bag-grown gourds! This method of growing gourds in bags is sure to bring you joy and a plentiful harvest.
Frequently Asked Questions (FAQ)
What size bag is best for growing gourds?
The ideal bag size depends on the gourd variety you plan to grow. For smaller, ornamental gourds, a 10-15 gallon bag may suffice. However, for larger varieties like bottle gourds or dipper gourds, you’ll need a minimum of 20-25 gallons, and even larger bags (30-50 gallons) are preferable to allow for ample root development. Remember, the bigger the gourd, the bigger the bag! Insufficient space can lead to stunted growth and reduced yields. Also, consider the weight of the bag when filled with soil and a mature gourd. Ensure you have a sturdy base or support system to prevent tipping.
What type of soil should I use in my gourd-growing bags?
Gourds thrive in well-draining, nutrient-rich soil. A good mix consists of equal parts compost, potting soil, and perlite or vermiculite. The compost provides essential nutrients, the potting soil offers a good base for root growth, and the perlite or vermiculite improves drainage and aeration. Avoid using heavy clay soil, as it can become waterlogged and suffocate the roots. You can also amend your soil with slow-release fertilizer to provide a steady supply of nutrients throughout the growing season. Consider testing your soil pH before planting; gourds prefer a slightly acidic to neutral pH (around 6.0-7.0).
How often should I water my gourds grown in bags?
Watering frequency depends on the weather, the size of the bag, and the gourd variety. Generally, you should water deeply whenever the top inch of soil feels dry to the touch. During hot, dry periods, you may need to water daily or even twice a day. Avoid overwatering, as this can lead to root rot. Ensure your bags have adequate drainage holes to prevent water from pooling at the bottom. A good rule of thumb is to water until you see water draining from the bottom of the bag. Mulching around the base of the plant can help retain moisture and reduce the need for frequent watering.
Do gourds grown in bags need fertilizer?
Yes, gourds are heavy feeders and benefit from regular fertilization. Start with a balanced fertilizer (e.g., 10-10-10) at planting time, following the instructions on the package. Once the plants start to flower and produce fruit, switch to a fertilizer higher in phosphorus and potassium (e.g., 5-10-10) to promote fruit development. You can also supplement with liquid seaweed or fish emulsion every few weeks to provide micronutrients. Avoid over-fertilizing, as this can lead to excessive foliage growth at the expense of fruit production.
How do I support my gourds as they grow in bags?
Gourds are vines and need support to climb and prevent the fruits from touching the ground. A sturdy trellis is essential, especially for larger gourd varieties. You can use a variety of trellising systems, such as A-frames, vertical trellises, or even repurposed fencing. Ensure the trellis is strong enough to support the weight of the mature gourds. You can also use slings or netting to support individual gourds as they grow, especially if they are particularly heavy. Regularly check the trellis and support system to ensure it is secure and adjust as needed.
What are some common pests and diseases that affect gourds grown in bags?
Common pests that affect gourds include squash bugs, squash vine borers, aphids, and cucumber beetles. Regularly inspect your plants for signs of infestation and take appropriate action, such as hand-picking pests, using insecticidal soap, or applying neem oil. Common diseases include powdery mildew, downy mildew, and fungal leaf spots. To prevent diseases, ensure good air circulation around your plants, avoid overhead watering, and apply a fungicide if necessary. Choose disease-resistant gourd varieties whenever possible.
Can I grow different types of gourds in the same bag?
While it’s technically possible to grow multiple gourd plants in a single large bag, it’s generally not recommended. Different gourd varieties may have different growth habits and nutrient requirements, which can lead to competition and reduced yields. It’s best to give each gourd plant its own dedicated bag to ensure optimal growth and development. If you do choose to grow multiple plants in the same bag, select compatible varieties with similar growth habits and provide ample space and nutrients.
How long does it take for gourds to mature when grown in bags?
The time it takes for gourds to mature depends on the variety and growing conditions. Generally, gourds take 90-120 days to mature from seed. However, some varieties may take longer. Ensure you provide adequate sunlight, water, and nutrients to promote rapid growth. You’ll know your gourds are mature when the stems begin to dry and turn brown, and the skin becomes hard and resistant to scratching.
Can I overwinter my gourd plants in bags?
Gourds are typically grown as annuals and do not survive freezing temperatures. However, in mild climates, you may be able to overwinter your gourd plants by protecting them from frost and providing adequate insulation. Cut back the vines and move the bags to a sheltered location, such as a garage or greenhouse. Water sparingly during the winter months and resume regular watering and fertilization in the spring. Keep in mind that overwintered gourd plants may not produce as well as new plants started from seed.
What do I do with my gourds after harvesting them from the bags?
After harvesting your gourds, you’ll need to cure them properly to ensure they dry completely and prevent rotting. Wipe the gourds clean with a damp cloth and allow them to air dry in a well-ventilated area for several weeks. Turn the gourds regularly to ensure even drying. Once the gourds are completely dry, they can be used for a variety of crafts and decorations. You can paint them, carve them, or use them to create birdhouses, bowls, or musical instruments. The possibilities are endless!
Leave a Comment