
Growing Coral Bells from Seed can seem daunting, but trust me, it’s a rewarding journey that unlocks a world of vibrant colors and textures in your garden! Have you ever dreamt of a garden bursting with unique coral bells, each a testament to your own green thumb? Forget relying solely on nursery-bought plants; imagine the satisfaction of nurturing these beauties from tiny seeds, watching them unfurl into stunning foliage.
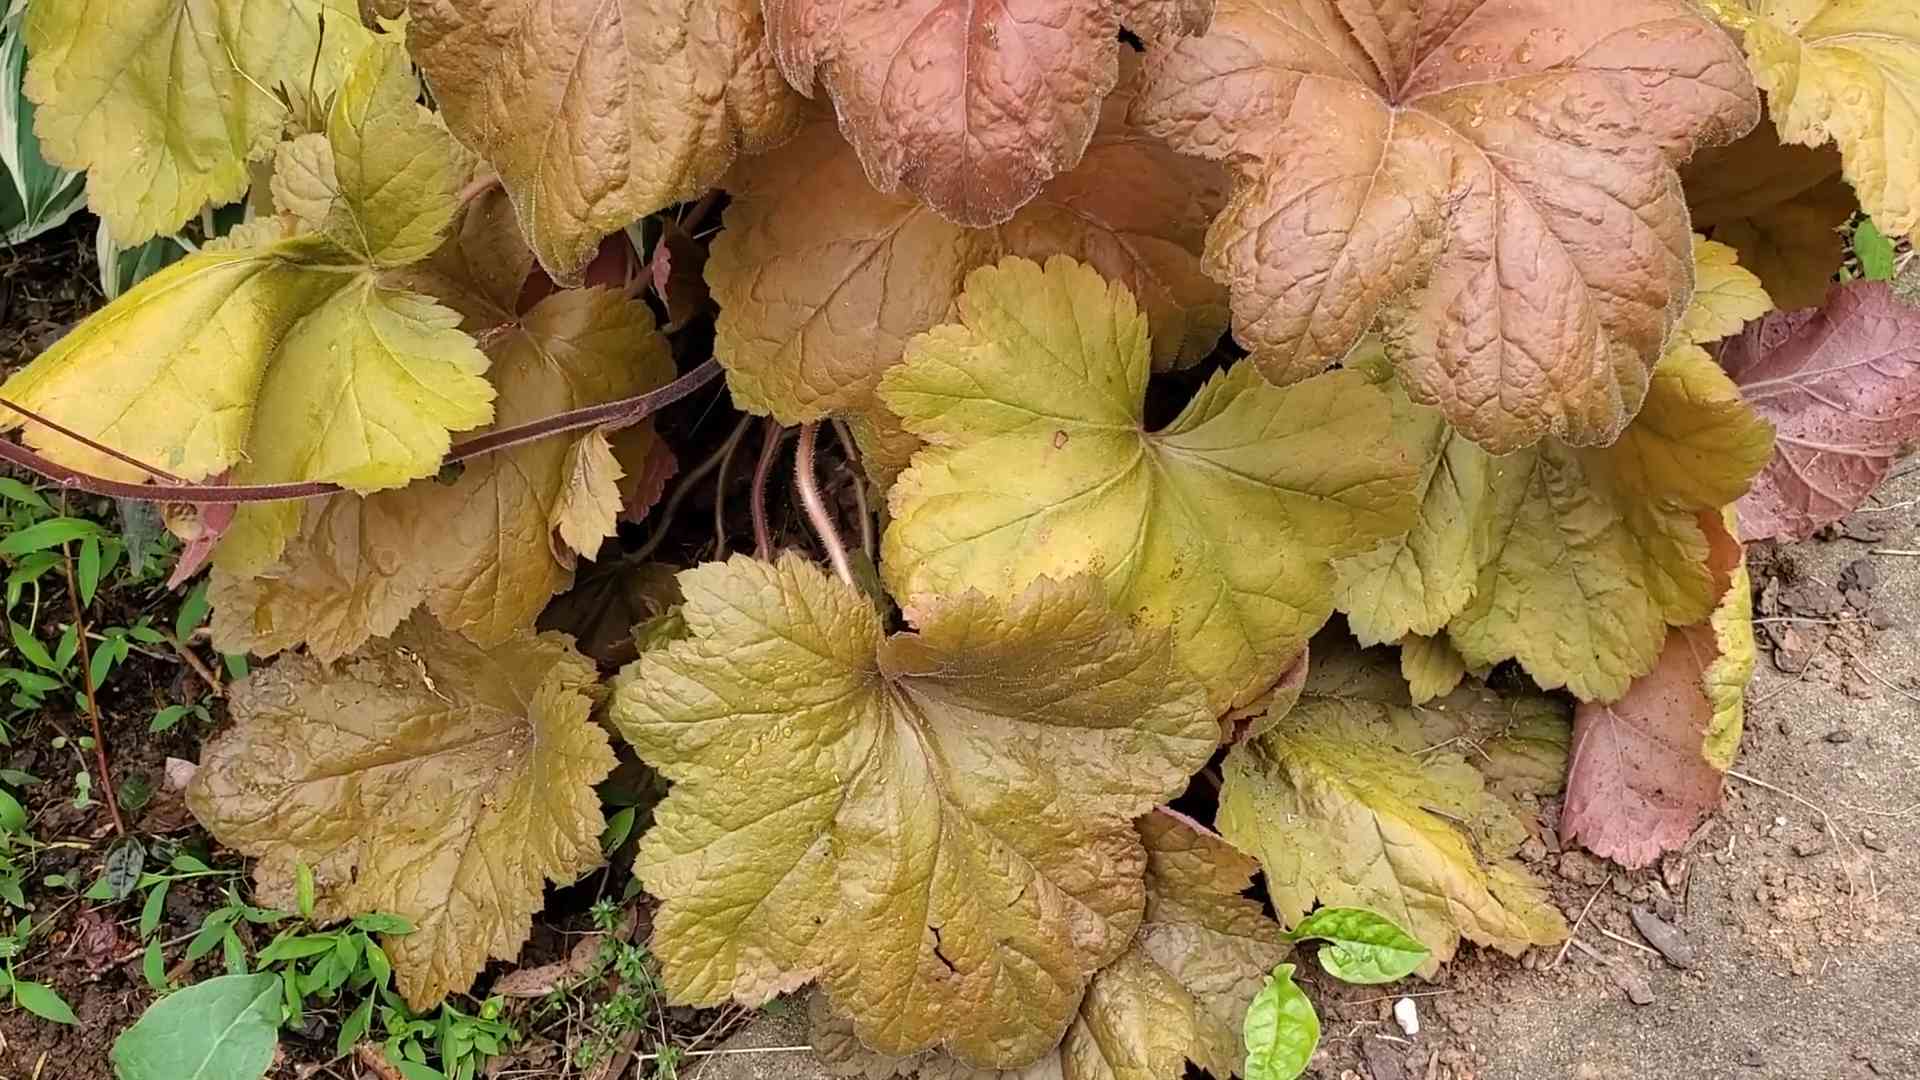
Coral bells, also known as Heuchera, have a rich history, gracing gardens for centuries with their captivating presence. Their popularity surged in the Victorian era, prized for their intricate leaf patterns and delicate flowers. Today, they remain a favorite among gardeners, offering a diverse palette of colors, from deep purples and vibrant reds to sunny yellows and shimmering silvers.
But why bother with seeds? Well, growing coral bells from seed allows you to cultivate rare and unusual varieties that might be hard to find as established plants. Plus, it’s a budget-friendly way to expand your collection and fill your garden with these low-maintenance charmers. I’m here to guide you through the process, sharing my tried-and-true DIY tricks and hacks to ensure your success. Get ready to embark on a fulfilling gardening adventure and witness the magic of life unfolding, one seed at a time!
Growing Coral Bells (Heuchera) from Seed: A Comprehensive DIY Guide
Hey there, fellow gardening enthusiasts! I’m so excited to share my experience and guide you through the process of growing beautiful Coral Bells (Heuchera) from seed. It might seem a little daunting at first, but trust me, with a little patience and these detailed instructions, you’ll be rewarded with a vibrant array of foliage colors and textures in your garden. Let’s dive in!
Why Grow Coral Bells from Seed?
Growing Coral Bells from seed offers several advantages:
* Cost-Effective: Buying seed packets is significantly cheaper than purchasing established plants, especially if you want a large number of Coral Bells.
* Variety: You can access a wider range of Coral Bell varieties from seed catalogs than you might find at your local garden center.
* Personal Satisfaction: There’s a unique sense of accomplishment in nurturing plants from tiny seeds to thriving specimens.
* Adaptability: Seed-grown plants tend to be more adaptable to your specific garden conditions.
What You’ll Need
Before we get started, gather these essential supplies:
* Coral Bell Seeds: Purchase high-quality seeds from a reputable source. Look for varieties that suit your climate and desired foliage colors.
* Seed Starting Trays or Pots: Choose trays with drainage holes to prevent waterlogging.
* Seed Starting Mix: Use a fine-textured, sterile mix specifically formulated for seed starting. Avoid using garden soil, as it can harbor diseases and pests.
* Spray Bottle: For gently misting the seeds and seedlings.
* Humidity Dome or Plastic Wrap: To maintain consistent moisture levels.
* Grow Lights (Optional): If you don’t have a bright, sunny location.
* Heat Mat (Optional): To provide bottom heat for faster germination.
* Small Labels and a Permanent Marker: To keep track of your different varieties.
* Tweezers or a Toothpick: For handling the tiny seeds.
* Well-draining potting mix: For transplanting seedlings into larger containers.
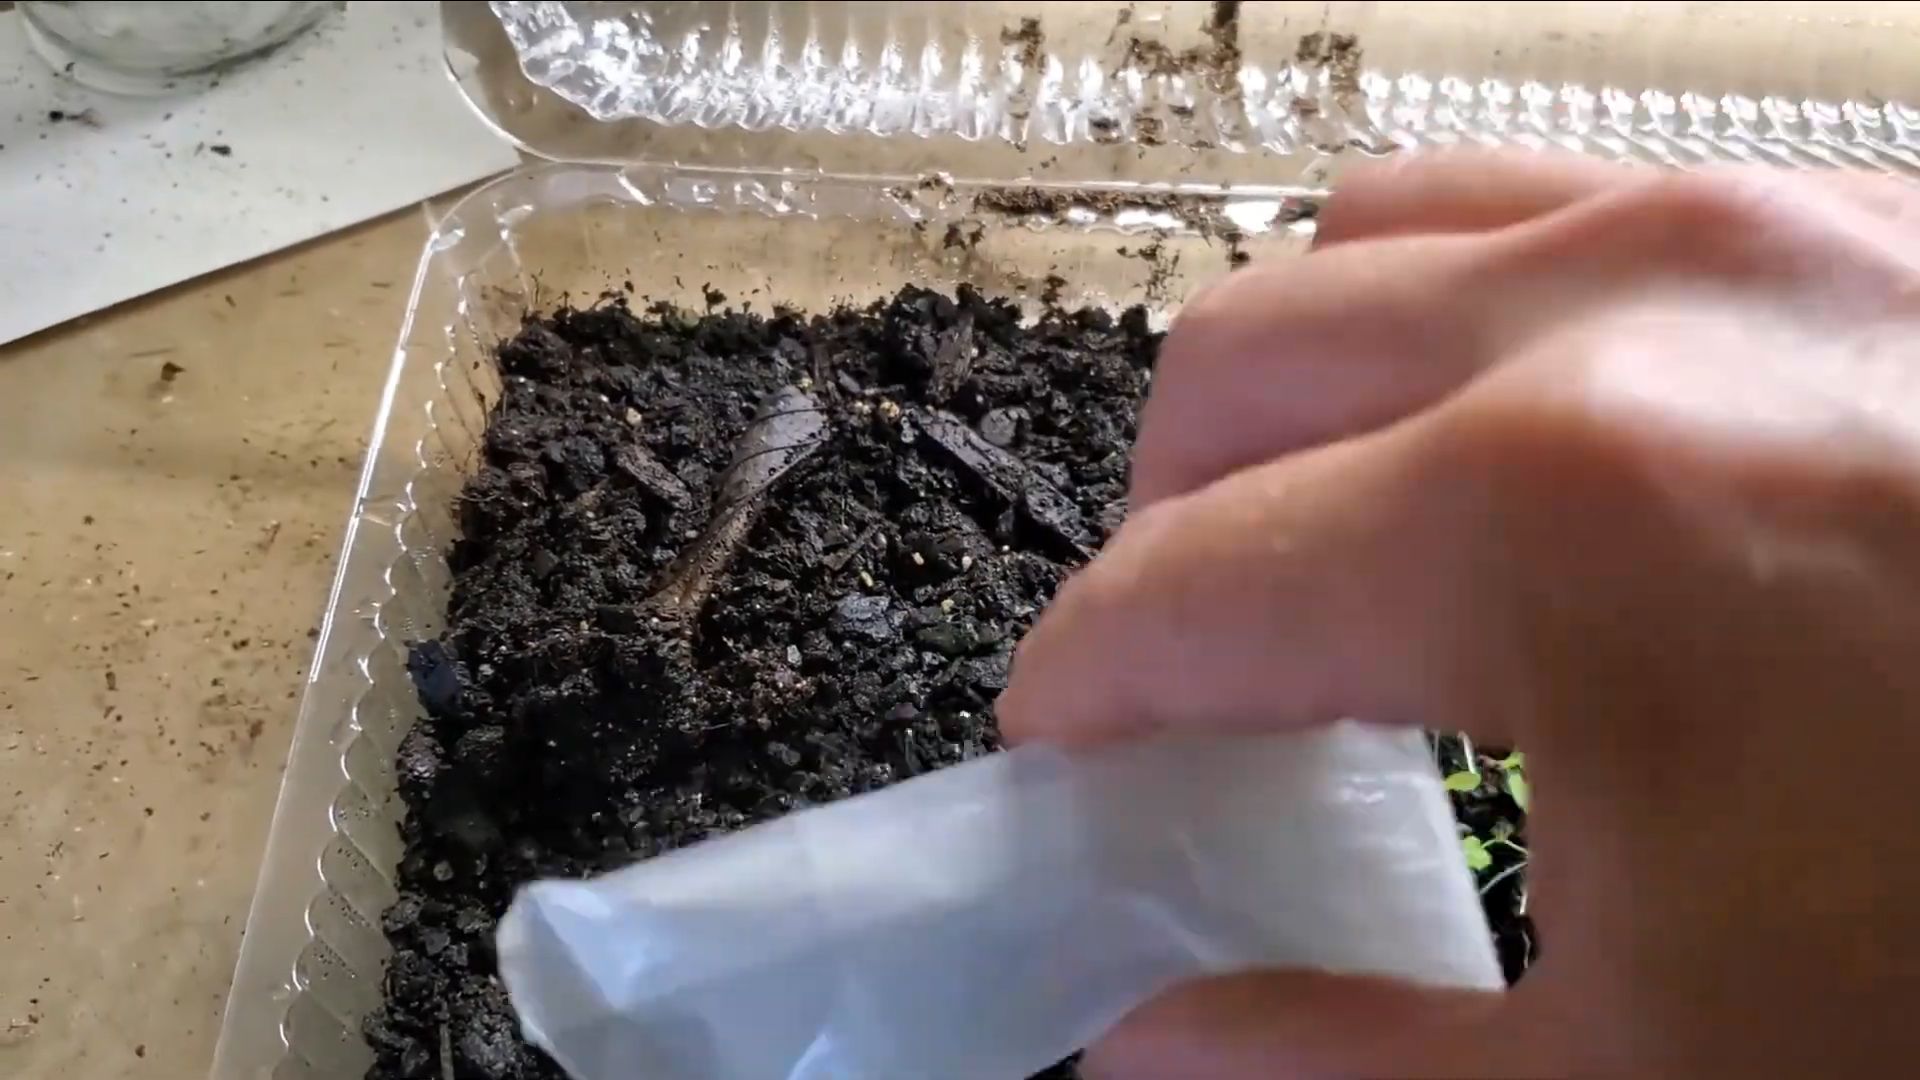
Phase 1: Sowing the Seeds
Coral Bell seeds are incredibly tiny, so handle them with care. Here’s how to sow them properly:
1. Prepare the Seed Starting Trays: Fill your seed starting trays or pots with the seed starting mix. Gently tap the trays to settle the mix and remove any air pockets.
2. Moisten the Mix: Thoroughly moisten the seed starting mix with the spray bottle. The mix should be damp but not soggy.
3. Sow the Seeds: Coral Bell seeds need light to germinate, so don’t bury them too deeply. Sprinkle the seeds evenly over the surface of the moistened mix. You can use tweezers or a toothpick to help distribute the seeds. Aim for about 2-3 seeds per cell or pot.
4. Lightly Press the Seeds: Gently press the seeds into the surface of the mix. Avoid covering them with more mix.
5. Mist Again: Lightly mist the seeds with the spray bottle to ensure good contact with the mix.
6. Cover with a Humidity Dome or Plastic Wrap: This will help maintain consistent moisture levels and create a humid environment that promotes germination.
7. Label the Trays: Use your labels and permanent marker to clearly identify the varieties you’ve sown. This will be especially helpful if you’re growing multiple types of Coral Bells.
8. Provide Light and Warmth: Place the trays in a bright, sunny location or under grow lights. If using grow lights, position them a few inches above the trays. If you’re using a heat mat, place the trays on top of it. The ideal temperature for germination is around 65-70掳F (18-21掳C).
Phase 2: Germination and Early Seedling Care
Germination typically takes 14-21 days, but it can vary depending on the variety and environmental conditions.
1. Monitor Moisture Levels: Check the moisture levels daily. The mix should remain consistently damp but not waterlogged. Mist the trays as needed to maintain moisture.
2. Ventilate the Trays: Once you see signs of germination, begin to ventilate the trays by lifting the humidity dome or plastic wrap for a few hours each day. This will help prevent fungal diseases.
3. Remove the Humidity Dome: Once most of the seeds have germinated, remove the humidity dome or plastic wrap completely.
4. Provide Adequate Light: Ensure the seedlings receive plenty of light. If using grow lights, adjust their height as the seedlings grow.
5. Thin the Seedlings: Once the seedlings have developed their first true leaves (the leaves that appear after the initial seed leaves), thin them to one seedling per cell or pot. Use small scissors to snip off the weaker seedlings at the soil line. This will give the remaining seedlings more room to grow.
Phase 3: Growing On and Hardening Off
Once the seedlings are large enough to handle, it’s time to transplant them into larger containers and gradually acclimate them to outdoor conditions.
1. Transplant the Seedlings: When the seedlings have developed several sets of true leaves and are large enough to handle without damaging them, transplant them into individual pots filled with well-draining potting mix. Gently remove the seedlings from the seed starting trays, being careful not to damage the roots. Plant each seedling at the same depth it was growing in the seed starting mix.
2. Water Thoroughly: After transplanting, water the seedlings thoroughly to settle the soil and help them establish.
3. Fertilize Lightly: Begin fertilizing the seedlings with a diluted liquid fertilizer every 2-3 weeks. Follow the instructions on the fertilizer label.
4. Harden Off the Seedlings: Before planting the Coral Bells in your garden, you’ll need to harden them off. This process gradually acclimates the seedlings to outdoor conditions, such as sunlight, wind, and temperature fluctuations. Start by placing the seedlings outdoors in a sheltered location for a few hours each day. Gradually increase the amount of time they spend outdoors over a period of 1-2 weeks.
5. Protect from Frost: If there’s a risk of frost, bring the seedlings indoors or cover them with a frost blanket.
Phase 4: Planting in the Garden
Once the Coral Bells have been hardened off, they’re ready to be planted in your garden.
1. Choose a Planting Location: Coral Bells prefer partial shade, especially in hot climates. Choose a location that receives morning sun and afternoon shade. They also need well-draining soil.
2. Prepare the Soil: Amend the soil with compost or other organic matter to improve drainage and fertility.
3. Plant the Coral Bells: Dig a hole that’s slightly larger than the root ball of the seedling. Gently remove the seedling from its pot and place it in the hole. Backfill with soil and gently firm around the base of the plant.
4. Water Thoroughly: Water the newly planted Coral Bells thoroughly.
5. Mulch Around the Plants: Apply a layer of mulch around the plants to help retain moisture, suppress weeds, and regulate soil temperature.
Caring for Your Coral Bells
Coral Bells are relatively low-maintenance plants, but here are a few tips to keep them thriving:
* Water Regularly: Water the plants regularly, especially during dry periods. Avoid overwatering, as this can lead to root rot.
* Fertilize Annually: Fertilize the plants annually in the spring with a balanced fertilizer.
* Deadhead Spent Flowers: Remove spent flower stalks to encourage more blooms.
* Divide Clumps: Every few years, divide the clumps of Coral Bells to prevent overcrowding and rejuvenate the plants. This is best done in the spring or fall.
* Watch for Pests and Diseases: Coral Bells are generally pest and disease resistant, but watch out for slugs, snails, and fungal diseases. Take appropriate action if you notice any problems.
Troubleshooting
Here are a few common problems you might encounter when growing Coral Bells from seed and how to address them:
* Poor Germination: This could be due to several factors, such as old seeds, improper temperature, or insufficient moisture. Make sure you’re using fresh seeds, providing adequate warmth, and keeping the mix consistently damp.
* Damping Off: This is a fungal disease that can kill seedlings. To prevent damping off, use a sterile seed starting mix, avoid overwatering, and provide good ventilation.
* Leggy Seedlings: This is caused by insufficient light. Provide more light by moving the seedlings to a brighter location or using grow lights.
* Slow Growth: This could be due to poor soil, insufficient nutrients, or inadequate light. Amend the soil with compost, fertilize regularly, and ensure the seedlings are receiving enough light.
Enjoy Your Beautiful Coral Bells!
Growing Coral Bells from seed
Conclusion
So, there you have it! Growing Coral Bells from seed might seem a little daunting at first, but with a little patience and the right approach, you can unlock a world of vibrant foliage and unique color combinations that you simply won’t find at your local garden center. This DIY trick for propagating your own Heuchera is not just about saving money; it’s about embracing the joy of gardening and creating something truly special.
Why is this a must-try? Because it empowers you to become a more self-sufficient gardener, allowing you to expand your collection of these beautiful plants without breaking the bank. Imagine the satisfaction of watching tiny seeds sprout and transform into thriving Coral Bells, each with its own subtle variations in color and texture. You’ll have a garden that reflects your personal touch and a deeper connection to the natural world.
Beyond the basic method outlined, there are plenty of ways to experiment and personalize your approach. Try different seed starting mixes to see which yields the best results for you. Consider using a heat mat to speed up germination, especially in cooler climates. And don’t be afraid to play around with different varieties of Coral Bells, mixing and matching colors to create stunning visual displays. You could even try collecting seeds from your own established plants to perpetuate your favorite cultivars.
For a more dramatic effect, consider grouping your seed-grown Coral Bells in mass plantings. The varying shades of green, purple, red, and bronze will create a tapestry of color that will be the envy of your neighbors. Or, use them as edging plants along pathways and borders, adding a touch of elegance and sophistication to your landscape. They also thrive in containers, making them a versatile choice for patios, balconies, and even indoor spaces.
The possibilities are truly endless when you embark on this DIY adventure. The key is to be patient, observant, and willing to learn from your experiences. Don’t be discouraged if your first attempt isn’t perfect. Gardening is a journey, not a destination, and every mistake is an opportunity to grow (pun intended!).
We wholeheartedly encourage you to give this DIY trick a try. It’s a rewarding and fulfilling experience that will transform your garden and deepen your appreciation for the beauty of nature. And most importantly, don’t forget to share your experiences with us! We’d love to hear about your successes, your challenges, and any tips or tricks you’ve discovered along the way. Post photos of your seed-grown Coral Bells on social media using #DIYCoralBells and tag us so we can celebrate your gardening triumphs together. Let’s create a community of passionate gardeners who are dedicated to sharing their knowledge and inspiring others to embrace the joy of growing their own plants. So go ahead, grab some seeds, and get ready to embark on a colorful adventure!
FAQ
Frequently Asked Questions About Growing Coral Bells from Seed
1. Are Coral Bells easy to grow from seed?
Growing Coral Bells from seed can be a bit more challenging than propagating them through division, but it’s definitely achievable with the right techniques and a little patience. The seeds are very small and require light to germinate, so proper handling and a suitable environment are crucial. Don’t be discouraged if your germination rate isn’t 100%; even a few successful seedlings can be a great start.
2. What is the best time of year to start Coral Bell seeds?
The ideal time to start Coral Bell seeds is typically late winter or early spring, about 8-10 weeks before the last expected frost. This allows the seedlings enough time to develop into strong, healthy plants before being transplanted outdoors. If you have a greenhouse or indoor grow lights, you can start them even earlier.
3. What kind of soil should I use for starting Coral Bell seeds?
Coral Bell seeds require a well-draining and sterile seed starting mix. A mix of peat moss, perlite, and vermiculite is a good option. Avoid using garden soil, as it may contain pathogens or weed seeds that can harm the delicate seedlings. You can also purchase pre-made seed starting mixes from most garden centers.
4. How do I ensure proper germination of Coral Bell seeds?
Coral Bell seeds need light to germinate, so don’t bury them too deeply. Simply sprinkle them on the surface of the seed starting mix and gently press them down. Keep the soil consistently moist but not waterlogged. Cover the seed tray with a clear plastic dome or plastic wrap to maintain humidity. Place the tray in a warm location with bright, indirect light. A temperature of around 65-75掳F (18-24掳C) is ideal for germination.
5. How long does it take for Coral Bell seeds to germinate?
Germination can take anywhere from 2 to 4 weeks, depending on the variety of Coral Bell and the environmental conditions. Be patient and continue to monitor the moisture levels and temperature. Once the seedlings emerge, gradually remove the plastic dome or wrap to acclimate them to lower humidity levels.
6. When can I transplant my Coral Bell seedlings?
Once the seedlings have developed a few sets of true leaves and are large enough to handle, you can transplant them into individual pots or cells. Use a well-draining potting mix and continue to provide them with bright, indirect light. Harden off the seedlings by gradually exposing them to outdoor conditions for a week or two before transplanting them into the garden.
7. What are the ideal growing conditions for Coral Bells in the garden?
Coral Bells prefer partial shade, especially in hot climates. They thrive in well-draining soil that is rich in organic matter. Amend the soil with compost or other organic materials before planting. Water regularly, especially during dry periods. Avoid overwatering, as this can lead to root rot.
8. Are there any common pests or diseases that affect Coral Bells?
Coral Bells are generally resistant to pests and diseases, but they can occasionally be affected by slugs, snails, or vine weevils. Use appropriate pest control measures if necessary. Root rot can be a problem in poorly draining soil, so ensure proper drainage.
9. Can I collect seeds from my own Coral Bell plants?
Yes, you can collect seeds from your own Coral Bell plants. Allow the flower stalks to dry completely on the plant. Once the seed pods are dry and brown, carefully cut them off and collect the seeds. Keep in mind that seeds collected from hybrid varieties may not produce plants that are true to the parent plant.
10. Why are my Coral Bell seedlings leggy?
Leggy seedlings are usually a sign that they are not getting enough light. Move them to a brighter location or supplement with artificial light. You can also gently transplant them deeper into the soil to encourage stronger stem growth.
11. My Coral Bell seeds didn’t germinate. What went wrong?
There are several reasons why your Coral Bell seeds may not have germinated. The seeds may have been old or of poor quality. The soil may have been too dry or too wet. The temperature may have been too cold or too hot. The seeds may not have received enough light. Review the germination requirements and try again, making sure to address any potential issues.
12. Can I grow Coral Bells from seed indoors year-round?
Yes, you can grow Coral Bells from seed indoors year-round if you provide them with the right conditions. Use grow lights to supplement natural light, maintain a consistent temperature, and ensure proper humidity levels. This is a great option for gardeners in colder climates who want to get a head start on the growing season.
Leave a Comment