
Growing Coconut Trees at home might seem like a tropical dream reserved for exotic locales, but I’m here to tell you it’s more achievable than you think! Forget those expensive vacations – imagine harvesting your own coconuts right in your backyard. For centuries, the coconut palm has been a symbol of prosperity and sustenance in many cultures, providing food, drink, shelter, and even medicine. Its versatility is legendary, and its presence has shaped landscapes and traditions across the globe.
But why should you consider growing your own coconut tree? Well, beyond the sheer novelty and bragging rights, having a coconut tree offers a sustainable source of fresh coconuts, free from the chemicals and long transport times associated with store-bought ones. Plus, it’s a fantastic way to add a touch of the tropics to your garden, creating a relaxing and visually stunning oasis. In this article, I’ll share some simple yet effective DIY tricks and hacks that will significantly increase your chances of successfully growing coconut trees, even if you don’t live in a tropical paradise. Get ready to embark on a rewarding gardening adventure!
Growing Coconut Trees: A DIY Guide to Tropical Paradise in Your Backyard
Okay, so you want to grow your own coconut tree? Awesome! It’s totally doable, even if you don’t live in the tropics. It takes patience, a little know-how, and a whole lot of love, but trust me, the reward of harvesting your own coconuts (eventually!) is totally worth it. I’m going to walk you through everything you need to know, from choosing the right coconut to nurturing your little palm into a towering beauty.
Choosing Your Coconut: The Seed of Success
The first, and arguably most important, step is selecting the right coconut. Not just any coconut from the grocery store will do. We need a mature, viable coconut that’s ready to sprout.
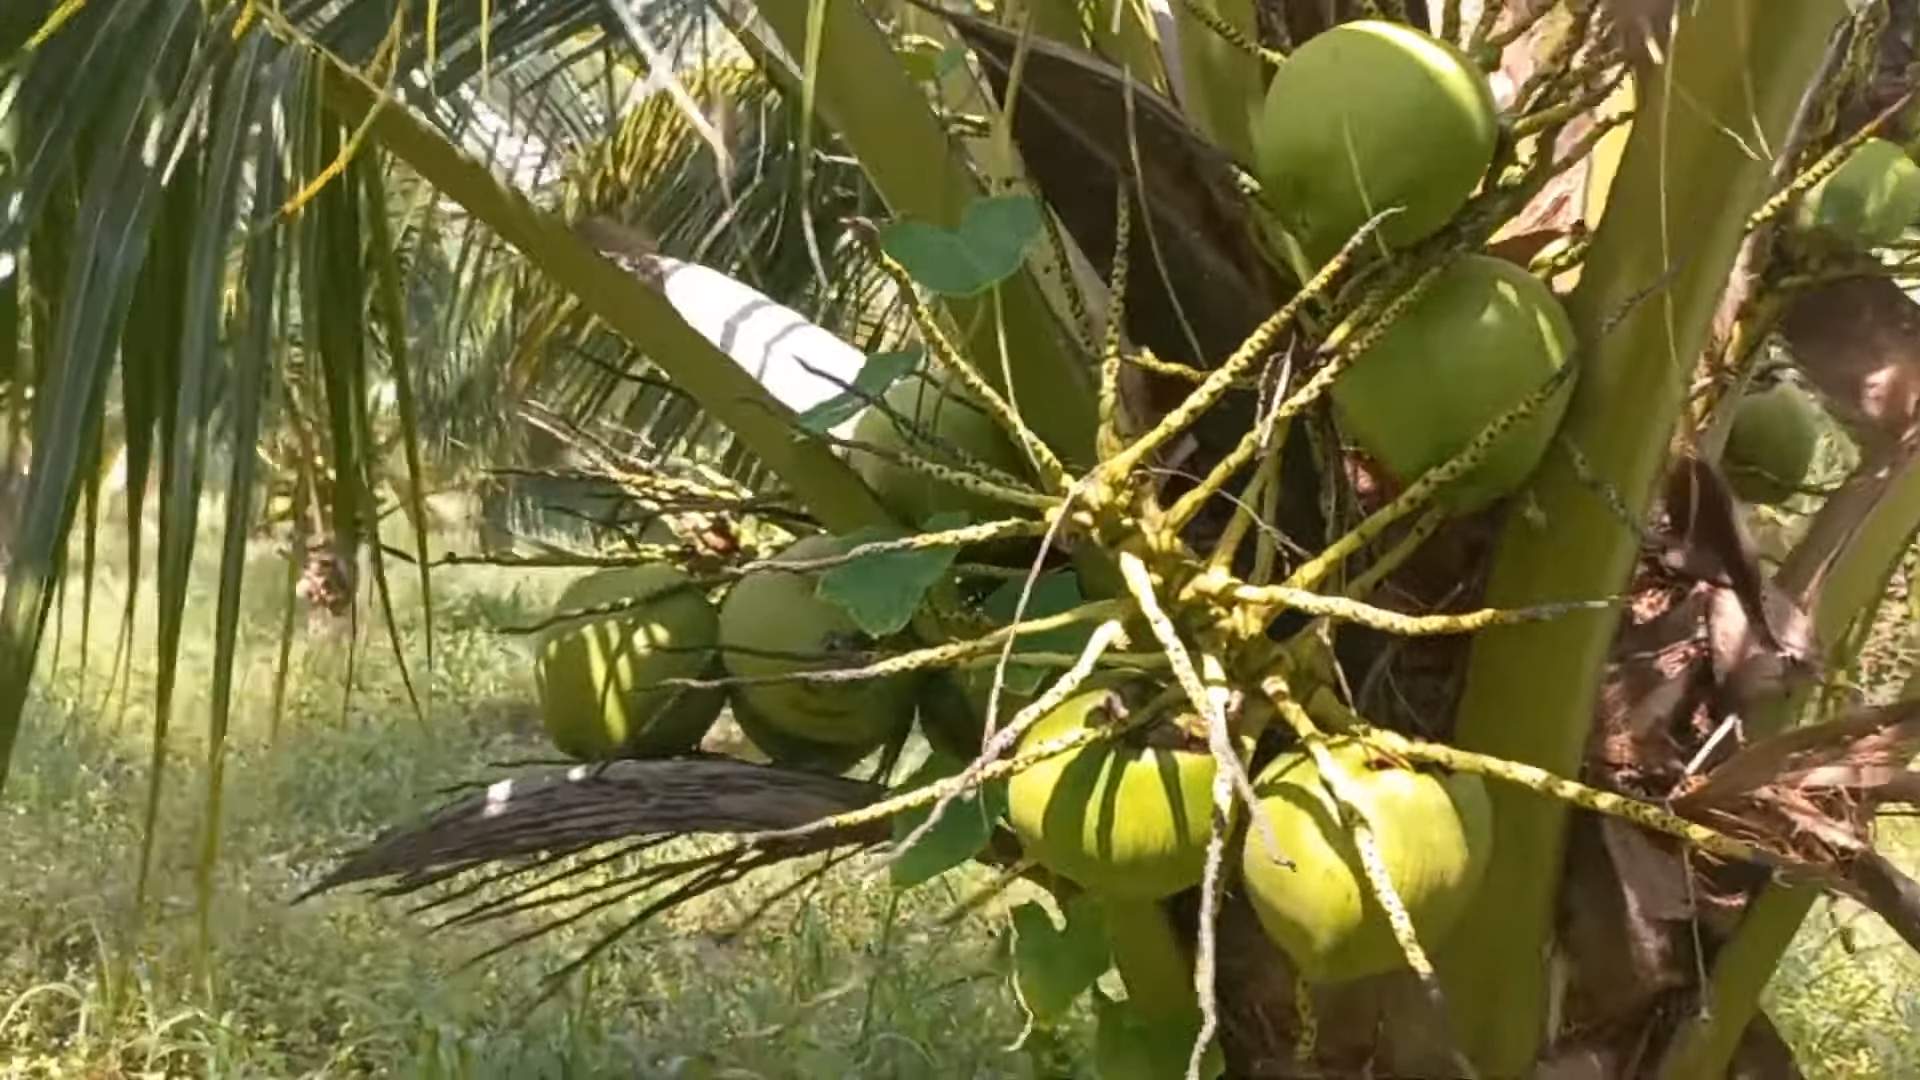
* Look for a Mature Coconut: This means a coconut that’s brown, heavy, and still has its husk intact. Green coconuts are too young and won’t germinate.
* Shake Test: Give the coconut a good shake. You should hear water sloshing around inside. This indicates that the coconut is still fresh and hasn’t dried out.
* Avoid Damaged Coconuts: Inspect the coconut for any cracks, bruises, or signs of mold. These can indicate that the coconut is damaged or diseased.
* Consider Variety: Different coconut varieties have different characteristics. Dwarf varieties are smaller and produce coconuts sooner, while tall varieties take longer but can grow much larger. Research which variety is best suited for your climate and space. For beginners, I recommend starting with a dwarf variety.
Preparing Your Coconut for Germination
Once you’ve chosen your coconut, it’s time to prepare it for germination. This involves creating the right environment for the coconut to sprout.
* Soaking the Coconut: Submerge the coconut in a bucket of water for 2-3 days. This helps to rehydrate the husk and encourages germination. Change the water daily to prevent the growth of bacteria.
* Choosing a Germination Medium: You have a few options here. You can use a well-draining potting mix, coco coir, or even just plain water. I personally prefer coco coir because it retains moisture well and provides good aeration.
* Creating a Germination Container: Choose a container that’s large enough to accommodate the coconut and its developing roots. A large pot or even a plastic storage bin will work. Make sure the container has drainage holes to prevent waterlogging.
Germinating Your Coconut: The Waiting Game
Now comes the part that requires the most patience: waiting for your coconut to germinate. This can take anywhere from 2 to 6 months, so don’t get discouraged if you don’t see results right away.
1. Planting the Coconut: Partially bury the coconut in your chosen germination medium, leaving about one-third of the coconut exposed. The “eyes” (the three soft spots on one end of the coconut) should be facing upwards.
2. Maintaining Moisture: Keep the germination medium consistently moist, but not waterlogged. Water the coconut regularly, but allow the excess water to drain away.
3. Providing Warmth: Coconuts need warmth to germinate. The ideal temperature is between 85-95°F (29-35°C). If you live in a cooler climate, you may need to use a heat mat or grow light to provide supplemental warmth.
4. Providing Light: While the coconut doesn’t need direct sunlight during germination, it does need some light. Place the container in a bright, indirect light location.
5. Patience is Key: As I mentioned before, germination can take a long time. Don’t give up! Keep the coconut moist and warm, and eventually, you should see a sprout emerging from one of the eyes.
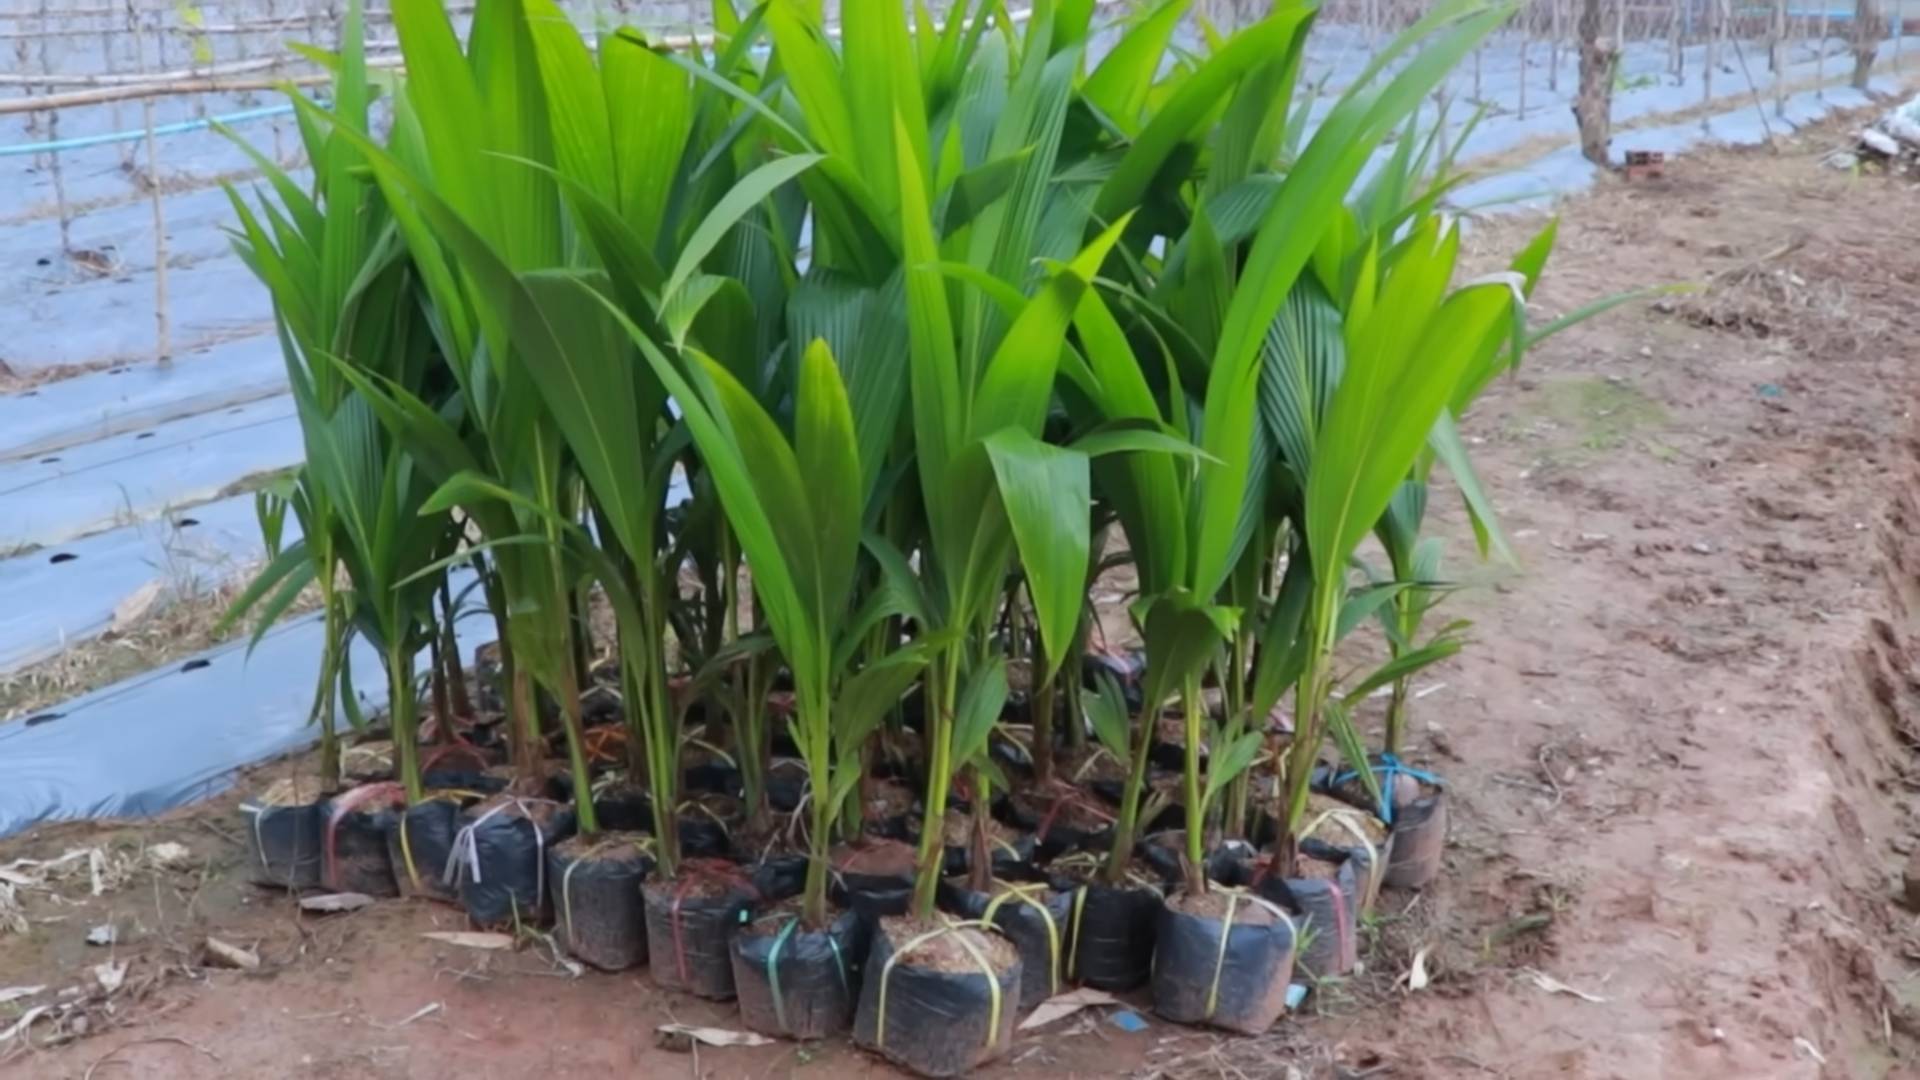
Transplanting Your Coconut Seedling
Once your coconut seedling has developed a few leaves and a strong root system, it’s time to transplant it into a larger pot.
1. Choosing a Pot: Select a pot that’s at least 12 inches in diameter and 12 inches deep. Make sure the pot has drainage holes.
2. Preparing the Potting Mix: Use a well-draining potting mix that’s rich in organic matter. You can amend a standard potting mix with compost, perlite, and vermiculite to improve drainage and aeration.
3. Carefully Remove the Seedling: Gently remove the coconut seedling from the germination container, being careful not to damage the roots.
4. Planting the Seedling: Place the seedling in the center of the pot and fill in around it with potting mix. The top of the coconut should be slightly above the soil level.
5. Watering: Water the seedling thoroughly after planting.
Caring for Your Coconut Tree: Nurturing Your Tropical Dream
Now that your coconut tree is planted, it’s time to provide it with the care it needs to thrive.
* Sunlight: Coconut trees need plenty of sunlight. Aim for at least 6-8 hours of direct sunlight per day. If you’re growing your coconut tree indoors, you’ll need to supplement with grow lights.
* Watering: Water your coconut tree regularly, especially during the growing season. Allow the soil to dry out slightly between waterings. Avoid overwatering, as this can lead to root rot.
* Fertilizing: Fertilize your coconut tree regularly with a balanced fertilizer. Follow the instructions on the fertilizer label. I like to use a slow-release fertilizer in the spring and a liquid fertilizer during the growing season.
* Temperature: Coconut trees thrive in warm temperatures. The ideal temperature range is between 70-90°F (21-32°C). Protect your coconut tree from frost and freezing temperatures.
* Humidity: Coconut trees prefer high humidity. If you live in a dry climate, you can increase the humidity around your coconut tree by misting it regularly or placing it on a pebble tray filled with water.
* Pruning: Coconut trees don’t require much pruning. Simply remove any dead or damaged fronds.
* Pest and Disease Control: Keep an eye out for pests and diseases. Common pests that affect coconut trees include spider mites, scale, and mealybugs. Treat infestations promptly with insecticidal soap or neem oil. Root rot is a common disease that can affect coconut trees. Prevent root rot by avoiding overwatering and ensuring good drainage.
Dealing with Common Challenges
Growing a coconut tree isn’t always easy. Here are some common challenges you might encounter and how to overcome them:
Okay, so you want to grow your own coconut tree? Awesome! It’s totally doable, even if you don’t live in the tropics. It takes patience, a little know-how, and a whole lot of love, but trust me, the reward of harvesting your own coconuts (eventually!) is totally worth it. I’m going to walk you through everything you need to know, from choosing the right coconut to nurturing your little palm into a towering beauty.
Choosing Your Coconut: The Seed of Success
The first, and arguably most important, step is selecting the right coconut. Not just any coconut from the grocery store will do. We need a mature, viable coconut that’s ready to sprout.
* Look for a Mature Coconut: This means a coconut that’s brown, heavy, and still has its husk intact. Green coconuts are too young and won’t germinate.
* Shake Test: Give the coconut a good shake. You should hear water sloshing around inside. This indicates that the coconut is still fresh and hasn’t dried out.
* Avoid Damaged Coconuts: Inspect the coconut for any cracks, bruises, or signs of mold. These can indicate that the coconut is damaged or diseased.
* Consider Variety: Different coconut varieties have different characteristics. Dwarf varieties are smaller and produce coconuts sooner, while tall varieties take longer but can grow much larger. Research which variety is best suited for your climate and space. For beginners, I recommend starting with a dwarf variety.
Preparing Your Coconut for Germination
Once you’ve chosen your coconut, it’s time to prepare it for germination. This involves creating the right environment for the coconut to sprout.
* Soaking the Coconut: Submerge the coconut in a bucket of water for 2-3 days. This helps to rehydrate the husk and encourages germination. Change the water daily to prevent the growth of bacteria.
* Choosing a Germination Medium: You have a few options here. You can use a well-draining potting mix, coco coir, or even just plain water. I personally prefer coco coir because it retains moisture well and provides good aeration.
* Creating a Germination Container: Choose a container that’s large enough to accommodate the coconut and its developing roots. A large pot or even a plastic storage bin will work. Make sure the container has drainage holes to prevent waterlogging.
Germinating Your Coconut: The Waiting Game
Now comes the part that requires the most patience: waiting for your coconut to germinate. This can take anywhere from 2 to 6 months, so don’t get discouraged if you don’t see results right away.
1. Planting the Coconut: Partially bury the coconut in your chosen germination medium, leaving about one-third of the coconut exposed. The “eyes” (the three soft spots on one end of the coconut) should be facing upwards.
2. Maintaining Moisture: Keep the germination medium consistently moist, but not waterlogged. Water the coconut regularly, but allow the excess water to drain away.
3. Providing Warmth: Coconuts need warmth to germinate. The ideal temperature is between 85-95°F (29-35°C). If you live in a cooler climate, you may need to use a heat mat or grow light to provide supplemental warmth.
4. Providing Light: While the coconut doesn’t need direct sunlight during germination, it does need some light. Place the container in a bright, indirect light location.
5. Patience is Key: As I mentioned before, germination can take a long time. Don’t give up! Keep the coconut moist and warm, and eventually, you should see a sprout emerging from one of the eyes.
Transplanting Your Coconut Seedling
Once your coconut seedling has developed a few leaves and a strong root system, it’s time to transplant it into a larger pot.
1. Choosing a Pot: Select a pot that’s at least 12 inches in diameter and 12 inches deep. Make sure the pot has drainage holes.
2. Preparing the Potting Mix: Use a well-draining potting mix that’s rich in organic matter. You can amend a standard potting mix with compost, perlite, and vermiculite to improve drainage and aeration.
3. Carefully Remove the Seedling: Gently remove the coconut seedling from the germination container, being careful not to damage the roots.
4. Planting the Seedling: Place the seedling in the center of the pot and fill in around it with potting mix. The top of the coconut should be slightly above the soil level.
5. Watering: Water the seedling thoroughly after planting.
Caring for Your Coconut Tree: Nurturing Your Tropical Dream
Now that your coconut tree is planted, it’s time to provide it with the care it needs to thrive.
* Sunlight: Coconut trees need plenty of sunlight. Aim for at least 6-8 hours of direct sunlight per day. If you’re growing your coconut tree indoors, you’ll need to supplement with grow lights.
* Watering: Water your coconut tree regularly, especially during the growing season. Allow the soil to dry out slightly between waterings. Avoid overwatering, as this can lead to root rot.
* Fertilizing: Fertilize your coconut tree regularly with a balanced fertilizer. Follow the instructions on the fertilizer label. I like to use a slow-release fertilizer in the spring and a liquid fertilizer during the growing season.
* Temperature: Coconut trees thrive in warm temperatures. The ideal temperature range is between 70-90°F (21-32°C). Protect your coconut tree from frost and freezing temperatures.
* Humidity: Coconut trees prefer high humidity. If you live in a dry climate, you can increase the humidity around your coconut tree by misting it regularly or placing it on a pebble tray filled with water.
* Pruning: Coconut trees don’t require much pruning. Simply remove any dead or damaged fronds.
* Pest and Disease Control: Keep an eye out for pests and diseases. Common pests that affect coconut trees include spider mites, scale, and mealybugs. Treat infestations promptly with insecticidal soap or neem oil. Root rot is a common disease that can affect coconut trees. Prevent root rot by avoiding overwatering and ensuring good drainage.
Dealing with Common Challenges
Growing a coconut tree isn’t always easy. Here are some common challenges you might encounter and how to overcome them:
* Slow Growth: Coconut trees are slow growers, especially in cooler climates. Be patient and provide your tree with the best possible care.
* Yellowing Leaves: Yellowing leaves can be a sign of nutrient deficiency, overwatering, or underwatering. Check the soil moisture and fertilize your tree if necessary.
* Lack of Fruiting: It can take several years for a coconut tree to start producing coconuts. Dwarf varieties typically fruit sooner than tall varieties. Make sure your tree is getting enough sunlight, water, and fertilizer.
* Pest Infestations: Regularly inspect your tree for pests and treat infestations promptly.
* Root Rot: Prevent root rot by avoiding overwatering and ensuring good drainage. If your tree develops root rot, you may need to repot it in fresh potting mix.
Overwintering Your Coconut Tree (If Necessary)
If you live in a climate with cold winters, you’ll need to bring your coconut tree indoors during the winter months.
1. Acclimatize Your Tree: Before bringing your tree indoors, gradually acclimatize it to the lower light levels. Move it to a shadier location for a few weeks before bringing it inside.
2. Choose a Location: Choose a location indoors that receives plenty of sunlight. A south-facing window is ideal.
3. Provide Supplemental Light: If you don’t have enough natural light, you’ll need to supplement with grow lights.
4. Maintain Humidity: Indoor air can be very dry during the winter months. Increase the humidity around your tree by misting it regularly or placing it on a pebble tray filled with water.
5. Water Sparingly: Water your tree less frequently during the winter months. Allow the soil to dry out more between waterings.
6. Avoid Fertilizing: Don’t fertilize your tree during the winter months.
7. Monitor for Pests: Indoor plants are more susceptible to pests. Regularly inspect your tree for pests and treat infestations promptly.
Harvesting Your Coconuts (The Ultimate Reward!)
After years of care and patience, your coconut tree may finally start producing coconuts. Harvesting coconuts can be tricky, so it’s important to do it safely.
* Wait for Maturity: Coconuts are ready to harvest when they are brown and the husk is dry.
* Use a Safe Method: The safest way to harvest coconuts is to use a long
Conclusion
So, there you have it! Growing coconut trees from the comfort of your own home, or at least starting the process, is not only achievable but also incredibly rewarding. This DIY trick, while requiring patience, offers a unique connection to nature and the satisfaction of nurturing a tropical icon from its humble beginnings. Forget expensive nursery-bought saplings; with a little effort and the right conditions, you can embark on this exciting horticultural adventure.
Why is this a must-try? Because it’s more than just growing a plant; it’s about understanding the life cycle of a coconut, appreciating the resilience of nature, and potentially enjoying the fruits (literally!) of your labor for years to come. Imagine the pride of harvesting your own coconuts, knowing you nurtured them from a single seed. Plus, it’s a fantastic conversation starter and a unique addition to your garden or landscape.
But the journey doesn’t end with the basic method. Feel free to experiment! Try different varieties of coconuts to see which thrives best in your local climate. Consider using different potting mixes to optimize drainage and nutrient availability. You could even explore hydroponic methods for faster growth, although this requires more specialized equipment and knowledge. Another variation is to focus on dwarf coconut varieties, which are more manageable in smaller spaces and tend to produce fruit earlier. Remember to research the specific needs of the variety you choose.
Don’t be discouraged if your first attempt isn’t a resounding success. Growing coconut trees, especially in non-tropical climates, can be challenging. The key is to learn from your mistakes, adjust your approach, and keep experimenting. The reward of a thriving coconut palm is well worth the effort.
We wholeheartedly encourage you to give this DIY trick a try. It’s a fantastic project for gardeners of all levels, from beginners to seasoned pros. And once you’ve embarked on your coconut-growing journey, we’d love to hear about your experiences! Share your tips, challenges, and successes in the comments below. Let’s create a community of coconut enthusiasts and learn from each other. So, grab a coconut, get your hands dirty, and start growing your own little piece of paradise today! Your journey to growing coconut trees starts now!
Frequently Asked Questions (FAQ)
What is the ideal climate for growing coconut trees?
Coconut trees thrive in warm, humid climates with plenty of sunshine. They need temperatures between 70°F and 90°F (21°C and 32°C) and high humidity levels. They are also sensitive to frost, so if you live in an area with cold winters, you’ll need to provide protection or grow them in containers that can be moved indoors.
How long does it take for a coconut tree to bear fruit?
This is a common question, and the answer depends on several factors, including the variety of coconut, the climate, and the care provided. Generally, it takes between 6 to 10 years for a coconut tree grown from seed to bear fruit. Dwarf varieties tend to produce fruit earlier, sometimes within 3 to 5 years. Proper watering, fertilization, and sunlight exposure can all contribute to faster fruit production.
What kind of soil is best for growing coconut trees?
Coconut trees prefer well-draining soil that is rich in organic matter. Sandy loam soil is ideal, as it allows for good drainage and aeration. Avoid heavy clay soils, as they can become waterlogged and lead to root rot. If you have clay soil, amend it with compost, sand, and other organic materials to improve drainage. A slightly acidic to neutral pH (6.0 to 7.0) is also preferred.
How often should I water my coconut tree?
Watering frequency depends on the climate and the age of the tree. Young coconut trees need more frequent watering than mature trees. In general, water deeply whenever the top inch of soil feels dry to the touch. During hot, dry weather, you may need to water daily. Avoid overwatering, as this can lead to root rot. Ensure the soil is well-draining to prevent water from pooling around the roots.
What kind of fertilizer should I use for my coconut tree?
Coconut trees benefit from regular fertilization, especially during the growing season. Use a balanced fertilizer that is specifically formulated for palm trees. Look for a fertilizer that contains nitrogen, phosphorus, potassium, and micronutrients like iron, manganese, and zinc. Follow the instructions on the fertilizer label for application rates and frequency. Fertilize your coconut tree every 3 to 4 months during the growing season.
How do I protect my coconut tree from pests and diseases?
Coconut trees are susceptible to various pests and diseases, including scale insects, mites, and fungal infections. Regularly inspect your tree for signs of infestation or disease. If you notice any problems, take action immediately. You can use insecticidal soap or horticultural oil to control pests. For fungal infections, use a fungicide. Proper watering, fertilization, and pruning can also help prevent pests and diseases.
Can I grow a coconut tree indoors?
Growing coconut trees indoors is challenging but possible, especially when starting from a sprouted coconut. You’ll need to provide plenty of bright, indirect light, high humidity, and warm temperatures. Use a large pot with well-draining soil and water regularly. You may also need to supplement with artificial lighting, especially during the winter months. Keep in mind that coconut trees can grow quite large, so you’ll eventually need to transplant it to a larger container or move it outdoors if possible. Dwarf varieties are better suited for indoor growing.
What do I do if my coconut tree’s leaves are turning yellow?
Yellowing leaves can be a sign of several problems, including nutrient deficiency, overwatering, underwatering, or pest infestation. Check the soil moisture to ensure you’re not overwatering or underwatering. Fertilize your tree with a balanced palm fertilizer to address potential nutrient deficiencies. Inspect the leaves for signs of pests or diseases. If you suspect a pest infestation, treat the tree with insecticidal soap or horticultural oil. If the problem persists, consult with a local arborist or gardening expert.
How do I harvest coconuts from my tree?
Harvesting coconuts can be dangerous, especially from tall trees. It’s best to hire a professional tree climber to harvest the coconuts for you. If you’re comfortable climbing the tree yourself, use proper safety equipment, including a harness and rope. Coconuts are typically ready to harvest when they are mature and the husk is brown. You can use a long pole with a hook to pull the coconuts down. Be careful not to drop the coconuts, as they can be heavy and cause injury.
What are some common mistakes to avoid when growing coconut trees?
Some common mistakes to avoid include planting the coconut too deep, overwatering, underwatering, neglecting fertilization, and failing to protect the tree from frost. Make sure to plant the coconut with the top third exposed. Water deeply but infrequently, allowing the soil to dry out slightly between waterings. Fertilize regularly with a balanced palm fertilizer. And if you live in an area with cold winters, provide protection from frost or grow the tree in a container that can be moved indoors. Proper planning and care are essential for successfully growing coconut trees.
Leave a Comment