
Growing cauliflower and broccoli can feel like a daunting task, right? I get it! You envision vibrant, healthy heads of these cruciferous veggies gracing your dinner table, but the reality often involves pest infestations, stunted growth, and a whole lot of frustration. But don’t worry, I’m here to tell you that with a few clever DIY tricks and hacks, you can absolutely master the art of cultivating these nutritional powerhouses in your own backyard!
For centuries, cauliflower and broccoli have been staples in diets around the world. Originating in the Mediterranean, these vegetables were prized for their unique flavors and health benefits. Think about it – Roman emperors feasted on early forms of broccoli! Today, we know they’re packed with vitamins, minerals, and antioxidants, making them a fantastic addition to any healthy lifestyle. But let’s be honest, store-bought cauliflower and broccoli can be expensive, and sometimes lack that fresh, vibrant flavor you crave.
That’s where this DIY guide comes in! I’m going to share some simple, yet effective, techniques that will help you overcome common challenges and achieve a bountiful harvest. From creating the perfect soil mix to warding off pesky cabbage worms with homemade solutions, these tips will empower you to take control of your garden and enjoy the satisfaction of growing cauliflower and broccoli that’s bursting with flavor and goodness. So, grab your gardening gloves, and let’s get started!
DIY-Anleitung: Blumenkohl und Brokkoli im eigenen Garten ziehen
Hallo Gartenfreunde! Ich zeige euch heute, wie ihr ganz einfach Blumenkohl und Brokkoli in eurem eigenen Garten anbauen könnt. Es ist gar nicht so schwer, wie man denkt, und das Ergebnis ist einfach unschlagbar – frisches, knackiges Gemüse direkt aus dem eigenen Beet!
Vorbereitung ist alles: Der richtige Standort und Boden
Bevor wir loslegen, ist es wichtig, den richtigen Standort und Boden vorzubereiten. Blumenkohl und Brokkoli sind nämlich kleine Diven, wenn es um ihre Bedürfnisse geht.
* Sonniger Standort: Beide Gemüsesorten lieben die Sonne. Sucht euch also ein Plätzchen in eurem Garten aus, das mindestens sechs Stunden direkte Sonneneinstrahlung pro Tag bekommt.
* Gut durchlässiger Boden: Staunässe ist der absolute Feind von Blumenkohl und Brokkoli. Der Boden sollte also gut durchlässig sein, damit das Wasser gut abfließen kann.
* Nährstoffreicher Boden: Blumenkohl und Brokkoli sind Starkzehrer, das heißt, sie brauchen viele Nährstoffe, um gut zu wachsen. Sorgt also für einen nährstoffreichen Boden.
* pH-Wert: Der ideale pH-Wert für Blumenkohl und Brokkoli liegt zwischen 6,0 und 7,0.
Aussaat und Anzucht: Der Grundstein für eine reiche Ernte
Es gibt zwei Möglichkeiten, Blumenkohl und Brokkoli anzubauen: Entweder ihr sät die Samen direkt ins Beet oder ihr zieht die Pflanzen in Töpfen vor. Ich empfehle euch die Voranzucht, da die Jungpflanzen dann robuster sind und besser gegen Schädlinge und Krankheiten gewappnet sind.
* Aussaatzeitpunkt: Für die Voranzucht solltet ihr etwa sechs bis acht Wochen vor dem letzten Frosttermin mit der Aussaat beginnen.
* Aussaatgefäße: Verwendet kleine Töpfe oder Anzuchtschalen mit Anzuchterde.
* Aussaat: Legt die Samen etwa 1 cm tief in die Erde und bedeckt sie leicht mit Erde.
* Gießen: Gießt die Erde vorsichtig an, sodass sie feucht, aber nicht nass ist.
* Standort: Stellt die Anzuchtgefäße an einen hellen und warmen Ort (ca. 18-20°C).
* Pflege: Haltet die Erde feucht und lüftet die Anzuchtgefäße regelmäßig, um Schimmelbildung zu vermeiden.
* Pikieren: Sobald die Jungpflanzen zwei bis drei echte Blätter haben, könnt ihr sie in größere Töpfe pikieren.
Das Auspflanzen: Ab ins Beet!
Sobald die Jungpflanzen kräftig genug sind und keine Frostgefahr mehr besteht, können sie ins Beet ausgepflanzt werden.
* Vorbereitung des Beets: Lockert den Boden im Beet gründlich auf und entfernt Unkraut.
* Düngen: Mischt Kompost oder organischen Dünger in den Boden, um die Pflanzen mit ausreichend Nährstoffen zu versorgen.
* Pflanzabstand: Haltet einen Pflanzabstand von etwa 50 cm zwischen den Pflanzen und 60 cm zwischen den Reihen ein.
* Pflanzen: Setzt die Jungpflanzen so tief ins Beet, dass der Wurzelballen mit Erde bedeckt ist.
* Gießen: Gießt die Pflanzen nach dem Auspflanzen gründlich an.
Pflege während der Wachstumsphase: Gießen, Düngen, Schützen
Damit eure Blumenkohl- und Brokkolipflanzen gut wachsen und eine reiche Ernte bringen, ist eine regelmäßige Pflege wichtig.
* Gießen: Gießt die Pflanzen regelmäßig, besonders während trockener Perioden. Achtet darauf, dass die Erde immer feucht, aber nicht nass ist.
* Düngen: Düngt die Pflanzen alle zwei bis drei Wochen mit einem organischen Dünger oder einem speziellen Gemüsedünger.
* Unkraut jäten: Entfernt regelmäßig Unkraut, damit die Pflanzen nicht um Nährstoffe und Wasser konkurrieren müssen.
* Schutz vor Schädlingen: Blumenkohl und Brokkoli sind anfällig für verschiedene Schädlinge, wie z.B. Kohlweißlinge, Erdflöhe und Blattläuse. Kontrolliert die Pflanzen regelmäßig und bekämpft Schädlinge bei Bedarf mit biologischen Mitteln. Ein Kulturschutznetz kann ebenfalls helfen, die Pflanzen vor Schädlingen zu schützen.
* Schutz vor Krankheiten: Auch verschiedene Krankheiten können Blumenkohl und Brokkoli befallen, wie z.B. Kohlhernie und Falscher Mehltau. Achtet auf Anzeichen von Krankheiten und entfernt befallene Blätter oder Pflanzen sofort. Eine gute Belüftung und ein lockerer Boden können helfen, Krankheiten vorzubeugen.
* Blumenkohl bleichen: Um einen schönen weißen Blumenkohlkopf zu erhalten, könnt ihr die Blätter um den Kopf herum zusammenbinden, sobald er etwa die Größe eines Tennisballs erreicht hat. Dadurch wird der Kopf vor Sonnenlicht geschützt und bleibt weiß.
Die Ernte: Der Lohn der Mühe
Endlich ist es soweit: Die Erntezeit ist gekommen!
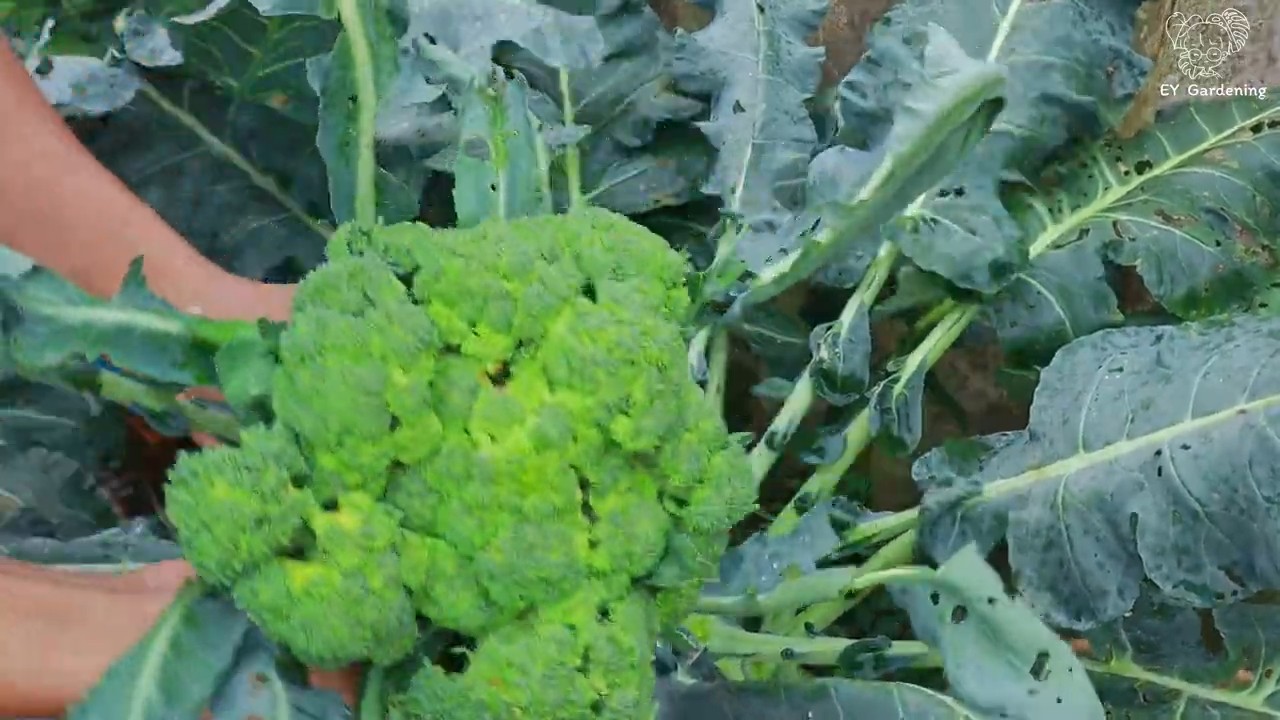
* Blumenkohl: Erntet den Blumenkohl, sobald der Kopf fest und kompakt ist. Schneidet den Kopf mit einem scharfen Messer ab, lasst aber einige Blätter am Strunk stehen.
* Brokkoli: Erntet den Brokkoli, sobald die Röschen fest und geschlossen sind. Schneidet den Haupttrieb mit einem scharfen Messer ab. Die Seitentriebe können später geerntet werden.
Zusätzliche Tipps für eine erfolgreiche Ernte
* Fruchtfolge beachten: Baut Blumenkohl und Brokkoli nicht jedes Jahr am selben Standort an, um Krankheiten und Schädlingen vorzubeugen.
* Sortenwahl: Wählt Sorten, die für euer Klima und eure Bodenverhältnisse geeignet sind.
* Mulchen: Mulcht den Boden um die Pflanzen herum mit Stroh oder Rasenschnitt, um die Feuchtigkeit zu halten und Unkrautwachstum zu reduzieren.
* Beobachtung: Beobachtet eure Pflanzen regelmäßig, um Probleme frühzeitig zu erkennen und zu beheben.
Häufige Probleme und Lösungen
* Kohlweißlinge: Diese Schmetterlingsraupen fressen Löcher in die Blätter. Sammelt die Raupen ab oder verwendet ein biologisches Insektizid. Ein Kulturschutznetz kann ebenfalls helfen.
* Erdflöhe: Diese kleinen Käfer fressen Löcher in die Blätter, besonders bei jungen Pflanzen. Haltet den Boden feucht und verwendet ein biologisches Insektizid.
* Blattläuse: Diese kleinen Insekten saugen Pflanzensaft und können die Pflanzen schwächen. Spritzt die Pflanzen mit einem Wasserstrahl ab oder verwendet ein biologisches Insektizid.
* Kohlhernie: Diese Krankheit verursacht Wucherungen an den Wurzeln und kann die Pflanzen absterben lassen. Baut Blumenkohl und Brokkoli nicht auf befallenen Böden an und verwendet resistente Sorten.
* Falscher Mehltau: Diese Krankheit verursacht gelbe Flecken auf den Blättern und einen weißen Belag auf der Unterseite. Sorgt für eine gute Belüftung und verwendet ein Fungizid.
Noch ein paar persönliche Worte
Ich hoffe, diese Anleitung hilft euch dabei, euren eigenen Blumenkohl und Brokkoli anzubauen. Es ist wirklich ein tolles Gefühl, sein eigenes Gemüse zu ernten und zu wissen, wo es herkommt. Lasst euch nicht entmutigen, wenn es nicht gleich beim ersten Mal klappt. Gärtnern ist ein Lernprozess, und mit etwas Geduld und Übung werdet ihr bald eure eigene reiche Ernte einfahren können. Viel Spaß beim Gärtnern!

Conclusion
So, there you have it! Mastering the art of growing cauliflower and broccoli at home is not just a rewarding experience; it’s a gateway to fresher, healthier, and more flavorful meals. We’ve explored the essential steps, from selecting the right varieties and preparing your soil to nurturing your plants and protecting them from pests and diseases.
Why is this DIY trick a must-try? Because store-bought cauliflower and broccoli, while convenient, often lack the vibrant taste and nutritional value of homegrown produce. By cultivating your own, you control every aspect of the growing process, ensuring that your vegetables are free from harmful chemicals and harvested at their peak ripeness. Imagine the satisfaction of serving a dish made with cauliflower or broccoli you nurtured from a tiny seed!
Beyond the basic techniques, there’s a world of possibilities to explore. Consider experimenting with different cauliflower varieties, such as purple or Romanesco, to add visual appeal and unique flavors to your dishes. For broccoli, try sprouting broccoli for a continuous harvest of tender shoots. You can also adapt your growing methods to suit your specific climate and garden conditions. If you live in a warmer region, choose heat-tolerant varieties and provide ample shade during the hottest part of the day. In cooler climates, start your seeds indoors to give them a head start.
Don’t be afraid to get creative with your pest control strategies. Companion planting, using herbs like rosemary or thyme near your cauliflower and broccoli, can help deter unwanted insects. You can also create a physical barrier using row covers to protect your plants from cabbage moths and other pests.
Growing cauliflower and broccoli can seem daunting at first, but with a little patience and attention, you’ll be amazed at what you can achieve. The key is to start small, learn from your mistakes, and adapt your approach as needed. Remember to monitor your plants regularly, provide them with adequate water and nutrients, and protect them from pests and diseases.
We wholeheartedly encourage you to embark on this gardening adventure. The rewards are well worth the effort. Not only will you enjoy delicious, homegrown vegetables, but you’ll also gain a deeper appreciation for the natural world and the process of growing your own food.
Once you’ve harvested your first cauliflower or broccoli head, we’d love to hear about your experience! Share your tips, challenges, and successes in the comments below. Let’s create a community of passionate gardeners who are dedicated to growing their own fresh, healthy produce. Your insights could inspire others to take the plunge and discover the joys of homegrown cauliflower and broccoli. So, grab your gardening gloves, prepare your soil, and get ready to experience the satisfaction of growing your own delicious vegetables! Let’s all become experts at growing cauliflower and broccoli!
Frequently Asked Questions (FAQ)
What are the best cauliflower and broccoli varieties to grow for beginners?
For beginners, consider starting with relatively easy-to-grow varieties. For cauliflower, ‘Snowball Y Improved’ is a classic choice known for its reliability and compact heads. ‘Early White Hybrid’ is another good option, offering a quick harvest. For broccoli, ‘Waltham 29’ is a popular variety that produces large, uniform heads. ‘Packman’ is a hybrid broccoli known for its early maturity and heat tolerance, making it suitable for warmer climates. These varieties are generally more forgiving and less prone to common problems, making them ideal for novice gardeners.
How much space do cauliflower and broccoli plants need?
Cauliflower and broccoli plants require adequate spacing to allow for proper growth and air circulation. Generally, space cauliflower plants 18-24 inches apart in rows that are 24-36 inches apart. Broccoli plants can be spaced slightly closer, around 18 inches apart in rows that are 24-30 inches apart. Proper spacing helps prevent overcrowding, which can lead to disease and reduced yields.
What type of soil is best for growing cauliflower and broccoli?
Cauliflower and broccoli thrive in well-drained, fertile soil that is rich in organic matter. The ideal soil pH is between 6.0 and 7.0. Before planting, amend your soil with compost or well-rotted manure to improve its structure and fertility. Adding a slow-release fertilizer can also provide essential nutrients for healthy growth. Avoid planting in heavy clay soil, as it can retain too much moisture and lead to root rot.
How often should I water my cauliflower and broccoli plants?
Cauliflower and broccoli plants need consistent moisture to thrive. Water deeply and regularly, especially during dry periods. Aim to keep the soil consistently moist but not waterlogged. A good rule of thumb is to water when the top inch of soil feels dry to the touch. Mulching around your plants can help retain moisture and suppress weeds.
What are some common pests and diseases that affect cauliflower and broccoli?
Common pests that affect cauliflower and broccoli include cabbage moths, cabbage loopers, aphids, and flea beetles. Diseases include clubroot, black rot, and downy mildew. To prevent pest and disease problems, practice crop rotation, use row covers to protect your plants, and inspect them regularly for signs of infestation or disease. If you spot any problems, take action promptly by using organic pest control methods or disease-resistant varieties.
How do I know when my cauliflower and broccoli are ready to harvest?
Cauliflower is ready to harvest when the head is firm, compact, and has reached its desired size (typically 6-8 inches in diameter). The curds should be tightly packed and white or creamy in color. Broccoli is ready to harvest when the central head is firm and the florets are tightly closed. If the florets start to open and turn yellow, it’s time to harvest immediately. Cut the head off with a sharp knife, leaving a few inches of stem. Side shoots may continue to develop after the main head is harvested, providing additional harvests.
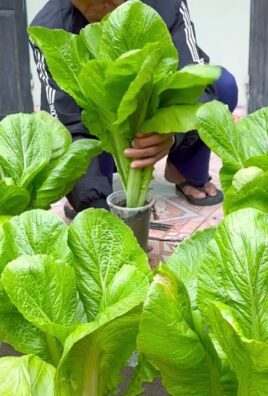
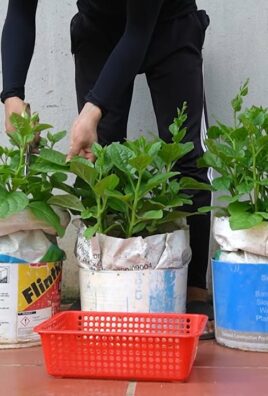
Can I grow cauliflower and broccoli in containers?
Yes, cauliflower and broccoli can be grown in containers, but you’ll need to choose a large container (at least 5 gallons) with good drainage. Use a high-quality potting mix and provide regular watering and fertilization. Container-grown plants may require more frequent watering than those grown in the ground. Choose compact varieties that are well-suited for container gardening.
How can I prevent my cauliflower from turning yellow?
Cauliflower heads can turn yellow if they are exposed to too much sunlight. To prevent this, blanch the heads by tying the outer leaves together over the developing head when it reaches about 3 inches in diameter. This will protect the head from the sun and keep it white.
What are some good companion plants for cauliflower and broccoli?
Good companion plants for cauliflower and broccoli include herbs like rosemary, thyme, and sage, which can help deter pests. Marigolds are also effective at repelling certain insects. Other beneficial companion plants include onions, garlic, and dill. Avoid planting cauliflower and broccoli near strawberries or tomatoes, as they can inhibit growth.
How do I store harvested cauliflower and broccoli?
Store harvested cauliflower and broccoli in the refrigerator. Wrap the heads loosely in plastic wrap or place them in a perforated plastic bag. They will typically last for up to a week in the refrigerator. To extend their shelf life, you can blanch and freeze them.

Leave a Comment