
Grow Winged Beans Easily and unlock a world of culinary possibilities right in your backyard! Have you ever dreamt of harvesting your own exotic, nutrient-packed vegetables? Imagine impressing your friends and family with a unique and delicious addition to your meals, all thanks to your green thumb. This isn’t just about gardening; it’s about embarking on a rewarding DIY adventure that connects you to nature and provides fresh, healthy food.
Winged beans, also known as asparagus peas or Goa beans, have a rich history, particularly in Southeast Asia and Papua New Guinea, where they’ve been cultivated for centuries. They’re more than just a vegetable; they’re a staple crop, revered for their versatility and nutritional value. Every part of the plant is edible, from the pods and leaves to the seeds and roots!
But why should you learn to grow winged beans easily? In today’s world, where we’re increasingly conscious of where our food comes from, having the ability to cultivate your own produce is incredibly empowering. Plus, winged beans are packed with protein, vitamins, and minerals, making them a fantastic addition to a healthy diet. This DIY guide will provide you with simple, step-by-step instructions to successfully cultivate these amazing plants, even if you’re a beginner gardener. Say goodbye to expensive grocery store prices and hello to fresh, homegrown goodness!
Grow Winged Beans Like a Pro: A DIY Guide
Hey there, fellow garden enthusiasts! I’m so excited to share my foolproof method for growing winged beans. These amazing legumes are not only delicious but also incredibly versatile. Every part of the plant is edible – the pods, beans, leaves, flowers, and even the tubers! Plus, they’re nitrogen-fixing, which means they’re great for your soil. Let’s dive into how you can cultivate these beauties in your own backyard.
Choosing the Right Winged Bean Variety
Before we get our hands dirty, let’s talk varieties. While there aren’t a ton of commercially available winged bean cultivars, you’ll still want to consider a few factors:
* Pod Length: Some varieties produce longer pods than others. If you’re planning on stir-frying them, longer pods might be preferable.
* Maturity Time: Winged beans need a long growing season, but some varieties mature slightly faster. If you live in an area with shorter summers, opt for a quicker-maturing type.
* Local Availability: Check with your local nurseries or seed suppliers to see what’s best suited for your climate.
Preparing Your Garden for Winged Bean Success
Winged beans are climbers, so you’ll need to provide them with a sturdy support system. They also thrive in warm weather and well-drained soil. Here’s how to get your garden ready:
* Sunlight: Winged beans need at least 6-8 hours of direct sunlight per day. Choose a location that gets plenty of sun.
* Soil: They prefer well-drained, slightly acidic soil (pH 6.0-6.8). Amend your soil with compost or well-rotted manure to improve drainage and fertility.
* Support System: This is crucial! Winged beans can grow up to 12 feet tall. You can use a trellis, fence, or even a sturdy teepee made of bamboo poles. I personally love using a trellis made from cattle panels – they’re strong and durable.
Step-by-Step Planting Guide
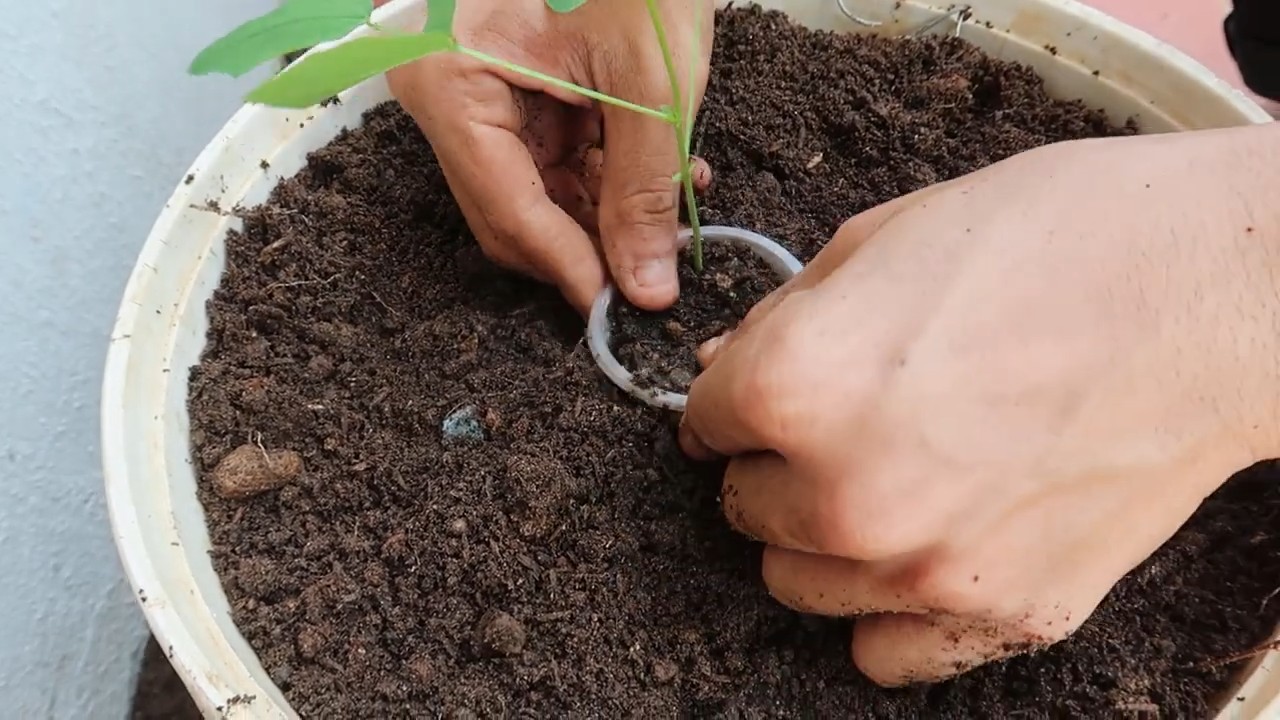
Now for the fun part – planting! You can either start your winged beans indoors or direct sow them in your garden. I prefer direct sowing because it avoids transplant shock.
1. Soaking the Seeds: To improve germination, soak the seeds in warm water for 24 hours before planting. This helps soften the hard seed coat.
2. Preparing the Planting Site: Loosen the soil around your trellis or support system. Dig small holes about 1 inch deep and 6 inches apart.
3. Sowing the Seeds: Place 2-3 seeds in each hole. This increases your chances of at least one seed germinating.
4. Covering the Seeds: Gently cover the seeds with soil and water thoroughly.
5. Marking the Planting Area: Label the area so you know what you’ve planted and avoid accidentally disturbing the seedlings.
Caring for Your Winged Bean Plants
Once your winged beans sprout, they’ll need regular care to thrive. Here’s what you need to do:
1. Watering: Water regularly, especially during dry spells. Winged beans need consistent moisture, but avoid overwatering, which can lead to root rot.
2. Fertilizing: Winged beans are nitrogen-fixing, so they don’t need a lot of fertilizer. However, you can give them a boost with a balanced fertilizer (10-10-10) a few weeks after they emerge.
3. Weeding: Keep the area around your plants free of weeds. Weeds compete for nutrients and water, which can stunt the growth of your winged beans.
4. Training the Vines: As your winged bean vines grow, gently guide them onto the trellis or support system. They’ll naturally start to climb, but you might need to help them along.
5. Pest and Disease Control: Winged beans are relatively pest-resistant, but keep an eye out for aphids, spider mites, and bean beetles. You can control these pests with insecticidal soap or neem oil. For fungal diseases, ensure good air circulation and avoid overhead watering.
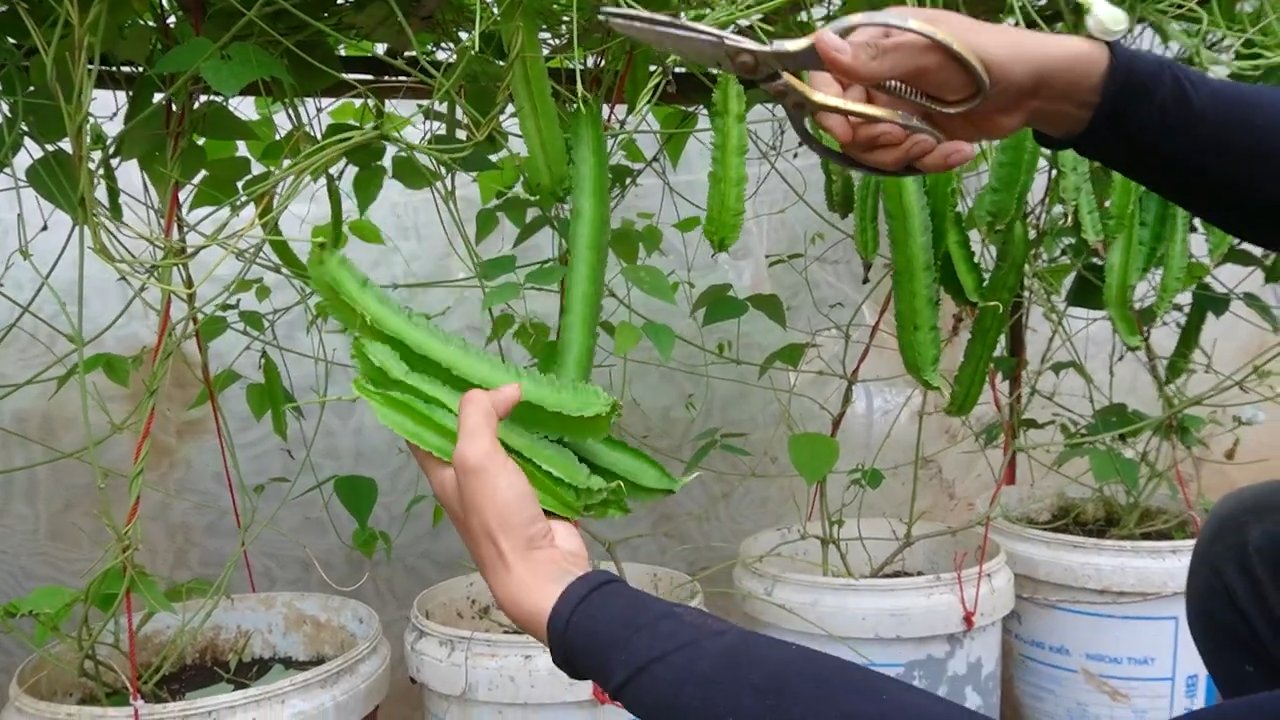
Harvesting Your Winged Beans
The best part of growing winged beans is, of course, the harvest! You can start harvesting the pods about 2-3 months after planting.
1. When to Harvest: Harvest the pods when they are young and tender, about 6-8 inches long. They should be firm and snap easily. If the pods become too mature, they’ll become tough and fibrous.
2. How to Harvest: Use scissors or pruning shears to cut the pods from the vine. Be careful not to damage the plant.
3. Harvesting Other Parts: You can also harvest the leaves, flowers, and beans. The leaves can be used like spinach, and the flowers can be added to salads. The beans can be eaten fresh or dried. The tubers can be harvested after the plant has died back in the fall.
4. Continuous Harvest: Winged beans will continue to produce pods throughout the growing season if you harvest them regularly. This encourages the plant to keep producing new pods.
Troubleshooting Common Winged Bean Problems
Even with the best care, you might encounter a few problems while growing winged beans. Here are some common issues and how to fix them:
* Poor Germination: If your seeds aren’t germinating, make sure the soil is warm enough (at least 70°F). You can also try scarifying the seeds by gently rubbing them with sandpaper before soaking them.
* Slow Growth: Slow growth can be caused by a lack of sunlight, poor soil, or insufficient watering. Make sure your plants are getting enough sun, amend the soil with compost, and water regularly.
* Yellowing Leaves: Yellowing leaves can be a sign of nutrient deficiency. Try fertilizing with a balanced fertilizer.
* Pest Infestations: As mentioned earlier, keep an eye out for pests and treat them promptly with insecticidal soap or neem oil.
* Lack of Pod Production: If your plants are growing well but not producing pods, it could be due to high temperatures or insufficient pollination. Winged beans are self-pollinating, but you can encourage pollination by gently shaking the vines.
Using Winged Beans in the Kitchen
Now that you’ve harvested your winged beans, it’s time to enjoy them! They have a unique flavor that’s often described as a cross between green beans and asparagus.
* Stir-Fries: Winged beans are delicious in stir-fries. Simply slice them into bite-sized pieces and add them to your favorite stir-fry recipe.
* Salads: The young, tender pods can be eaten raw in salads.
* Soups and Stews: Winged beans can be added to soups and stews for extra flavor and nutrition.
* Steaming or Boiling: You can also steam or boil winged beans until they’re tender-crisp.
* Roasting: Roasting winged beans with a little olive oil and salt is a simple and delicious way to enjoy them.
* The other parts: The leaves can be used like spinach, and the flowers can be added to salads. The beans can be eaten fresh or dried. The tubers can be harvested after the plant has died back in the fall and cooked like potatoes.
Saving Winged Bean Seeds
If you want to grow winged beans again next year, you can save the seeds from your current crop.
1. Allow Pods to Mature: Let some of the pods mature on the vine until they turn brown and dry.
2. Harvest the Pods: Carefully harvest the dried pods and remove the seeds.
3. Dry the Seeds: Spread the seeds out on a tray and let them dry completely in a cool, dry place.
4. Store the Seeds: Store the dried seeds in an airtight container in a cool, dark place. They should be viable for several years.
Winged Bean Trellis Design Ideas
Since winged beans are vigorous climbers, a sturdy and well-designed trellis is essential. Here are a few ideas to inspire you:
* Cattle Panel Trellis: As I mentioned earlier, cattle panels are a great option. They’re strong, durable, and easy to work with. Simply bend the panel into an arch and secure it to the ground with stakes.
* Bamboo Teepee: A bamboo teepee is a simple and attractive option. Tie several bamboo poles together at the top to form a teepee shape.
* Wooden Trellis: You can build a wooden trellis using lumber and wire mesh. This allows you to customize the size and shape of the trellis to fit your garden.
* Existing Fence: If you have a fence, you can use it as a trellis. Simply attach wire mesh or netting to the fence to provide support for the vines.
* Arbor: An arbor is
Conclusion
So, there you have it! Growing winged beans doesn’t have to be a daunting task. By embracing this simple DIY trick, you’re not just cultivating a unique and nutritious vegetable; you’re unlocking a world of culinary possibilities and contributing to a more sustainable food system. The beauty of this method lies in its accessibility – it requires minimal investment, utilizes readily available materials, and empowers even novice gardeners to achieve remarkable results.
Why is this DIY method a must-try? Because it addresses the core needs of winged beans: strong support for their vigorous climbing habit and a well-draining, nutrient-rich environment for optimal growth. Traditional methods can be cumbersome and expensive, often involving elaborate trellises or specialized equipment. This DIY approach simplifies the process, making it both cost-effective and environmentally friendly. Plus, the satisfaction of nurturing your own food from seed to table is an unparalleled reward.
But don’t stop there! Feel free to experiment and adapt this DIY trick to suit your specific needs and preferences. Consider these variations:
* Vertical Gardening on a Balcony: If you have limited space, adapt the support structure to fit your balcony railing or create a compact vertical garden using stacked containers.
* Companion Planting: Enhance the growth of your winged beans by planting them alongside beneficial companions like marigolds (to deter pests) or basil (to improve flavor).
* Seed Saving: Once your winged beans mature, save the seeds for future planting. This ensures a continuous supply of this delicious and nutritious vegetable.
* Different Support Structures: While the suggested structure works well, feel free to experiment with other materials like bamboo poles, repurposed metal fencing, or even sturdy branches. The key is to provide ample support for the vines to climb.
* Soil Amendments: Tailor the soil mix to your specific climate and soil conditions. Adding compost, aged manure, or other organic matter can further enhance soil fertility and drainage.
Ultimately, the success of your winged bean growing endeavor hinges on your willingness to experiment, observe, and adapt. Don’t be afraid to try new things and learn from your experiences. Remember, gardening is a journey, not a destination.
We wholeheartedly encourage you to give this DIY trick a try. Witness the magic of watching your winged beans thrive, and savor the delicious rewards of your labor. And most importantly, share your experiences with us! We’d love to hear about your successes, challenges, and any innovative variations you come up with. Post photos of your winged bean plants, share your favorite recipes, and connect with fellow gardeners in the comments section below. Let’s cultivate a community of winged bean enthusiasts and spread the word about this amazing vegetable! Let’s all learn how to grow winged beans easily.
Frequently Asked Questions (FAQ)
Q1: What exactly are winged beans, and why should I grow them?
Winged beans (Psophocarpus tetragonolobus), also known as Goa beans or asparagus peas, are a highly nutritious and versatile legume native to Southeast Asia. They are unique because almost every part of the plant is edible, including the pods, leaves, flowers, seeds, and tubers. Winged beans are packed with protein, vitamins, and minerals, making them a valuable addition to any diet. They are also relatively easy to grow, especially with the DIY trick outlined above, and can add a touch of exotic flair to your garden. Their ability to fix nitrogen in the soil also makes them a great choice for improving soil health.
Q2: What is the best time of year to plant winged beans?
Winged beans are tropical plants that thrive in warm weather. The ideal time to plant them is after the last frost, when the soil temperature has reached at least 65°F (18°C). In most regions, this is typically in late spring or early summer. If you live in a colder climate, you can start the seeds indoors 4-6 weeks before the last frost and transplant them outdoors once the weather warms up. Be sure to provide them with plenty of sunlight and warmth for optimal growth.
Q3: How much sunlight do winged beans need?
Winged beans require at least 6-8 hours of direct sunlight per day to thrive. Choose a planting location that receives ample sunlight throughout the day. If you are growing them indoors, supplement with grow lights if necessary. Insufficient sunlight can lead to stunted growth and reduced pod production.
Q4: What kind of soil is best for growing winged beans?
Winged beans prefer well-draining, fertile soil with a slightly acidic to neutral pH (6.0-7.0). Amend the soil with compost, aged manure, or other organic matter to improve drainage and fertility. Avoid heavy clay soils, as they can become waterlogged and inhibit root growth. A raised bed or container gardening mix is often a good option.
Q5: How often should I water winged beans?
Winged beans need consistent moisture, especially during hot and dry weather. Water deeply and regularly, ensuring that the soil remains consistently moist but not waterlogged. Avoid overhead watering, as this can promote fungal diseases. Mulching around the base of the plants can help retain moisture and suppress weeds.
Q6: What kind of support structure is best for winged beans?
Winged beans are vigorous climbers and require a strong support structure to grow properly. The DIY trick outlined above provides a simple and effective solution. However, you can also use other materials like bamboo poles, trellises, or even sturdy branches. The key is to provide ample support for the vines to climb and spread. Ensure the structure is tall enough to accommodate the plant’s growth, which can reach up to 10-12 feet.
Q7: How long does it take for winged beans to mature?
Winged beans typically take 90-120 days to mature from seed to harvest. The exact time will depend on the variety, climate, and growing conditions. You can start harvesting the pods when they are young and tender, typically around 6-8 inches long. Regular harvesting will encourage continued pod production.
Q8: Are there any common pests or diseases that affect winged beans?
Winged beans are generally resistant to pests and diseases, but they can be susceptible to aphids, spider mites, and fungal diseases like powdery mildew. Inspect your plants regularly for signs of infestation or disease and take appropriate action. Organic pest control methods, such as insecticidal soap or neem oil, can be effective in controlling pests. Ensure good air circulation and avoid overhead watering to prevent fungal diseases.
Q9: How do I harvest winged beans?
Harvest winged bean pods when they are young and tender, typically around 6-8 inches long. Use a sharp knife or scissors to cut the pods from the vine. Regular harvesting will encourage continued pod production. You can also harvest the leaves, flowers, and tubers for culinary use.
Q10: How do I store winged beans?
Fresh winged bean pods can be stored in the refrigerator for up to a week. To store them for longer, you can blanch them in boiling water for a few minutes and then freeze them. Dried winged beans can be stored in an airtight container in a cool, dry place for several months.
Q11: Can I grow winged beans in containers?
Yes, winged beans can be successfully grown in containers, provided that the container is large enough to accommodate their root system and the support structure. Choose a container that is at least 12 inches in diameter and depth. Use a well-draining potting mix and provide adequate support for the vines to climb. Water regularly and fertilize as needed.
Q12: Are winged beans nitrogen fixers?
Yes, winged beans are nitrogen-fixing plants, meaning they have the ability to convert atmospheric nitrogen into a form that plants can use. This makes them a valuable addition to any garden, as they can help improve soil fertility and reduce the need for synthetic fertilizers.
Q13: Where can I find winged bean seeds?
Winged bean seeds can be found at some local nurseries or online seed retailers. Look for reputable suppliers that offer high-quality seeds. You can also save seeds from your own plants for future planting.
Q14: What are some ways to cook with winged beans?
Winged beans are incredibly versatile in the kitchen. The young pods can be eaten raw in salads or stir-fried, steamed, boiled, or roasted. The leaves can be used like spinach, and the flowers can be added to salads or used as a garnish. The seeds can be roasted and eaten like nuts, or ground into flour. The tubers can be boiled, baked, or fried like potatoes. Experiment with different recipes and find your favorite ways to enjoy this delicious and nutritious vegetable.

Leave a Comment