
Grow Mustard Greens Home – sounds like a plan, right? I’m so excited to share some simple, yet effective, DIY tricks that will have you harvesting your own peppery greens in no time! Forget those wilted, overpriced bunches at the grocery store. Imagine stepping outside your door and snipping fresh, vibrant mustard greens for your salad, stir-fry, or even a spicy pesto.
Mustard greens have a rich history, dating back thousands of years. They’ve been cultivated in Asia and Europe, prized not only for their delicious flavor but also for their medicinal properties. In some cultures, they even symbolize good fortune and prosperity! But beyond their historical significance, why should you bother growing them yourself?
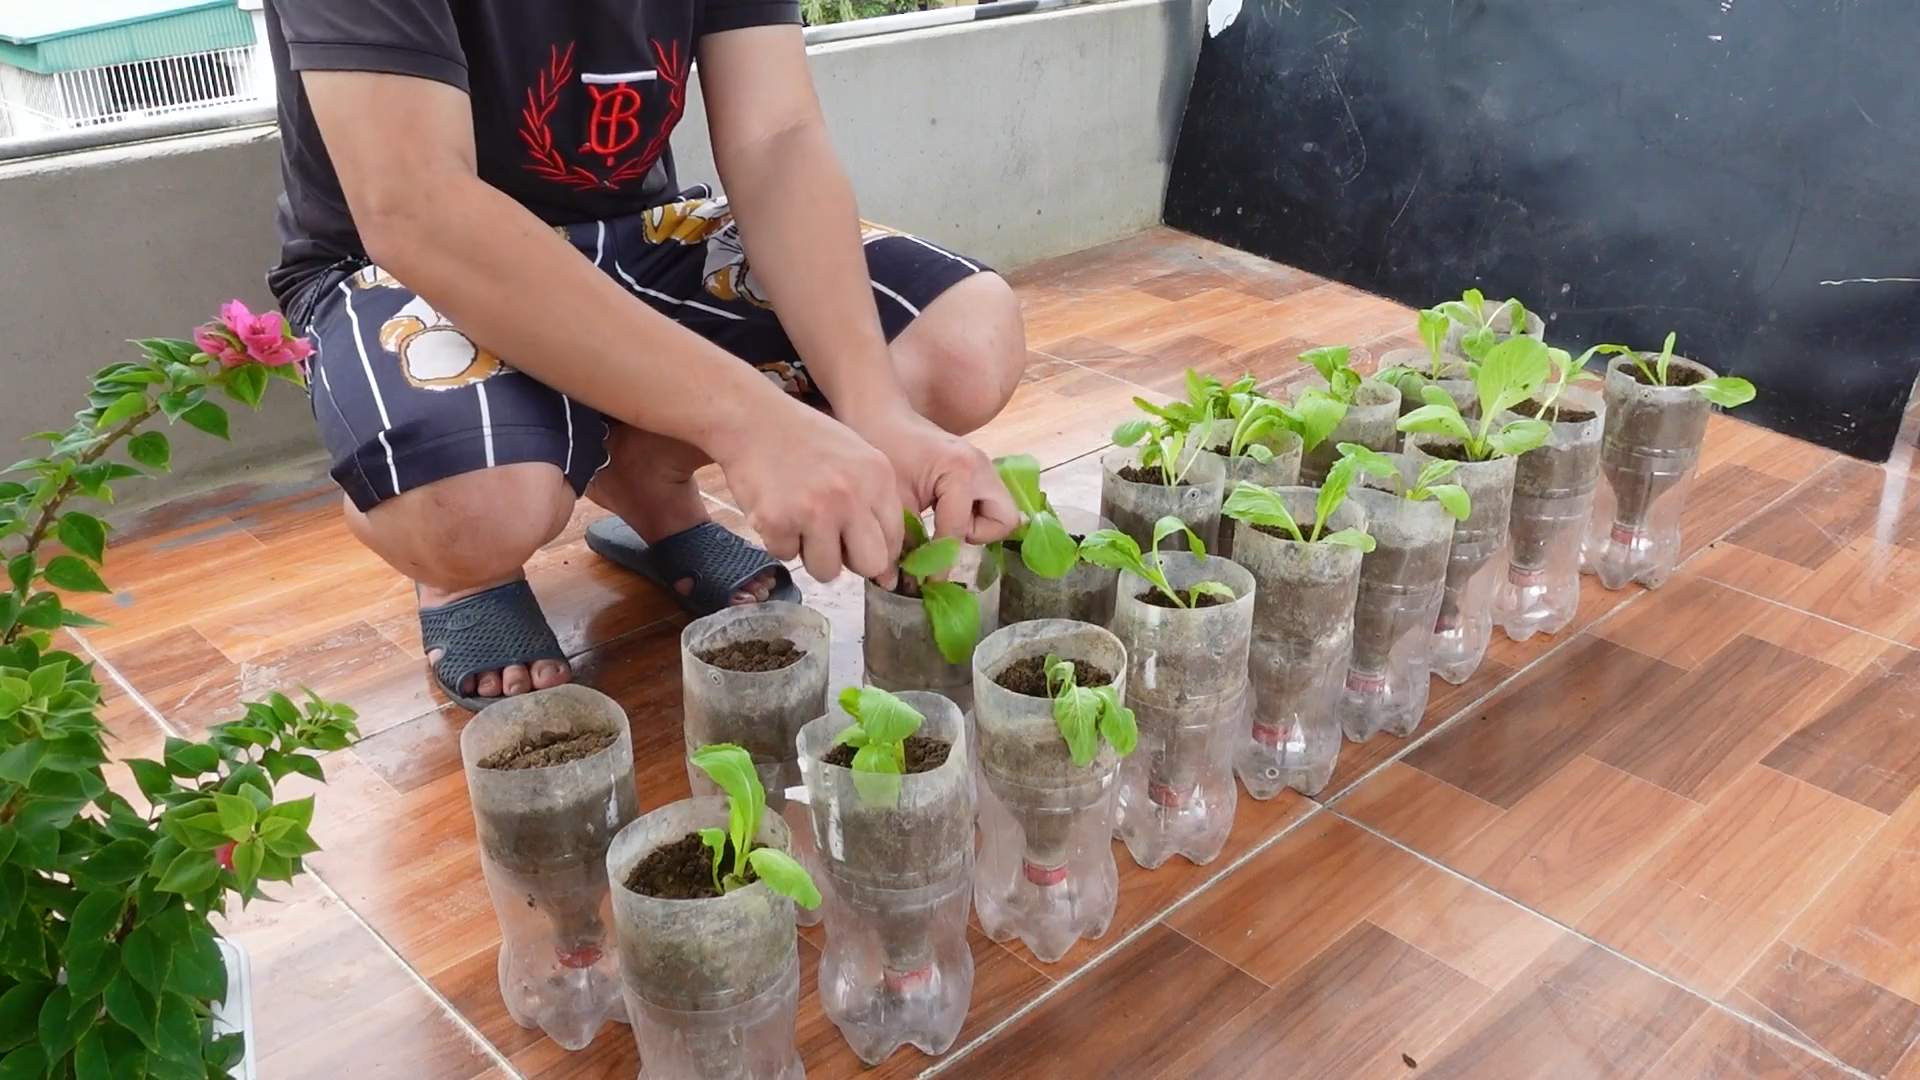
Well, for starters, growing your own food is incredibly empowering. You control what goes into your plants, ensuring they’re free from harmful pesticides and chemicals. Plus, growing mustard greens home is surprisingly easy, even if you don’t have a sprawling garden. These hardy greens thrive in containers, raised beds, or even a sunny windowsill. And let’s be honest, there’s nothing quite like the satisfaction of nurturing a plant from seed to table. I’m here to guide you through some clever DIY hacks that will make the process even smoother and more rewarding. Get ready to unleash your inner gardener!
Growing Mustard Greens at Home: A Beginner’s Guide
Hey there, fellow gardening enthusiasts! I’m so excited to share my experience with growing mustard greens right in my own backyard (or even on a sunny windowsill!). Mustard greens are not only delicious with their peppery bite, but they’re also incredibly easy to grow, making them perfect for beginners like I once was. This guide will walk you through every step, from choosing the right seeds to harvesting your bountiful crop. Let’s get started!
Choosing Your Mustard Green Variety
Before we dive into the nitty-gritty, let’s talk about the different types of mustard greens you can grow. Each variety offers a slightly different flavor and texture, so choosing the right one is key to your enjoyment. Here are a few popular options:
- Southern Giant Curled: This is a classic variety with large, frilly leaves and a mild, slightly sweet flavor. It’s a great all-around choice.
- Florida Broadleaf: Known for its smooth, broad leaves and robust, peppery taste. It’s perfect for adding a kick to your dishes.
- Red Giant: This variety boasts beautiful, reddish-purple leaves and a strong, pungent flavor. It adds a pop of color to your garden and your plate.
- Mizuna: A Japanese mustard green with feathery, serrated leaves and a mild, slightly peppery flavor. It’s great in salads and stir-fries.
I personally love growing Southern Giant Curled because it’s so versatile, but feel free to experiment and find your favorite!
Getting Started: Planting Your Mustard Greens
Now for the fun part: planting! Mustard greens are cool-season crops, meaning they thrive in cooler temperatures. This makes them ideal for planting in early spring or late summer/early fall.
When to Plant:
* Spring Planting: Plant your seeds 2-4 weeks before the last expected frost.
* Fall Planting: Plant your seeds 6-8 weeks before the first expected frost.
Where to Plant:
Mustard greens prefer a sunny location with at least 6 hours of sunlight per day. However, they can tolerate partial shade, especially in hotter climates.
Soil Preparation:
Mustard greens aren’t too picky about soil, but they do best in well-drained soil that’s rich in organic matter. Here’s how I prepare my soil:
1. Clear the area: Remove any weeds, rocks, or debris from the planting area.
2. Amend the soil: Add compost or well-rotted manure to the soil to improve its fertility and drainage. I usually add a couple of inches of compost and work it into the top 6-8 inches of soil.
3. Loosen the soil: Use a garden fork or tiller to loosen the soil to a depth of at least 6 inches. This will make it easier for the mustard green roots to grow.
4. Smooth the surface: Rake the soil to create a smooth, even surface.
Step-by-Step Planting Instructions:
1. Sow the seeds: Mustard green seeds are tiny, so be careful not to sow them too thickly. I usually sow them about 1/4 to 1/2 inch deep and about 1 inch apart. You can sow them in rows or broadcast them over the planting area.
2. Cover the seeds: Gently cover the seeds with a thin layer of soil.
3. Water thoroughly: Water the planting area gently but thoroughly. You want to make sure the soil is moist but not soggy.
4. Keep the soil moist: Keep the soil consistently moist until the seeds germinate. This usually takes about 5-7 days. I check the soil moisture daily and water as needed.
Caring for Your Mustard Greens:
Once your mustard green seedlings emerge, it’s important to provide them with proper care to ensure a healthy and productive crop.
Thinning:
When the seedlings are about 2 inches tall, thin them to about 4-6 inches apart. This will give them enough space to grow and prevent overcrowding. I know it feels bad to pull out the extra seedlings, but it’s necessary for the health of the remaining plants. You can always transplant the thinned seedlings to another location if you have space.
Watering:
Mustard greens need consistent moisture to thrive. Water them regularly, especially during dry periods. I usually water them deeply once or twice a week, depending on the weather. Avoid overwatering, as this can lead to root rot.
Fertilizing:
Mustard greens are heavy feeders, so they benefit from regular fertilization. I usually fertilize them every 2-3 weeks with a balanced fertilizer. You can also use a liquid fertilizer or compost tea. Follow the instructions on the fertilizer package for application rates.
Weeding:
Keep the planting area free of weeds. Weeds compete with mustard greens for nutrients and water, so it’s important to remove them regularly. I usually hand-pull weeds as soon as I see them.
Pest and Disease Control:
Mustard greens are generally pest-resistant, but they can be susceptible to certain pests and diseases. Here are a few common problems and how to deal with them:
* Aphids: These tiny insects suck the sap from plants, causing them to weaken and distort. You can control aphids by spraying them with a strong stream of water or by using insecticidal soap.
* Flea beetles: These small, jumping beetles chew tiny holes in the leaves of mustard greens. You can control flea beetles by covering the plants with row covers or by using insecticidal soap.
* Downy mildew: This fungal disease causes yellow spots on the leaves of mustard greens. You can prevent downy mildew by providing good air circulation and avoiding overhead watering. If you see signs of downy mildew, remove the affected leaves and spray the plants with a fungicide.
I’ve found that regular monitoring and early intervention are key to preventing serious pest and disease problems.
Harvesting Your Mustard Greens:
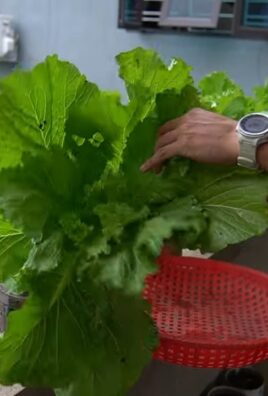
The best part of growing mustard greens is, of course, harvesting them! You can start harvesting mustard greens when the leaves are about 6-8 inches long.
How to Harvest:
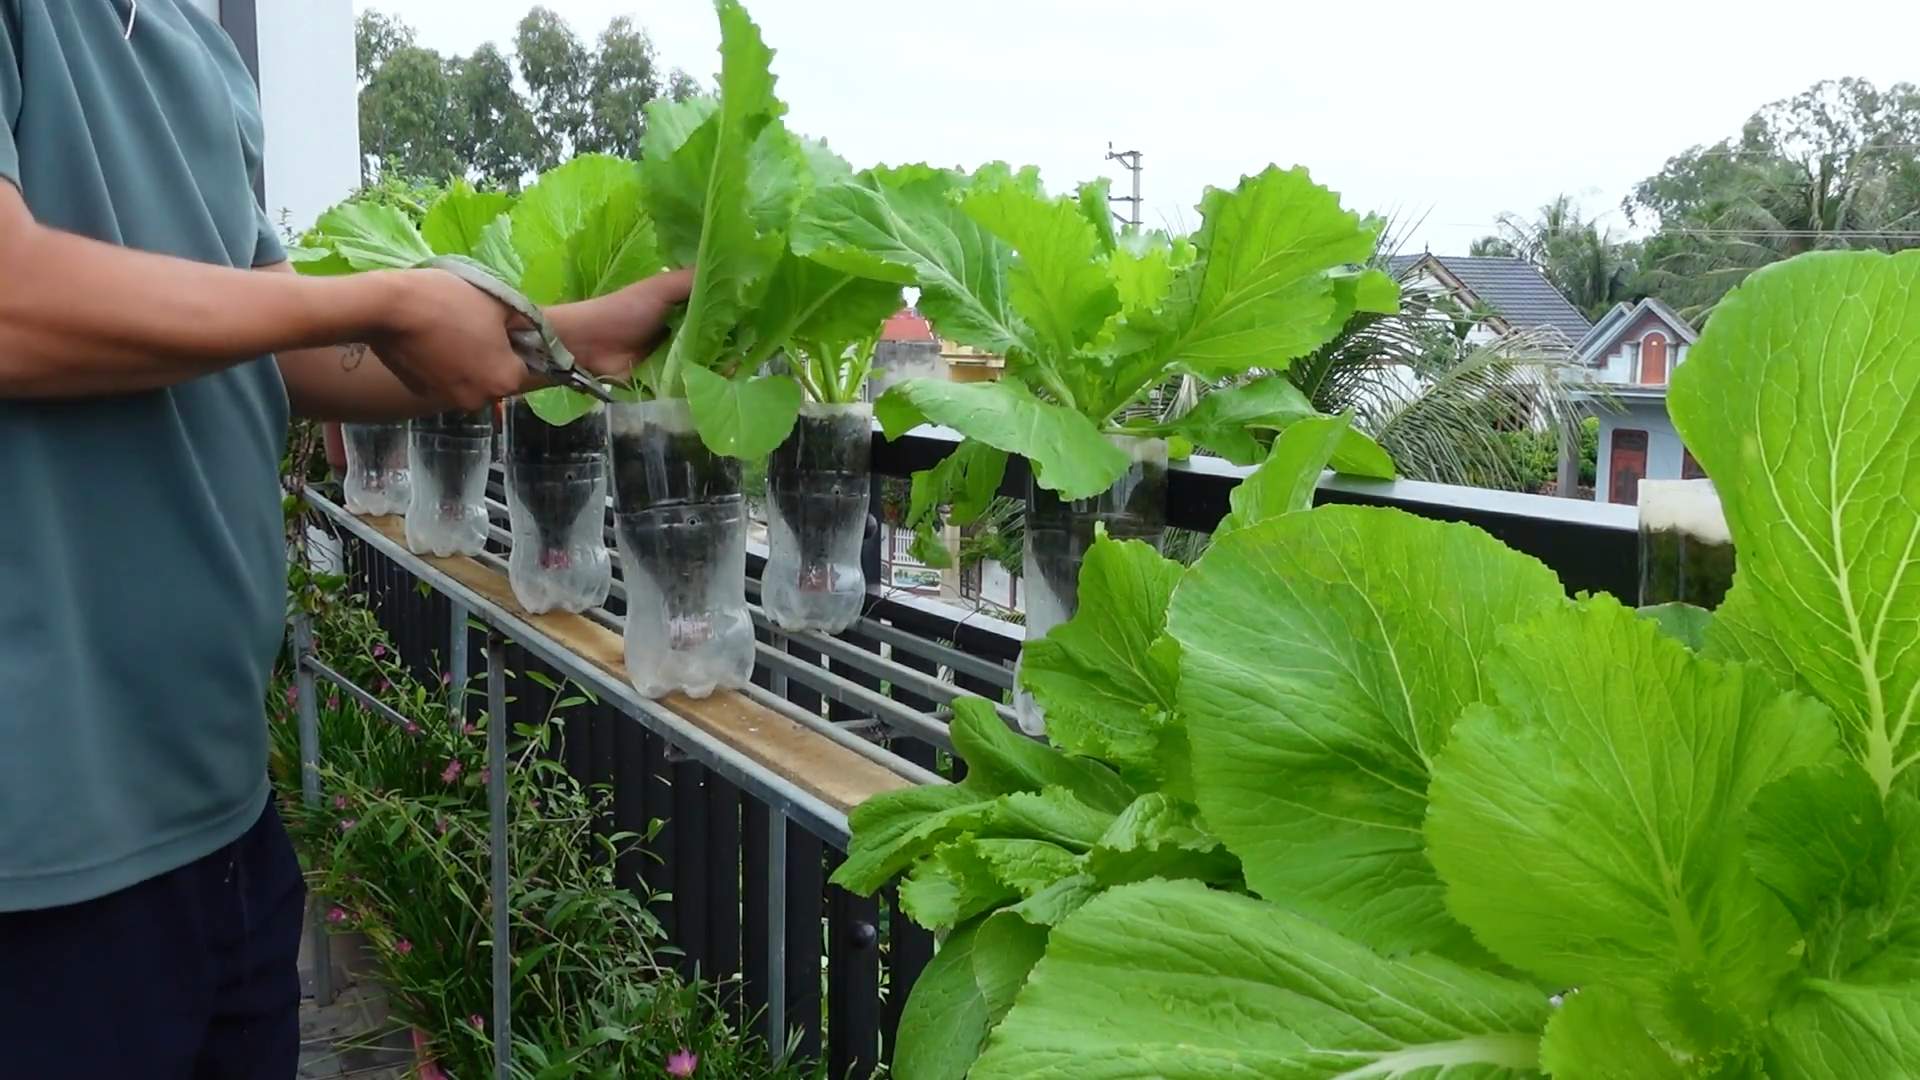
1. Cut the outer leaves: Use a sharp knife or scissors to cut the outer leaves of the plant, leaving the inner leaves to continue growing. This is called “cut-and-come-again” harvesting, and it allows you to harvest mustard greens multiple times from the same plant.
2. Harvest regularly: Harvest mustard greens regularly to encourage continued growth.
3. Harvest before flowering: Harvest mustard greens before they start to flower, as the leaves will become bitter once the plant bolts (goes to seed).
Storing Your Mustard Greens:
Mustard greens are best used fresh, but they can be stored in the refrigerator for up to a week. To store them, wrap them in a damp paper towel and place them in a plastic bag.
Enjoying Your Homegrown Mustard Greens:
Now that you’ve harvested your mustard greens, it’s time to enjoy them! Mustard greens can be eaten raw or cooked. They’re delicious in salads, stir-fries, soups, and stews. Here are a few of my favorite ways to use mustard greens:
* Mustard Green Salad: Toss mustard greens with a vinaigrette dressing and your favorite toppings, such as tomatoes, cucumbers, and onions.
* Sautéed Mustard Greens: Sauté mustard greens with garlic, olive oil, and a pinch of red pepper flakes.
* Mustard Green Soup: Add mustard greens to your favorite soup recipe for a peppery kick.
* Mustard Green Stir-Fry: Stir-fry mustard greens with other vegetables and your favorite protein.
I hope this guide has inspired you to grow your own mustard greens at home. It’s a rewarding experience that will provide you with fresh, delicious, and nutritious greens all season long. Happy gardening!
Conclusion
So, there you have it! Growing mustard greens at home is not only achievable but also incredibly rewarding. Forget those wilted, overpriced bunches at the grocery store. Imagine stepping into your own backyard or onto your balcony and harvesting vibrant, peppery mustard greens whenever you need them. This DIY trick is a game-changer for anyone who values fresh, flavorful ingredients and wants to connect with their food source.
Why is this a must-try? Because it’s simple, cost-effective, and delivers a superior product. You control the growing conditions, ensuring your mustard greens are free from harmful pesticides and bursting with flavor. Plus, there’s a certain satisfaction that comes from nurturing something from seed to table. It’s a small act of self-sufficiency that can have a big impact on your culinary creations.
But the fun doesn’t stop there! Feel free to experiment with different varieties of mustard greens. Some are milder, while others pack a serious punch. Try growing ‘Red Giant’ for its beautiful color and slightly sweet flavor, or ‘Florida Broadleaf’ for its classic, robust taste. You can also adjust the growing conditions to influence the flavor profile. For example, cooler temperatures tend to produce milder greens.
Consider companion planting to enhance your mustard green garden. Planting them alongside herbs like dill or chamomile can deter pests and improve the overall health of your plants. You can also succession plant, sowing new seeds every few weeks, to ensure a continuous harvest throughout the growing season.
Don’t be afraid to get creative with your harvest! Mustard greens are incredibly versatile. Use them in salads, stir-fries, soups, or even as a spicy addition to sandwiches. They’re also delicious sautéed with garlic and olive oil. The possibilities are endless!
We wholeheartedly encourage you to give this DIY trick a try. It’s a fantastic way to add fresh, healthy greens to your diet and connect with the natural world. And most importantly, we want to hear about your experience! Share your photos, tips, and recipes in the comments below. Let’s build a community of home gardeners who are passionate about growing their own food. Embrace the joy of growing mustard greens at home and discover the difference fresh, homegrown produce can make. This is more than just a recipe; it’s an invitation to cultivate a healthier, more flavorful life.
Now, let’s address some frequently asked questions to ensure your success:
Frequently Asked Questions (FAQ)
What is the best time of year to plant mustard greens?
Mustard greens are a cool-season crop, meaning they thrive in cooler temperatures. The best time to plant them is in early spring or late summer/early fall. Avoid planting during the hottest months of summer, as the heat can cause them to bolt (go to seed) prematurely, resulting in bitter-tasting leaves. In spring, plant after the last frost. For a fall harvest, sow seeds about 4-6 weeks before the first expected frost.
What kind of soil do mustard greens need?
Mustard greens prefer well-drained soil that is rich in organic matter. Amend your soil with compost or well-rotted manure before planting to improve its fertility and drainage. A slightly acidic to neutral soil pH (around 6.0 to 7.0) is ideal. If you’re unsure about your soil pH, you can purchase a soil testing kit from your local garden center.
How much sunlight do mustard greens require?
Mustard greens need at least 4-6 hours of sunlight per day. While they can tolerate some shade, especially during the hottest part of the day, they will grow best in a sunny location. If you’re growing them indoors, provide supplemental lighting with grow lights.
How often should I water my mustard greens?
Keep the soil consistently moist, but not waterlogged. Water deeply whenever the top inch of soil feels dry to the touch. Avoid overhead watering, as this can promote fungal diseases. Instead, water at the base of the plants. During hot, dry weather, you may need to water more frequently.
What are some common pests and diseases that affect mustard greens?
Common pests that can affect mustard greens include aphids, flea beetles, cabbage worms, and slugs. To control these pests, you can use organic methods such as handpicking, insecticidal soap, or diatomaceous earth. Common diseases include downy mildew and white rust. To prevent these diseases, ensure good air circulation, avoid overhead watering, and remove any infected leaves promptly. Crop rotation can also help to prevent soilborne diseases.
How do I harvest mustard greens?
You can begin harvesting mustard greens when the leaves are about 4-6 inches long. Harvest the outer leaves first, leaving the inner leaves to continue growing. This will allow you to enjoy a continuous harvest over several weeks. You can also harvest the entire plant at once if you prefer. Simply cut the plant off at the base.
How do I store mustard greens?
Mustard greens are best used fresh, but they can be stored in the refrigerator for up to a week. To store them, wrap them loosely in a damp paper towel and place them in a plastic bag or container. Avoid washing them until you’re ready to use them.
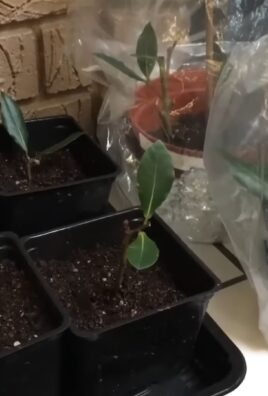
Can I grow mustard greens in containers?
Yes, mustard greens are well-suited for container gardening. Choose a container that is at least 6-8 inches deep and has drainage holes. Use a high-quality potting mix and follow the same planting and care instructions as you would for growing them in the ground.
How do I prevent mustard greens from becoming too bitter?
Several factors can contribute to bitter-tasting mustard greens, including hot weather, lack of water, and overmaturity. To prevent bitterness, plant in the cool season, provide adequate water, and harvest the leaves when they are young and tender. You can also try growing milder varieties of mustard greens.
Can I eat the stems of mustard greens?
Yes, the stems of mustard greens are edible, but they can be a bit tough. To make them more palatable, you can chop them finely and cook them along with the leaves. You can also pickle or ferment the stems for a unique flavor.
Leave a Comment