
Grow Mushrooms Indoors Easily? Absolutely! Imagine harvesting fresh, delicious mushrooms right from your own home, any time of year. Forget those expensive grocery store prices and questionable freshness – with a few simple tricks and a little DIY magic, you can become a mushroom-growing maestro.
For centuries, cultures around the world have revered mushrooms, not just for their culinary delights but also for their medicinal properties. From ancient Chinese emperors seeking the “elixir of life” in rare fungi to European peasants foraging for prized truffles, mushrooms have always held a special place in our history. Now, you can tap into that rich tradition without even stepping outside!
Why should you learn to grow mushrooms indoors easily? Well, besides the obvious benefit of having a constant supply of gourmet ingredients, it’s also incredibly rewarding. It’s a fantastic way to connect with nature, learn about the fascinating world of fungi, and even reduce your carbon footprint by growing your own food. Plus, let’s be honest, it’s just plain cool! I’m going to show you some simple, step-by-step methods that will have you harvesting your own bounty of delicious mushrooms in no time. Get ready to unleash your inner mycologist!
Growing Mushrooms Indoors: A Beginner’s Guide
Okay, so you want to grow mushrooms indoors? Awesome! It’s a surprisingly rewarding hobby, and you get delicious, fresh mushrooms as a bonus. Don’t be intimidated; it’s easier than you think. I’m going to walk you through a simple method using a mushroom grow kit. This is the best way to start, especially if you’re a beginner.
What You’ll Need
Before we dive in, let’s gather our supplies. The beauty of using a grow kit is that most of what you need is already included!
* Mushroom Grow Kit: This is the heart of the operation. You can find these online or at some garden centers. Make sure it’s a kit for a mushroom variety you like (Oyster, Shiitake, Lion’s Mane are all popular and relatively easy).
* Spray Bottle: A clean spray bottle filled with distilled or filtered water. Tap water can sometimes contain chlorine or other chemicals that might inhibit growth.
* A Clean, Well-Lit Area: Not direct sunlight! Mushrooms prefer indirect light. A spot near a window that doesn’t get blasted by the sun is perfect.
* Humidity Tent (Usually Included in the Kit): This helps maintain the high humidity levels mushrooms need. If your kit doesn’t include one, a large clear plastic bag will work.
* Optional: Thermometer/Hygrometer: This helps you monitor temperature and humidity, but it’s not strictly necessary, especially for your first grow.
* Optional: Perlite: If you’re using a plastic bag as a humidity tent, a layer of perlite at the bottom, kept moist, will help maintain humidity.
Preparing Your Grow Kit
Most grow kits come pre-inoculated, meaning the mushroom spores are already growing in the substrate (the material the mushrooms will grow from). Here’s how to get it ready:
1. Open the Kit Carefully: Follow the instructions that came with your specific kit. Usually, this involves opening the bag or box and exposing the substrate. Some kits require you to cut slits in the bag.
2. Hydrate the Substrate: This is crucial! The substrate needs to be moist for the mushrooms to thrive. Again, follow your kit’s instructions, but generally, you’ll either soak the entire block in water for a specified time (usually a few hours) or heavily mist the surface.
3. Drain Excess Water: If you soaked the block, make sure to drain off any excess water. You want it moist, not waterlogged.
Setting Up Your Growing Environment
Now, let’s create the perfect mushroom-growing haven:
1. Choose Your Location: Find that spot with indirect light. Avoid areas that are too hot or too cold. Ideal temperatures are usually between 60-75°F (15-24°C), but check your kit’s instructions for the specific requirements of your mushroom variety.
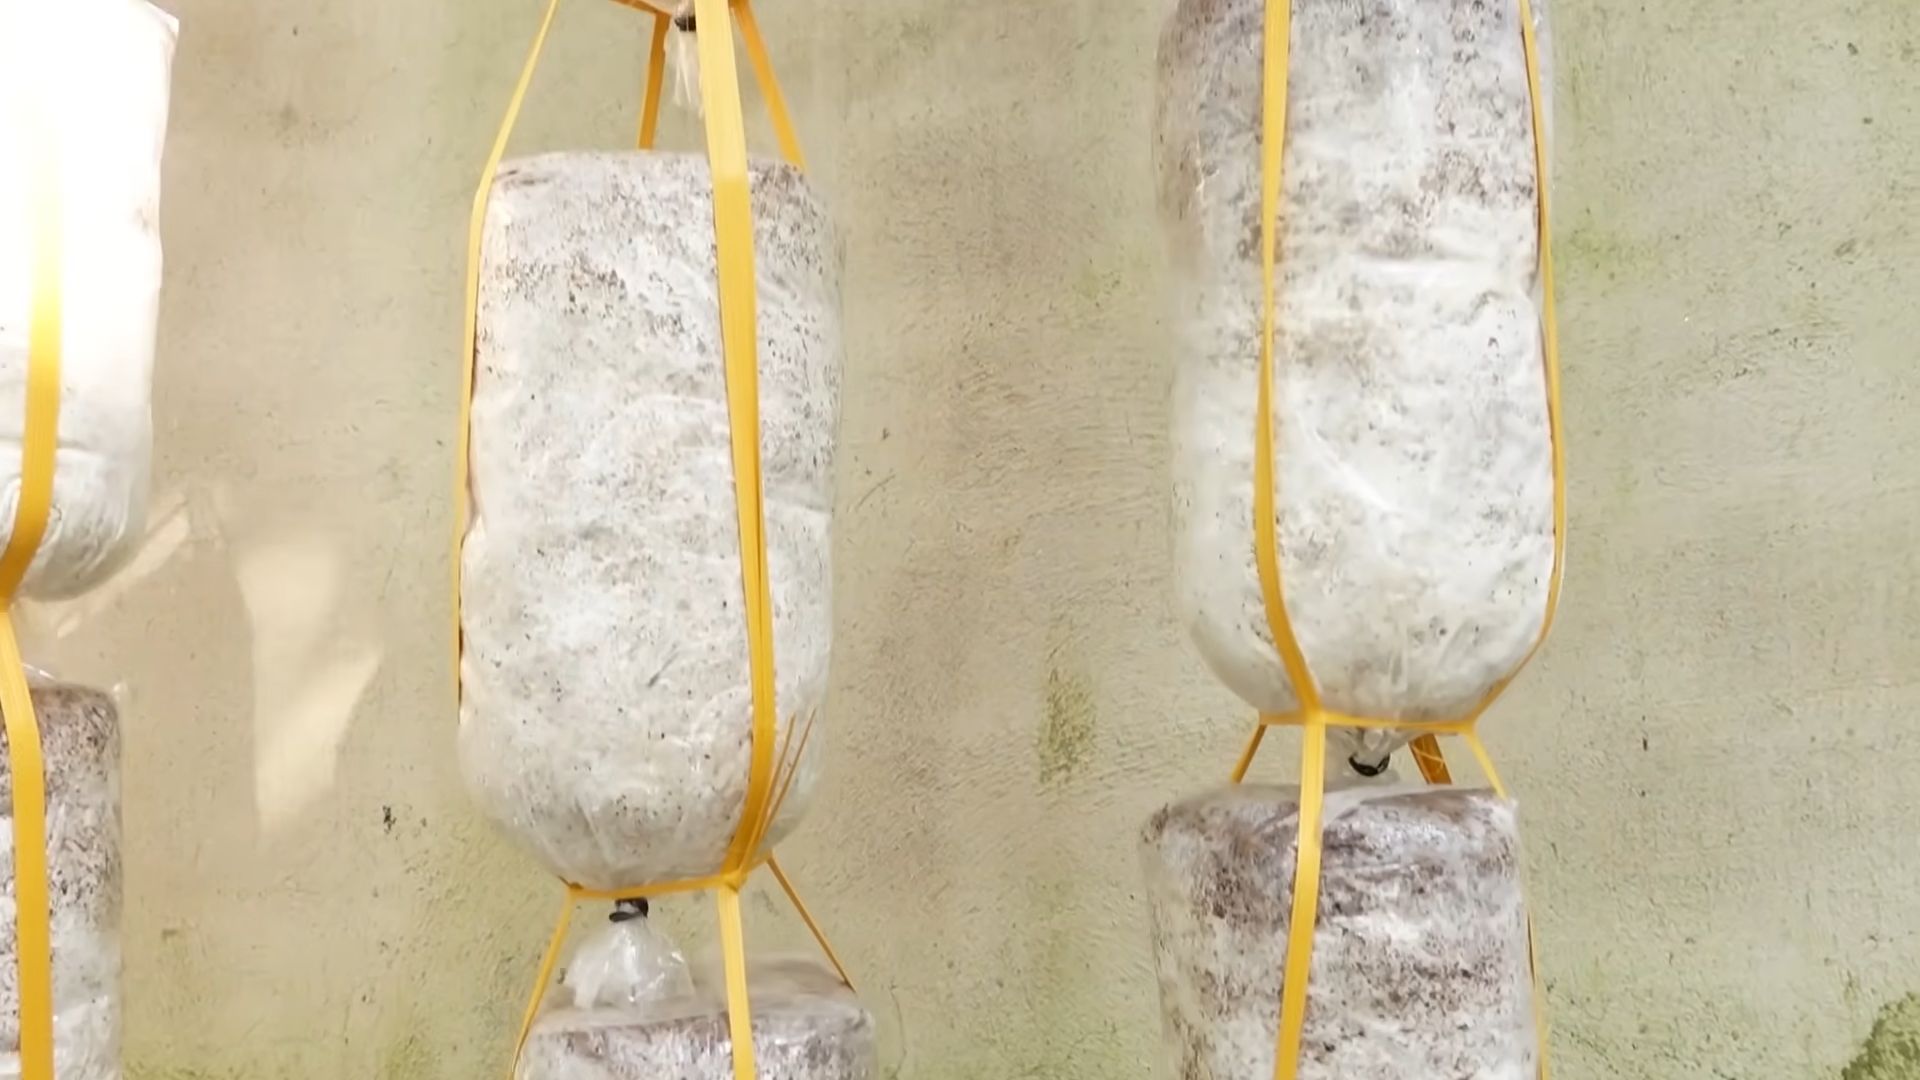
2. Set Up Your Humidity Tent: Place the hydrated substrate block inside the humidity tent (or plastic bag). If you’re using a plastic bag, add a layer of perlite to the bottom and moisten it. This will help maintain humidity.
3. Position for Airflow: Make sure there’s some airflow around the tent. Don’t seal the bag completely; leave a small opening for air exchange. This prevents the buildup of stagnant air, which can lead to mold.
Maintaining Your Mushroom Garden
This is where the daily care comes in. It’s not difficult, but consistency is key:
1. Mist Regularly: This is the most important part! Mist the inside of the humidity tent (or the substrate directly, depending on your kit’s instructions) 2-3 times a day. You want to keep the humidity high, but avoid overwatering. The surface of the substrate should be moist, but not dripping wet.
2. Monitor Humidity: If you have a hygrometer, aim for 80-90% humidity. If you don’t, just observe the substrate. If it looks dry, mist it. If there’s condensation on the inside of the tent, you’re probably doing well.
3. Check for Contamination: Keep an eye out for any signs of mold or discoloration other than the white mycelium (the mushroom’s root system). Green, black, or other colored molds are a sign of contamination. If you see any, it’s best to discard the kit to prevent the mold from spreading.
4. Be Patient: It can take a week or two (or even longer, depending on the variety) for the first mushrooms to start appearing. Don’t get discouraged if you don’t see anything right away.
Harvesting Your Mushrooms
The moment you’ve been waiting for!
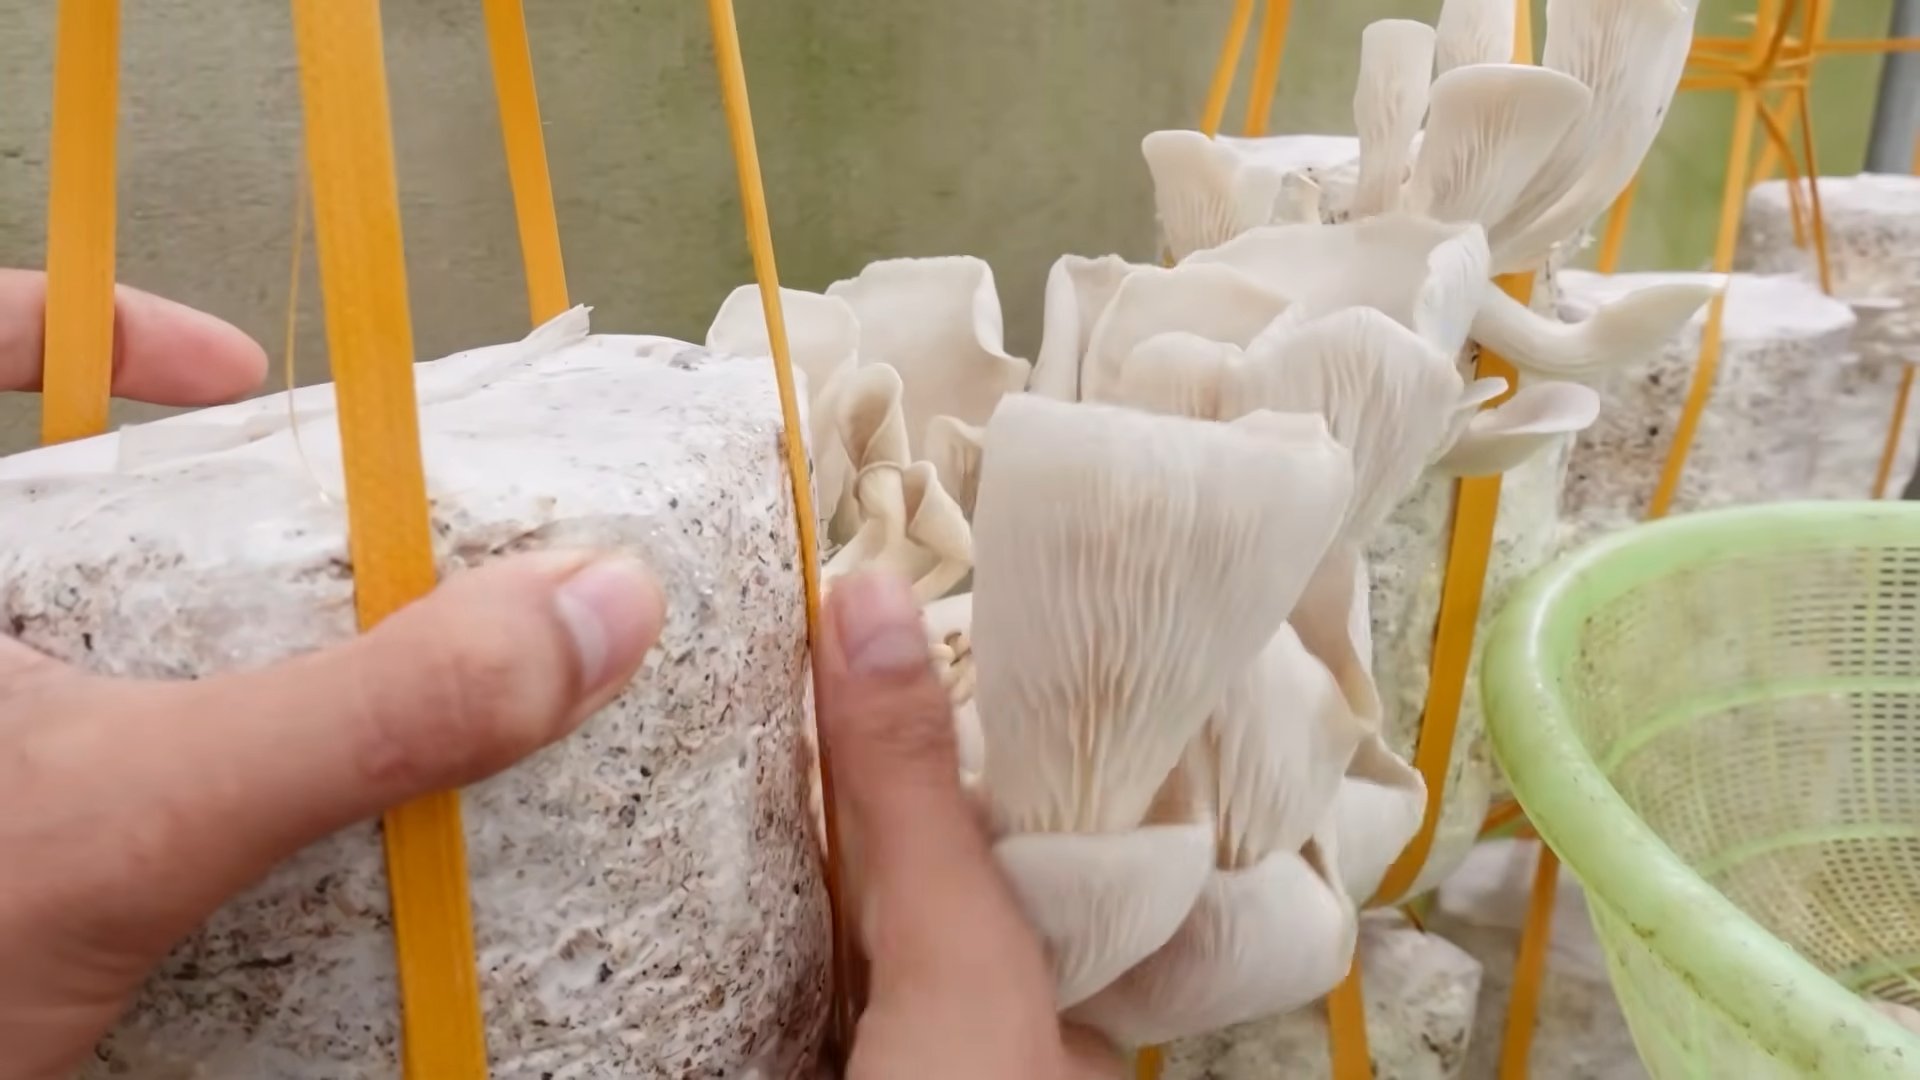
1. Harvest at the Right Time: This depends on the type of mushroom. Oyster mushrooms, for example, are usually ready to harvest when the caps are fully formed and the edges start to curl upwards. Shiitake mushrooms are ready when the caps have opened and the gills are visible. Again, consult your kit’s instructions for specific guidance.
2. Harvest Carefully: Gently twist and pull the mushrooms from the substrate. Avoid damaging the surrounding mycelium. You can also use a clean, sharp knife to cut the mushrooms off at the base.
3. Enjoy Your Harvest! Freshly grown mushrooms are delicious! Use them in your favorite recipes, or simply sauté them with butter and garlic.
Second Flush (and Beyond!)
The good news is, you can usually get multiple flushes (harvests) from a single grow kit!
1. Soak the Substrate Again: After harvesting your first flush, soak the substrate again to rehydrate it. Follow the same procedure as before.
2. Repeat the Process: Place the substrate back in the humidity tent and continue misting regularly.
3. Expect Smaller Yields: Subsequent flushes will usually produce fewer mushrooms than the first flush, but it’s still worth it!
4. Know When to Quit: Eventually, the substrate will become depleted of nutrients, and you won’t get any more mushrooms. At that point, you can compost the substrate and start a new kit.
Troubleshooting
Sometimes things don’t go exactly as planned. Here are some common problems and how to fix them:
* Mushrooms are growing slowly or not at all: Make sure the humidity is high enough and the temperature is within the ideal range. Be patient!
* Mushrooms are small and stunted: This could be due to low humidity or insufficient airflow. Increase misting and make sure there’s some ventilation.
* Mushrooms are growing with long stems and small caps: This is usually a sign of insufficient light. Move the kit to a slightly brighter location (but still avoid direct sunlight).
* Mold is growing on the substrate: Unfortunately, this usually means the kit is contaminated. Discard it to prevent the mold from spreading.
Choosing the Right Mushroom Grow Kit
With so many options available, picking the right kit can feel overwhelming. Here’s what to consider:
* Mushroom Variety: Start with a variety known for being easy to grow, like Oyster, Shiitake, or Lion’s Mane.
* Kit Type: Some kits come in bags, while others come in blocks or tubs. Choose the type that you find most convenient.
* Reviews: Read reviews from other growers to get an idea of the kit’s quality and ease of use.
* Price: Grow kits range in price, so set a budget before you start shopping.
Beyond Grow Kits: Exploring More Advanced Techniques
Once you’ve mastered the basics with a grow kit, you might want to explore more advanced techniques, such as:
* Growing from Spores: This involves starting from scratch with mushroom spores and creating your own substrate. It’s more challenging, but also more rewarding.
* Using Different Substrates: Experiment with different substrates, such as straw, wood chips, or coffee grounds.
* Building Your Own Grow Chamber: Create a custom-built grow chamber to control temperature and humidity more precisely.
Final Thoughts
Growing mushrooms indoors is a fun and rewarding hobby that anyone can enjoy. With a little patience and care, you can harvest delicious, fresh mushrooms right in your own home. So, go ahead and give it a try! You might be surprised at how easy it is. Happy growing!
Conclusion
So, there you have it! Growing mushrooms indoors easily is not just a pipe dream; it’s an achievable reality with a little patience and the right approach. We’ve walked you through a simple, effective method that bypasses the complexities often associated with mushroom cultivation. Forget expensive kits and specialized equipment. This DIY trick empowers you to cultivate fresh, delicious mushrooms right in the comfort of your own home, using readily available materials.
Why is this a must-try? Because it’s accessible, affordable, and incredibly rewarding. Imagine the satisfaction of harvesting your own gourmet mushrooms, knowing you nurtured them from start to finish. Think of the culinary possibilities – adding them to your favorite pasta dishes, omelets, stir-fries, or even grilling them for a savory side. Beyond the deliciousness, you’re also gaining a valuable skill and connecting with the natural world in a unique way.
But the journey doesn’t end here! Feel free to experiment with different mushroom varieties. Oyster mushrooms are a fantastic starting point, but once you’ve mastered the basics, consider branching out to shiitake, lion’s mane, or even more exotic species. Each variety offers a unique flavor profile and texture, adding exciting dimensions to your culinary creations.
You can also explore different substrates. While coffee grounds are a readily available and effective option, you can also experiment with straw, sawdust, or even cardboard. Just remember to properly sterilize your chosen substrate to prevent contamination.
Consider adjusting the humidity levels based on the specific mushroom variety you’re growing. Some mushrooms thrive in higher humidity environments, while others prefer slightly drier conditions. A simple humidity monitor can help you maintain optimal conditions.
Don’t be afraid to get creative with your growing environment. While a dark, humid space is ideal, you can also use a grow tent or even a modified storage container to create a controlled environment.
The key to success is observation and adaptation. Pay close attention to your mushrooms’ growth patterns and adjust your approach accordingly. If you notice any signs of contamination, such as mold or unusual odors, take immediate action to prevent it from spreading.
We are confident that with a little effort, you’ll be enjoying a bountiful harvest of homegrown mushrooms in no time. This DIY method for growing mushrooms indoors easily is a game-changer for home cooks, gardening enthusiasts, and anyone looking to add a touch of self-sufficiency to their lives.
So, what are you waiting for? Gather your supplies, follow the steps outlined, and embark on your mushroom-growing adventure today! We encourage you to share your experiences, successes, and challenges in the comments below. Let’s build a community of mushroom enthusiasts and learn from each other. Happy growing!
Frequently Asked Questions (FAQ)
What types of mushrooms are easiest to grow indoors using this method?
Oyster mushrooms are generally considered the easiest variety to grow indoors for beginners. They are relatively forgiving, fast-growing, and thrive on a variety of substrates, including coffee grounds. Other good options for beginners include shiitake and lion’s mane, although they may require slightly more attention and specific substrates. Avoid attempting to grow morels indoors, as they are notoriously difficult and require very specific conditions.
How long does it take to grow mushrooms indoors using this method?
The time it takes to grow mushrooms indoors can vary depending on the mushroom variety, the substrate used, and the environmental conditions. Generally, you can expect to see the first signs of mycelial growth (the white, thread-like network that colonizes the substrate) within a week or two. Fruiting (the development of actual mushrooms) typically occurs within a few weeks after full colonization. Oyster mushrooms, for example, can often be harvested within 3-4 weeks of inoculation.
What are the ideal environmental conditions for growing mushrooms indoors?
Mushrooms generally prefer a dark, humid environment with temperatures between 60-75°F (15-24°C). Humidity is crucial for mushroom development, so aim for a humidity level of 80-90%. You can maintain humidity by misting the growing area regularly or using a humidifier. While mushrooms don’t need direct sunlight, they do require some indirect light for proper fruiting. A north-facing window or a shaded area is usually sufficient.
How do I prevent contamination when growing mushrooms indoors?
Contamination is a common challenge in mushroom cultivation, but it can be minimized by following proper sterilization techniques. Sterilize your substrate by pasteurizing it in hot water or using a pressure cooker. Clean your work area thoroughly with disinfectant. Wear gloves and a mask when handling the substrate and spawn. Monitor your growing area regularly for signs of contamination, such as mold or unusual odors. If you detect contamination, remove the affected area immediately to prevent it from spreading.
What are some common problems I might encounter when growing mushrooms indoors, and how can I fix them?
Some common problems include slow growth, contamination, and small or deformed mushrooms. Slow growth can be caused by low temperatures, insufficient humidity, or poor substrate quality. Contamination can be prevented by following proper sterilization techniques. Small or deformed mushrooms can be caused by insufficient light, poor ventilation, or nutrient deficiencies. Adjust your environmental conditions and substrate accordingly to address these issues.
Can I use different substrates besides coffee grounds?
Yes, you can use a variety of substrates for growing mushrooms indoors, including straw, sawdust, cardboard, and wood chips. Each substrate has its own advantages and disadvantages. Straw is a good option for oyster mushrooms, while sawdust is often used for shiitake mushrooms. Cardboard is a readily available and inexpensive option, but it may require more frequent watering. Regardless of the substrate you choose, make sure to sterilize it properly before use.
How do I know when my mushrooms are ready to harvest?
Mushrooms are typically ready to harvest when the caps have fully expanded and the gills are visible. The exact timing will vary depending on the mushroom variety. Oyster mushrooms, for example, are usually harvested when the caps are still slightly curled downwards. Shiitake mushrooms are harvested when the caps have flattened out and the edges have begun to curl upwards. Harvest your mushrooms by gently twisting them off the substrate or cutting them off with a clean knife.
How do I store my harvested mushrooms?
Store your harvested mushrooms in a paper bag in the refrigerator. Avoid storing them in plastic bags, as this can cause them to become slimy. Freshly harvested mushrooms will typically last for up to a week in the refrigerator. You can also dry or freeze your mushrooms for longer-term storage.
Is it safe to eat mushrooms grown indoors?
Yes, it is generally safe to eat mushrooms grown indoors, provided that you have properly identified the mushroom variety and followed proper growing techniques. Only consume mushrooms that you are 100% certain are edible. If you are unsure about the identity of a mushroom, do not eat it. When growing mushrooms indoors easily, it’s crucial to maintain a clean environment to prevent contamination and ensure the safety of your harvest.
What should I do with the spent substrate after harvesting my mushrooms?
The spent substrate can be used as compost in your garden or added to your compost pile. It is rich in nutrients and beneficial microorganisms that can improve soil health. You can also use it as mulch around your plants.


Leave a Comment