
Grow Malabar Spinach Home and unlock a world of fresh, vibrant greens right at your fingertips! Have you ever dreamt of stepping into your backyard and harvesting delicious, nutritious spinach for your dinner, without ever having to visit the grocery store? Well, dream no more! This DIY guide is your key to cultivating this amazing leafy vegetable with ease.
Malabar Spinach, also known as Ceylon Spinach or vine spinach, isn’t actually a true spinach, but its mild flavor and impressive nutritional profile have made it a staple in Asian and African cuisines for centuries. Imagine the satisfaction of recreating authentic dishes with ingredients you’ve nurtured yourself. Beyond its culinary appeal, growing your own Malabar Spinach is a fantastic way to embrace sustainable living and reduce your carbon footprint.
In today’s world, where access to fresh, healthy produce can sometimes be a challenge, learning how to grow Malabar Spinach home offers a practical and rewarding solution. This DIY trick is essential because it empowers you to control the quality of your food, avoid harmful pesticides, and enjoy a constant supply of this versatile green. Plus, it’s a fun and engaging activity for the whole family! So, let’s dive in and discover the secrets to successfully cultivating Malabar Spinach in your own backyard or balcony garden.
Malabar Spinat zu Hause anbauen: Dein umfassender DIY-Leitfaden
Hallo Gartenfreunde! Ich freue mich riesig, euch heute zu zeigen, wie ihr Malabar Spinat (Basella alba) ganz einfach zu Hause anbauen könnt. Dieser Kletterspinat ist nicht nur super lecker und nahrhaft, sondern auch ein echter Hingucker in jedem Garten oder auf dem Balkon. Los geht’s!
Warum Malabar Spinat?
Bevor wir loslegen, kurz ein paar Gründe, warum ich Malabar Spinat so liebe:
* Hitzebeständig: Perfekt für heiße Sommer, in denen normaler Spinat schlappmacht.
* Schnellwachsend: Du kannst schon nach wenigen Wochen ernten.
* Vielseitig: Die Blätter und Stängel sind essbar und können wie Spinat verwendet werden.
* Dekorativ: Mit seinen roten oder grünen Stängeln und den fleischigen Blättern ist er eine Zierde für jeden Garten.
* Einfach anzubauen: Selbst für Anfänger geeignet!
Was du brauchst: Die Materialliste
Bevor wir mit dem Anbau beginnen, stelle sicher, dass du alles griffbereit hast. Hier ist eine Liste der Dinge, die du benötigst:
* Malabar Spinat Samen oder Stecklinge: Samen sind online oder in gut sortierten Gartencentern erhältlich. Stecklinge kannst du von einer bestehenden Pflanze nehmen.
* Anzuchttöpfe oder -schalen: Für die Voranzucht der Samen.
* Anzuchterde: Spezielle Erde für die Anzucht, die nährstoffarm und locker ist.
* Pflanztöpfe oder ein Beet: Für die ausgewachsenen Pflanzen. Die Größe hängt davon ab, wie viele Pflanzen du anbauen möchtest.
* Gartenerde: Eine gute, nährstoffreiche Erde. Du kannst auch Kompost untermischen.
* Rankhilfe: Malabar Spinat ist ein Kletterer und braucht eine Rankhilfe, z.B. ein Spalier, ein Rankgitter oder Schnüre.
* Gießkanne oder Gartenschlauch: Zum Bewässern der Pflanzen.
* Ggf. Flüssigdünger: Für die zusätzliche Nährstoffversorgung während der Wachstumsphase.
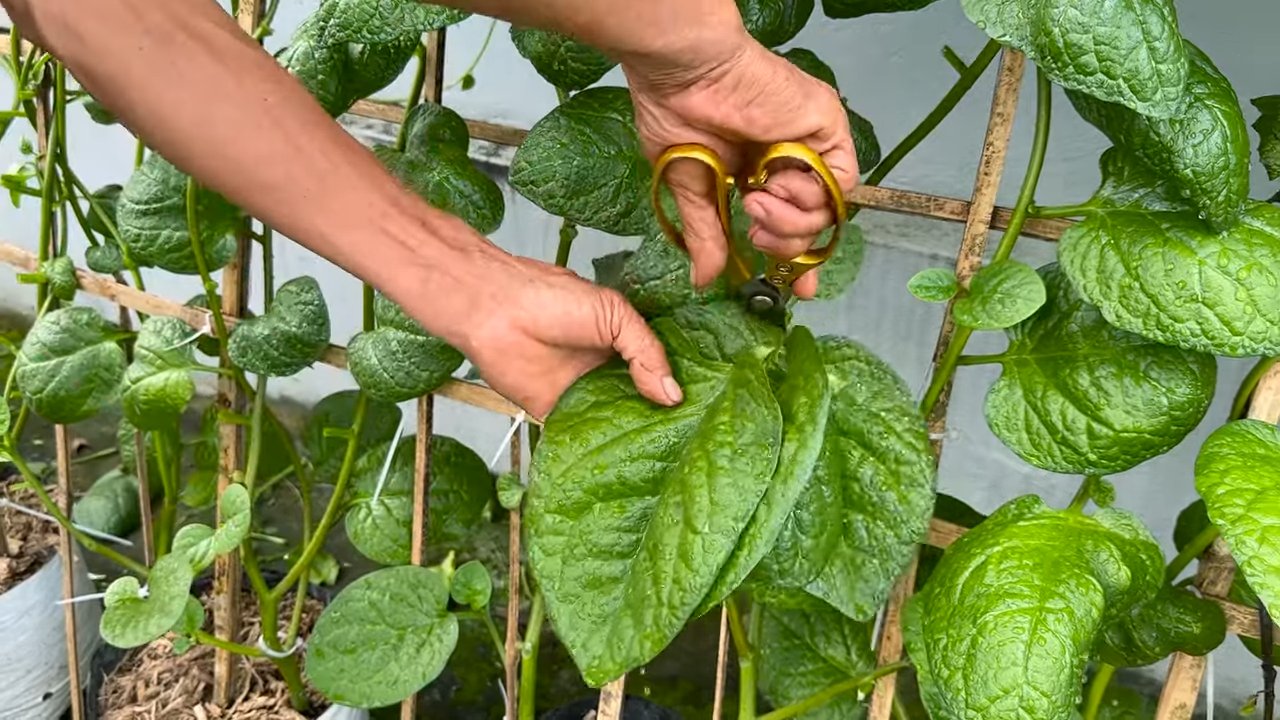
* Gartenschere: Zum Ernten und Beschneiden der Pflanzen.
Aussaat: Der Start in ein grünes Abenteuer
Die Aussaat ist der erste Schritt, um deinen eigenen Malabar Spinat anzubauen. Du kannst entweder direkt ins Freiland säen oder die Samen vorziehen. Ich empfehle die Voranzucht, da die Keimrate dadurch oft höher ist.
Schritt-für-Schritt Anleitung zur Aussaat:
1. Samen vorbereiten (optional): Um die Keimung zu beschleunigen, kannst du die Samen vor der Aussaat für 24 Stunden in lauwarmem Wasser einweichen. Das macht die Samenschale weicher.
2. Anzuchttöpfe vorbereiten: Fülle die Anzuchttöpfe oder -schalen mit Anzuchterde. Drücke die Erde leicht an.
3. Samen aussäen: Lege in jeden Topf 2-3 Samen. Bedecke die Samen mit einer dünnen Schicht Erde (ca. 0,5 cm).
4. Bewässern: Befeuchte die Erde vorsichtig mit einer Sprühflasche oder einer Gießkanne mit Brauseaufsatz. Die Erde sollte feucht, aber nicht nass sein.
5. Warm stellen: Stelle die Anzuchttöpfe an einen warmen, hellen Ort. Die ideale Keimtemperatur liegt zwischen 20 und 25 Grad Celsius. Ein Mini-Gewächshaus oder eine Fensterbank über der Heizung sind ideal.
6. Feucht halten: Halte die Erde während der Keimung feucht. Vermeide Staunässe.
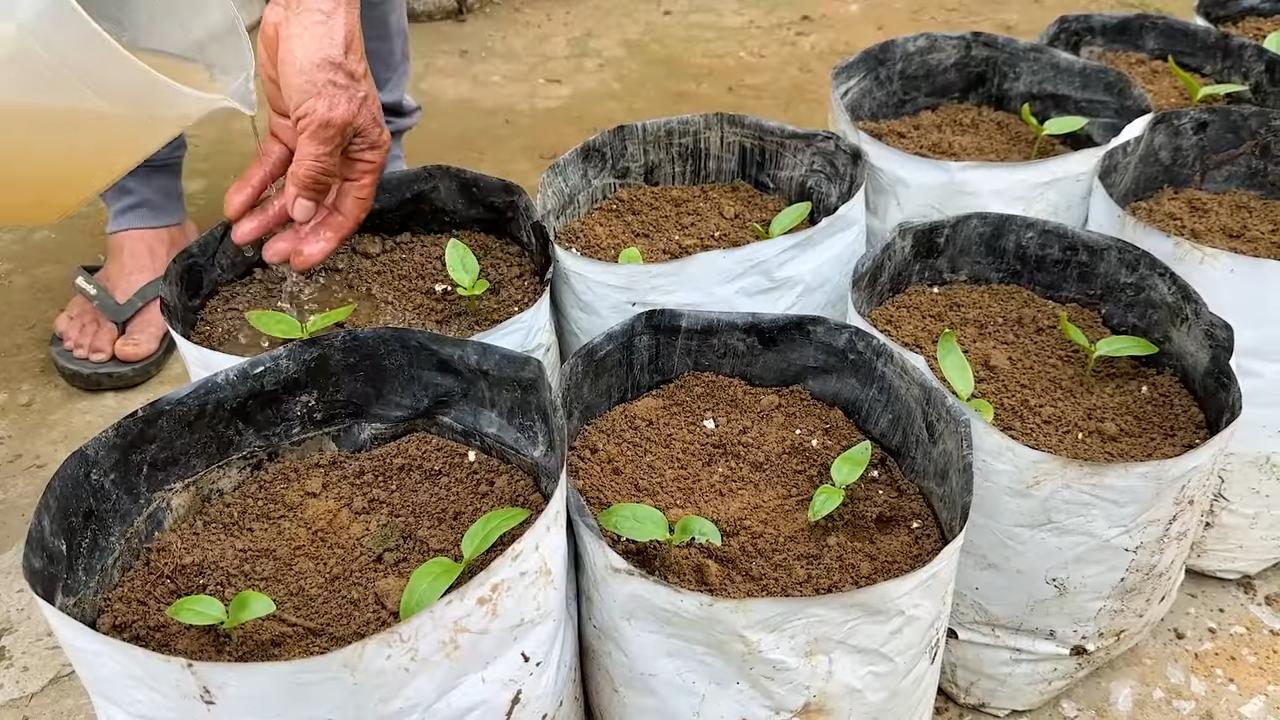
7. Pikieren: Sobald die Sämlinge 2-3 echte Blätter haben (neben den Keimblättern), kannst du sie pikieren. Das bedeutet, dass du die stärksten Sämlinge in größere Töpfe umpflanzt.
Pflanzung: Ab ins Beet oder in den Topf
Sobald die Sämlinge kräftig genug sind (ca. 10-15 cm hoch), können sie ins Freiland oder in größere Töpfe umgepflanzt werden.
Schritt-für-Schritt Anleitung zur Pflanzung:
1. Standort vorbereiten: Wähle einen sonnigen bis halbschattigen Standort für deine Malabar Spinat Pflanzen. Der Boden sollte locker, nährstoffreich und gut durchlässig sein.
2. Boden vorbereiten: Lockere den Boden im Beet oder im Topf auf und mische Kompost oder organischen Dünger unter.
3. Pflanzlöcher ausheben: Hebe Pflanzlöcher aus, die etwas größer sind als die Wurzelballen der Sämlinge.
4. Pflanzen einsetzen: Setze die Sämlinge vorsichtig in die Pflanzlöcher. Achte darauf, dass die Wurzelballen nicht beschädigt werden.
5. Mit Erde auffüllen: Fülle die Pflanzlöcher mit Erde auf und drücke sie leicht an.
6. Bewässern: Gieße die Pflanzen gründlich an.
7. Rankhilfe anbringen: Bringe eine Rankhilfe in der Nähe der Pflanzen an. Malabar Spinat ist ein Kletterer und braucht Unterstützung, um nach oben zu wachsen.
Pflege: Damit dein Malabar Spinat prächtig gedeiht
Die Pflege von Malabar Spinat ist relativ einfach. Hier sind ein paar Tipps, damit deine Pflanzen prächtig gedeihen:
* Bewässerung: Gieße die Pflanzen regelmäßig, besonders während trockener Perioden. Die Erde sollte immer leicht feucht sein. Vermeide Staunässe.
* Düngung: Dünge die Pflanzen alle 2-3 Wochen mit einem Flüssigdünger für Gemüse. Das fördert das Wachstum und die Blattbildung.
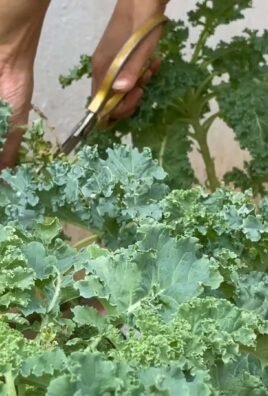
* Beschneidung: Schneide die Pflanzen regelmäßig zurück, um das Wachstum anzuregen und die Form zu erhalten. Du kannst die Triebspitzen einfach abknipsen.
* Rankhilfe: Achte darauf, dass die Pflanzen ausreichend Halt an der Rankhilfe finden. Leite die Triebe bei Bedarf an.
* Schutz vor Schädlingen: Malabar Spinat ist relativ resistent gegen Schädlinge. Gelegentlich können Blattläuse auftreten. Diese kannst du mit einem Wasserstrahl oder mit einem biologischen Insektizid bekämpfen.
Ernte: Die Früchte deiner Arbeit genießen
Du kannst mit der Ernte beginnen, sobald die Pflanzen ausreichend Blätter gebildet haben. Das ist in der Regel nach 6-8 Wochen der Fall.
Schritt-für-Schritt Anleitung zur Ernte:
1. Blätter ernten: Pflücke die Blätter und Stängel nach Bedarf ab. Du kannst die äußeren Blätter zuerst ernten.
2. Regelmäßig ernten: Durch regelmäßiges Ernten förderst du das Wachstum der Pflanze.
3. Verwendung: Malabar Spinat kann wie normaler Spinat verwendet werden. Er eignet sich für Salate, Suppen, Eintöpfe oder als Beilage. Die Blätter sind etwas dicker und fleischiger als normaler Spinat.
Überwinterung: Malabar Spinat mehrjährig anbauen?
Malabar Spinat ist in unseren Breitengraden nicht winterhart. Er kann aber als einjährige Pflanze angebaut werden. Wenn du ihn überwintern möchtest, musst du ihn frostfrei halten.
So überwinterst du Malabar Spinat:
1. Pflanze ausgraben: Grabe die Pflanze vor dem ersten Frost aus.
2. In einen Topf pflanzen: Pflanze die Pflanze in einen Topf mit frischer Erde.
3. Frostfrei stellen: Stelle den Topf an einen hellen, kühlen Ort (ca. 10-15 Grad Celsius).
4. Weniger gießen: Gieße die Pflanze während der Überwinterung nur sparsam. Die Erde sollte nicht austrocknen, aber auch nicht zu nass sein.
5. Im Frühjahr auspflanzen: Sobald keine Frostgefahr mehr besteht, kannst du die Pflanze wieder ins Freiland auspflanzen.
Häufige Probleme und Lösungen
Auch beim Anbau von Malabar Spinat können Probleme auftreten. Hier sind
Conclusion
So, there you have it! Growing Malabar Spinach at home is not just a gardening project; it’s an investment in fresh, nutritious greens right at your fingertips. We’ve walked through the simple steps, from selecting the right seeds or cuttings to providing the ideal growing conditions. The benefits extend far beyond just having a readily available supply of this unique leafy vegetable. You’re also contributing to a more sustainable lifestyle, reducing your reliance on store-bought produce, and enjoying the satisfaction of nurturing something from seed to table.
This DIY trick is a must-try for several compelling reasons. First, the taste of homegrown Malabar Spinach is simply superior. The freshness and vibrant flavor are unmatched by anything you can find in a supermarket. Second, you have complete control over the growing process, ensuring that your spinach is free from harmful pesticides and chemicals. This is especially important for those who prioritize organic and healthy eating. Third, growing Malabar Spinach is incredibly rewarding. Watching your plants thrive and then harvesting your own food is a deeply satisfying experience.
But the best part? The versatility of Malabar Spinach! Don’t limit yourself to just one way of enjoying this leafy green. Experiment with different recipes and cooking methods. Try adding it to stir-fries for a slightly tangy and mucilaginous texture. Use it in soups and stews as a thickening agent and a nutritional boost. Blend it into smoothies for a healthy and refreshing drink. You can even use the leaves as a wrap for fillings like rice, vegetables, or meat.
For a spicier kick, consider adding a pinch of red pepper flakes to your soil or even growing your Malabar Spinach alongside some chili peppers. The subtle heat will infuse into the leaves, adding a delightful complexity to your dishes. If you prefer a sweeter flavor, try fertilizing your plants with a diluted solution of molasses or compost tea. This will encourage the production of sugars in the leaves, resulting in a sweeter and more palatable taste.
Remember, gardening is all about experimentation. Don’t be afraid to try new things and see what works best for you. Observe your plants closely, pay attention to their needs, and adjust your growing methods accordingly. With a little patience and care, you’ll be rewarded with a bountiful harvest of delicious and nutritious Malabar Spinach.
We are confident that you’ll find growing Malabar Spinach at home to be a worthwhile and enjoyable experience. So, grab your seeds or cuttings, prepare your soil, and get ready to embark on this exciting gardening adventure. We encourage you to try this DIY trick and share your experiences with us! Let us know how your Malabar Spinach is growing, what recipes you’ve tried, and any tips or tricks you’ve discovered along the way. Your feedback will help us improve this guide and inspire others to grow their own food. Happy gardening!
Frequently Asked Questions (FAQ)
What exactly is Malabar Spinach and why should I grow it?
Malabar Spinach (Basella alba or Basella rubra) isn’t a true spinach, but a leafy vine that thrives in warm weather. It’s packed with vitamins A and C, iron, and calcium, making it a nutritional powerhouse. Unlike traditional spinach, it doesn’t bolt in the heat, making it an excellent choice for summer gardens. Growing it yourself ensures you have access to fresh, organic greens without relying on store-bought options. Plus, it’s a beautiful, climbing plant that can add visual interest to your garden or balcony.
How do I start growing Malabar Spinach? Seeds or cuttings?
You can start Malabar Spinach from either seeds or cuttings. Seeds require a bit more patience as they can be slow to germinate. Soak the seeds in warm water for 24 hours before planting to improve germination rates. Plant them about half an inch deep in well-draining soil. Cuttings, on the other hand, offer a quicker start. Simply take a 4-6 inch cutting from a healthy plant, remove the lower leaves, and place it in water or directly into moist soil. Roots should develop within a week or two.
What kind of soil and sunlight does Malabar Spinach need?
Malabar Spinach thrives in well-draining soil that is rich in organic matter. Amend your soil with compost or aged manure before planting. It prefers full sun (at least 6 hours of direct sunlight per day) but can tolerate partial shade, especially in hotter climates. Ensure the soil remains consistently moist, but not waterlogged.
How often should I water and fertilize my Malabar Spinach?
Water your Malabar Spinach regularly, especially during hot and dry periods. Aim to keep the soil consistently moist, but avoid overwatering, which can lead to root rot. Fertilize every 2-3 weeks with a balanced organic fertilizer or compost tea. Avoid over-fertilizing, as this can lead to excessive foliage growth at the expense of flavor.
Does Malabar Spinach need a trellis or support?
Yes, Malabar Spinach is a climbing vine and needs a trellis, fence, or other support structure to grow properly. This will not only keep the plant off the ground but also improve air circulation and make harvesting easier. You can use a simple bamboo trellis, a wire fence, or even a sturdy tomato cage.
How do I harvest Malabar Spinach?
You can start harvesting Malabar Spinach leaves as soon as the plant is established and has reached a decent size. Simply snip off the leaves as needed, leaving at least a few leaves on each stem to encourage continued growth. Regular harvesting will also help to keep the plant from becoming too leggy.
What are some common pests and diseases that affect Malabar Spinach?
Malabar Spinach is generally pest and disease-resistant, but it can occasionally be affected by aphids, spider mites, or fungal diseases. Inspect your plants regularly and take action promptly if you notice any problems. For aphids and spider mites, try spraying the plants with a strong stream of water or using insecticidal soap. For fungal diseases, ensure good air circulation and avoid overwatering.
Can I grow Malabar Spinach in containers?
Yes, Malabar Spinach can be successfully grown in containers, making it a great option for those with limited garden space. Choose a large container (at least 12 inches in diameter) with good drainage. Use a high-quality potting mix and provide a trellis or support for the vine to climb.
How do I store harvested Malabar Spinach?
Store harvested Malabar Spinach in the refrigerator in a plastic bag or container. It will keep for several days. For longer storage, you can blanch the leaves and freeze them.
Is Malabar Spinach safe to eat raw?
While Malabar Spinach is generally safe to eat raw, some people may find the texture slightly mucilaginous. Cooking the leaves will reduce this effect. If you plan to eat it raw, choose young, tender leaves.

Leave a Comment