
Grow Leeks at Home? Absolutely! Imagine stepping into your garden and harvesting fresh, flavorful leeks, ready to elevate your culinary creations. Forget those bland, store-bought options – with a few simple tricks, you can cultivate these delicious alliums right in your backyard, no matter how small your space might be.
Leeks have a rich history, dating back to ancient Egypt, where they were prized for their medicinal properties and culinary uses. The Romans, known for their sophisticated palates, spread leeks throughout Europe, and they’ve been a staple in gardens and kitchens ever since. From hearty soups to delicate tarts, leeks add a unique depth of flavor that’s hard to resist.
But why should you bother to grow leeks at home? Well, for starters, homegrown leeks taste infinitely better than anything you can buy at the supermarket. Plus, you’ll have complete control over the growing process, ensuring they’re free from harmful pesticides and chemicals. And let’s be honest, there’s something incredibly satisfying about nurturing a plant from seed to harvest. In this article, I’m going to share some easy DIY tricks and hacks that will help you grow leeks at home, even if you’re a complete beginner. Get ready to enjoy the freshest, most flavorful leeks you’ve ever tasted!
Grow Your Own Delicious Leeks: A Beginner’s Guide
Hey there, fellow gardening enthusiasts! I’m so excited to share my experience with growing leeks at home. Leeks are such a versatile and flavorful vegetable, and honestly, growing them yourself is surprisingly easy and rewarding. Forget those sad, overpriced leeks at the grocery store – let’s get you started on your own homegrown harvest!
Getting Started: What You’ll Need
Before we dive into the nitty-gritty, let’s gather our supplies. Here’s a checklist of everything you’ll need to successfully grow leeks:
* Leek Seeds: Choose a variety that suits your climate. ‘American Flag’ and ‘Giant Musselburgh’ are popular choices.
* Seed Starting Trays or Pots: These will give your leeks a head start.
* Seed Starting Mix: This is a light, well-draining soil specifically formulated for seedlings.
* Larger Pots or Garden Bed: For transplanting your leeks once they’re bigger.
* Well-Draining Soil: Leeks love rich, fertile soil. Amend your garden soil with compost or well-rotted manure.
* Watering Can or Hose: For keeping your leeks hydrated.
* Fertilizer: A balanced fertilizer will help your leeks thrive.
* Trowel or Small Shovel: For transplanting.
* Optional:
* Row Covers: To protect your leeks from pests and harsh weather.
* Blanching Collars: To create longer, whiter shanks.
Phase 1: Starting Your Leek Seeds Indoors
Starting leek seeds indoors gives them a head start, especially if you live in a region with a shorter growing season. I usually start mine about 8-10 weeks before the last expected frost.
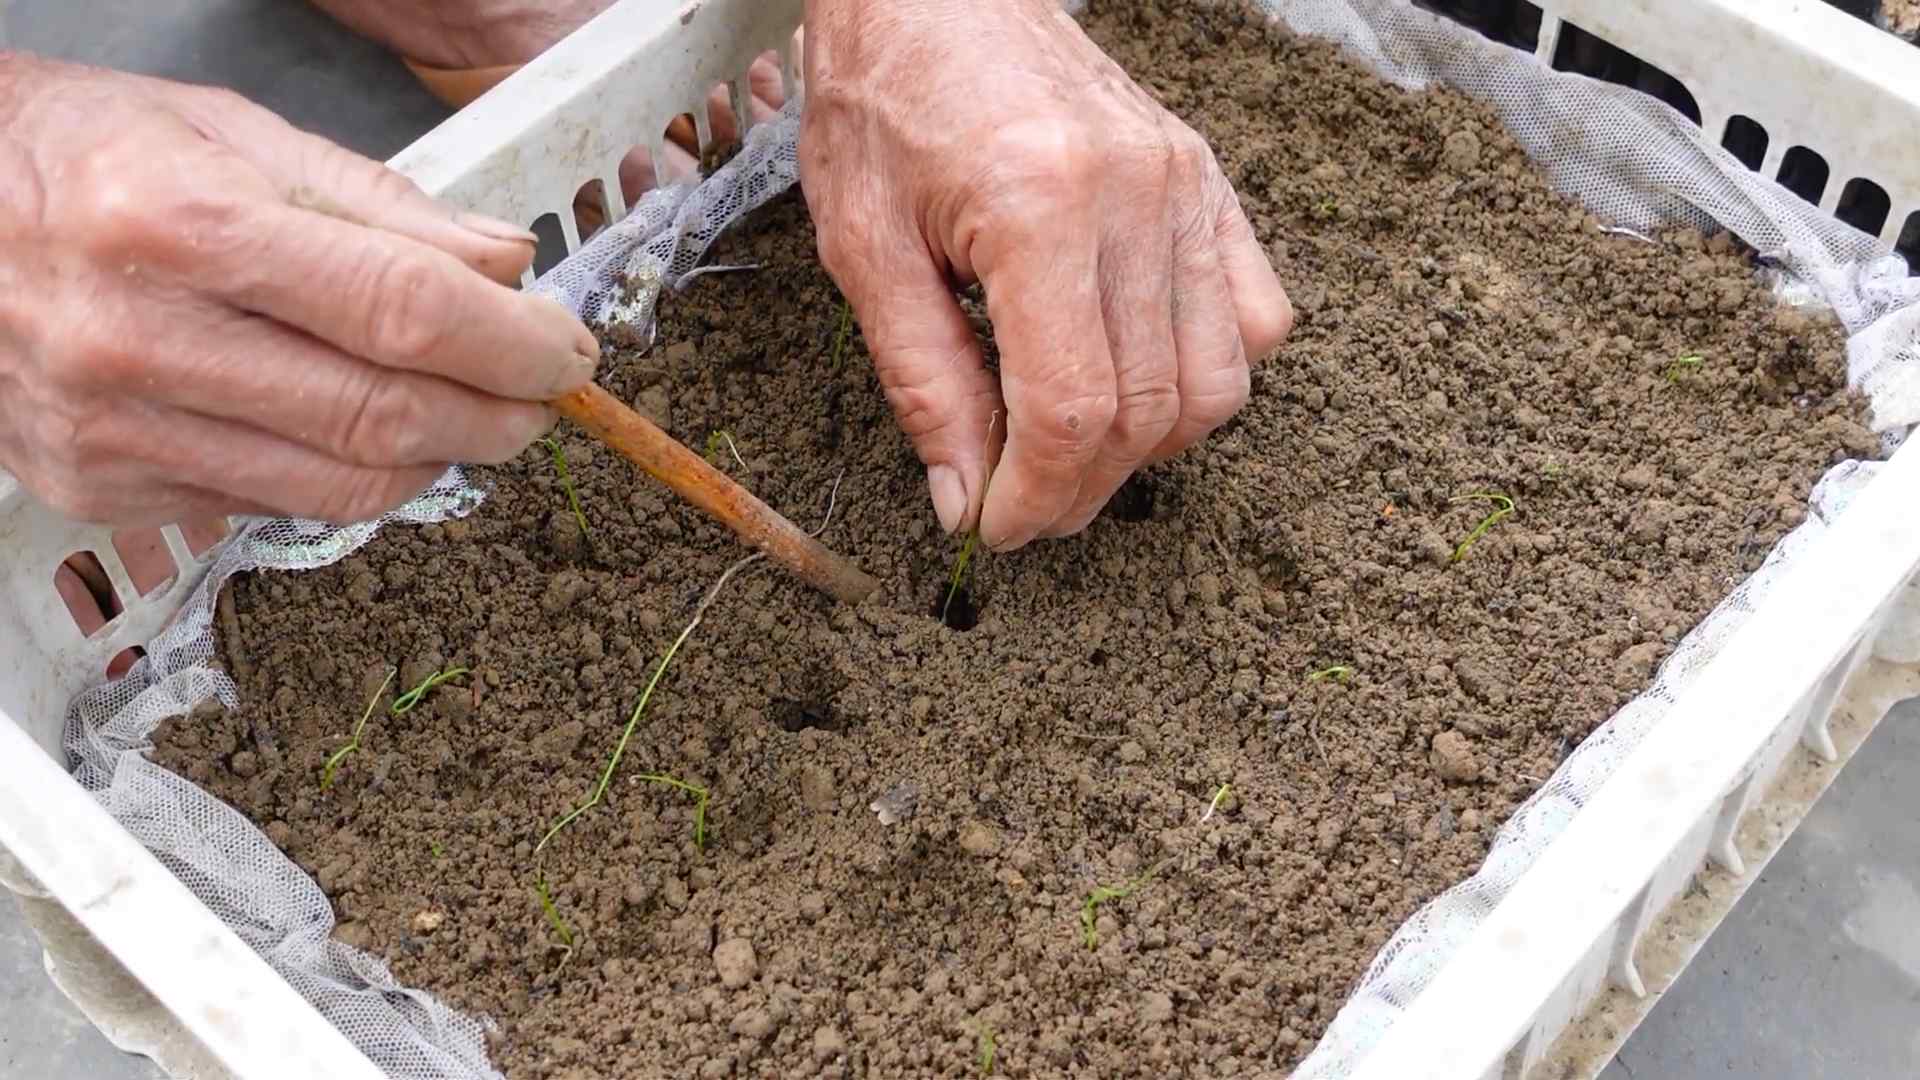
1. Prepare Your Seed Starting Trays: Fill your seed starting trays or pots with seed starting mix. Gently press the soil down to remove any air pockets.
2. Sow the Seeds: Sprinkle the leek seeds evenly over the surface of the soil. You don’t need to bury them too deep – about ¼ inch is perfect.
3. Cover the Seeds: Lightly cover the seeds with more seed starting mix.
4. Water Gently: Use a watering can with a fine rose to gently water the soil. You want to moisten the soil without disturbing the seeds.
5. Provide Warmth and Light: Place the trays in a warm location (around 65-70°F) and provide plenty of light. A sunny windowsill or a grow light works well.
6. Keep the Soil Moist: Check the soil regularly and water as needed to keep it consistently moist, but not soggy.
7. Thin the Seedlings: Once the seedlings have developed a few true leaves (the second set of leaves), thin them out so that they are about 1 inch apart. This will give them enough room to grow. I know it feels brutal to pull out the little guys, but it’s necessary for the health of the remaining plants.
Phase 2: Transplanting Your Leek Seedlings
Once the danger of frost has passed and your leek seedlings are about 6-8 inches tall, it’s time to transplant them into your garden or larger pots.
1. Harden Off the Seedlings: Before transplanting, you’ll need to harden off the seedlings. This means gradually exposing them to outdoor conditions over a period of about a week. Start by placing them outside in a sheltered location for a few hours each day, gradually increasing the amount of time they spend outdoors. This will help them adjust to the sun, wind, and temperature changes.
2. Prepare the Soil: Leeks prefer well-draining soil that is rich in organic matter. Amend your garden soil with compost or well-rotted manure before planting.
3. Dig Trenches or Holes: Dig trenches or holes that are about 6-8 inches deep and 6 inches apart. The depth is important for blanching the leeks later on.
4. Transplant the Seedlings: Carefully remove the seedlings from the trays or pots and gently separate the roots. Place each seedling in a trench or hole, spacing them about 6 inches apart.
5. Backfill with Soil: Backfill the trenches or holes with soil, leaving about 2-3 inches of the leek stem exposed.
6. Water Thoroughly: Water the newly transplanted leeks thoroughly.
Phase 3: Caring for Your Growing Leeks
Now that your leeks are in the ground, it’s time to provide them with the care they need to thrive.
1. Water Regularly: Leeks need consistent moisture, especially during dry periods. Water them deeply whenever the soil feels dry to the touch.
2. Fertilize: Feed your leeks with a balanced fertilizer every few weeks to promote healthy growth. Follow the instructions on the fertilizer package.
3. Weed Regularly: Keep the area around your leeks free of weeds. Weeds compete with leeks for nutrients and water.
4. Hill the Soil: As your leeks grow, gradually hill the soil around the stems. This will blanch the lo
Hey there, fellow gardening enthusiasts! I’m so excited to share my experience with growing leeks at home. Leeks are such a versatile and flavorful vegetable, and honestly, growing them yourself is surprisingly easy and rewarding. Forget those sad, overpriced leeks at the grocery store – let’s get you started on your own homegrown harvest!
Getting Started: What You’ll Need
Before we dive into the nitty-gritty, let’s gather our supplies. Here’s a checklist of everything you’ll need to successfully grow leeks:
* Leek Seeds: Choose a variety that suits your climate. ‘American Flag’ and ‘Giant Musselburgh’ are popular choices.
* Seed Starting Trays or Pots: These will give your leeks a head start.
* Seed Starting Mix: This is a light, well-draining soil specifically formulated for seedlings.
* Larger Pots or Garden Bed: For transplanting your leeks once they’re bigger.
* Well-Draining Soil: Leeks love rich, fertile soil. Amend your garden soil with compost or well-rotted manure.
* Watering Can or Hose: For keeping your leeks hydrated.
* Fertilizer: A balanced fertilizer will help your leeks thrive.
* Trowel or Small Shovel: For transplanting.
* Optional:
* Row Covers: To protect your leeks from pests and harsh weather.
* Blanching Collars: To create longer, whiter shanks.
Phase 1: Starting Your Leek Seeds Indoors
Starting leek seeds indoors gives them a head start, especially if you live in a region with a shorter growing season. I usually start mine about 8-10 weeks before the last expected frost.
1. Prepare Your Seed Starting Trays: Fill your seed starting trays or pots with seed starting mix. Gently press the soil down to remove any air pockets.
2. Sow the Seeds: Sprinkle the leek seeds evenly over the surface of the soil. You don’t need to bury them too deep – about ¼ inch is perfect.
3. Cover the Seeds: Lightly cover the seeds with more seed starting mix.
4. Water Gently: Use a watering can with a fine rose to gently water the soil. You want to moisten the soil without disturbing the seeds.
5. Provide Warmth and Light: Place the trays in a warm location (around 65-70°F) and provide plenty of light. A sunny windowsill or a grow light works well.
6. Keep the Soil Moist: Check the soil regularly and water as needed to keep it consistently moist, but not soggy.
7. Thin the Seedlings: Once the seedlings have developed a few true leaves (the second set of leaves), thin them out so that they are about 1 inch apart. This will give them enough room to grow. I know it feels brutal to pull out the little guys, but it’s necessary for the health of the remaining plants.
Phase 2: Transplanting Your Leek Seedlings
Once the danger of frost has passed and your leek seedlings are about 6-8 inches tall, it’s time to transplant them into your garden or larger pots.
1. Harden Off the Seedlings: Before transplanting, you’ll need to harden off the seedlings. This means gradually exposing them to outdoor conditions over a period of about a week. Start by placing them outside in a sheltered location for a few hours each day, gradually increasing the amount of time they spend outdoors. This will help them adjust to the sun, wind, and temperature changes.
2. Prepare the Soil: Leeks prefer well-draining soil that is rich in organic matter. Amend your garden soil with compost or well-rotted manure before planting.
3. Dig Trenches or Holes: Dig trenches or holes that are about 6-8 inches deep and 6 inches apart. The depth is important for blanching the leeks later on.
4. Transplant the Seedlings: Carefully remove the seedlings from the trays or pots and gently separate the roots. Place each seedling in a trench or hole, spacing them about 6 inches apart.
5. Backfill with Soil: Backfill the trenches or holes with soil, leaving about 2-3 inches of the leek stem exposed.
6. Water Thoroughly: Water the newly transplanted leeks thoroughly.
Phase 3: Caring for Your Growing Leeks
Now that your leeks are in the ground, it’s time to provide them with the care they need to thrive.
1. Water Regularly: Leeks need consistent moisture, especially during dry periods. Water them deeply whenever the soil feels dry to the touch.
2. Fertilize: Feed your leeks with a balanced fertilizer every few weeks to promote healthy growth. Follow the instructions on the fertilizer package.
3. Weed Regularly: Keep the area around your leeks free of weeds. Weeds compete with leeks for nutrients and water.
4. Hill the Soil: As your leeks grow, gradually hill the soil around the stems. This will blanch the lower part of the leek, making it white and tender. You can also use blanching collars for this purpose. I usually do this every couple of weeks.
5. Pest and Disease Control: Keep an eye out for pests and diseases. Leek moth and onion thrips can be problematic. Use organic pest control methods if necessary. Good air circulation can help prevent fungal diseases.
Phase 4: Harvesting Your Leeks
The best part! You can harvest your leeks whenever they reach the desired size. They are usually ready to harvest about 100-120 days after planting.
1. Loosen the Soil: Use a garden fork to loosen the soil around the leeks.
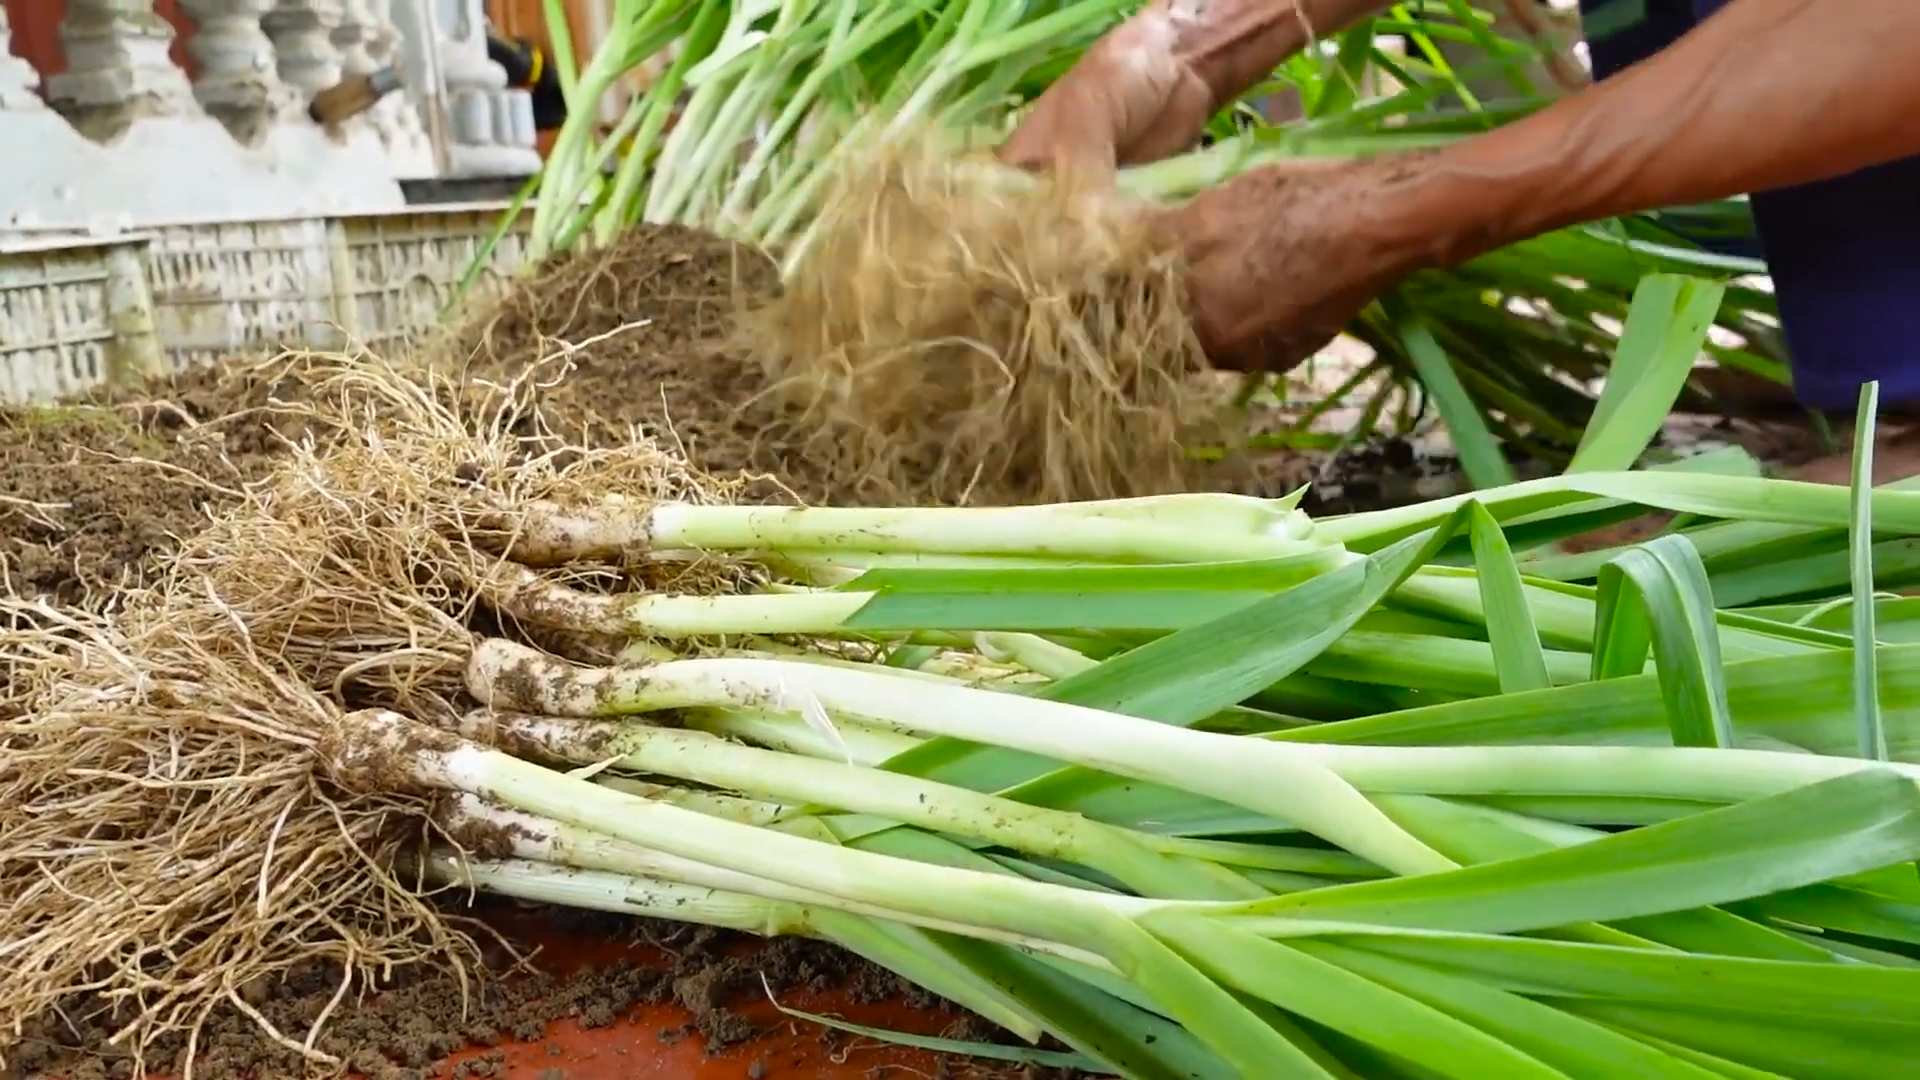
2. Pull the Leeks: Gently pull the leeks from the ground.
3. Clean the Leeks: Remove any excess soil from the leeks.
4. Store the Leeks: Store the leeks in the refrigerator for up to a week. You can also freeze them for longer storage. To freeze, wash and chop the leeks, then blanch them in boiling water for a few minutes. Drain and cool them, then pack them into freezer bags or containers.
Tips for Success
* Choose the Right Variety: Select a leek variety that is well-suited to your climate and growing conditions.
* Start Seeds Early: Starting seeds indoors gives your leeks a head start and allows you to harvest them earlier.
* Provide Consistent Moisture: Leeks need consistent moisture to thrive.
* Fertilize Regularly: Feeding your leeks with a balanced fertilizer will promote healthy growth.
* Blanch the Stems: Blanching the stems will make them white and tender.
* Protect from Pests and Diseases: Keep an eye out for pests and diseases and take action if necessary.
Troubleshooting Common Leek Problems
* Yellowing Leaves: This can be caused by a variety of factors, including nutrient deficiencies, overwatering, or pests. Check the soil pH and nutrient levels, and make sure the soil is well-draining.
* Stunted Growth: This can be caused by poor soil, lack of water, or pests. Amend the soil with compost or well-rotted manure, water regularly, and control pests.
* Leek Moth: Leek moths can damage leek leaves and stems. Use row covers to prevent leek moths from laying eggs on your plants. You can also use organic insecticides to control leek moth larvae.
* Onion Thrips: Onion thrips are tiny insects that can suck the sap from leek leaves. Use insecticidal soap or neem oil to control onion thrips.
Enjoy Your Homegrown Leeks!
Growing your own leeks is a rewarding experience that will provide you with fresh, flavorful vegetables for your meals. With a little bit of care and attention, you can enjoy a bountiful harvest of homegrown leeks. I hope this guide has been helpful. Happy gardening!
Conclusion
So, there you have it! Growing leeks at home is not only achievable but also incredibly rewarding. Forget those expensive, often lackluster leeks from the grocery store. With a little patience and these simple steps, you can cultivate your own supply of fresh, flavorful leeks right in your backyard or even on your balcony.
Why is this DIY trick a must-try? Because it puts you in control. You control the quality of the soil, the amount of sunlight, and the absence of harmful pesticides. You get to harvest leeks at their peak freshness, bursting with flavor that store-bought varieties simply can’t match. Plus, there’s an undeniable satisfaction in nurturing something from seed to table. It’s a connection to nature and a step towards a more sustainable lifestyle.
But the benefits don’t stop there. Growing your own leeks allows for exciting variations. Experiment with different varieties! From the mild ‘American Flag’ to the robust ‘Giant Musselburgh,’ each leek offers a unique flavor profile. Try blanching your leeks for a milder taste and whiter stalks by mounding soil around them as they grow. Or, if you’re short on space, consider growing leeks in containers. Just ensure they have adequate drainage and plenty of sunlight. You can even succession plant, sowing seeds every few weeks, to ensure a continuous harvest throughout the growing season.
Don’t be intimidated if you’re a beginner gardener. Growing leeks at home is surprisingly forgiving. The key is to provide them with well-drained soil, plenty of sunlight, and consistent watering. And remember, even if your first attempt isn’t perfect, you’ll learn valuable lessons that will make your next crop even better.
We wholeheartedly encourage you to give this DIY trick a try. Imagine the delicious soups, stews, and gratins you can create with your homegrown leeks. Think of the pride you’ll feel when you serve a meal featuring ingredients you nurtured yourself.
So, grab your seeds, prepare your soil, and embark on this exciting gardening adventure. And most importantly, share your experience with us! We’d love to hear about your successes, your challenges, and any tips or tricks you discover along the way. Post photos of your leeks, share your favorite recipes, and let’s create a community of home gardeners passionate about growing their own food. Happy growing!
Frequently Asked Questions (FAQ)
Q: What is the best time of year to start growing leeks?
A: Leeks are a cool-season crop, so the best time to start them depends on your climate. In colder regions with long winters, start seeds indoors 8-10 weeks before the last expected frost. In milder climates, you can sow seeds directly into the ground in late summer or early fall for a winter or spring harvest. The key is to give them enough time to mature before the hottest part of summer or the coldest part of winter.
Q: What kind of soil do leeks need?
A: Leeks thrive in well-drained, fertile soil that is rich in organic matter. Amend your soil with compost or well-rotted manure before planting to improve drainage and fertility. A slightly acidic to neutral pH (around 6.0 to 7.0) is ideal. If your soil is heavy clay, consider adding sand or perlite to improve drainage.
Q: How much sunlight do leeks need?
A: Leeks need at least 6 hours of sunlight per day to grow properly. Choose a location in your garden that receives full sun for most of the day. If you are growing leeks in containers, make sure to place them in a sunny spot.
Q: How often should I water leeks?
A: Leeks need consistent moisture, especially during hot, dry weather. Water them deeply whenever the top inch of soil feels dry to the touch. Avoid overwatering, as this can lead to root rot. Mulching around the plants can help retain moisture and suppress weeds.
Q: How do I blanch leeks?
A: Blanching leeks produces a milder flavor and whiter stalks. To blanch leeks, gradually mound soil around the stems as they grow. Start when the leeks are about 6 inches tall and continue to add soil every few weeks until the white portion of the stem is the desired length. You can also use cardboard tubes or other materials to block sunlight from the stems.
Q: What are some common pests and diseases that affect leeks?
A: Common pests that can affect leeks include onion flies, thrips, and leek moths. Diseases include white rot, rust, and downy mildew. To prevent pest and disease problems, practice crop rotation, keep your garden clean, and avoid overwatering. You can also use organic pest control methods, such as insecticidal soap or neem oil.
Q: How do I harvest leeks?
A: Leeks can be harvested at any size, but they are typically ready to harvest when they are about 1 inch in diameter. To harvest, loosen the soil around the base of the plant with a garden fork and gently pull the leek out of the ground. Trim off the roots and the top of the green leaves.
Q: Can I grow leeks in containers?
A: Yes, leeks can be grown in containers. Choose a container that is at least 12 inches deep and wide to allow the roots to develop properly. Use a well-draining potting mix and make sure the container has drainage holes. Water regularly and fertilize every few weeks with a balanced fertilizer.
Q: How do I store leeks?
A: Leeks can be stored in the refrigerator for up to two weeks. Wrap them loosely in plastic wrap or store them in a plastic bag. You can also freeze leeks for longer storage. Blanch them for a few minutes, then chop them and freeze them in freezer bags.
Q: What are some ways to use homegrown leeks?
A: Homegrown leeks are incredibly versatile and can be used in a variety of dishes. They are delicious in soups, stews, gratins, and quiches. You can also sauté them with butter or olive oil and serve them as a side dish. Leeks can also be grilled or roasted. The possibilities are endless!
Leave a Comment