
Grow Green Beans Easily? Absolutely! Imagine stepping outside your back door and harvesting a basketful of crisp, delicious green beans, all grown with your own two hands. Sounds dreamy, right? Well, it doesn’t have to be just a dream! For generations, home gardeners have cultivated these versatile legumes, and I’m here to share some simple, yet effective, DIY tricks to make your green bean growing experience a resounding success.
From ancient civilizations to modern-day kitchen gardens, green beans have held a special place in our diets and cultures. Their ease of cultivation and nutritional value have made them a staple crop worldwide. But let’s face it, sometimes even the easiest plants can throw us a curveball. That’s where these DIY hacks come in!
Are you tired of battling pests, struggling with poor germination, or just not getting the yields you hoped for? I understand! That’s why I’ve compiled these tried-and-true methods to help you grow green beans easily and abundantly. Whether you’re a seasoned gardener or just starting out, these tips will empower you to create a thriving green bean patch that will have you enjoying fresh, homegrown goodness all season long. So, grab your gardening gloves, and let’s get started!
Growing Green Beans: A Beginner-Friendly DIY Guide
Hey there, fellow gardening enthusiasts! I’m so excited to share my tried-and-true method for growing green beans. It’s surprisingly easy, even if you’re a complete newbie. Trust me, there’s nothing quite like the taste of fresh, homegrown green beans. This guide will walk you through every step, from choosing the right variety to harvesting your delicious bounty. Let’s get started!
Choosing Your Green Bean Variety
Before we get our hands dirty, let’s talk about the different types of green beans. This is important because it will influence how you plant and care for them.
* **Bush Beans:** These are compact and don’t require staking. They’re perfect for smaller gardens or containers. They produce most of their beans at once, making them ideal for canning or freezing.
* **Pole Beans:** These beans are climbers and need a trellis or other support to grow. They produce beans over a longer period, giving you a continuous harvest.
* **Snap Beans:** This is the most common type, known for their crisp pods. Both bush and pole varieties can be snap beans.
* **String Beans:** Older varieties used to have tough strings along the seams, but most modern varieties are stringless.
* **Dry Beans:** These are grown for their dried seeds, which are used in soups and stews. While technically green beans at one stage, we won’t be focusing on these in this guide.
I personally love growing both bush and pole beans. Bush beans are great for a quick harvest, while pole beans keep me supplied for weeks! For this guide, I’ll focus on growing snap beans, as they are the most popular and versatile.
Preparing Your Garden Bed
Green beans need a sunny spot with well-drained soil. Here’s how to get your garden bed ready:
* **Sunlight:** Choose a location that gets at least 6-8 hours of direct sunlight per day.
* **Soil:** Green beans prefer slightly acidic to neutral soil (pH 6.0-7.0).
* **Drainage:** Make sure the soil drains well. Green beans don’t like soggy roots.
* **Soil Amendment:** Amend the soil with compost or other organic matter to improve drainage and fertility.
Step-by-Step Planting Guide
Now for the fun part – planting!
1. **Check the Last Frost Date:** Green beans are sensitive to frost, so wait until after the last expected frost in your area to plant. You can find this information online by searching for your local weather station’s frost dates.
2. **Prepare the Soil:** Loosen the soil to a depth of about 12 inches. Remove any rocks, weeds, or debris. Mix in compost or other organic matter.
3. **Planting Bush Beans:**
* Sow seeds directly into the ground, 1 inch deep and 2-3 inches apart.
* Space rows 18-24 inches apart.
* Gently cover the seeds with soil and water thoroughly.
4. **Planting Pole Beans:**
* Install a trellis or other support system before planting. This could be a teepee, a fence, or a simple trellis made from bamboo stakes and twine.
* Sow seeds 1 inch deep and 4-6 inches apart at the base of the trellis.
* Gently cover the seeds with soil and water thoroughly.
5. **Watering:** Keep the soil consistently moist, but not waterlogged, until the seeds germinate. This usually takes 5-10 days.
6. **Thinning (If Necessary):** Once the seedlings emerge, thin them to the strongest plants, spacing bush beans 4-6 inches apart and pole beans 6-8 inches apart.
Caring for Your Green Bean Plants
Once your green bean plants are established, here’s how to keep them healthy and productive:
* **Watering:** Water regularly, especially during dry spells. Aim for about 1 inch of water per week. Water at the base of the plants to avoid wetting the foliage, which can lead to fungal diseases.
* **Weeding:** Keep the garden bed free of weeds, which can compete with the green beans for nutrients and water. Hand-pull weeds carefully to avoid disturbing the roots of the bean plants.
* **Fertilizing:** Green beans don’t need a lot of fertilizer, but a side dressing of compost or a balanced organic fertilizer can help boost growth. Apply fertilizer according to the package directions. I usually fertilize about 3-4 weeks after the seedlings emerge.
* **Pest Control:** Keep an eye out for common green bean pests, such as aphids, bean beetles, and slugs.
* **Aphids:** These tiny insects suck sap from the plants. You can control them with a strong spray of water or by introducing beneficial insects like ladybugs.
* **Bean Beetles:** These beetles chew holes in the leaves and pods. Handpick them off the plants or use an insecticidal soap.
* **Slugs:** These slimy creatures can damage young seedlings. Use slug bait or traps to control them. I like to use beer traps – bury a shallow dish filled with beer in the garden, and the slugs will be attracted to it and drown.
* **Disease Prevention:** Prevent fungal diseases by watering at the base of the plants and providing good air circulation. If you notice any signs of disease, such as yellowing leaves or spots, remove the affected plants immediately.
Supporting Pole Beans
Pole beans need support to climb. Here are a few options:
* **Trellis:** A trellis is a sturdy structure that provides a vertical surface for the beans to climb. You can buy a pre-made trellis or build your own from wood or metal.
* **Teepee:** A teepee is a simple and attractive support system made from bamboo stakes or branches. Tie the stakes together at the top to form a cone shape.
* **Fence:** If you have a fence, you can train the pole beans to climb along it.
* **String or Twine:** You can also use string or twine to create a simple support system. Tie the string to stakes or a fence and train the beans to climb up the string.
I find that a teepee is both functional and adds a nice visual element to the garden.
Harvesting Your Green Beans
The moment we’ve all been waiting for – harvesting!
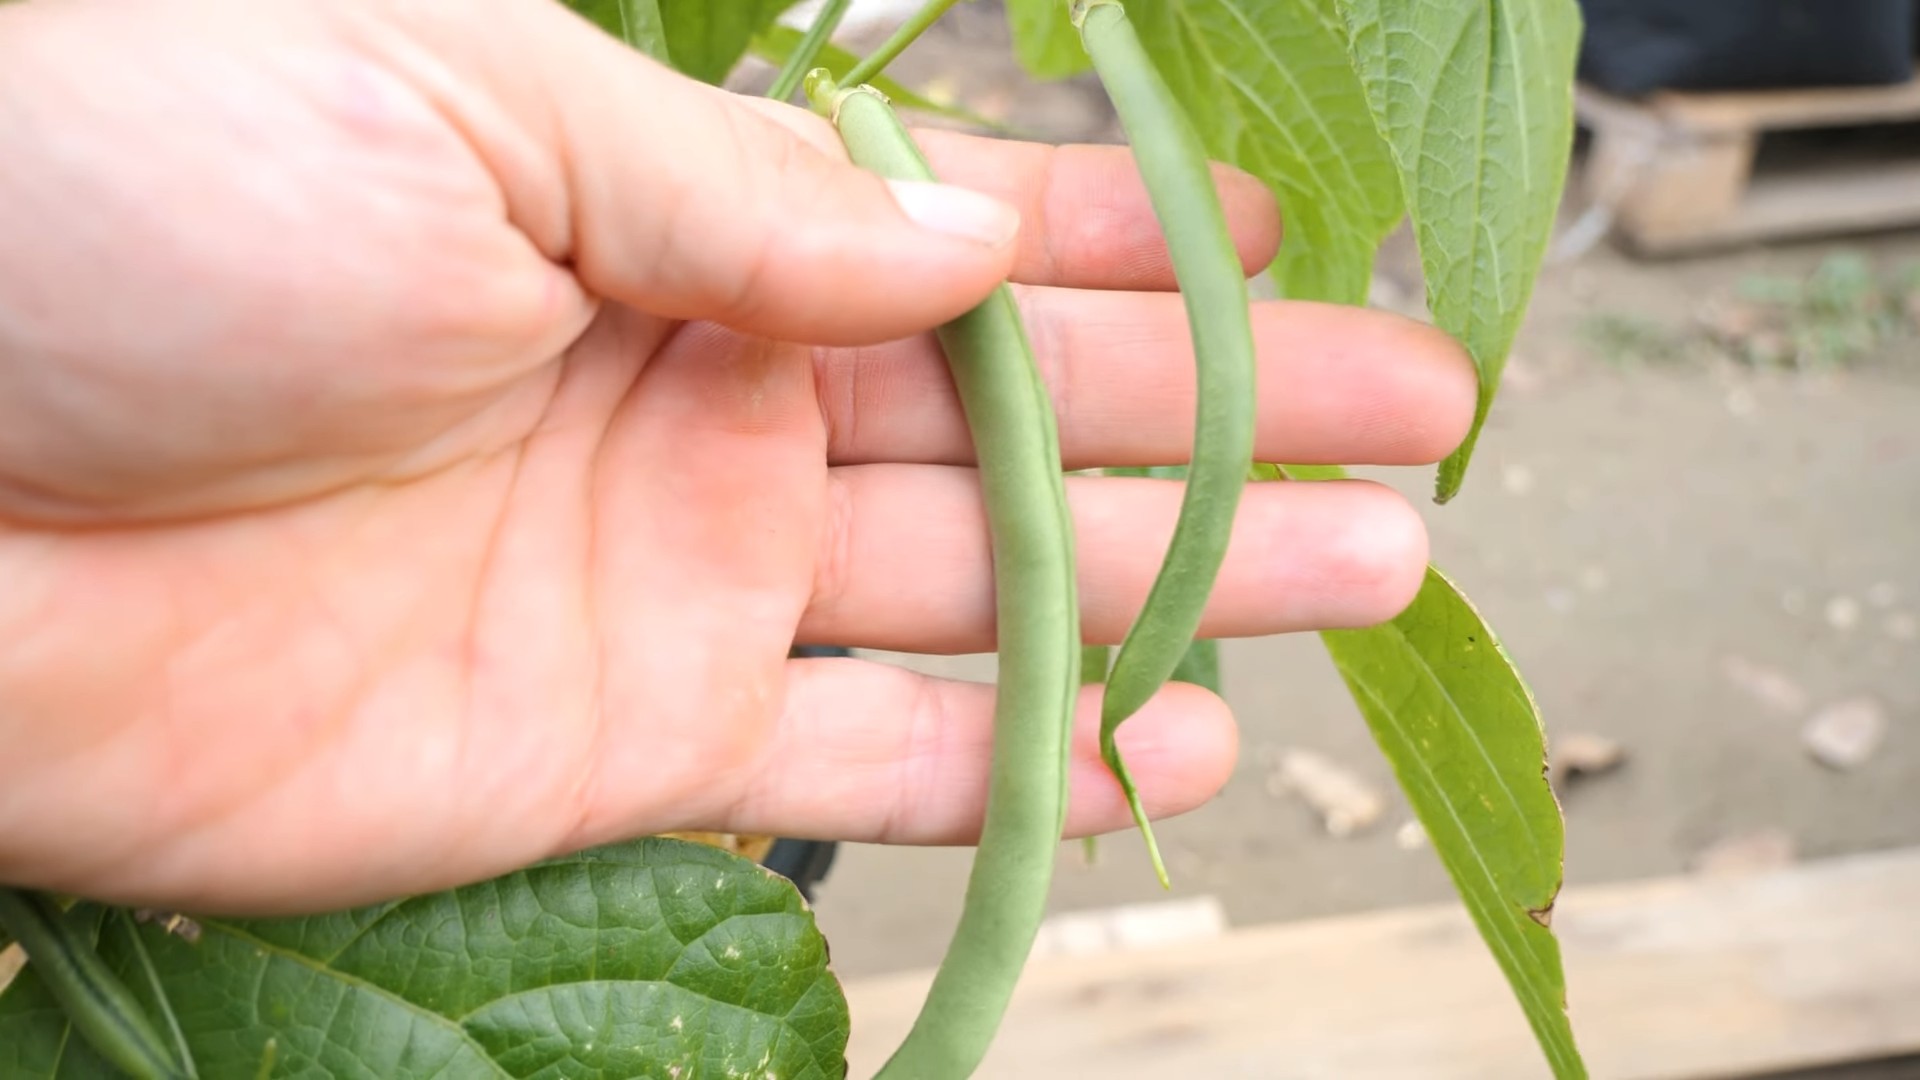
* **Timing:** Green beans are usually ready to harvest about 50-60 days after planting. The pods should be firm, crisp, and snap easily when bent.
* **Technique:** Harvest the beans by gently snapping them off the plant. Be careful not to damage the plant.
* **Frequency:** Harvest green beans regularly, about every 2-3 days, to encourage continued production.
* **Storage:** Freshly harvested green beans can be stored in the refrigerator for up to a week.
Tip: The more you harvest, the more beans the plant will produce!
Troubleshooting Common Problems
Even with the best care, you might encounter some problems while growing green beans. Here are a few common issues and how to address them:
* **Poor Germination:** If your seeds don’t germinate, it could be due to several factors:
* **Cold Soil:** Green beans need warm soil to germinate. Wait until the soil temperature is at least 60°F (15°C) before planting.
* **Poor Quality Seeds:** Use fresh, high-quality seeds.
* **Overwatering:** Overwatering can cause the seeds to rot.
* **Pests:** Pests like slugs can eat the seeds before they germinate.
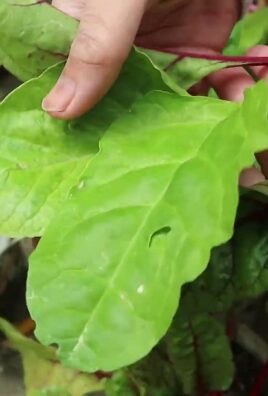
* **Yellowing Leaves:** Yellowing leaves can be a sign of nutrient deficiency, disease, or pest infestation.
* **Nutrient Deficiency:** Amend the soil with compost or fertilizer.
* **Disease:** Remove affected plants and improve air circulation.
* **Pests:** Control pests with appropriate methods.
* **Lack of Flowers or Beans:** If your plants are growing well but not producing flowers or beans, it could be due to:
* **Insufficient Sunlight:** Make sure the plants are getting enough sunlight.
* **Over-Fertilizing:** Too much nitrogen can promote leafy growth at the expense of flowers and beans.
* **High Temperatures:** High temperatures can inhibit flowering.
* **Bean Pods are Tough:** Overripe beans can become tough and stringy. Harvest the beans when they are young and tender.
Saving Seeds for Next Year
If you want to save seeds from your green beans for next year, here’s how:
1. **Choose Healthy Plants:** Select healthy plants that produce high-quality beans.
2. **Allow Pods to Mature:** Let some of the pods mature on the plant until they are dry and brown.
3. **Harvest the Pods:** Harvest the dry pods and shell the beans.
4. **Dry the Seeds:** Spread the seeds out on a tray and let them dry completely for several weeks.
5.
Conclusion
So, there you have it! Growing green beans doesn’t have to be a daunting task. With this simple DIY trick, you can transform your gardening experience and enjoy a bountiful harvest of fresh, crisp green beans right from your own backyard. This method is a game-changer because it addresses some of the most common challenges faced by gardeners, such as poor germination rates, weed control, and efficient use of space. By pre-sprouting your seeds and providing a supportive structure, you’re giving your green beans the best possible start, setting them up for success from day one.
Why is this a must-try? Because it’s efficient, cost-effective, and significantly increases your chances of a successful harvest. Imagine the satisfaction of picking your own organic green beans, knowing you nurtured them from seed to table with your own hands. Plus, this method is adaptable to various garden sizes and skill levels. Whether you’re a seasoned gardener or just starting out, you can easily incorporate this DIY trick into your routine.
But don’t stop there! Feel free to experiment with different varieties of green beans. Bush beans are perfect for smaller spaces, while pole beans will climb and provide a beautiful vertical element to your garden. You can also try companion planting. Marigolds, for example, are known to deter pests, while basil can improve the flavor of your green beans. Consider adding a layer of mulch around your plants to help retain moisture and suppress weeds.
And remember, the key to successful gardening is observation and adaptation. Pay attention to your plants, adjust your watering schedule as needed, and don’t be afraid to experiment. The more you learn, the better your green bean harvest will be.
We are confident that this DIY trick will revolutionize the way you grow green beans easily. It’s a simple yet effective method that will save you time, effort, and frustration. So, what are you waiting for? Give it a try and see for yourself!
We’d love to hear about your experience! Share your photos, tips, and stories in the comments below. Let’s create a community of green bean enthusiasts and learn from each other. Happy gardening!
Frequently Asked Questions (FAQ)
What type of green beans are best suited for this DIY trick?
This method works well for both bush beans and pole beans. Bush beans are more compact and don’t require a trellis, making them ideal for smaller gardens or containers. Pole beans, on the other hand, need a trellis or other support structure to climb on. They tend to produce a larger yield over a longer period. Consider your garden space and personal preferences when choosing which type to grow. Popular varieties include Blue Lake Bush Bean, Kentucky Wonder Pole Bean, and Contender Bush Bean.
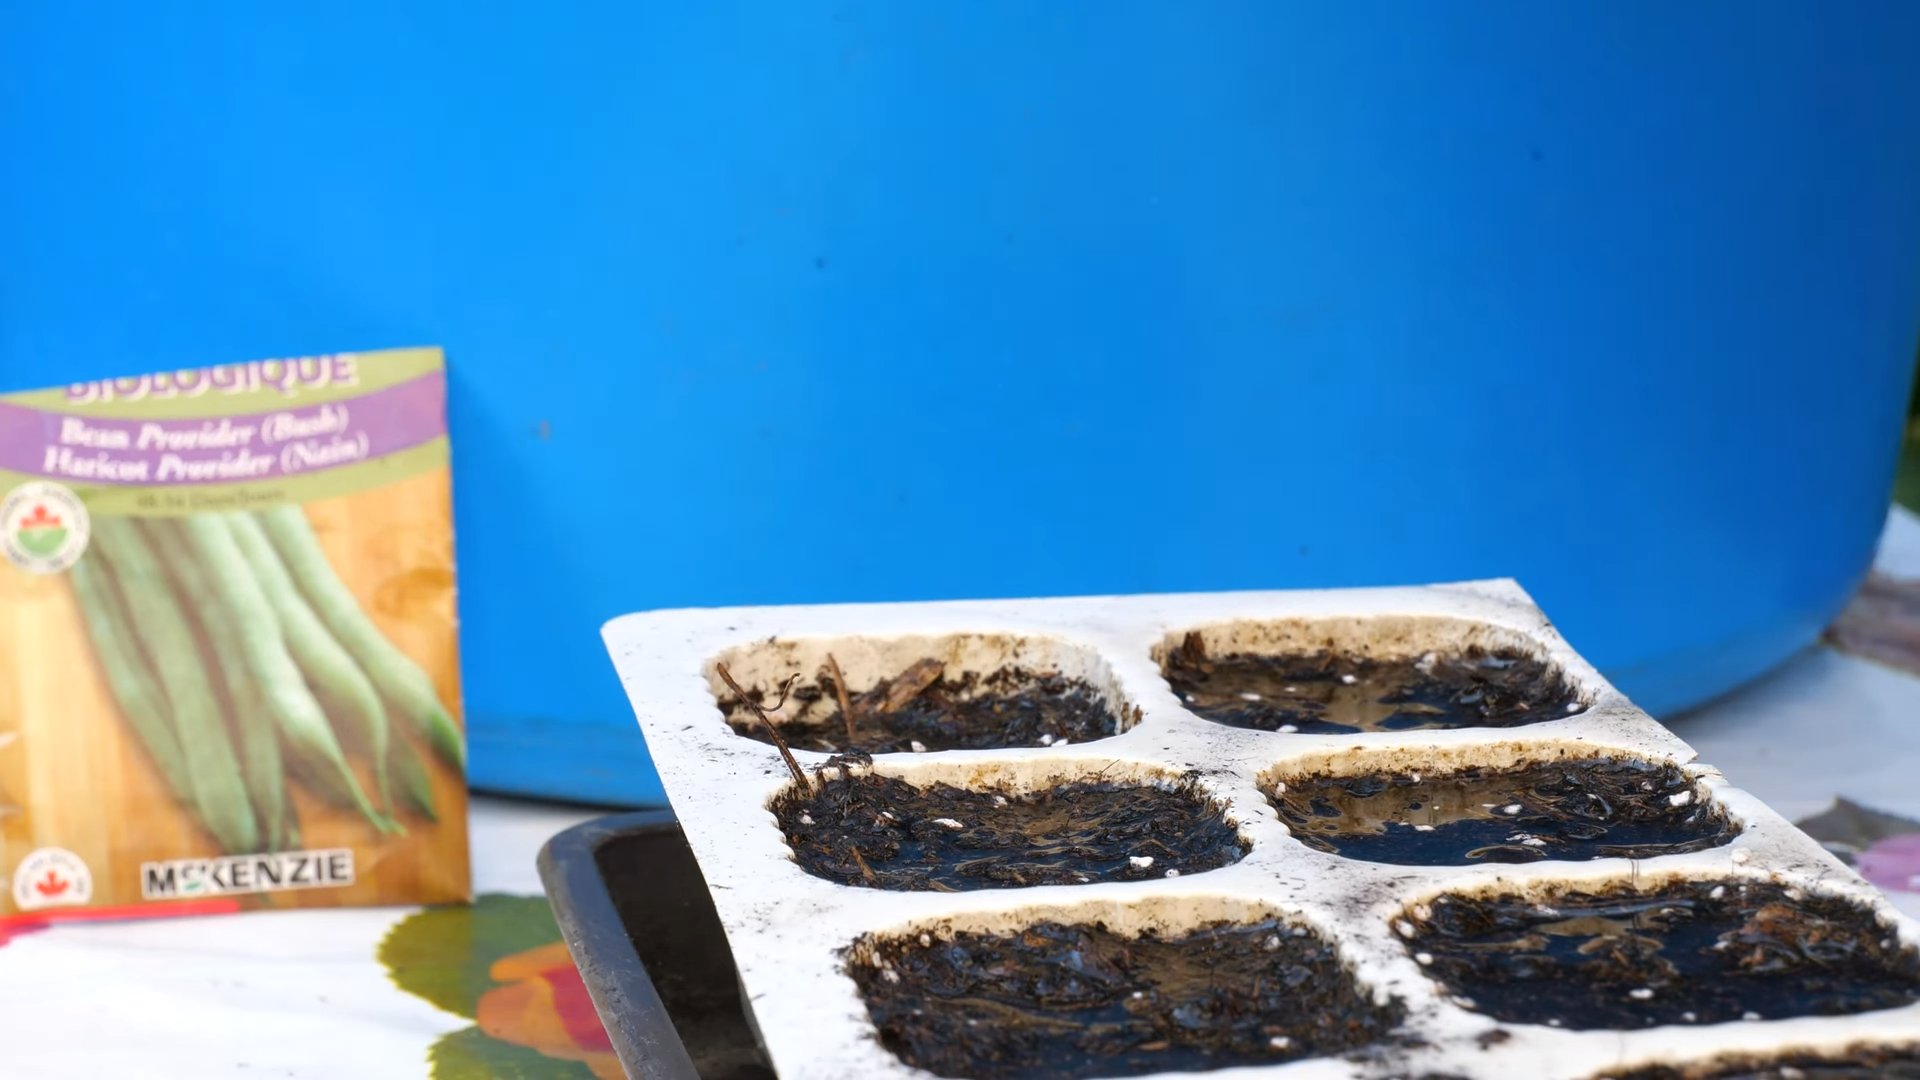
How long does it take for green bean seeds to germinate using this method?
Pre-sprouting green bean seeds typically takes 2-5 days. You’ll know they’re ready to plant when you see a small root emerging from the seed. This significantly speeds up the germination process compared to directly sowing seeds in the ground, which can take 7-14 days depending on soil temperature and moisture levels.
What kind of soil is best for growing green beans?
Green beans thrive in well-drained soil that is rich in organic matter. The ideal soil pH is between 6.0 and 7.0. Before planting, amend your soil with compost or well-rotted manure to improve its fertility and drainage. Avoid heavy clay soils, as they can become waterlogged and hinder root growth. If you have clay soil, consider adding sand and organic matter to improve its texture.
How often should I water my green bean plants?
Green beans need consistent moisture, especially during flowering and pod development. Water deeply and regularly, aiming for about 1 inch of water per week. Avoid overhead watering, as this can promote fungal diseases. Instead, water at the base of the plants. Check the soil moisture regularly and adjust your watering schedule as needed, depending on the weather conditions.
What are some common pests and diseases that affect green beans, and how can I prevent them?
Common pests that affect green beans include aphids, bean beetles, and spider mites. To prevent infestations, inspect your plants regularly and remove any pests you find. You can also use insecticidal soap or neem oil to control pests. Common diseases include powdery mildew and bean rust. To prevent these diseases, ensure good air circulation around your plants, avoid overhead watering, and use disease-resistant varieties. Crop rotation can also help prevent soilborne diseases.
Can I grow green beans in containers?
Yes, you can successfully grow green beans in containers. Choose a container that is at least 12 inches deep and wide. Use a well-draining potting mix and provide adequate support for pole beans. Container-grown green beans may require more frequent watering and fertilization than those grown in the ground.
How do I know when my green beans are ready to harvest?
Green beans are typically ready to harvest about 50-60 days after planting. Pick them when the pods are firm, crisp, and fully developed, but before the beans inside become too large and tough. Regular harvesting encourages continued production. Snap the beans off the plant carefully to avoid damaging the vines.
What are some good companion plants for green beans?
Good companion plants for green beans include marigolds, basil, carrots, cucumbers, and rosemary. Marigolds deter pests, basil improves flavor, carrots repel bean flies, cucumbers provide shade, and rosemary deters bean beetles. Avoid planting green beans near onions or garlic, as they can inhibit growth.
How can I save seeds from my green bean plants for next year?
To save seeds from your green bean plants, allow some of the pods to mature fully on the vine. Let them dry completely until the pods are brittle and the beans inside are hard and dry. Shell the beans and store them in an airtight container in a cool, dry place. Be sure to label the container with the variety and date.
What if my green bean plants are not producing any beans?
There are several reasons why your green bean plants might not be producing beans. Common causes include insufficient sunlight, poor soil fertility, lack of pollination, and extreme temperatures. Ensure your plants are getting at least 6 hours of sunlight per day, fertilize them regularly with a balanced fertilizer, and provide adequate water. If temperatures are too hot or too cold, consider providing shade or protection.

Leave a Comment