
Grow Collard Greens Like a Pro, and unlock a world of delicious, nutritious, and incredibly rewarding home gardening! Have you ever dreamed of stepping outside your back door and harvesting vibrant, leafy greens for a healthy and satisfying meal? Well, dream no more! This DIY guide is your key to transforming your garden (or even a sunny balcony!) into a collard green paradise.
Collard greens, a staple in Southern cuisine and a symbol of good luck and prosperity, have a rich history dating back to ancient Greece. For generations, these hardy greens have provided sustenance and flavor, and now, you can easily cultivate them yourself. But let’s face it, sometimes growing your own food can feel intimidating. Maybe you’ve tried before and struggled, or perhaps you’re just not sure where to start. That’s where these simple, yet effective, DIY tricks and hacks come in.
I’m here to show you that growing collard greens doesn’t have to be a daunting task. Whether you’re a seasoned gardener or a complete beginner, these tips will help you grow collard greens like a pro, ensuring a bountiful harvest of these flavorful and vitamin-packed greens. Imagine the satisfaction of serving up a dish made with ingredients you nurtured from seed to table! So, grab your gardening gloves, and let’s get started on this exciting journey to homegrown goodness!
Grow Collard Greens Like a Pro: A DIY Guide
Hey there, fellow gardeners! I’m so excited to share my tried-and-true method for growing collard greens that are so delicious and abundant, you’ll be sharing them with the whole neighborhood. Forget those wimpy, store-bought greens – we’re talking about robust, flavorful leaves that are packed with nutrients. Let’s get started!
Choosing the Right Variety
First things first, let’s talk about collard green varieties. There are tons of options out there, and choosing the right one can make a big difference in your success. Here are a few of my favorites:
* Georgia Southern: This is a classic for a reason. It’s heat-tolerant, produces large, smooth leaves, and has a mild flavor.
* Vates: A reliable and cold-hardy variety, perfect for fall and winter harvests. It has slightly crinkled leaves and a slightly stronger flavor.
* Champion: This variety is known for its disease resistance and fast growth. It’s a great choice if you’re new to growing collard greens.
* Top Bunch: Produces a large bunch of leaves at the top of the plant, making for easy harvesting.
* Blue Max: A beautiful variety with blue-green leaves and a mild flavor.
Consider your climate and personal preferences when making your choice. I usually plant a mix of Georgia Southern and Vates to get the best of both worlds.
Preparing Your Garden Bed
Collard greens are pretty adaptable, but they thrive in well-drained soil that’s rich in organic matter. Here’s how I prepare my garden bed:
* Sunlight: Collard greens need at least 6 hours of sunlight per day. Choose a spot in your garden that gets plenty of sunshine.
* Soil Testing: Before you start, it’s a good idea to test your soil’s pH. Collard greens prefer a pH between 6.0 and 6.8. You can buy a soil testing kit at most garden centers.
* Amending the Soil: If your soil is too acidic (below 6.0), add lime to raise the pH. If it’s too alkaline (above 6.8), add sulfur to lower the pH. I also like to amend my soil with compost or well-rotted manure to improve drainage and fertility.
* Tilling or Digging: Loosen the soil to a depth of at least 12 inches. This will allow the roots to grow easily. Remove any rocks, weeds, or other debris.
* Creating Raised Beds (Optional): If you have heavy clay soil, consider creating raised beds. This will improve drainage and prevent root rot.
Planting Your Collard Greens
You can start collard greens from seed or purchase transplants from a garden center. I usually start mine from seed indoors about 6-8 weeks before the last frost.
Starting from Seed Indoors:
1. Gather Your Supplies: You’ll need seed starting trays or pots, seed starting mix, collard green seeds, and a spray bottle.
2. Fill the Trays: Fill the seed starting trays with seed starting mix. Moisten the mix with water.
3. Sow the Seeds: Plant the seeds about 1/4 inch deep in the soil. I usually plant 2-3 seeds per cell to increase my chances of germination.
4. Water Gently: Water the seeds gently with a spray bottle. Avoid overwatering, which can lead to damping off.
5. Provide Light: Place the trays under grow lights or in a sunny window. Collard green seedlings need at least 12 hours of light per day.
6. Keep the Soil Moist: Keep the soil moist but not soggy. Water when the top inch of soil feels dry to the touch.
7. Harden Off the Seedlings: Before transplanting the seedlings outdoors, you’ll need to harden them off. This means gradually exposing them to outdoor conditions over a period of 7-10 days. Start by placing the seedlings outdoors for a few hours each day, gradually increasing the amount of time they spend outside.
Transplanting Seedlings or Planting Transplants:
1. Prepare the Planting Holes: Dig holes that are slightly larger than the root balls of the seedlings or transplants. Space the holes about 18-24 inches apart.
2. Plant the Seedlings or Transplants: Gently remove the seedlings or transplants from their containers. Loosen the roots slightly. Place the seedlings or transplants in the holes and backfill with soil.
3. Water Thoroughly: Water the seedlings or transplants thoroughly after planting.
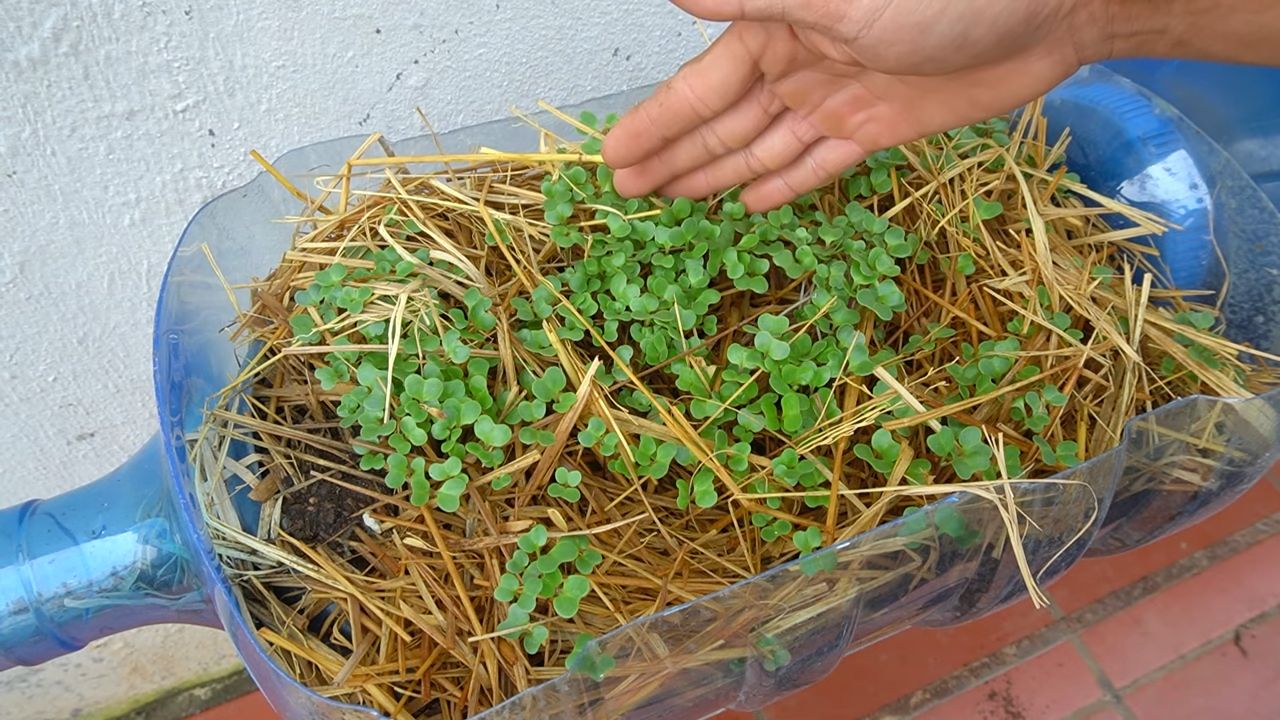
4. Mulch: Apply a layer of mulch around the plants to help retain moisture and suppress weeds. I like to use straw or shredded leaves.
Caring for Your Collard Greens
Once your collard greens are planted, it’s important to provide them with proper care to ensure a bountiful harvest.
* Watering: Collard greens need consistent moisture, especially during hot, dry weather. Water deeply once or twice a week, or more often if the soil dries out quickly.
* Fertilizing: Collard greens are heavy feeders, so they benefit from regular fertilization. I like to use a balanced fertilizer, such as 10-10-10, every 4-6 weeks. You can also side-dress the plants with compost or well-rotted manure.
* Weeding: Keep the garden bed free of weeds, which can compete with the collard greens for nutrients and water. Hand-pull weeds regularly or use a hoe to cultivate the soil.
* Pest Control: Collard greens can be susceptible to a variety of pests, including cabbage worms, aphids, and flea beetles. Inspect your plants regularly for signs of infestation.
* Cabbage Worms: These green caterpillars can quickly devour the leaves of your collard greens. Hand-pick them off the plants or use a biological insecticide, such as Bacillus thuringiensis (Bt).
* Aphids: These small, sap-sucking insects can weaken your plants. Spray them off with a strong stream of water or use insecticidal soap.
* Flea Beetles: These tiny beetles can create small holes in the leaves of your collard greens. Cover the plants with row covers to prevent flea beetles from reaching them.
* Disease Control: Collard greens can also be susceptible to diseases, such as black rot and downy mildew.
* Black Rot: This bacterial disease can cause yellowing and wilting of the leaves. Plant disease-resistant varieties and avoid overhead watering.
* Downy Mildew: This fungal disease can cause white or gray patches on the leaves. Improve air circulation and avoid overhead watering.
Harvesting Your Collard Greens
You can start harvesting collard greens when the leaves are about 8-10 inches long.
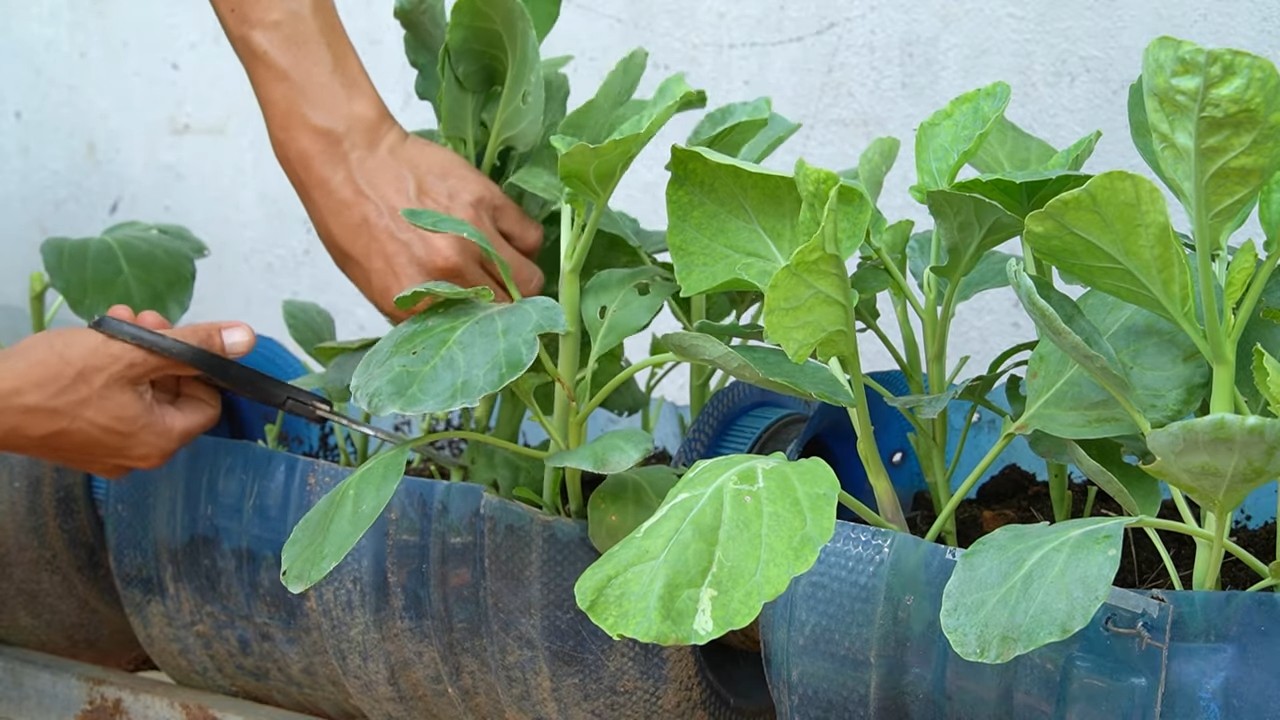
1. Harvesting Individual Leaves: The easiest way to harvest collard greens is to pick individual leaves from the bottom of the plant. This will allow the plant to continue producing new leaves.
2. Harvesting the Whole Plant: If you want to harvest the entire plant, cut it off at the base.
3. Best Time to Harvest: The best time to harvest collard greens is in the morning, after the dew has dried.
4. Storing Collard Greens: Store collard greens in the refrigerator for up to a week. To keep them fresh, wrap them in a damp paper towel and place them in a plastic bag.
Extending Your Harvest
Want to enjoy fresh collard greens for as long as possible? Here are a few tips:
* Succession Planting: Plant new collard green seeds or transplants every 2-3 weeks to ensure a continuous harvest.
* Cold Frames or Row Covers: Protect your collard greens from frost and freezing temperatures with cold frames or row covers.
* Overwintering: In mild climates, you can overwinter collard greens by mulching heavily around the plants.
Troubleshooting
Even with the best care, you might encounter some problems while growing collard greens. Here are a few common issues and how to address them:
* Yellowing Leaves: This could be a sign of nutrient deficiency, overwatering, or disease. Check the soil pH and fertilize if necessary. Make sure the soil is well-drained and avoid overhead watering.
* Holes in Leaves: This is usually caused by pests, such as cabbage worms or flea beetles. Inspect your plants regularly and take appropriate action.
* Slow Growth: This could be due to lack of sunlight, poor soil, or insufficient watering. Make sure your plants are getting enough sunlight and water, and amend the soil if necessary.
Enjoying Your Harvest
Now for the best part – enjoying your delicious, homegrown collard greens! There are so many ways to prepare them.
Conclusion
So, there you have it! Mastering the art of growing collard greens like a pro isn’t some unattainable gardening dream. It’s a tangible reality within your reach, achievable with a little know-how and a dash of dedication. We’ve walked through the essential steps, from selecting the right seeds and preparing your soil to nurturing your plants and harvesting those beautiful, nutrient-packed leaves.
But why should you embark on this green-thumb adventure? Beyond the sheer satisfaction of cultivating your own food, growing your own collard greens offers a multitude of benefits. You’ll have access to fresher, more flavorful greens than you can typically find in stores, often at a fraction of the cost. Plus, you’ll know exactly what’s going into your food – no mystery pesticides or herbicides here! You’re in complete control of the growing process, ensuring a healthy and sustainable harvest.
And let’s not forget the versatility of collard greens! While traditionally enjoyed braised or simmered, don’t be afraid to experiment. Try adding them to smoothies for a nutritional boost, sautéing them with garlic and olive oil for a quick and easy side dish, or even using them as wraps for your favorite fillings. For a spicy kick, add a pinch of red pepper flakes during cooking. If you prefer a sweeter flavor, a drizzle of maple syrup or a splash of balsamic vinegar can work wonders. Consider adding smoked turkey or ham hocks for a classic Southern flavor profile. Vegetarian? Smoked paprika or a dash of liquid smoke can mimic that smoky flavor beautifully.
Growing collard greens is also a fantastic way to connect with nature and de-stress. There’s something incredibly therapeutic about tending to your garden, watching your plants grow, and reaping the rewards of your labor. It’s a mindful activity that can help you slow down, appreciate the simple things in life, and reconnect with the earth.
We encourage you to take the plunge and give this DIY trick a try. Start small, perhaps with just a few plants, and gradually expand your garden as you gain confidence and experience. Don’t be afraid to experiment with different varieties of collard greens to find your favorites. Some popular options include ‘Georgia Southern’, ‘Vates’, and ‘Champion’. Each variety offers a slightly different flavor and texture, so exploring your options is part of the fun.
Most importantly, don’t be discouraged if you encounter challenges along the way. Gardening is a learning process, and even experienced gardeners face setbacks from time to time. The key is to learn from your mistakes, adapt your approach, and keep on growing.
We’re confident that with a little effort and the guidance provided in this article, you’ll be well on your way to harvesting a bountiful crop of delicious and nutritious collard greens. So, grab your seeds, get your hands dirty, and experience the joy of growing your own food.
We’d love to hear about your experiences! Share your tips, tricks, and triumphs in the comments section below. Let’s create a community of collard green enthusiasts and inspire others to embrace the joys of home gardening. Happy growing!
Frequently Asked Questions (FAQ)
What is the best time of year to plant collard greens?
The best time to plant collard greens depends on your climate. In warmer climates, you can plant them in the fall for a winter harvest or in early spring for a spring harvest. In colder climates, start seeds indoors 6-8 weeks before the last expected frost and transplant them outdoors after the danger of frost has passed. You can also plant seeds directly in the ground in the spring, but be sure to wait until the soil has warmed up to at least 60 degrees Fahrenheit. For a continuous harvest, consider succession planting, sowing new seeds every few weeks.
How much sunlight do collard greens need?
Collard greens thrive in full sun, requiring at least 6 hours of direct sunlight per day. However, they can tolerate partial shade, especially in hotter climates. If you’re growing them in a shady area, be sure to choose a spot that receives at least 4 hours of sunlight per day. Insufficient sunlight can lead to leggy growth and reduced yields.
What kind of soil is best for collard greens?
Collard greens prefer well-drained, fertile soil with a pH between 6.0 and 7.5. Amend your soil with compost or other organic matter before planting to improve drainage and fertility. A soil test can help you determine the pH of your soil and identify any nutrient deficiencies. If your soil is too acidic, you can add lime to raise the pH. If it’s too alkaline, you can add sulfur to lower the pH.
How often should I water collard greens?
Collard greens need consistent moisture, especially during hot, dry weather. Water them deeply whenever the top inch of soil feels dry to the touch. Avoid overwatering, as this can lead to root rot. Mulching around your plants can help retain moisture and suppress weeds. A soaker hose or drip irrigation system is an efficient way to water collard greens, delivering water directly to the roots.
What are some common pests and diseases that affect collard greens?
Common pests that affect collard greens include aphids, cabbage worms, flea beetles, and slugs. Diseases include black rot, downy mildew, and clubroot. To prevent pest and disease problems, practice crop rotation, keep your garden clean, and inspect your plants regularly. If you spot any pests or diseases, take action immediately. You can use organic pesticides or fungicides to control these problems. Row covers can also help protect your plants from pests.
How do I harvest collard greens?
You can begin harvesting collard greens when the leaves are about 8-10 inches long. Harvest the outer leaves first, leaving the inner leaves to continue growing. This will allow you to harvest collard greens continuously for several weeks. To harvest, simply cut the leaves off at the base of the plant with a sharp knife or scissors.
How do I store collard greens?
Freshly harvested collard greens can be stored in the refrigerator for up to a week. To store them, wash them thoroughly and pat them dry. Wrap them in a damp paper towel and place them in a plastic bag or container. You can also freeze collard greens for longer storage. To freeze them, blanch them in boiling water for 2-3 minutes, then plunge them into ice water to stop the cooking process. Drain them well and pack them into freezer bags or containers.
Can I grow collard greens in containers?
Yes, collard greens can be grown successfully in containers. Choose a container that is at least 12 inches deep and wide. Fill it with a well-draining potting mix and plant your collard green seedlings. Be sure to water them regularly and fertilize them every few weeks. Place the container in a sunny location that receives at least 6 hours of direct sunlight per day.
Are collard greens nutritious?
Yes, collard greens are incredibly nutritious. They are an excellent source of vitamins A, C, and K, as well as calcium, iron, and fiber. They are also a good source of antioxidants, which can help protect your body against disease. Eating collard greens regularly can help improve your overall health and well-being.
What are some different ways to cook collard greens?
Collard greens can be cooked in a variety of ways. They are traditionally braised or simmered with ham hocks or other smoked meats. They can also be sautéed, steamed, or added to soups and stews. For a healthier option, try steaming or sautéing them with garlic and olive oil. You can also add them to smoothies for a nutritional boost. Experiment with different recipes and find your favorite way to enjoy these delicious and nutritious greens.

Leave a Comment