
Grow Celery Indoors Easily? Absolutely! Imagine fresh, crisp celery stalks just steps away, ready to add a delightful crunch to your salads, soups, and snacks. Forget those limp, store-bought bunches that have seen better days. I’m going to show you how to cultivate your own vibrant celery patch right inside your home, no matter the season!
Celery, with its origins tracing back to the Mediterranean, has been enjoyed for centuries, not just for its culinary uses but also for its medicinal properties. Ancient Greeks even used celery leaves to crown victors in athletic games! While traditionally grown outdoors, the beauty of modern gardening is that we can adapt and innovate.
Let’s face it, buying celery can be a gamble. Sometimes it’s perfect, other times it’s stringy and flavorless. Plus, think of the environmental impact of transporting produce across long distances. That’s where this DIY trick comes in. Learning how to grow celery indoors easily gives you control over the quality, freshness, and sustainability of your food. It’s a rewarding project that brings a touch of green into your home and a healthy boost to your diet. So, grab your gardening gloves, and let’s get started!
Grow Celery Indoors From Kitchen Scraps: A Beginner’s Guide
Hey there, fellow plant enthusiasts! Ever thought about growing your own celery? It’s surprisingly easy, and you can start right from the celery you buy at the grocery store. This guide will walk you through the process of regrowing celery indoors, turning kitchen scraps into fresh, crunchy stalks. Let’s get started!
What You’ll Need
Before we dive in, let’s gather our supplies. You probably have most of these already!
* Celery Stalk: Choose a fresh-looking celery stalk with the base intact. The base is the part where the stalks are connected.
* Shallow Dish or Bowl: Something to hold water, like a pie dish or a small bowl.
* Water: Tap water is fine.
* Potting Soil: A well-draining potting mix is ideal.
* Pot: A pot that’s at least 6 inches in diameter. This gives the celery roots plenty of room to grow.
* Spray Bottle (Optional): For misting the celery.
* Sunny Location: A windowsill or spot with plenty of sunlight.
Phase 1: Regrowing Celery in Water
This is where the magic begins! We’ll start by encouraging the celery base to sprout new roots.
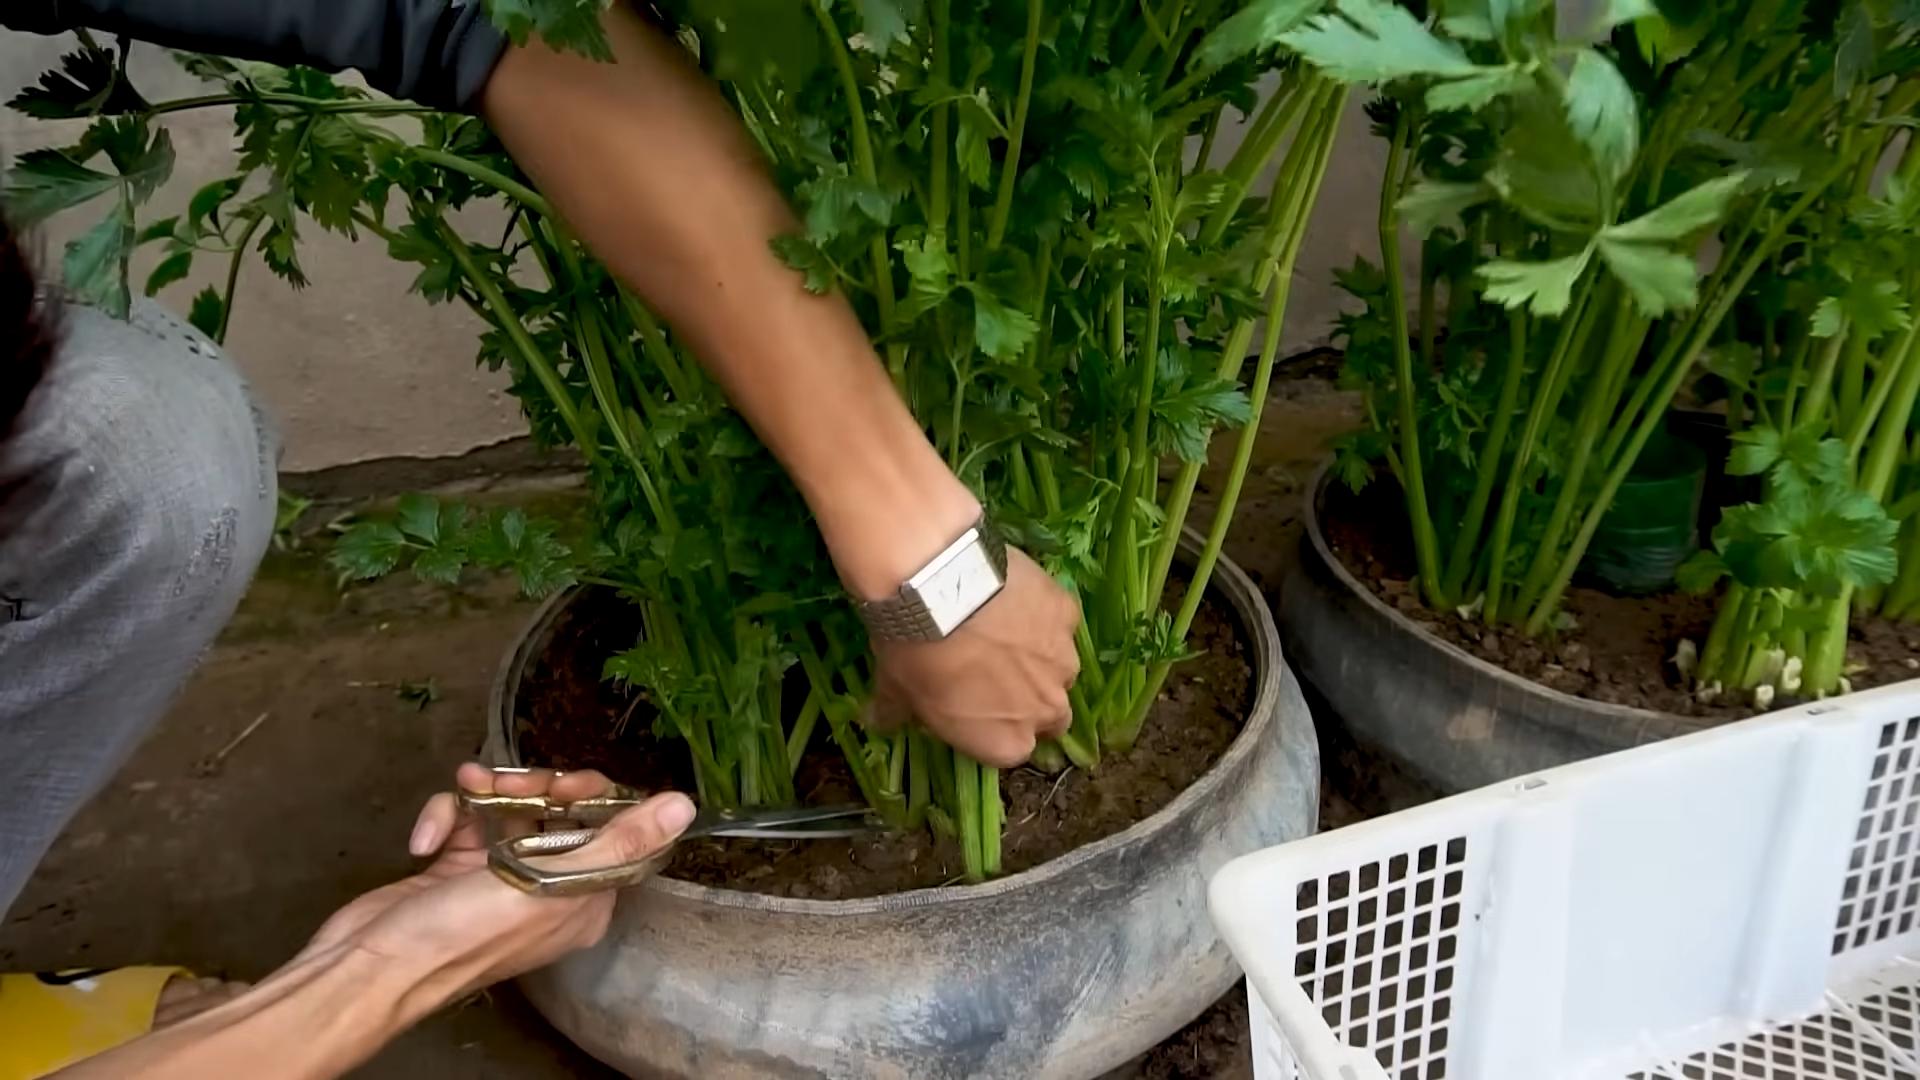
1. Prepare the Celery Base: Carefully cut off the celery stalks about 2 inches from the base. You can use these stalks for cooking or snacking – no waste here!
2. Place in Water: Put the celery base in your shallow dish or bowl. Add enough water to cover the bottom inch or so of the base. You don’t want to submerge the entire base, just the bottom part where the roots will emerge.
3. Find a Sunny Spot: Place the dish with the celery base on a windowsill or in another location that receives plenty of sunlight. Celery loves light!
4. Change the Water Regularly: Every day or every other day, change the water in the dish. This helps prevent bacteria growth and keeps the water fresh for the celery.
5. Observe and Wait: Over the next few days, you should start to see small roots emerging from the bottom of the celery base. You might also notice new green leaves sprouting from the top. This is a sign that your celery is happy and growing!
6. Be Patient: It usually takes about 5-7 days for the roots to develop enough for transplanting. Don’t rush the process. Let the roots grow to be about an inch or two long before moving on to the next phase.
Phase 2: Transplanting to Soil
Once your celery has developed a good root system, it’s time to move it to a pot with soil.
1. Prepare the Pot: Fill your pot with well-draining potting soil. Leave about an inch of space at the top of the pot.
2. Make a Hole: Use your finger or a small trowel to create a hole in the center of the soil that’s large enough to accommodate the celery base and its roots.
3. Carefully Transplant: Gently remove the celery base from the water dish. Be careful not to damage the delicate roots. Place the celery base into the hole in the soil.
4. Cover the Roots: Gently fill the hole with soil, covering the roots. Make sure the base of the celery is still slightly exposed above the soil line.
5. Water Thoroughly: Water the soil thoroughly until water drains out of the bottom of the pot. This helps settle the soil around the roots and provides the celery with the moisture it needs.
6. Return to Sunny Location: Place the pot back in your sunny location.
Phase 3: Caring for Your Celery Plant
Now that your celery is planted in soil, it’s time to provide it with the care it needs to thrive.
1. Watering: Celery needs consistent moisture to grow well. Water the plant whenever the top inch of soil feels dry to the touch. Avoid overwatering, as this can lead to root rot.
2. Sunlight: Celery loves sunlight, so make sure it gets at least 6 hours of direct sunlight per day. If you don’t have a sunny windowsill, you can use a grow light to supplement the sunlight.
3. Fertilizing (Optional): If you want to give your celery a boost, you can fertilize it every few weeks with a balanced liquid fertilizer. Follow the instructions on the fertilizer package.
4. Misting (Optional): Celery also appreciates humidity. You can mist the plant with water every day or two to increase the humidity around it.
5. Pest Control: Keep an eye out for pests like aphids or spider mites. If you see any pests, you can try spraying the plant with insecticidal soap or neem oil.
6. Harvesting: After a few weeks, your celery plant should start to grow larger and produce more stalks. You can harvest the stalks as needed by cutting them off at the base of the plant. The plant will continue to produce new stalks as long as you provide it with proper care.
Troubleshooting
Sometimes, things don’t go exactly as planned. Here are a few common problems you might encounter and how to fix them:
* Celery isn’t growing: Make sure your celery is getting enough sunlight and water. If it’s not, try moving it to a sunnier location or watering it more frequently. You can also try fertilizing it to give it a boost.
* Celery is turning yellow: Yellowing leaves can be a sign of overwatering or underwatering. Check the soil moisture and adjust your watering accordingly. Yellowing can also be caused by a lack of nutrients, so try fertilizing the plant.
* Celery is wilting: Wilting can be caused by underwatering or extreme heat. Make sure the soil is moist and move the plant to a cooler location if necessary.
* Celery is attracting pests: If you notice pests on your celery plant, try spraying it with insecticidal soap or neem oil. You can also try hand-picking the pests off the plant.
Tips for Success
Here are a few extra tips to help you grow healthy and delicious celery indoors:
* Start with a healthy celery base: Choose a celery stalk with a firm, healthy base. Avoid stalks that are wilted or discolored.
* Use well-draining soil: Celery needs well-draining soil to prevent root rot.
* Provide plenty of sunlight: Celery loves sunlight, so make sure it gets at least 6 hours of direct sunlight per day.
* Water regularly: Celery needs consistent moisture to grow well.
* Be patient: It takes time for celery to grow, so don’t get discouraged if you don’t see results immediately.
Why Grow Celery Indoors?
You might be wondering, “Why bother growing celery indoors when I can just buy it at the store?” Well, there are several good reasons:
* Freshness: Homegrown celery is much fresher and more flavorful than store-bought celery.
* Sustainability: Growing your own celery reduces your reliance on commercially grown produce, which can have a significant environmental impact.
* Cost-effectiveness: Regrowing celery from kitchen scraps is a great way to save money on groceries.
* Fun and rewarding: Growing your own food is a fun and rewarding experience that can connect you with nature.
* Reduce Waste: This is a great way to reduce food waste and get more out of your groceries.
Enjoy Your Homegrown Celery!
Growing celery indoors from kitchen scraps is a simple and rewarding project that anyone can do. With a little patience and care, you can enjoy fresh, crunchy celery right from your own home. So, grab a celery stalk, follow these steps, and get ready to enjoy the fruits (or rather, vegetables) of your labor! Happy growing!
Conclusion
So, there you have it! Growing celery indoors easily is not only achievable, but it’s also a rewarding and sustainable way to enjoy fresh, crisp celery whenever you desire. Forget those limp, store-bought stalks that have traveled miles and lost their vibrancy. With this simple DIY trick, you can cultivate your own supply of this versatile vegetable right in your kitchen.
Why is this a must-try? Because it’s economical, environmentally friendly, and incredibly satisfying. Think about it: you’re reducing food waste by regrowing celery from scraps, saving money on grocery bills, and minimizing your carbon footprint. Plus, there’s something truly special about nurturing a plant from its humble beginnings to a thriving, edible crop.
But the benefits don’t stop there. Growing your own celery allows you to control the growing environment, ensuring that your celery is free from harmful pesticides and herbicides. You know exactly what’s going into your food, giving you peace of mind and a healthier option for your family.
Ready to take your indoor celery growing to the next level? Consider these variations:
* Experiment with different celery varieties: While standard green celery is a great starting point, explore other options like golden celery or red celery for unique flavors and colors.
* Hydroponics: For a more advanced approach, try growing your celery in a hydroponic system. This soilless method can accelerate growth and maximize yields.
* Companion planting: Place your celery near other herbs and vegetables that benefit from its presence, such as onions, garlic, and tomatoes. This can help deter pests and improve overall plant health.
* Celery Salt: Don’t throw away the leaves! Dry them in a low oven and grind them into a powder to make your own homemade celery salt. It’s a fantastic addition to soups, stews, and even Bloody Marys.
This DIY project is more than just a gardening hack; it’s a step towards a more sustainable and self-sufficient lifestyle. It’s a chance to connect with nature, learn about plant growth, and enjoy the fruits (or rather, vegetables) of your labor.
We wholeheartedly encourage you to give this DIY trick a try. It’s easier than you might think, and the rewards are well worth the effort. Once you’ve experienced the joy of harvesting your own homegrown celery, you’ll never look at a celery stalk the same way again.
Don’t be shy! Share your experiences with us. We’d love to hear about your successes, challenges, and any creative variations you come up with. Post pictures of your thriving celery plants on social media using #IndoorCelery and inspire others to join the indoor gardening movement. Let’s cultivate a community of celery enthusiasts and spread the word about this fantastic DIY trick!
Frequently Asked Questions (FAQ)
How long does it take to regrow celery from a base?
Generally, it takes about 1-2 weeks to see new growth sprouting from the celery base. However, it can take several months to grow a full-sized celery stalk suitable for harvesting. Patience is key! The initial focus is on root development, followed by leaf growth. Providing optimal conditions, such as adequate sunlight and consistent moisture, will encourage faster growth.
What kind of water should I use?
Tap water is generally fine, but if your tap water is heavily chlorinated, it’s best to let it sit out for 24 hours to allow the chlorine to dissipate before using it. Filtered water or rainwater are also excellent options. Avoid using softened water, as it can contain high levels of sodium, which can be harmful to plants.
How much sunlight does the celery need?
Celery thrives in bright, indirect sunlight. Aim for at least 6 hours of sunlight per day. If you don’t have a sunny windowsill, you can supplement with a grow light. Rotate the celery regularly to ensure even growth on all sides. If the leaves start to look pale or leggy, it’s a sign that the plant isn’t getting enough light.
When should I transplant the celery to soil?
Once the celery base has developed a good root system (about 2-3 inches long) and new leaves have emerged, it’s time to transplant it to soil. Choose a pot that’s at least 6 inches in diameter and fill it with a well-draining potting mix. Gently remove the celery from the water and plant it in the soil, making sure to cover the roots completely. Water thoroughly after transplanting.
What kind of soil is best for growing celery indoors?
A well-draining potting mix is essential for growing celery indoors. Look for a mix that contains peat moss, perlite, and vermiculite. You can also amend your potting mix with compost or other organic matter to improve its fertility. Avoid using garden soil, as it can be too heavy and may contain pests or diseases.
How often should I water the celery after transplanting?
Keep the soil consistently moist, but not waterlogged. Water the celery when the top inch of soil feels dry to the touch. Avoid overwatering, as this can lead to root rot. Check the soil moisture regularly and adjust your watering schedule accordingly.
How do I fertilize my indoor celery plant?
Celery is a heavy feeder, so it’s important to fertilize it regularly. Use a balanced liquid fertilizer diluted to half strength every 2-3 weeks. You can also use a slow-release fertilizer at the time of planting. Avoid over-fertilizing, as this can burn the roots.
What are some common pests and diseases that affect celery?
Aphids, spider mites, and whiteflies are common pests that can affect celery. Check your plants regularly for signs of infestation and treat them with insecticidal soap or neem oil if necessary. Celery is also susceptible to diseases like blight and powdery mildew. To prevent these diseases, ensure good air circulation and avoid overwatering.
Can I harvest individual stalks of celery as needed?
Yes, you can harvest individual stalks of celery as needed. Simply cut the outer stalks near the base of the plant. This will encourage the plant to produce more stalks. Avoid harvesting more than one-third of the plant at a time, as this can weaken it.
How do I store harvested celery?
Wrap the harvested celery stalks in a damp paper towel and store them in a plastic bag in the refrigerator. This will help keep them fresh and crisp for up to a week. You can also store celery in a container of water in the refrigerator, changing the water every few days.
What if my celery starts to bolt (flower)?
Bolting, or flowering, can occur when celery is exposed to stress, such as extreme temperatures or inconsistent watering. Once celery bolts, the stalks become bitter and less palatable. To prevent bolting, provide consistent care and avoid exposing your celery to extreme conditions. If your celery does bolt, you can still harvest the seeds for future planting.
Is growing celery indoors from scraps truly sustainable?
Yes! By regrowing celery from scraps, you’re actively reducing food waste and minimizing your reliance on commercially grown celery, which often involves significant transportation and resource consumption. It’s a small but meaningful step towards a more sustainable lifestyle.


Leave a Comment