
Grow Celery at Home, you say? Absolutely! Imagine stepping into your backyard and snipping fresh, crisp celery stalks for your salads, soups, or even a healthy snack with peanut butter. No more limp, store-bought celery that’s been sitting on the shelf for days. This isn’t just about convenience; it’s about connecting with nature and enjoying the unparalleled flavor of homegrown produce.
Celery, with its origins tracing back to the Mediterranean, has been cultivated for centuries, initially for medicinal purposes before becoming a culinary staple. From ancient remedies to modern-day crudités, celery has a rich history. But let’s be honest, buying celery can be a gamble. It’s often expensive, and you might end up throwing half of it away because it goes bad before you can use it. That’s where our DIY guide comes in!
This article is packed with simple, effective tricks and hacks to help you grow celery at home, regardless of your gardening experience. Whether you have a sprawling garden or just a sunny windowsill, we’ll show you how to cultivate this crunchy vegetable with ease. We’ll cover everything from seed starting to harvesting, troubleshooting common problems, and even share some creative ways to use your homegrown celery. So, ditch the grocery store celery and let’s get growing!
Zieh dein eigenes Staudensellerie zu Hause: Ein umfassender DIY-Leitfaden
Hey Leute! Habt ihr euch jemals gefragt, wie ihr frischen, knackigen Staudensellerie direkt in eurer Küche oder eurem Garten anbauen könnt? Ich zeige euch, wie es geht! Es ist einfacher als ihr denkt und super befriedigend, wenn ihr eure eigenen, selbstgezogenen Selleriestangen ernten könnt. Dieser Leitfaden ist vollgepackt mit Tipps und Tricks, die ich im Laufe der Zeit gelernt habe, um euch den Anbau von Staudensellerie so einfach wie möglich zu machen. Los geht’s!
Was du brauchst: Die Vorbereitung
Bevor wir loslegen, hier eine Liste der Dinge, die ihr benötigt. Keine Sorge, die meisten davon habt ihr wahrscheinlich schon zu Hause!
- Ein Staudensellerie-Strunk: Am besten einen frischen, festen Strunk aus dem Supermarkt oder vom Bauernmarkt. Achtet darauf, dass er eine gesunde Basis hat.
- Ein Messer: Ein scharfes Messer ist wichtig, um saubere Schnitte zu machen.
- Ein Glas oder eine Schale: Groß genug, um die Selleriebasis aufzunehmen.
- Wasser: Leitungswasser ist völlig ausreichend.
- Pflanzerde: Hochwertige Blumenerde oder Gartenerde.
- Ein Pflanzgefäß: Ein Topf mit Drainagelöchern ist ideal.
- Ein sonniger Standort: Staudensellerie liebt die Sonne!
- Geduld: Der Anbau braucht Zeit, aber es lohnt sich!
Phase 1: Die Selleriebasis wiederbeleben
Dieser erste Schritt ist entscheidend, um euren Staudensellerie zum Wachsen zu bringen. Wir wecken ihn quasi wieder auf!
- Den Strunk vorbereiten: Schneidet den Staudensellerie etwa 5-7 cm vom unteren Ende ab. Achtet darauf, dass ihr die Basis, wo die Wurzeln wachsen werden, intakt lasst.
- Ins Wasser stellen: Platziert die Selleriebasis in eurem Glas oder eurer Schale und füllt es mit Wasser, so dass die Basis etwa zur Hälfte bedeckt ist.
- Sonniger Standort: Stellt das Glas an einen sonnigen Ort, z.B. auf eine Fensterbank.
- Wasser wechseln: Wechselt das Wasser alle 1-2 Tage, um es frisch und sauber zu halten. Das verhindert, dass sich Bakterien bilden.
- Geduld haben: Nach etwa 5-7 Tagen solltet ihr sehen, wie kleine Wurzeln aus der Basis sprießen und neue grüne Blätter in der Mitte wachsen. Das ist ein gutes Zeichen!
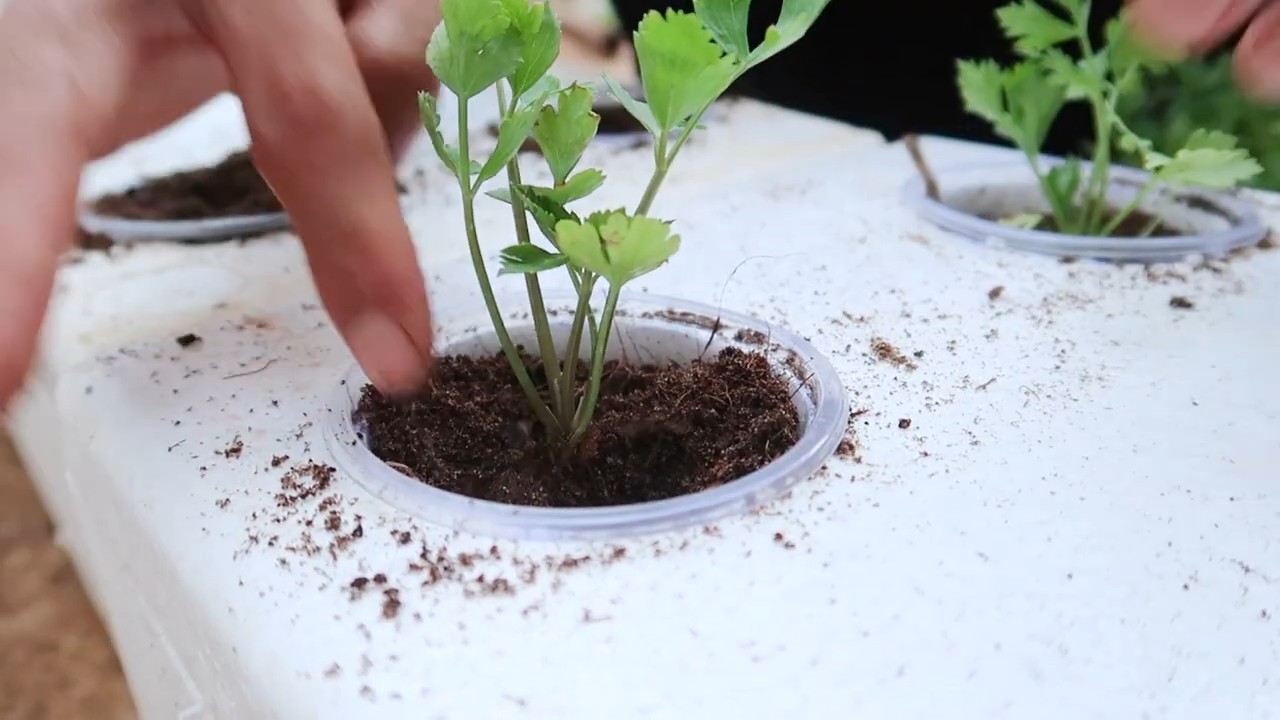
Phase 2: Einpflanzen in Erde
Sobald die Wurzeln gut entwickelt sind, ist es Zeit, den Staudensellerie in Erde zu pflanzen.
- Den Topf vorbereiten: Füllt euren Pflanztopf mit Pflanzerde. Lasst etwa 2-3 cm Platz bis zum Rand.
- Ein Loch graben: Macht ein kleines Loch in die Mitte der Erde, das groß genug ist, um die Selleriebasis aufzunehmen.
- Einpflanzen: Setzt die Selleriebasis vorsichtig in das Loch und bedeckt sie mit Erde. Achtet darauf, dass die neuen Blätter nicht mit Erde bedeckt sind.
- Angießen: Gießt die Erde gründlich an, bis das Wasser aus den Drainagelöchern abläuft.
- Sonniger Standort: Stellt den Topf wieder an einen sonnigen Ort.
Phase 3: Pflege und Wachstum
Jetzt beginnt die eigentliche Arbeit, aber keine Sorge, es ist nicht schwer!
- Gießen: Haltet die Erde feucht, aber nicht durchnässt. Gießt, wenn sich die oberste Erdschicht trocken anfühlt.
- Düngen: Düngt den Staudensellerie alle 2-3 Wochen mit einem organischen Flüssigdünger. Das fördert das Wachstum.
- Beobachten: Achtet auf Schädlinge oder Krankheiten. Wenn ihr etwas Ungewöhnliches bemerkt, recherchiert, wie ihr es behandeln könnt.
- Stützen: Wenn die Selleriestangen zu lang werden, könnt ihr sie mit Stäben oder einem kleinen Gitter stützen.
- Ernten: Nach etwa 2-3 Monaten könnt ihr die äußeren Stangen ernten, wenn sie groß genug sind. Schneidet sie einfach an der Basis ab. Die inneren Stangen wachsen weiter.
Zusätzliche Tipps und Tricks für den erfolgreichen Staudensellerie-Anbau
Hier sind noch ein paar zusätzliche Tipps, die euch helfen werden, den besten Staudensellerie anzubauen:
- Der richtige Standort: Staudensellerie braucht mindestens 6 Stunden Sonnenlicht pro Tag.
- Die richtige Erde: Staudensellerie bevorzugt nährstoffreiche, gut durchlässige Erde.
- Regelmäßiges Gießen: Staudensellerie braucht viel Wasser, besonders während der heißen Sommermonate.
- Schutz vor Frost: Staudensellerie ist nicht frosthart. Wenn es Frost gibt, solltet ihr ihn ins Haus holen oder abdecken.
- Schädlinge und Krankheiten: Achtet auf Blattläuse, Schnecken und Pilzkrankheiten. Bekämpft sie frühzeitig mit natürlichen Mitteln.
- Bleichen: Um hellere, zartere Stangen zu erhalten, könnt ihr die Stangen einige Wochen vor der Ernte mit Erde oder Pappe abdecken. Das nennt man Bleichen.
- Vermehrung: Ihr könnt Staudensellerie auch aus Samen ziehen, aber das ist etwas aufwendiger.
Häufige Probleme und Lösungen
Manchmal läuft nicht alles glatt. Hier sind einige häufige Probleme und wie ihr sie beheben könnt:
- Gelbe Blätter: Können auf zu wenig Wasser, Nährstoffmangel oder zu viel Sonne hindeuten.
- Schlaffe Stangen: Können auf zu wenig Wasser oder zu viel Hitze hindeuten.
- Schädlinge: Blattläuse, Schnecken und andere Schädlinge können den Staudensellerie befallen. Bekämpft sie mit natürlichen Mitteln wie Neemöl oder Insektizidseife.
- Pilzkrankheiten: Können durch zu viel Feuchtigkeit entstehen. Sorgt für gute Belüftung und vermeidet es, die Blätter zu gießen.
Warum Staudensellerie selbst anbauen?
Es gibt viele Gründe, warum es sich lohnt, Staudensellerie selbst anzubauen:
- Frischer und aromatischer: Selbst angebauter Staudensellerie schmeckt viel besser als gekaufter.
- Gesünder: Ihr wisst genau, was drin ist und könnt auf Pestizide verzichten.
- Nachhaltiger: Ihr reduziert euren ökologischen Fußabdruck, indem ihr keine langen Transportwege benötigt.
- Befriedigend: Es ist ein tolles Gefühl, etwas selbst anzubauen und zu ernten.
- Kostengünstig: Auf lange Sicht spart ihr Geld, wenn ihr euren eigenen Staudensellerie anbaut.
Ich hoffe, dieser Leitfaden hat euch geholfen und inspiriert, euren eigenen Staudensellerie anzubauen. Es ist ein lohnendes Projekt, das euch mit frischem, gesundem Gemüse belohnt. Viel Spaß beim Gärtnern! Und vergesst nicht, eure Erfolge (und Misserfolge!) mit mir zu teilen. Ich bin gespannt auf eure Erfahrungen!
Conclusion
So, there you have it! Growing celery at home from kitchen scraps is not just a fun experiment; it’s a sustainable way to reduce food waste, enjoy fresh, flavorful celery, and connect with the natural world. It’s a surprisingly simple process that yields impressive results, transforming what would otherwise be discarded into a vibrant, edible plant.
Why is this DIY trick a must-try? Because it empowers you to take control of your food source, even in a small way. Imagine the satisfaction of snipping off a stalk of celery that you nurtured from a humble base, knowing you’ve contributed to a more eco-friendly lifestyle. Plus, homegrown celery often boasts a more intense flavor than store-bought varieties, adding a delightful zest to your soups, salads, and snacks.
But the benefits don’t stop there. This project is incredibly educational, especially for children. It’s a hands-on lesson in plant biology, demonstrating the resilience and regenerative power of nature. It’s also a fantastic way to introduce kids to gardening and encourage healthy eating habits.
Looking for variations? Absolutely! Once your celery has established roots and is growing well in soil, you can experiment with different growing conditions. Try moving it to a sunnier spot to see if it affects the flavor or growth rate. You can also try different types of soil or even hydroponic setups for a more advanced gardening experience. Consider companion planting – celery is said to thrive alongside tomatoes, onions, and cabbage.
Another exciting variation is to let your celery plant bolt, meaning it will send up a flower stalk. While the stalks may become a bit tougher, the celery seeds are incredibly flavorful and can be used as a spice in various dishes. You can even save the seeds to plant more celery in the future, completing the cycle.
Don’t be afraid to experiment with different celery varieties too! While the method works best with standard celery, you might be able to adapt it for other types, such as celeriac (celery root).
We wholeheartedly encourage you to give this DIY celery growing trick a try. It’s a rewarding experience that’s both environmentally friendly and delicious. The process of regrowing celery from scraps is a testament to the power of resourcefulness and a great way to bring a little bit of the garden into your home.
Once you’ve embarked on your celery-growing adventure, we’d love to hear about your experience! Share your photos, tips, and any challenges you encounter in the comments below. Let’s create a community of home gardeners and inspire others to embrace this simple yet impactful DIY project. Your insights could be invaluable to fellow growers, helping them overcome obstacles and achieve success. So, grab a celery base, a glass of water, and get ready to witness the magic of regrowth! Happy growing!
Frequently Asked Questions (FAQ)
1. What kind of celery works best for regrowing?
The best celery for regrowing is fresh, organic celery from the grocery store or farmer’s market. Look for celery with a firm, intact base and healthy-looking stalks. Avoid celery that is wilted, discolored, or has signs of rot. Organic celery is preferable because it is less likely to have been treated with chemicals that could inhibit regrowth. However, non-organic celery can also work, just be sure to wash the base thoroughly before starting the process. The key is to have a healthy base with the root end still attached.
2. How long does it take to see new growth?
You should start to see new growth within 5-7 days. The first sign of growth will be small, pale green leaves emerging from the center of the celery base. Be patient, as the growth rate can vary depending on factors such as temperature, light, and water quality. Ensure the celery base is consistently submerged in water and placed in a bright location to encourage faster growth. If you don’t see any growth after two weeks, it’s likely that the celery base is not viable, and you should try again with a fresh one.
3. When should I transplant the celery to soil?
Transplant your celery to soil when the roots are about 2-3 inches long and the new leaves are well-developed. This usually takes about 1-2 weeks after you start seeing new growth. Choose a pot that is at least 6 inches in diameter and fill it with well-draining potting mix. Gently remove the celery base from the water and plant it in the pot, burying the base up to the point where the new leaves emerge. Water thoroughly after planting.
4. What kind of soil is best for growing celery?
Celery prefers rich, well-draining soil that is high in organic matter. A good potting mix for celery should contain a blend of peat moss, perlite, and vermiculite. You can also amend your soil with compost or aged manure to improve its fertility and drainage. Celery also prefers a slightly acidic soil pH, around 6.0 to 6.8. You can test your soil pH with a soil testing kit and amend it accordingly with lime (to raise the pH) or sulfur (to lower the pH).
5. How much sunlight does celery need?
Celery needs at least 6 hours of sunlight per day to thrive. Place your potted celery plant in a sunny location, such as a south-facing window or a spot in your garden that receives full sun. If you don’t have enough natural light, you can supplement with a grow light. Be sure to rotate the plant regularly to ensure that all sides receive equal exposure to light.
6. How often should I water my celery plant?
Celery needs consistent moisture to grow well. Water your celery plant regularly, keeping the soil consistently moist but not waterlogged. Check the soil moisture level daily and water when the top inch of soil feels dry to the touch. Avoid letting the soil dry out completely, as this can stress the plant and inhibit growth. When watering, water deeply, allowing the water to drain out of the bottom of the pot.
7. Can I grow celery indoors year-round?
Yes, you can grow celery indoors year-round, provided you provide it with enough light, water, and nutrients. Use a grow light to supplement natural light, especially during the winter months. Maintain consistent soil moisture and fertilize regularly with a balanced liquid fertilizer. Be aware that indoor-grown celery may not grow as large or as quickly as celery grown outdoors, but you can still enjoy fresh, homegrown celery even in the middle of winter.
8. What are common pests and diseases that affect celery?
Celery can be susceptible to several pests and diseases, including aphids, celery leaf miners, and fungal diseases such as early blight and late blight. Inspect your celery plants regularly for signs of pests or diseases. If you find any pests, you can try washing them off with a strong stream of water or using insecticidal soap. For fungal diseases, remove any affected leaves and treat the plant with a fungicide. Good air circulation and proper watering practices can help prevent fungal diseases.
9. How do I harvest my celery?
You can harvest your celery when the stalks are at least 6 inches long and thick enough to eat. To harvest, simply cut the stalks off at the base of the plant with a sharp knife. You can harvest individual stalks as needed, or you can harvest the entire plant at once. After harvesting, store the celery in the refrigerator in a plastic bag or container.
10. Can I regrow celery multiple times from the same base?
While you can regrow celery from the same base multiple times, the subsequent harvests will likely be smaller and less flavorful than the first. The celery plant will eventually exhaust its resources and stop producing new growth. For best results, it’s recommended to start with a fresh celery base each time you want to regrow celery. However, you can certainly experiment with regrowing the same base multiple times to see how it performs.

Leave a Comment