
Grow celery along fence? Absolutely! Imagine stepping into your backyard and harvesting crisp, juicy celery stalks just inches from your fence line. Sounds like a dream, right? Well, it doesn’t have to be! This DIY guide will unlock the secrets to maximizing your garden space and enjoying fresh, homegrown celery, even if you’re short on room.
For centuries, resourceful gardeners have been finding innovative ways to cultivate their favorite vegetables in limited spaces. From vertical gardens in ancient Babylon to the modern-day urban farming movement, the desire to connect with nature and grow our own food has always been strong. Celery, with its refreshing crunch and versatility in the kitchen, has long been a staple in gardens worldwide.
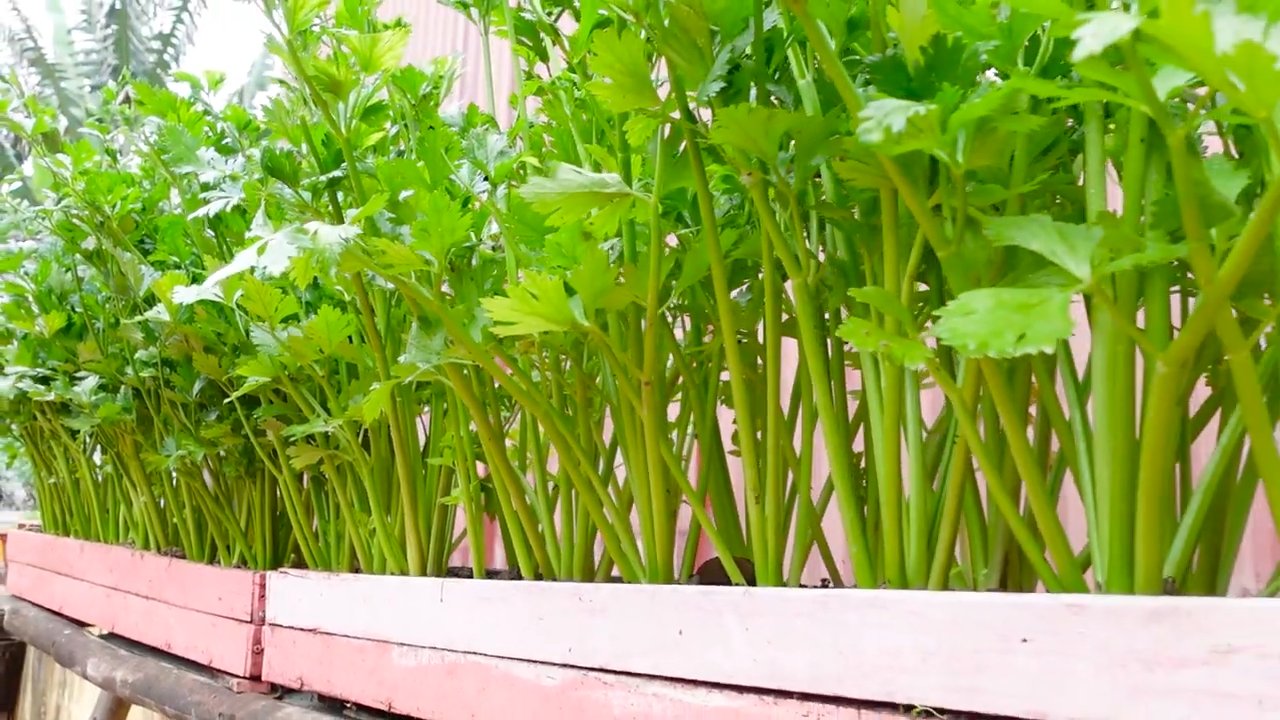
But let’s face it, traditional gardening can be time-consuming and space-intensive. That’s where this clever DIY trick comes in. Growing celery along your fence not only saves valuable garden real estate but also provides natural support for the stalks, protecting them from wind and sun. Plus, it’s a fantastic way to add a touch of greenery and beauty to an otherwise underutilized area. I’m excited to share this simple yet effective method that will transform your fence into a thriving celery patch. Get ready to grow celery along fence and enjoy the freshest celery you’ve ever tasted!
Sellerie am Zaun ziehen: Ein DIY-Leitfaden für den vertikalen Anbau
Hallo liebe Gartenfreunde! Habt ihr wenig Platz im Garten, aber trotzdem Lust auf frischen Sellerie? Dann habe ich heute genau das Richtige für euch: Wir ziehen Sellerie einfach am Zaun hoch! Das spart Platz, sieht toll aus und ist gar nicht so schwer, wie man vielleicht denkt. Ich zeige euch, wie’s geht!
Was ihr für den vertikalen Sellerieanbau braucht
Bevor wir loslegen, hier eine Liste mit allen Materialien und Werkzeugen, die ihr benötigt:
* Selleriepflanzen: Am besten Jungpflanzen aus dem Gartencenter oder selbst vorgezogene. Achtet darauf, dass sie gesund und kräftig aussehen.
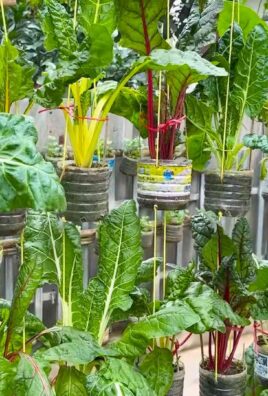
* Pflanzgefäße: Hängekörbe, Pflanztaschen oder auch recycelte Plastikflaschen, die ihr entsprechend präpariert. Wichtig ist, dass sie Löcher für den Wasserabzug haben.
* Gute Pflanzerde: Eine Mischung aus Gartenerde, Kompost und etwas Sand ist ideal.
* Dünger: Organischer Dünger oder Flüssigdünger für Gemüse.
* Zaun: Ein stabiler Zaun, an dem ihr die Pflanzgefäße befestigen könnt.
* Befestigungsmaterial: Kabelbinder, Haken, Draht oder was auch immer sich am besten eignet, um eure Pflanzgefäße am Zaun zu befestigen.
* Gießkanne oder Gartenschlauch: Zum regelmäßigen Gießen.
* Schere oder Messer: Zum Zuschneiden von Material.
* Handschuhe: Um eure Hände sauber zu halten.
Die Vorbereitung: So macht ihr euren Zaun bereit
Bevor wir die Selleriepflanzen einsetzen, müssen wir den Zaun vorbereiten. Das ist wichtig, damit die Pflanzen später auch gut halten und genügend Platz zum Wachsen haben.
1. Zaun überprüfen: Stellt sicher, dass euer Zaun stabil genug ist, um das Gewicht der bepflanzten Gefäße zu tragen. Ein wackeliger Zaun ist keine gute Basis.
2. Standort wählen: Sellerie braucht Sonne, aber nicht zu viel pralle Mittagssonne. Ein Standort mit Halbschatten ist ideal. Achtet auch darauf, dass der Standort windgeschützt ist.
3. Pflanzgefäße vorbereiten: Wenn ihr recycelte Plastikflaschen verwendet, schneidet sie auf und bohrt Löcher für den Wasserabzug. Hängekörbe und Pflanztaschen sind in der Regel schon fertig.
4. Befestigungsmaterial vorbereiten: Schneidet Kabelbinder oder Draht in passende Stücke, um die Pflanzgefäße am Zaun zu befestigen.
Sellerie einpflanzen: Schritt für Schritt zum Erfolg
Jetzt kommt der spannende Teil: Wir pflanzen den Sellerie ein! Keine Sorge, es ist wirklich einfach.
1. Pflanzgefäße befüllen: Füllt die Pflanzgefäße mit der vorbereiteten Erde. Lasst oben ein paar Zentimeter frei, damit ihr beim Gießen nicht alles überschwemmt.
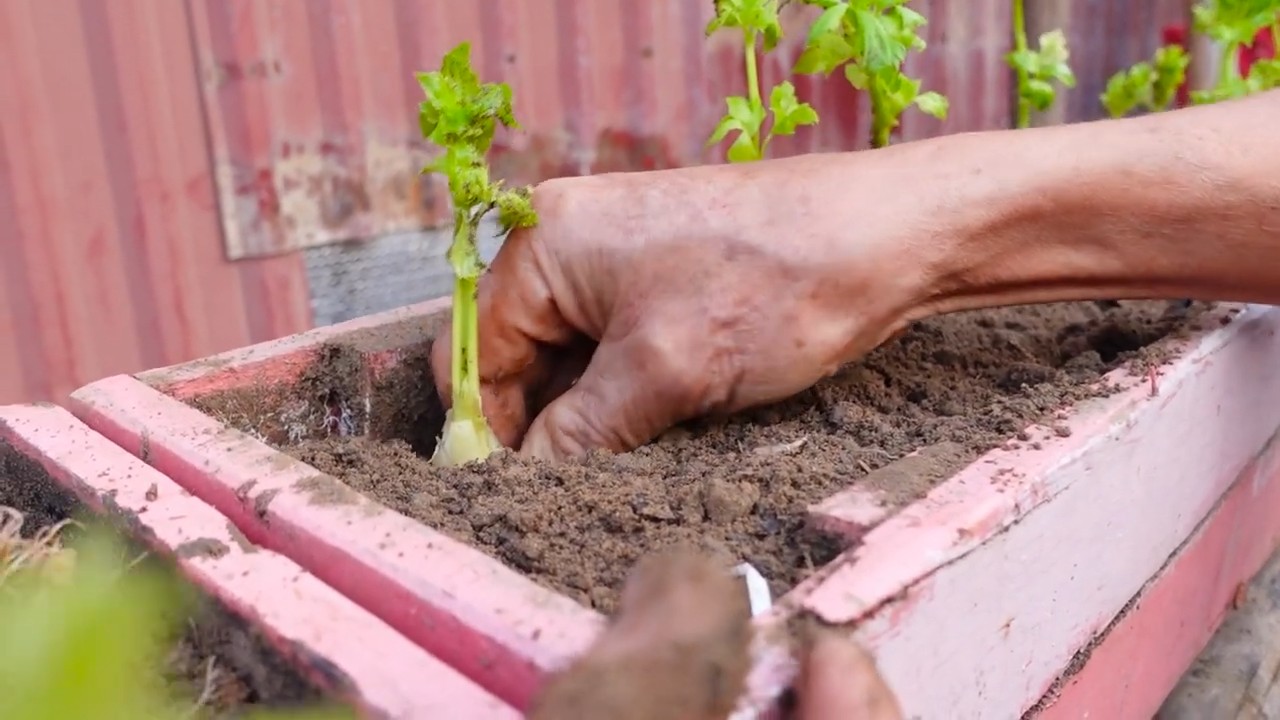
2. Selleriepflanzen vorbereiten: Nehmt die Selleriepflanzen vorsichtig aus ihren Töpfen. Lockert die Wurzeln etwas auf, damit sie sich besser in der neuen Erde ausbreiten können.
3. Sellerie einpflanzen: Setzt die Selleriepflanzen in die Pflanzgefäße. Achtet darauf, dass die Wurzeln gut mit Erde bedeckt sind. Drückt die Erde leicht an.
4. Gießen: Gießt die frisch eingepflanzten Selleriepflanzen gründlich an. Das hilft ihnen, sich in der neuen Umgebung zu akklimatisieren.
5. Pflanzgefäße befestigen: Befestigt die bepflanzten Gefäße am Zaun. Achtet darauf, dass sie sicher hängen und nicht herunterfallen können. Verteilt die Gefäße gleichmäßig, damit der Zaun nicht zu einseitig belastet wird.
Die Pflege: So bleibt euer Sellerie gesund und kräftig
Damit euer Sellerie am Zaun auch gut wächst und gedeiht, ist die richtige Pflege entscheidend. Hier ein paar Tipps:
1. Regelmäßiges Gießen: Sellerie braucht viel Wasser, besonders an heißen Tagen. Gießt regelmäßig, aber vermeidet Staunässe. Die Erde sollte immer leicht feucht sein.
2. Düngen: Sellerie ist ein Starkzehrer und braucht regelmäßig Dünger. Düngt alle zwei bis drei Wochen mit organischem Dünger oder Flüssigdünger für Gemüse.
3. Schädlinge kontrollieren: Achtet auf Schädlinge wie Blattläuse oder Schnecken. Bei Bedarf könnt ihr natürliche Schädlingsbekämpfungsmittel einsetzen.
4. Verwelkte Blätter entfernen: Entfernt regelmäßig verwelkte oder gelbe Blätter, damit die Pflanze ihre Energie in die gesunden Blätter stecken kann.
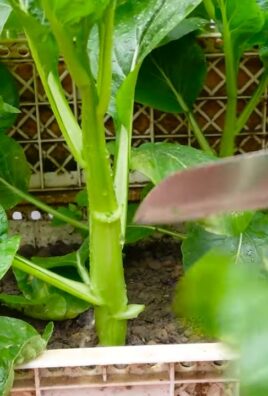
5. Sellerie ernten: Je nach Sorte und Standort könnt ihr den Sellerie nach etwa drei bis vier Monaten ernten. Erntet die Stangen nach Bedarf, indem ihr sie unten abschneidet.
Zusätzliche Tipps für den erfolgreichen Anbau
Hier noch ein paar zusätzliche Tipps, die euch beim Anbau von Sellerie am Zaun helfen können:
* Sortenwahl: Es gibt verschiedene Selleriesorten. Wählt eine Sorte, die für den Anbau in Pflanzgefäßen geeignet ist.
* Windschutz: Wenn euer Standort sehr windig ist, könnt ihr einen Windschutz anbringen, um die Pflanzen zu schützen.
* Mulchen: Eine Mulchschicht aus Stroh oder Rasenschnitt hilft, die Feuchtigkeit im Boden zu halten und Unkraut zu unterdrücken.
* Kombination mit anderen Pflanzen: Sellerie verträgt sich gut mit anderen Pflanzen wie Tomaten, Kohl oder Zwiebeln. Ihr könnt also auch andere Pflanzen in eure Pflanzgefäße setzen.
* Beobachtung: Beobachtet eure Pflanzen regelmäßig, um Probleme frühzeitig zu erkennen und zu beheben.
Häufige Probleme und Lösungen
Auch beim Anbau von Sellerie am Zaun können Probleme auftreten. Hier sind einige häufige Probleme und wie ihr sie lösen könnt:
* Gelbe Blätter: Gelbe Blätter können ein Zeichen für Nährstoffmangel sein. Düngt die Pflanzen mit einem geeigneten Dünger.
* Blattläuse: Blattläuse können mit einem Wasserstrahl abgespült oder mit natürlichen Schädlingsbekämpfungsmitteln bekämpft werden.
* Schnecken: Schnecken können mit Schneckenkorn oder Schneckenzäunen bekämpft werden.
* Pilzkrankheiten: Pilzkrankheiten können durch gute Belüftung und Vermeidung von Staunässe vorgebeugt werden. Bei Bedarf können Fungizide eingesetzt werden.
Fazit: Sellerie am Zaun – ein lohnendes Projekt
Ich hoffe, dieser Leitfaden hat euch geholfen und inspiriert, euren eigenen Sellerie am Zaun anzubauen. Es ist ein tolles Projekt, das nicht nur Platz spart, sondern auch frischen Sellerie direkt vor der Haustür liefert. Probiert es aus und lasst mich wissen, wie es euch ergangen ist! Viel Spaß beim Gärtnern!
Conclusion
So, there you have it! Growing celery along a fence isn’t just a quirky gardening experiment; it’s a practical, space-saving, and aesthetically pleasing way to cultivate this crisp and refreshing vegetable. We’ve explored how this method leverages vertical space, protects your celery from harsh weather, and even deters some common garden pests. But more than that, it’s about embracing a more sustainable and creative approach to gardening.
Why is this DIY trick a must-try? Because it offers a multitude of benefits that traditional celery cultivation simply can’t match. Imagine a vibrant green wall of celery stalks, adding a touch of rustic charm to your garden while providing a readily available source of fresh, organic produce. It’s a win-win!
Beyond the practical advantages, growing celery along a fence opens up a world of possibilities for customization and experimentation. Consider these variations to tailor the method to your specific needs and preferences:
* **Espaliered Celery:** Train your celery stalks to grow in a specific pattern along the fence, creating a living work of art. This requires more attention and pruning, but the visual impact is stunning.
* **Companion Planting:** Incorporate companion plants like marigolds or nasturtiums along the base of the fence to further deter pests and attract beneficial insects.
* **Vertical Herb Garden Integration:** Combine your celery with other herbs that thrive in similar conditions, such as parsley or chives, creating a multi-functional vertical garden.
* **Container Celery:** If you don’t have a fence, you can adapt this method by using tall containers placed against a wall or trellis. This is perfect for balcony gardens or smaller spaces.
* Different Celery Varieties: Experiment with different celery varieties to see which ones thrive best in your specific climate and growing conditions. Some varieties are more compact and better suited for vertical growing than others.
The key to success with this method is consistent care and attention. Regular watering, fertilization, and pest control are essential for healthy celery growth. But the rewards are well worth the effort. You’ll not only enjoy a bountiful harvest of fresh celery, but you’ll also gain a deeper connection to the natural world and a sense of accomplishment from creating something beautiful and useful with your own hands.
We wholeheartedly encourage you to give this DIY trick a try. Whether you’re a seasoned gardener or a complete beginner, growing celery along a fence is a rewarding and accessible project that can transform your garden and your diet. Don’t be afraid to experiment, adapt, and make it your own.
And most importantly, we want to hear about your experience! Share your photos, tips, and challenges with us in the comments below. Let’s create a community of gardeners who are passionate about sustainable and creative growing methods. Together, we can unlock the full potential of our gardens and enjoy the delicious rewards of our labor. So, grab your seeds, find a fence, and get growing! Let’s see how you make this **celery growing** technique your own!
Frequently Asked Questions (FAQ)
1. What type of fence is best for growing celery?
The ideal fence for growing celery is one that provides adequate support and allows for good air circulation. A chain-link fence, a wooden picket fence, or even a sturdy trellis can work well. The key is to ensure that the fence is strong enough to support the weight of the celery plants as they grow and that it doesn’t block too much sunlight. Avoid fences that are made of materials that can overheat in the sun, as this can damage the celery plants.
2. How do I train the celery stalks to grow along the fence?
Training celery stalks to grow along a fence requires a bit of patience and gentle guidance. As the plants grow, use soft twine or plant ties to loosely attach the stalks to the fence. Avoid tying them too tightly, as this can restrict their growth. Regularly check the ties and adjust them as needed to ensure that the stalks are supported without being constricted. You can also use small clips or hooks to attach the stalks to the fence. The goal is to encourage the plants to grow upwards along the fence, rather than sprawling outwards.
3. What are the best celery varieties for growing along a fence?
While most celery varieties can be grown along a fence, some are better suited for this method than others. Look for varieties that are relatively compact and have strong, upright growth habits. Some popular choices include ‘Utah Tall Improved’, ‘Conquistador’, and ‘Giant Red’. These varieties tend to be less prone to sprawling and are easier to train along a fence. Experiment with different varieties to see which ones thrive best in your specific climate and growing conditions.
4. How much sunlight does celery need when grown along a fence?
Celery requires at least six hours of sunlight per day to thrive. When growing celery along a fence, make sure that the location receives adequate sunlight. If the fence casts a shadow for part of the day, consider planting the celery on the side of the fence that receives the most sunlight. You can also use reflective materials, such as aluminum foil or white paint, to bounce more sunlight onto the plants.
5. How often should I water celery grown along a fence?
Celery is a water-loving plant and requires consistent moisture to thrive. When growing celery along a fence, water the plants deeply and regularly, especially during hot, dry weather. Aim to keep the soil consistently moist, but not waterlogged. Check the soil moisture regularly by sticking your finger into the soil. If the top inch of soil feels dry, it’s time to water. Mulching around the base of the plants can help to retain moisture and reduce the need for frequent watering.
6. What are some common pests and diseases that affect celery, and how can I prevent them?
Celery is susceptible to several common pests and diseases, including aphids, celery leaf miners, and celery blight. To prevent these problems, practice good garden hygiene, such as removing weeds and debris from around the plants. Inspect the plants regularly for signs of pests or diseases and take action promptly if you notice any problems. You can use organic pest control methods, such as insecticidal soap or neem oil, to control aphids and other pests. To prevent celery blight, choose disease-resistant varieties and avoid overhead watering.
7. How do I harvest celery grown along a fence?
You can harvest celery stalks as needed once they reach a desirable size. To harvest, simply cut the stalks at the base of the plant with a sharp knife. You can harvest individual stalks or the entire plant at once. If you only harvest a few stalks at a time, the plant will continue to produce new stalks. After harvesting, wash the celery stalks thoroughly and store them in the refrigerator.
8. Can I grow celery along a fence in containers?
Yes, you can grow celery along a fence in containers. This is a great option for gardeners who have limited space or who want to grow celery on a balcony or patio. Choose large containers that are at least 12 inches deep and wide. Fill the containers with a well-draining potting mix and plant the celery seedlings. Place the containers against a fence or wall and train the celery stalks to grow upwards. Water and fertilize the plants regularly, and provide them with plenty of sunlight.
9. What are some good companion plants for celery?
Celery benefits from being planted alongside certain companion plants. Some good companion plants for celery include onions, garlic, marigolds, and nasturtiums. Onions and garlic help to deter pests, while marigolds and nasturtiums attract beneficial insects that prey on pests. Companion planting can help to create a healthier and more productive garden.
10. How can I improve the flavor of my home-grown celery?
The flavor of home-grown celery can be enhanced by providing the plants with optimal growing conditions. Make sure that the plants receive plenty of sunlight, water, and nutrients. You can also blanch the celery stalks by wrapping them in paper or cardboard for a few weeks before harvesting. Blanching reduces the amount of chlorophyll in the stalks, resulting in a milder, sweeter flavor.
Leave a Comment