
Grow Cauliflower at Home? Absolutely! Imagine harvesting your own crisp, creamy cauliflower, knowing exactly where it came from and how it was grown. Forget those bland, overpriced heads at the grocery store – with a few simple tricks, you can cultivate this nutritional powerhouse right in your backyard, or even in containers on your balcony!
Cauliflower, a descendant of wild cabbage, has been enjoyed for centuries. Originating in the Mediterranean, it gradually made its way across the globe, becoming a staple in diverse cuisines. From creamy soups to roasted delights, its versatility is undeniable. But let’s be honest, buying cauliflower can be a gamble. Sometimes it’s perfect, other times it’s… well, less than ideal. That’s where the magic of DIY comes in!
I’m here to share some easy-to-follow home gardening tricks that will empower you to grow cauliflower at home successfully, even if you’re a complete beginner. We’ll cover everything from choosing the right variety and preparing your soil to protecting your precious plants from pests and diseases. Why settle for store-bought when you can enjoy the satisfaction of nurturing your own delicious, healthy cauliflower from seed to table? Let’s get started!
Growing Cauliflower at Home: A Beginner’s Guide
Hey there, fellow gardening enthusiasts! Ever dreamt of harvesting your own crisp, delicious cauliflower right from your backyard? Well, dream no more! Growing cauliflower at home is totally achievable, even for beginners. It might seem a little intimidating at first, but with the right knowledge and a little patience, you’ll be enjoying homegrown cauliflower in no time. I’m going to walk you through everything you need to know, from choosing the right variety to dealing with pesky pests. Let’s get started!
Choosing the Right Cauliflower Variety
First things first, you need to pick the perfect cauliflower variety for your climate and growing season. Different varieties mature at different rates, so it’s important to choose one that will thrive in your area.
* Consider your climate: If you live in a warmer climate, opt for heat-tolerant varieties like ‘Snow Crown’ or ‘Cheddar’. For cooler climates, ‘Snowball Y Improved’ or ‘Early White Vienna’ are excellent choices.
* Think about your growing season: Cauliflower needs a long growing season (around 55-100 days), so make sure you have enough time before the first frost. If you have a shorter growing season, choose early-maturing varieties.
* Explore different colors: Cauliflower comes in more than just white! You can find purple, orange, and green varieties, which add a fun and colorful twist to your garden and your plate. ‘Graffiti’ (purple) and ‘Cheddar’ (orange) are popular choices.
* Disease resistance: Look for varieties that are resistant to common cauliflower diseases like black rot and clubroot. This will save you a lot of headaches down the road.
Preparing the Soil
Cauliflower is a heavy feeder, meaning it needs nutrient-rich soil to thrive. Proper soil preparation is crucial for a successful harvest.
* Choose a sunny location: Cauliflower needs at least 6 hours of direct sunlight per day.
* Test your soil: A soil test will tell you the pH level and nutrient content of your soil. Cauliflower prefers a slightly acidic to neutral pH (6.0-7.0).
* Amend the soil: Based on your soil test results, amend the soil with compost, well-rotted manure, or other organic matter to improve drainage and fertility. I usually add a generous amount of compost to my garden beds before planting.
* Ensure good drainage: Cauliflower doesn’t like soggy soil, so make sure your soil drains well. If you have heavy clay soil, consider adding sand or perlite to improve drainage.
* Work the soil: Loosen the soil to a depth of at least 12 inches to allow the roots to grow easily.
Starting Cauliflower Seeds (Optional)
While you can buy cauliflower seedlings from a nursery, starting your own seeds gives you more control over the process and allows you to choose from a wider variety of options.
1. Start seeds indoors: About 4-6 weeks before the last expected frost, sow cauliflower seeds indoors in seed trays or small pots filled with seed-starting mix.
2. Planting depth: Plant the seeds about ¼ inch deep.
3. Keep the soil moist: Water the seeds gently and keep the soil consistently moist but not soggy.
4. Provide warmth: Place the seed trays in a warm location (around 70-75°F) or use a heat mat to speed up germination.
5. Provide light: Once the seedlings emerge, provide them with plenty of light. A sunny windowsill or grow lights will work well.
6. Harden off the seedlings: Before transplanting the seedlings outdoors, you need to harden them off. This means gradually exposing them to outdoor conditions over a period of 7-10 days. Start by placing them outside for a few hours each day in a sheltered location, gradually increasing the amount of time they spend outdoors.
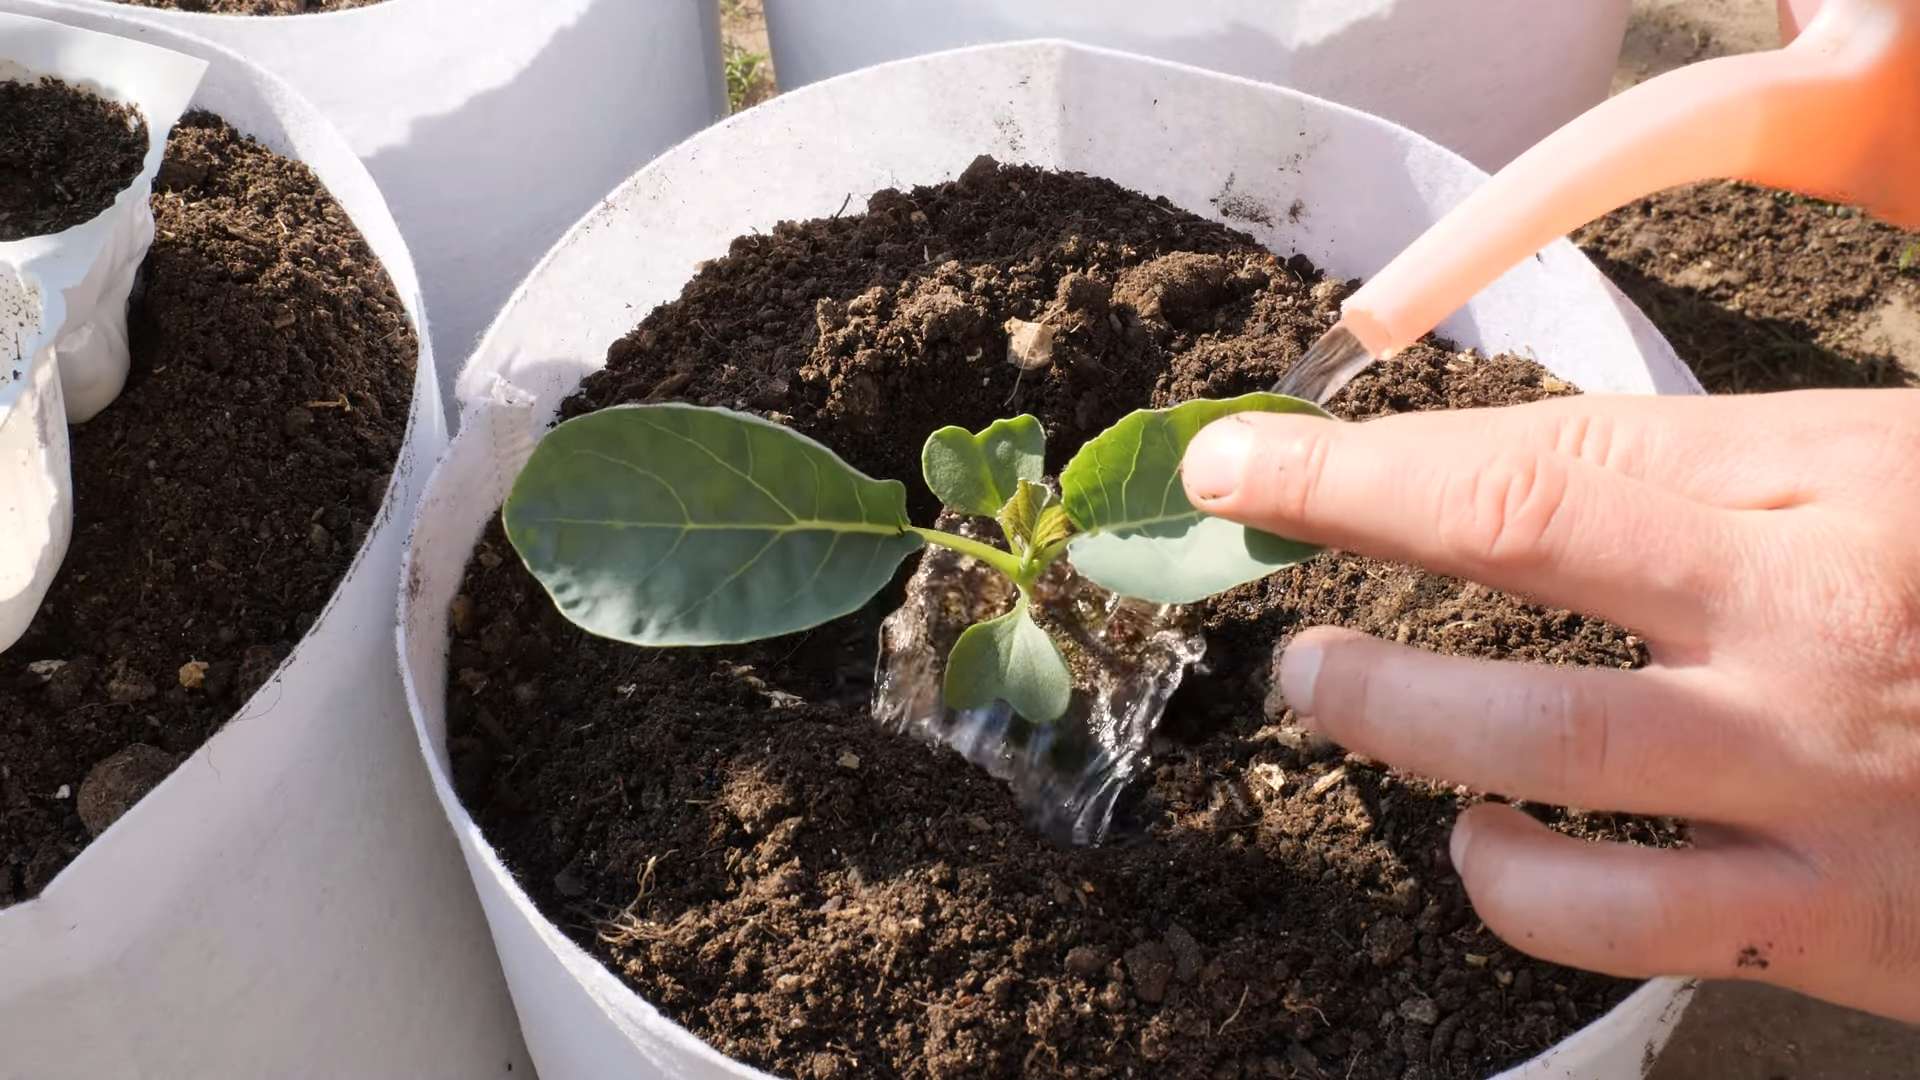
Transplanting Cauliflower Seedlings
Whether you started your own seeds or bought seedlings from a nursery, transplanting them into your garden is a crucial step.
1. Choose the right time: Transplant cauliflower seedlings outdoors 2-3 weeks before the last expected frost in spring, or in late summer for a fall harvest.
2. Prepare the planting holes: Dig holes that are slightly larger than the root balls of the seedlings. Space the holes 18-24 inches apart.
3. Carefully remove the seedlings: Gently remove the seedlings from their containers, being careful not to damage the roots.
4. Plant the seedlings: Place the seedlings in the holes and backfill with soil. Make sure the top of the root ball is level with the soil surface.
5. Water thoroughly: Water the seedlings thoroughly after planting.
6. Mulch around the plants: Apply a layer of mulch around the plants to help retain moisture, suppress weeds, and regulate soil temperature. I like to use straw or wood chips.
Caring for Your Cauliflower Plants
Once your cauliflower plants are in the ground, it’s important to provide them with the care they need to thrive.
* Water regularly: Cauliflower needs consistent moisture, especially during hot weather. Water deeply and regularly, aiming for about 1-2 inches of water per week.
* Fertilize regularly: As heavy feeders, cauliflower plants need regular fertilization. Use a balanced fertilizer or side-dress with compost or well-rotted manure every few weeks.
* Weed regularly: Keep the area around your cauliflower plants free of weeds, which can compete for nutrients and water.
* Protect from pests: Cauliflower is susceptible to several pests, including cabbage worms, aphids, and flea beetles. I’ll discuss pest control in more detail below.
* Blanching (for white varieties): When the cauliflower head reaches about 2-3 inches in diameter, you’ll need to blanch it to keep it white. This involves tying the outer leaves together over the head to protect it from sunlight. This prevents the head from turning yellow or green. You can use twine, rubber bands, or even clothespins to tie the leaves together. Check the head regularly and harvest when it reaches the desired size. Colored varieties do not need blanching.
Dealing with Pests and Diseases
Unfortunately, cauliflower is a favorite snack for many garden pests. Here’s how to protect your plants:
* Cabbage worms: These green caterpillars can quickly devour cauliflower leaves. Handpicking them off the plants is an effective method, especially for small infestations. You can also use Bacillus thuringiensis (Bt), a natural insecticide that is safe for humans and beneficial insects.
* Aphids: These tiny insects suck the sap from plants, causing them to weaken and become distorted. Spraying the plants with a strong stream of water can dislodge aphids. You can also use insecticidal soap or neem oil.
* Flea beetles: These small, jumping beetles can create tiny holes in cauliflower leaves. Covering the plants with row covers can prevent flea beetles from reaching them. You can also use diatomaceous earth, a natural insecticide made from fossilized algae.
* Clubroot: This soilborne disease causes the roots of cauliflower plants to become swollen and distorted. To prevent clubroot, choose disease-resistant varieties, practice crop rotation, and amend the soil with lime to raise the pH.
* Black rot: This bacterial disease causes dark lesions on cauliflower leaves. To prevent black rot, choose disease-resistant varieties, avoid overhead watering, and practice crop rotation.
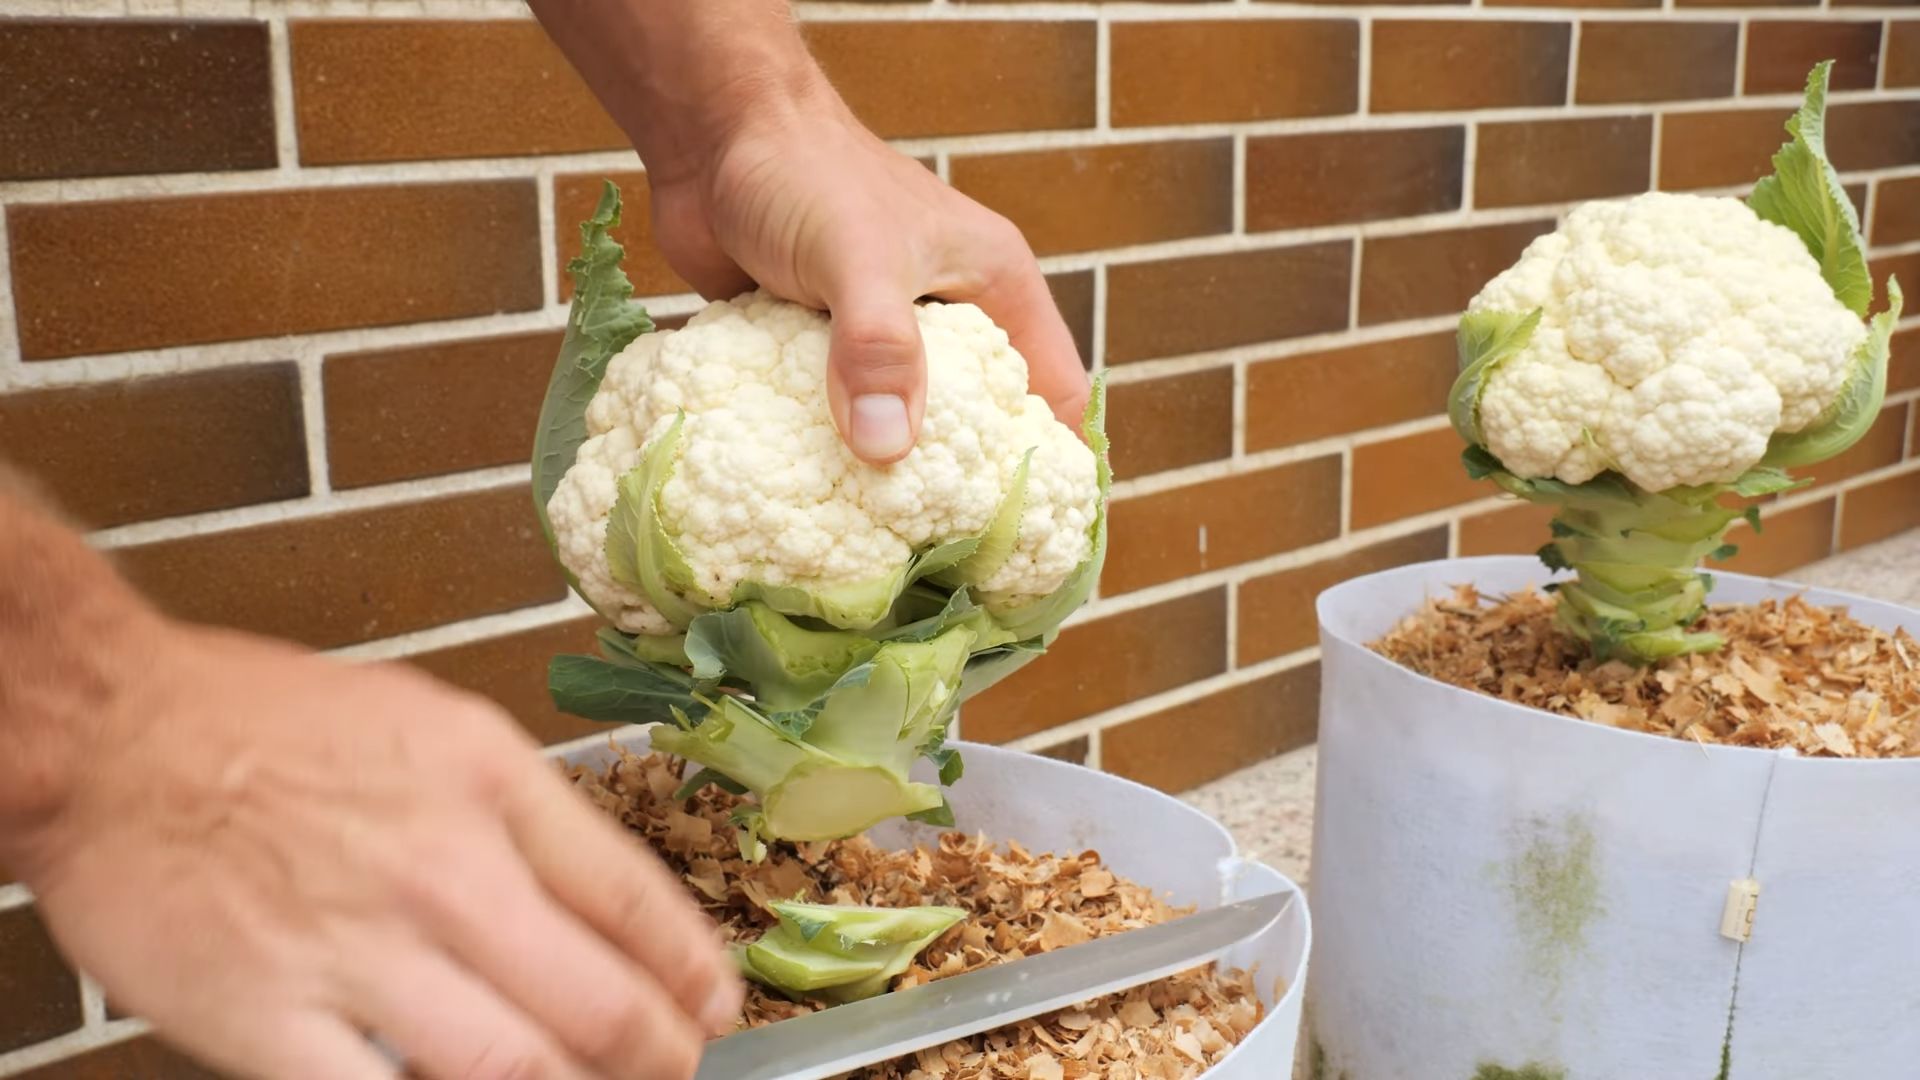
Harvesting Your Cauliflower
The moment you’ve been waiting for! Harvesting your homegrown cauliflower is incredibly rewarding.
1. Check for maturity: Cauliflower is ready to harvest when the head is firm, compact, and reaches the desired size (usually 6-8 inches in diameter).
2. Cut the head: Use a sharp knife to cut the head from the plant, leaving a few leaves attached to protect the head.
3. Harvest in the morning: Harvest cauliflower in the morning when the temperatures are cooler.
4. Store properly: Store cauliflower in the refrigerator for up to a week.
Troubleshooting Common Problems
Even with the best care, you might encounter some problems while growing cauliflower. Here are some common issues and how to address them:
* Buttoning: This occurs when the cauliflower head forms prematurely and remains small. It can be caused by stress, such as lack of water or nutrients. Make sure to water and fertilize your plants regularly.
* Loose heads: This occurs when the cauliflower head is not compact and has gaps between the florets. It can be caused by hot weather or inconsistent watering. Choose heat-tolerant varieties and water regularly.
* Yellowing heads: This occurs when the cauliflower head is exposed to sunlight. Blanching the head will prevent it from turning yellow.
Enjoying Your Homegrown Cauliflower
Congratulations! You’ve successfully grown your own cauliflower. Now it’s time to enjoy the fruits (or rather, vegetables) of your labor. Cauliflower
Conclusion
So, there you have it! Growing cauliflower at home might seem daunting at first, but with a little patience, the right techniques, and this simple guide, you can enjoy fresh, delicious, and organically grown cauliflower straight from your own garden. Forget those expensive, often lackluster heads from the grocery store. Imagine the satisfaction of harvesting your own crisp, white (or purple, or orange!) cauliflower, knowing exactly where it came from and how it was grown.
This isn’t just about saving money; it’s about connecting with your food, understanding the growing process, and enjoying the unparalleled flavor of homegrown produce. Plus, it’s a fantastic way to get some exercise, relieve stress, and beautify your outdoor space.
Why is this DIY cauliflower growing trick a must-try? Because it empowers you to take control of your food source, reduces your reliance on commercial agriculture, and provides you with a healthier, tastier alternative. It’s also incredibly rewarding to nurture a plant from seed to harvest.
Looking for variations? Consider these options to personalize your cauliflower growing experience:
* Experiment with different varieties: Beyond the standard white cauliflower, explore colorful options like purple Graffiti, orange Cheddar, or Romanesco cauliflower with its unique fractal pattern. Each variety offers a slightly different flavor profile and visual appeal.
* Succession planting: Plant new cauliflower seedlings every few weeks to ensure a continuous harvest throughout the growing season. This is especially useful in regions with longer growing seasons.
* Companion planting: Plant beneficial companion plants alongside your cauliflower to deter pests and improve soil health. Marigolds, nasturtiums, and herbs like rosemary and thyme are excellent choices.
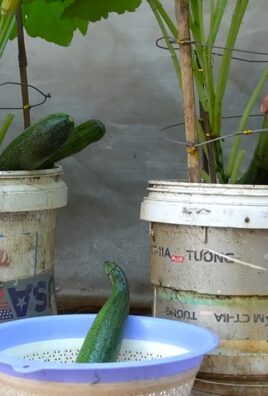
* Container gardening: If you have limited space, you can successfully grow cauliflower in large containers. Choose a pot that is at least 18 inches in diameter and depth, and use a high-quality potting mix.
* Hydroponics: For the more adventurous gardener, consider growing cauliflower hydroponically. This method allows for precise control over nutrient levels and can result in faster growth and higher yields.
Don’t be afraid to experiment and adapt these techniques to suit your specific climate, soil conditions, and personal preferences. The key is to observe your plants closely, learn from your mistakes, and enjoy the process.
We wholeheartedly encourage you to give this DIY cauliflower growing method a try. It’s a worthwhile investment of your time and effort, and the rewards are well worth it. Once you’ve harvested your first homegrown cauliflower, you’ll never look at store-bought cauliflower the same way again.
So, grab your seeds, prepare your soil, and get ready to embark on a rewarding gardening adventure. And most importantly, don’t forget to share your experiences with us! We’d love to hear about your successes, challenges, and any tips or tricks you’ve discovered along the way. Share your photos and stories in the comments section below, and let’s build a community of passionate home gardeners. Let us know how your journey to grow cauliflower at home goes!
Frequently Asked Questions (FAQ)
How long does it take to grow cauliflower from seed?
Growing cauliflower from seed to harvest typically takes between 75 and 85 days, depending on the variety and growing conditions. Starting seeds indoors 6-8 weeks before the last expected frost can give you a head start. Keep in mind that some varieties may mature faster than others, so always check the seed packet for specific information. Factors like temperature, sunlight, and soil fertility can also influence the growth rate.
What are the most common problems when growing cauliflower and how can I prevent them?
Several common problems can affect cauliflower growth. Cabbage worms and cabbage loopers are frequent pests that can damage the leaves. You can prevent them by using row covers, handpicking the worms, or applying Bacillus thuringiensis (Bt), a natural insecticide. Clubroot is a fungal disease that causes swollen roots and stunted growth. To prevent clubroot, ensure good soil drainage, maintain a soil pH of 6.5-7.0, and practice crop rotation. Black rot is another bacterial disease that can cause yellowing and rotting of the leaves. Use disease-free seeds, avoid overhead watering, and remove infected plants promptly to prevent its spread. Buttoning, where small, premature heads form, can be caused by stress factors like nutrient deficiencies, temperature fluctuations, or transplant shock. Ensure consistent watering, fertilize regularly, and protect young plants from extreme weather conditions to prevent buttoning.
What kind of soil is best for growing cauliflower?
Cauliflower thrives in well-drained, fertile soil that is rich in organic matter. The ideal soil pH is between 6.5 and 7.0. Before planting, amend the soil with compost or well-rotted manure to improve its structure and nutrient content. Cauliflower needs consistent moisture, so the soil should retain water well but also drain freely to prevent root rot. If your soil is heavy clay, consider adding sand or perlite to improve drainage. A soil test can help you determine the nutrient levels and pH of your soil, allowing you to make necessary amendments before planting.
How much sunlight does cauliflower need?
Cauliflower requires at least 6 hours of direct sunlight per day to grow properly. Insufficient sunlight can lead to leggy growth, smaller heads, and reduced yields. Choose a planting location that receives full sun throughout the day. If you live in a hot climate, providing some afternoon shade can help prevent the cauliflower from bolting (going to seed prematurely).
How often should I water cauliflower?
Cauliflower needs consistent moisture, especially during head formation. Water deeply and regularly, aiming for about 1-1.5 inches of water per week. Avoid overhead watering, as this can promote fungal diseases. Instead, water at the base of the plant. Mulching around the plants can help retain moisture and suppress weeds. Check the soil moisture regularly and adjust your watering schedule based on weather conditions.
When and how should I fertilize cauliflower?
Cauliflower is a heavy feeder and benefits from regular fertilization. Apply a balanced fertilizer (e.g., 10-10-10) at planting time, following the instructions on the fertilizer package. Side-dress with a nitrogen-rich fertilizer when the heads begin to form. You can also use organic fertilizers like compost tea or fish emulsion. Avoid over-fertilizing, as this can lead to excessive foliage growth at the expense of head development.
How do I know when my cauliflower is ready to harvest?
Cauliflower is ready to harvest when the head is firm, compact, and reaches the desired size (typically 6-8 inches in diameter). The florets should be tightly closed and not starting to separate. Check the seed packet for the expected head size for your specific variety. Use a sharp knife to cut the head from the plant, leaving a few leaves attached to protect the head. Harvest in the morning when the plant is cool to prevent wilting.
Can I grow cauliflower in containers?
Yes, you can successfully grow cauliflower in containers, but you’ll need to choose a large pot (at least 18 inches in diameter and depth) to accommodate the plant’s root system. Use a high-quality potting mix that is well-draining and rich in organic matter. Container-grown cauliflower may require more frequent watering and fertilization than plants grown in the ground. Choose a sunny location for your container and monitor the plant closely for signs of pests or diseases.
What is blanching cauliflower and why is it important?
Blanching cauliflower involves covering the developing head
So, there you have it! Growing cauliflower at home might seem daunting at first, but with a little patience, the right techniques, and this simple guide, you can enjoy fresh, delicious, and organically grown cauliflower straight from your own garden. Forget those expensive, often lackluster heads from the grocery store. Imagine the satisfaction of harvesting your own crisp, white (or purple, or orange!) cauliflower, knowing exactly where it came from and how it was grown.
This isn’t just about saving money; it’s about connecting with your food, understanding the growing process, and enjoying the unparalleled flavor of homegrown produce. Plus, it’s a fantastic way to get some exercise, relieve stress, and beautify your outdoor space.
Why is this DIY cauliflower growing trick a must-try? Because it empowers you to take control of your food source, reduces your reliance on commercial agriculture, and provides you with a healthier, tastier alternative. It’s also incredibly rewarding to nurture a plant from seed to harvest.
Looking for variations? Consider these options to personalize your cauliflower growing experience:
* Experiment with different varieties: Beyond the standard white cauliflower, explore colorful options like purple Graffiti, orange Cheddar, or Romanesco cauliflower with its unique fractal pattern. Each variety offers a slightly different flavor profile and visual appeal.
* Succession planting: Plant new cauliflower seedlings every few weeks to ensure a continuous harvest throughout the growing season. This is especially useful in regions with longer growing seasons.
* Companion planting: Plant beneficial companion plants alongside your cauliflower to deter pests and improve soil health. Marigolds, nasturtiums, and herbs like rosemary and thyme are excellent choices.
* Container gardening: If you have limited space, you can successfully grow cauliflower in large containers. Choose a pot that is at least 18 inches in diameter and depth, and use a high-quality potting mix.
* Hydroponics: For the more adventurous gardener, consider growing cauliflower hydroponically. This method allows for precise control over nutrient levels and can result in faster growth and higher yields.
Don’t be afraid to experiment and adapt these techniques to suit your specific climate, soil conditions, and personal preferences. The key is to observe your plants closely, learn from your mistakes, and enjoy the process.
We wholeheartedly encourage you to give this DIY cauliflower growing method a try. It’s a worthwhile investment of your time and effort, and the rewards are well worth it. Once you’ve harvested your first homegrown cauliflower, you’ll never look at store-bought cauliflower the same way again.
So, grab your seeds, prepare your soil, and get ready to embark on a rewarding gardening adventure. And most importantly, don’t forget to share your experiences with us! We’d love to hear about your successes, challenges, and any tips or tricks you’ve discovered along the way. Share your photos and stories in the comments section below, and let’s build a community of passionate home gardeners. Let us know how your journey to grow cauliflower at home goes!
Frequently Asked Questions (FAQ)
How long does it take to grow cauliflower from seed?
Growing cauliflower from seed to harvest typically takes between 75 and 85 days, depending on the variety and growing conditions. Starting seeds indoors 6-8 weeks before the last expected frost can give you a head start. Keep in mind that some varieties may mature faster than others, so always check the seed packet for specific information. Factors like temperature, sunlight, and soil fertility can also influence the growth rate.
What are the most common problems when growing cauliflower and how can I prevent them?
Several common problems can affect cauliflower growth. Cabbage worms and cabbage loopers are frequent pests that can damage the leaves. You can prevent them by using row covers, handpicking the worms, or applying Bacillus thuringiensis (Bt), a natural insecticide. Clubroot is a fungal disease that causes swollen roots and stunted growth. To prevent clubroot, ensure good soil drainage, maintain a soil pH of 6.5-7.0, and practice crop rotation. Black rot is another bacterial disease that can cause yellowing and rotting of the leaves. Use disease-free seeds, avoid overhead watering, and remove infected plants promptly to prevent its spread. Buttoning, where small, premature heads form, can be caused by stress factors like nutrient deficiencies, temperature fluctuations, or transplant shock. Ensure consistent watering, fertilize regularly, and protect young plants from extreme weather conditions to prevent buttoning.
What kind of soil is best for growing cauliflower?
Cauliflower thrives in well-drained, fertile soil that is rich in organic matter. The ideal soil pH is between 6.5 and 7.0. Before planting, amend the soil with compost or well-rotted manure to improve its structure and nutrient content. Cauliflower needs consistent moisture, so the soil should retain water well but also drain freely to prevent root rot. If your soil is heavy clay, consider adding sand or perlite to improve drainage. A soil test can help you determine the nutrient levels and pH of your soil, allowing you to make necessary amendments before planting.
How much sunlight does cauliflower need?
Cauliflower requires at least 6 hours of direct sunlight per day to grow properly. Insufficient sunlight can lead to leggy growth, smaller heads, and reduced yields. Choose a planting location that receives full sun throughout the day. If you live in a hot climate, providing some afternoon shade can help prevent the cauliflower from bolting (going to seed prematurely).
How often should I water cauliflower?
Cauliflower needs consistent moisture, especially during head formation. Water deeply and regularly, aiming for about 1-1.5 inches of water per week. Avoid overhead watering, as this can promote fungal diseases. Instead, water at the base of the plant. Mulching around the plants can help retain moisture and suppress weeds. Check the soil moisture regularly and adjust your watering schedule based on weather conditions.
When and how should I fertilize cauliflower?
Cauliflower is a heavy feeder and benefits from regular fertilization. Apply a balanced fertilizer (e.g., 10-10-10) at planting time, following the instructions on the fertilizer package. Side-dress with a nitrogen-rich fertilizer when the heads begin to form. You can also use organic fertilizers like compost tea or fish emulsion. Avoid over-fertilizing, as this can lead to excessive foliage growth at the expense of head development.
How do I know when my cauliflower is ready to harvest?
Cauliflower is ready to harvest when the head is firm, compact, and reaches the desired size (typically 6-8 inches in diameter). The florets should be tightly closed and not starting to separate. Check the seed packet for the expected head size for your specific variety. Use a sharp knife to cut the head from the plant, leaving a few leaves attached to protect the head. Harvest in the morning when the plant is cool to prevent wilting.
Can I grow cauliflower in containers?
Yes, you can successfully grow cauliflower in containers, but you’ll need to choose a large pot (at least 18 inches in diameter and depth) to accommodate the plant’s root system. Use a high-quality potting mix that is well-draining and rich in organic matter. Container-grown cauliflower may require more frequent watering and fertilization than plants grown in the ground. Choose a sunny location for your container and monitor the plant closely for signs of pests or diseases.
What is blanching cauliflower and why is it important?
Blanching cauliflower involves covering the developing head with its own leaves to protect it from sunlight. This prevents the head from turning yellow or brown and helps maintain its white color and delicate flavor. To blanch cauliflower, simply fold the large outer leaves over the head and secure them with twine or rubber bands. Start blanching when the head is about 2-3 inches in diameter and continue until harvest. Some self-blanching varieties have leaves that naturally curl inward to protect the head.
Can I save seeds from my cauliflower plants?
Saving seeds from cauliflower is possible, but it requires allowing the plant to overwinter and produce flowers in the second year. Cauliflower is a biennial plant, meaning it completes its life cycle over two years. In the first year, it produces the head that we eat. If you want to save seeds, you’ll need to protect the plant from freezing temperatures during the winter. In the second year, the plant will produce flowers, which will eventually develop into seed pods. Allow the seed pods to dry on the plant before harvesting them. Keep in mind that cauliflower is cross-pollinated, so the seeds may not produce plants that are identical to the parent plant.

Leave a Comment