
Grow Brussels Sprouts Containers: Ever dreamt of harvesting your own mini cabbages right from your patio? I know I have! There’s something incredibly satisfying about nurturing your own food, and Brussels sprouts, with their unique flavor and nutritional punch, are a fantastic choice. But let’s be honest, the idea of growing them can seem a little daunting, especially if you’re short on space.
Historically, Brussels sprouts have been cultivated in Belgium since the 16th century, eventually making their way into gardens worldwide. They’ve become a staple in many cuisines, offering a hearty and slightly nutty flavor that complements a variety of dishes. But what if you don’t have a sprawling garden to dedicate to these little green gems? That’s where the magic of container gardening comes in!
In this article, I’m going to share my favorite DIY tricks and hacks for successfully grow Brussels Sprouts Containers, even if you only have a small balcony or patio. We’ll cover everything from choosing the right container and soil to providing the perfect amount of sunlight and water. Forget the grocery store – with a little know-how, you can enjoy fresh, homegrown Brussels sprouts all season long. So, grab your gardening gloves, and let’s get started!
Growing Brussels Sprouts in Containers: A Complete DIY Guide
Okay, so you want to grow Brussels sprouts but don’t have a sprawling garden? No problem! I’m here to tell you that you absolutely can cultivate these mini cabbages in containers. It’s easier than you might think, and I’m going to walk you through every step. Let’s get started!
Choosing the Right Container and Soil
First things first, you need a good home for your Brussels sprouts. This is crucial for their success.
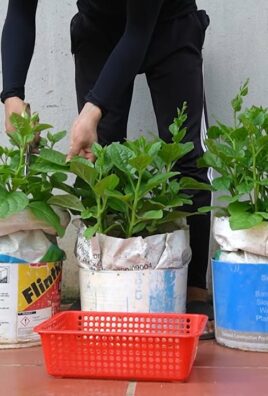
* Container Size: Brussels sprouts need room to grow, both above and below ground. I recommend a container that’s at least 12 inches in diameter and 12 inches deep. A 5-gallon bucket works great, but bigger is always better! Think about using a half wine barrel or a large, sturdy planter.
* Drainage: This is non-negotiable. Your container *must* have drainage holes. Brussels sprouts hate sitting in soggy soil, which can lead to root rot. If your container doesn’t have holes, drill some!
* Material: Plastic, terracotta, or even fabric pots will work. Just make sure they’re durable enough to hold the weight of the mature plant and the soil.
* Soil: Forget garden soil! It’s too heavy and compacts easily in containers. You need a well-draining potting mix. I like to use a mix of:
* 1 part compost (for nutrients)
* 1 part peat moss or coco coir (for moisture retention)
* 1 part perlite or vermiculite (for drainage)
Planting Your Brussels Sprouts
Now for the fun part – getting those little sprouts into their new home!
1. Starting from Seed (Optional): You can start Brussels sprouts from seed indoors about 4-6 weeks before the last expected frost.
* Sow seeds about ½ inch deep in seed-starting trays filled with seed-starting mix.
* Keep the soil consistently moist but not soggy.
* Provide plenty of light. A sunny windowsill or grow lights work well.
* Once the seedlings have a few sets of true leaves, you can transplant them into individual pots.
2. Buying Transplants (Recommended for Beginners): This is the easiest way to get started. Look for healthy-looking transplants at your local garden center. Choose plants that are about 4-6 inches tall and have a good green color. Avoid plants that are yellowing, wilting, or have signs of pests or diseases.
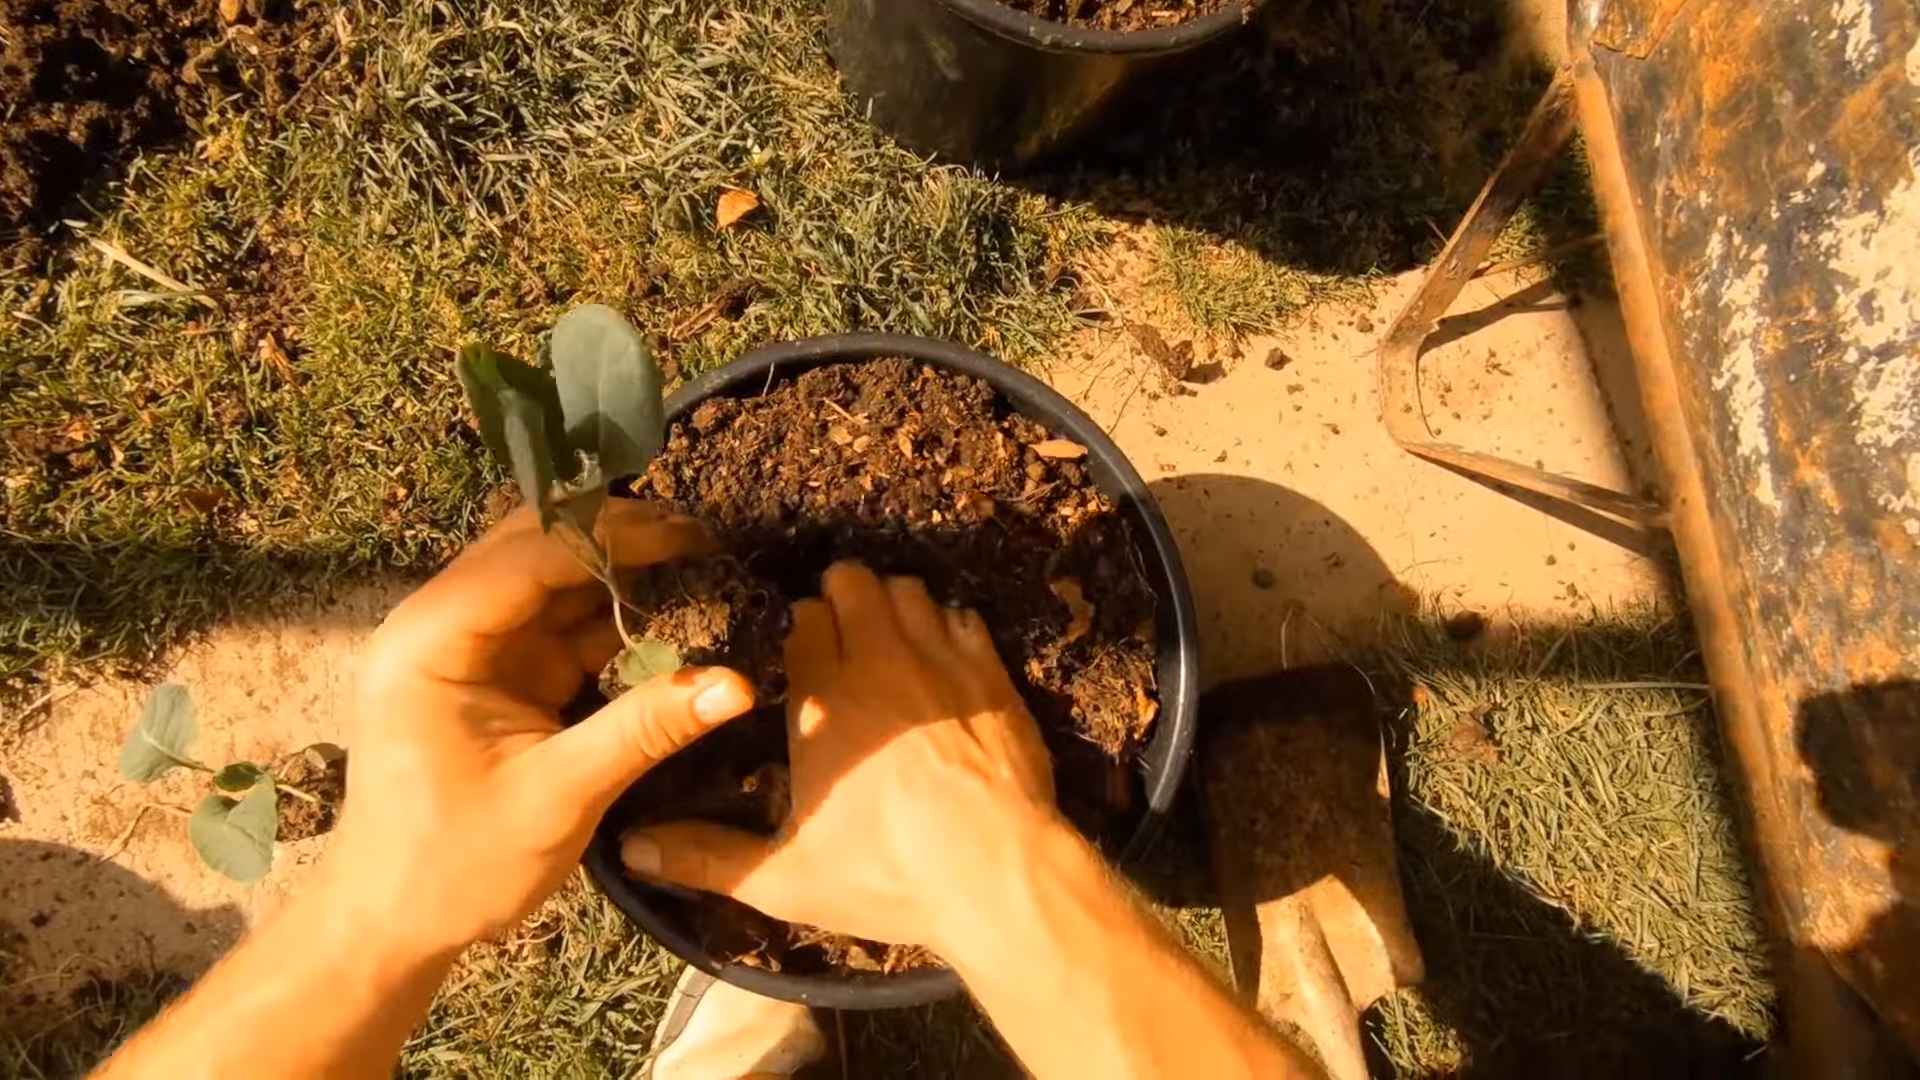
3. Planting the Transplants:
* Fill your container with the potting mix, leaving about an inch or two of space at the top.
* Gently remove the transplant from its nursery pot. Loosen the roots a bit with your fingers.
* Dig a hole in the potting mix that’s large enough to accommodate the root ball.
* Place the transplant in the hole and backfill with potting mix.
* Gently firm the soil around the base of the plant.
* Water thoroughly after planting.
Caring for Your Brussels Sprouts
This is where the real work begins, but don’t worry, it’s manageable!
1. Sunlight: Brussels sprouts need at least 6 hours of sunlight per day. Place your container in a sunny spot in your yard or on your balcony. If you don’t have enough sunlight, you might need to supplement with grow lights.
2. Watering: Water regularly, especially during hot, dry weather. The soil should be consistently moist but not soggy. Check the soil moisture by sticking your finger into the soil. If the top inch feels dry, it’s time to water. Avoid overhead watering, as this can lead to fungal diseases. Water at the base of the plant.
3. Fertilizing: Brussels sprouts are heavy feeders, so they need regular fertilization.
* Start fertilizing about 2-3 weeks after planting.
* Use a balanced fertilizer (e.g., 10-10-10) or a fertilizer specifically formulated for vegetables.
* Follow the instructions on the fertilizer label.
* You can also supplement with organic fertilizers like compost tea or fish emulsion.
4. Pest Control: Brussels sprouts are susceptible to several pests, including cabbage worms, aphids, and flea beetles.
* Cabbage Worms: These are green caterpillars that munch on the leaves. Handpick them off the plants or use Bacillus thuringiensis (Bt), a natural insecticide.
* Aphids: These are small, sap-sucking insects that can weaken the plant. Spray them off with a strong stream of water or use insecticidal soap.
* Flea Beetles: These are tiny beetles that jump when disturbed. They can create small holes in the leaves. Use row covers to protect the plants or spray with neem oil.
5. Disease Control: Brussels sprouts can also be affected by diseases like clubroot and black rot.
* Clubroot: This is a soilborne disease that causes swollen roots. Prevent it by ensuring good drainage and avoiding planting in soil that has previously been affected.
* Black Rot: This is a bacterial disease that causes yellowing and blackening of the leaves. Prevent it by avoiding overhead watering and ensuring good air circulation. Remove any infected leaves immediately.
6. Staking: As the Brussels sprouts grow taller, they may need staking to prevent them from falling over. Use bamboo stakes or tomato cages to support the plants.
Harvesting Your Brussels Sprouts
Finally, the moment you’ve been waiting for – harvesting your homegrown Brussels sprouts!
1. Timing: Brussels sprouts are typically ready to harvest about 90-100 days after planting. The sprouts should be firm and about 1-2 inches in diameter.
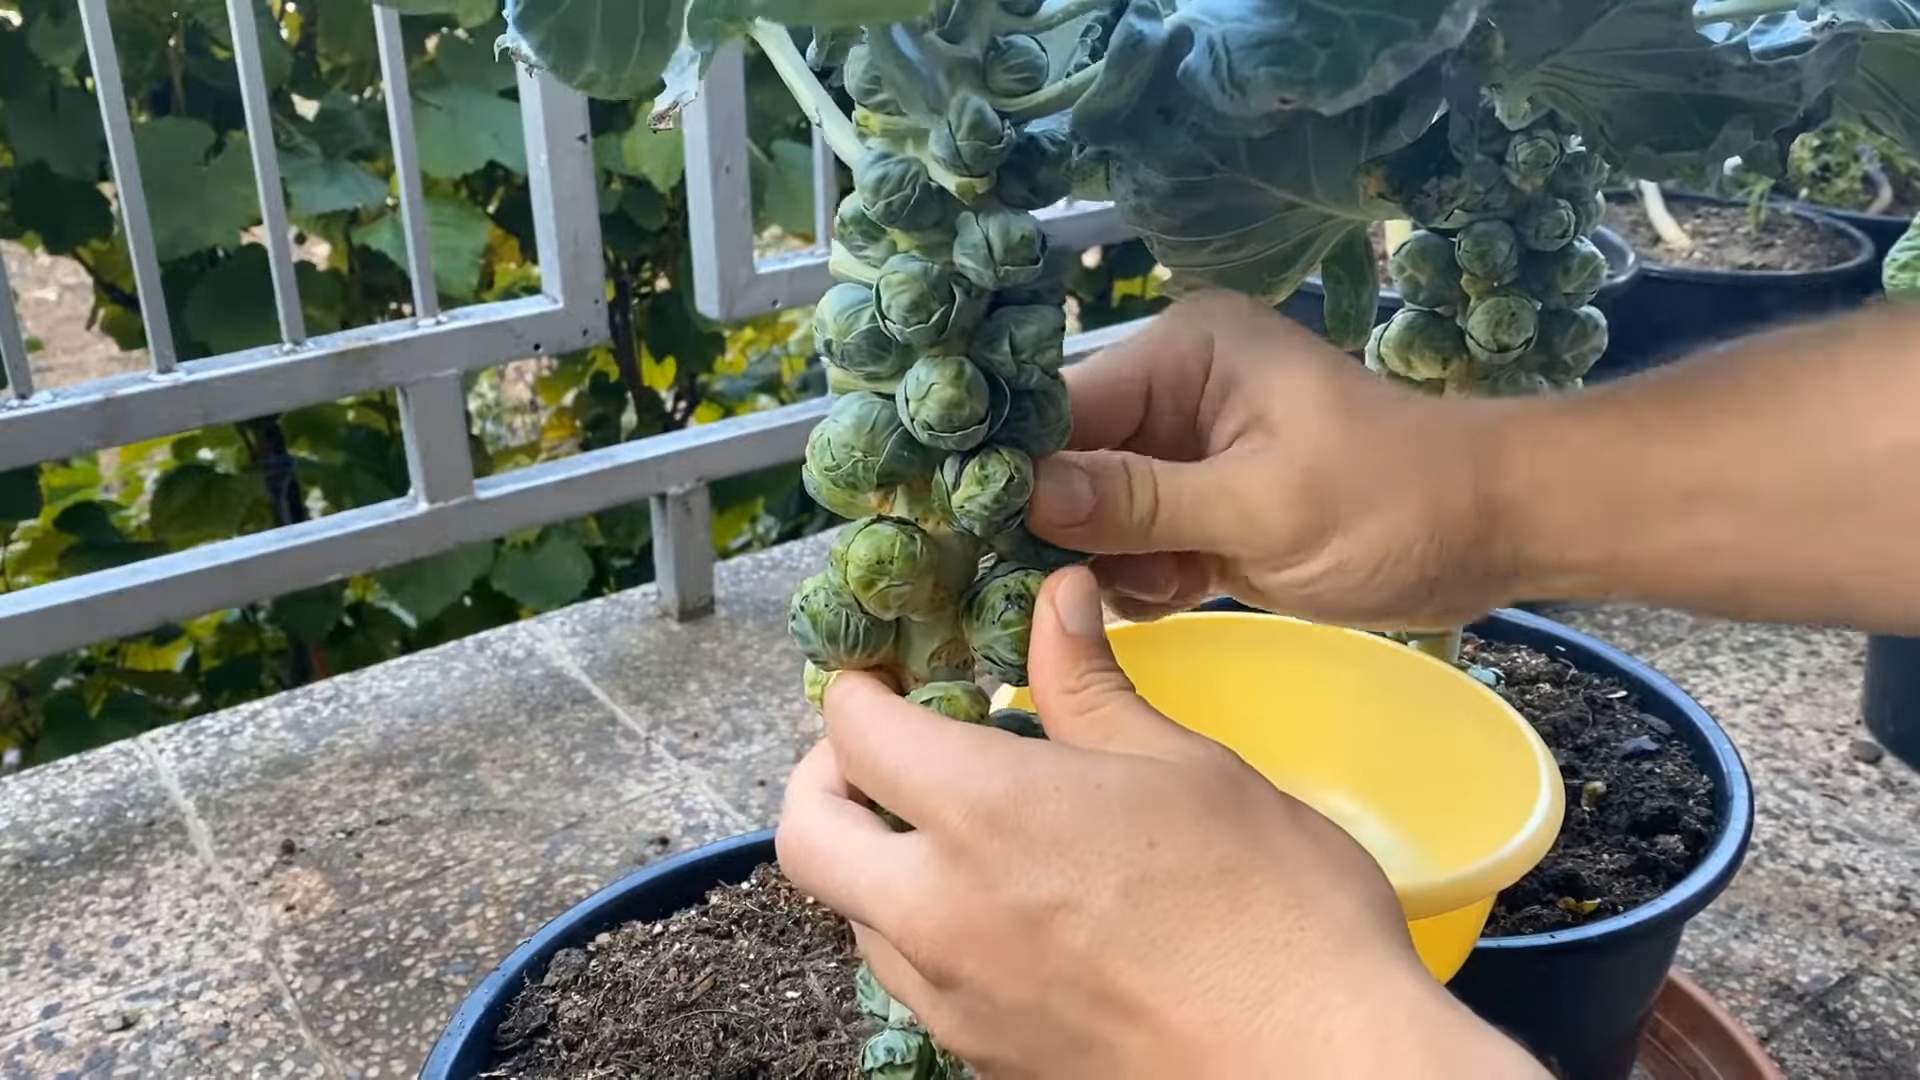
2. Harvesting Technique:
* Start harvesting from the bottom of the plant and work your way up.
* Twist the sprouts off the stem.
* You can harvest the sprouts gradually as they mature.
* After harvesting the sprouts, you can cut off the top of the plant to encourage the remaining sprouts to mature more quickly.
3. Storage: Brussels sprouts can be stored in the refrigerator for up to a week.
Troubleshooting Common Problems
Even with the best care, you might encounter some problems along the way. Here are a few common issues and how to address them:
* Yellowing Leaves: This could be a sign of nutrient deficiency, overwatering, or disease. Check the soil moisture and fertilize if necessary. If the problem persists, inspect the plant for signs of pests or diseases.
* Sprouts Not Forming: This could be due to insufficient sunlight, poor soil, or lack of fertilization. Make sure the plant is getting enough sunlight and fertilize regularly.
* Bitter Sprouts: Brussels sprouts can become bitter if they are exposed to frost or if they are not harvested at the right time. Harvest the sprouts before they are exposed to frost or after a light frost, which can actually improve their flavor.
* Pest Infestation: Regularly inspect the plants for signs of pests and take action immediately if you find any.
Tips for Success
Here are a few extra tips to help you grow the best Brussels sprouts possible:
* Choose the Right Variety: Some varieties of Brussels sprouts are better suited for container growing than others. Look for compact varieties like ‘Jade Cross’ or ‘Long Island Improved’.
* Rotate Your Crops: Avoid planting Brussels sprouts in the same container year after year. This can help prevent soilborne diseases.
* Mulch: Apply a layer of mulch around the base of the plant to help retain moisture and suppress weeds.
* Water deeply but infrequently: This encourages deep root growth, which makes the plant more drought-tolerant.
* Be patient: Brussels sprouts take a while to mature, so don’t get discouraged if you don’t see results right away.
Growing Brussels sprouts in containers is a rewarding experience. With a little bit of care and attention, you can enjoy fresh, homegrown sprouts even if you don’t have a traditional garden. Good luck, and happy gardening!
Conclusion
So, there you have it! Growing Brussels sprouts in containers isn’t just a possibility; it’s a rewarding and accessible gardening adventure, even if you’re short on space or new to the world of cultivation. We’ve walked through the essential steps, from selecting the right container and soil to nurturing your plants and protecting them from pests. But why should you actually take the plunge and try this DIY trick?
Simply put, growing your own Brussels sprouts offers a level of freshness and flavor that you just can’t replicate with store-bought produce. Imagine plucking perfectly formed sprouts right from your container, knowing exactly where they came from and what went into their growth. The taste difference is remarkable – a sweeter, more nuanced flavor that elevates any dish. Plus, there’s an undeniable satisfaction that comes from nurturing a plant from seedling to harvest.
Beyond the superior taste and personal fulfillment, container gardening offers unparalleled control. You can easily move your Brussels sprouts to chase the sun, protect them from harsh weather, or even bring them indoors during unexpected frosts. This level of flexibility is a game-changer, especially for those living in climates with unpredictable conditions.
But the beauty of this DIY project lies in its adaptability. Feel free to experiment with different Brussels sprouts varieties. ‘Long Island Improved’ is a classic choice, but consider trying ‘Redarling’ for a vibrant splash of color or ‘Jade Cross’ for its compact size and early maturity. You can also companion plant with herbs like thyme or rosemary to deter pests and enhance the flavor of your sprouts.
Don’t be afraid to get creative with your container design! Use repurposed materials like old buckets or wooden crates for a rustic touch. Or, opt for decorative planters that complement your outdoor space. The possibilities are endless!
Growing Brussels sprouts in containers is more than just a gardening project; it’s an opportunity to connect with nature, learn new skills, and enjoy the fruits (or rather, vegetables) of your labor. It’s a chance to embrace a more sustainable lifestyle and reduce your reliance on store-bought produce. And let’s be honest, there’s something incredibly satisfying about serving a meal made with ingredients you grew yourself.
So, what are you waiting for? Grab a container, some soil, and a packet of Brussels sprouts seeds, and embark on this exciting gardening journey. We’re confident that you’ll be amazed by the results.
And most importantly, we want to hear about your experience! Share your tips, tricks, and triumphs in the comments below. Let’s build a community of container gardening enthusiasts and inspire others to grow their own delicious Brussels sprouts. Happy gardening!
Frequently Asked Questions (FAQ)
What is the best time of year to start growing Brussels sprouts in containers?
The ideal time to start growing Brussels sprouts depends on your climate. In general, Brussels sprouts thrive in cooler weather, so they are typically planted in late spring or early summer for a fall harvest, or in late winter/early spring for a summer harvest in milder climates. Check your local planting calendar for specific recommendations based on your region’s average frost dates. Starting seeds indoors 6-8 weeks before the last expected frost is a great way to get a head start.
What size container is needed for growing Brussels sprouts?
Brussels sprouts need ample space to develop their root systems and produce a good yield. A container that is at least 12 inches in diameter and 12 inches deep is recommended for a single plant. However, a larger container, such as a 5-gallon bucket or a half-barrel planter, is even better. Ensure the container has adequate drainage holes to prevent waterlogging.
What type of soil is best for Brussels sprouts in containers?
Brussels sprouts prefer well-draining, fertile soil with a slightly acidic to neutral pH (around 6.0 to 7.0). A good quality potting mix amended with compost or other organic matter is ideal. Avoid using garden soil in containers, as it can become compacted and hinder drainage. You can also add slow-release fertilizer to the soil at planting time to provide essential nutrients throughout the growing season.
How often should I water my Brussels sprouts plants in containers?
Watering frequency depends on factors such as weather conditions, container size, and soil type. Generally, Brussels sprouts plants in containers need to be watered regularly to keep the soil consistently moist but not waterlogged. Check the soil moisture level by sticking your finger about an inch deep into the soil. If it feels dry, it’s time to water. Water deeply until excess water drains out of the bottom of the container. During hot, dry weather, you may need to water daily.
How much sunlight do Brussels sprouts need?
Brussels sprouts require at least 6 hours of direct sunlight per day to thrive. Choose a location for your container that receives plenty of sunlight. If you live in a particularly hot climate, providing some afternoon shade can help prevent the plants from overheating.
How do I fertilize Brussels sprouts in containers?
Brussels sprouts are heavy feeders and benefit from regular fertilization. Use a balanced fertilizer (e.g., 10-10-10) every 2-3 weeks during the growing season. You can also use organic fertilizers such as compost tea or fish emulsion. Follow the instructions on the fertilizer package for proper application rates.
What are some common pests and diseases that affect Brussels sprouts, and how can I control them?
Common pests that affect Brussels sprouts include aphids, cabbage worms, and flea beetles. Diseases include clubroot and downy mildew. To control pests, you can use insecticidal soap, neem oil, or Bacillus thuringiensis (Bt). To prevent diseases, ensure good air circulation, avoid overhead watering, and practice crop rotation. If you notice signs of disease, remove affected leaves promptly.
How do I harvest Brussels sprouts?
Brussels sprouts are typically ready to harvest when the sprouts are firm, green, and about 1-2 inches in diameter. Start harvesting from the bottom of the plant upwards, twisting or cutting off the sprouts. The lower sprouts mature first. You can harvest over several weeks as the sprouts mature.
Can I grow Brussels sprouts indoors?
While it’s possible to grow Brussels sprouts indoors, it can be challenging to provide them with the necessary sunlight and cool temperatures. If you want to try growing them indoors, choose a sunny location near a south-facing window and supplement with grow lights if needed. Ensure good air circulation and maintain a cool temperature (around 60-70°F).
How can I encourage my Brussels sprouts to produce more sprouts?
Pinching off the top of the plant (the terminal bud) about a month before the expected harvest can encourage the plant to put more energy into developing the sprouts. This will result in larger and more uniform sprouts. Also, make sure your plants are getting enough sunlight, water, and nutrients.
Leave a Comment