
Grow baby carrots at home? Absolutely! Imagine plucking perfectly petite, sweet baby carrots straight from your own backyard – it’s easier than you think, and incredibly rewarding. Forget those bland, store-bought carrots; with a few simple tricks and a little DIY magic, you can cultivate a vibrant harvest of these crunchy delights yourself.
For centuries, home gardening has been a cornerstone of self-sufficiency and a connection to nature. From ancient civilizations cultivating herbs and vegetables in their courtyards to the victory gardens of wartime, growing your own food has always been a way to nourish both body and soul. Now, you can participate in this time-honored tradition, even if you only have a small space.
Why should you learn to grow baby carrots at home? Well, besides the unparalleled flavor and freshness, it’s a fantastic way to save money, reduce your carbon footprint, and enjoy a relaxing, therapeutic hobby. Plus, knowing exactly where your food comes from gives you peace of mind. In this article, I’ll share my favorite DIY tricks and hacks to help you achieve a bountiful baby carrot harvest, even if you’re a complete beginner. Get ready to get your hands dirty and enjoy the sweet taste of success!
Grow Your Own Sweet & Crunchy Baby Carrots: A DIY Guide
Hey there, fellow gardening enthusiasts! Ever dreamt of plucking perfectly petite, sweet baby carrots straight from your own backyard? Well, dream no more! I’m going to walk you through the process of growing your own delicious baby carrots at home. It’s easier than you think, and the reward of fresh, homegrown goodness is totally worth it.
Choosing the Right Carrot Variety
Not all carrots are created equal, especially when it comes to baby carrots. While you *can* harvest any carrot variety early, some are specifically bred to be small and tender. Here are a few of my favorite varieties for baby carrots:
* ‘Thumbelina’: These are round, almost golf-ball shaped carrots, perfect for snacking and incredibly cute.
* ‘Paris Market’: Similar to Thumbelina, these are also round and mature quickly.
* ‘Little Finger’: As the name suggests, these are small and slender, with a sweet flavor.
* ‘Amsterdam Forcing’: These are long and thin, ideal if you prefer a more traditional carrot shape in a smaller size.
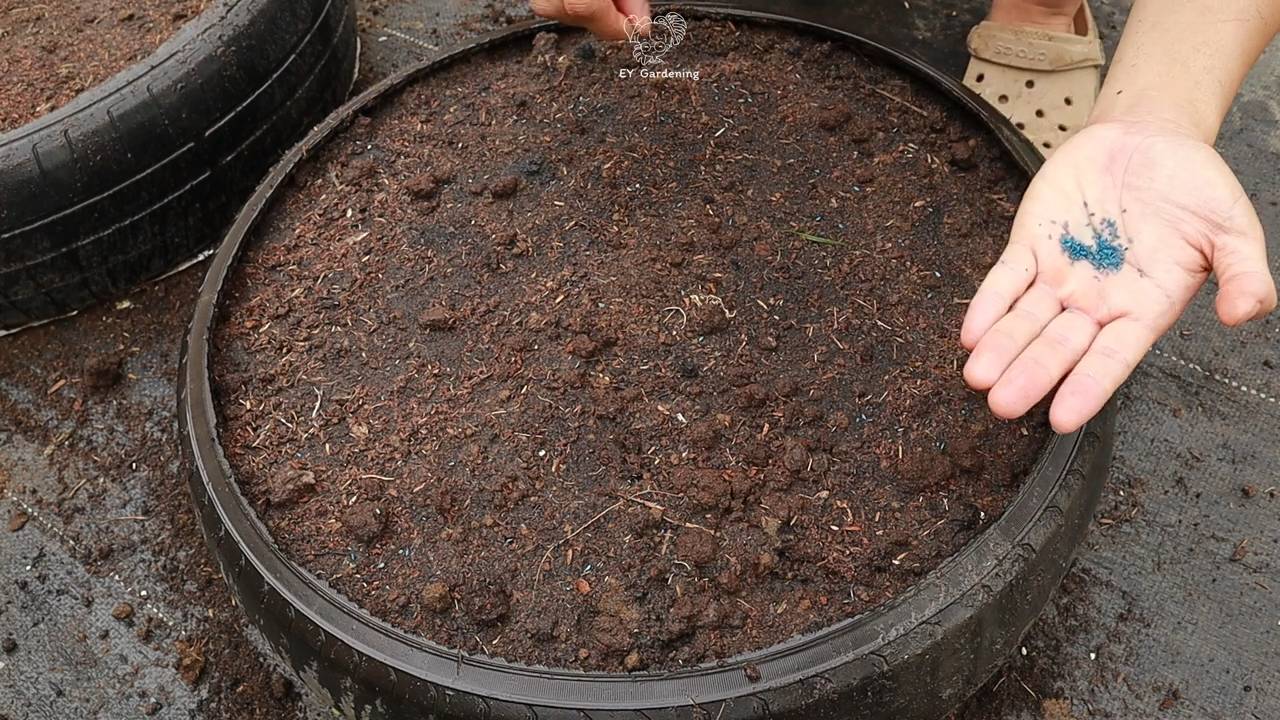
Preparing the Soil: The Key to Success
Carrots need loose, well-drained soil to thrive. Rocky or compacted soil will result in stunted, misshapen carrots. This is probably the most important step, so don’t skimp on the soil prep!
* Soil Testing: Before you even think about planting, test your soil’s pH. Carrots prefer a pH between 6.0 and 6.8. You can buy a soil testing kit at most garden centers.
* Loosening the Soil: Use a garden fork or tiller to loosen the soil to a depth of at least 12 inches. This will allow the carrot roots to grow freely.
* Removing Rocks and Debris: This is crucial! Pick out any rocks, stones, or large clumps of soil. Even small pebbles can cause carrots to fork or split.
* Adding Organic Matter: Amend the soil with plenty of compost or well-rotted manure. This will improve drainage, fertility, and soil structure. I usually add a 2-3 inch layer and work it in thoroughly.
* Creating Raised Beds (Optional): If your soil is particularly heavy or poorly drained, consider growing your carrots in raised beds. This will provide better drainage and warmer soil.
Planting Your Baby Carrot Seeds
Now for the fun part! Planting the seeds is relatively simple, but there are a few tricks to ensure success.
* Timing is Everything: Carrots are a cool-season crop, so plant them in early spring or late summer for a fall harvest. Check your local frost dates to determine the best planting time in your area. I usually aim for 2-3 weeks before the last expected frost in spring.
* Sowing the Seeds: Carrot seeds are tiny, so it’s easy to sow them too thickly. I like to use a seed dispenser or carefully sprinkle the seeds into shallow furrows.
1. Create furrows about 1/4 to 1/2 inch deep and 1-2 inches apart.
2. Sprinkle the seeds thinly along the furrows.
3. Cover the seeds lightly with soil.
4. Gently water the area to moisten the soil.
* Spacing: Aim for about 1 inch between seeds. Don’t worry if you sow them too thickly; you can always thin them later.
* Watering: Keep the soil consistently moist until the seeds germinate. This may require watering daily, especially in dry weather.
Caring for Your Growing Carrots
Once your carrot seedlings emerge, it’s important to provide them with the right care to ensure a bountiful harvest.
* Thinning: This is essential for preventing overcrowding and allowing the carrots to develop properly.
1. Once the seedlings are about 2 inches tall, thin them to about 1-2 inches apart.
2. Carefully pull out the weaker seedlings, being careful not to disturb the roots of the remaining plants.
3. You can even eat the thinned seedlings as microgreens!
* Watering: Carrots need consistent moisture, especially during hot, dry weather. Water deeply and regularly, aiming for about 1 inch of water per week. Avoid overhead watering, as this can promote fungal diseases.
* Weeding: Keep the carrot bed free of weeds, which can compete with the carrots for nutrients and water. Hand-pull weeds carefully to avoid disturbing the carrot roots.
* Fertilizing: Carrots are not heavy feeders, but they will benefit from a light feeding of fertilizer. Use a balanced fertilizer or a fertilizer specifically formulated for root vegetables. Follow the instructions on the fertilizer package. I like to use a liquid seaweed fertilizer diluted in water every few weeks.
* Sunlight: Carrots need at least 6 hours of sunlight per day. Choose a sunny location for your carrot bed.
Protecting Your Carrots from Pests and Diseases
While carrots are relatively easy to grow, they can be susceptible to certain pests and diseases.
* Carrot Rust Fly: This is a common pest that can damage carrot roots. The larvae of the carrot rust fly tunnel into the roots, causing them to become discolored and unmarketable.
* Prevention: Cover your carrot bed with row covers to prevent the flies from laying their eggs. Rotate your crops to avoid planting carrots in the same location year after year.
* Control: If you see signs of carrot rust fly, you can use insecticidal soap or neem oil.
* Nematodes: These microscopic worms can attack carrot roots, causing them to become stunted and deformed.
* Prevention: Improve soil health by adding plenty of organic matter. Rotate your crops to avoid planting carrots in the same location year after year.
* Control: There are several biological controls available for nematodes, such as beneficial nematodes.
* Leaf Blight: This fungal disease can cause the leaves of carrots to become spotted and yellow.
* Prevention: Provide good air circulation around the plants. Avoid overhead watering.
* Control: If you see signs of leaf blight, you can use a fungicide.
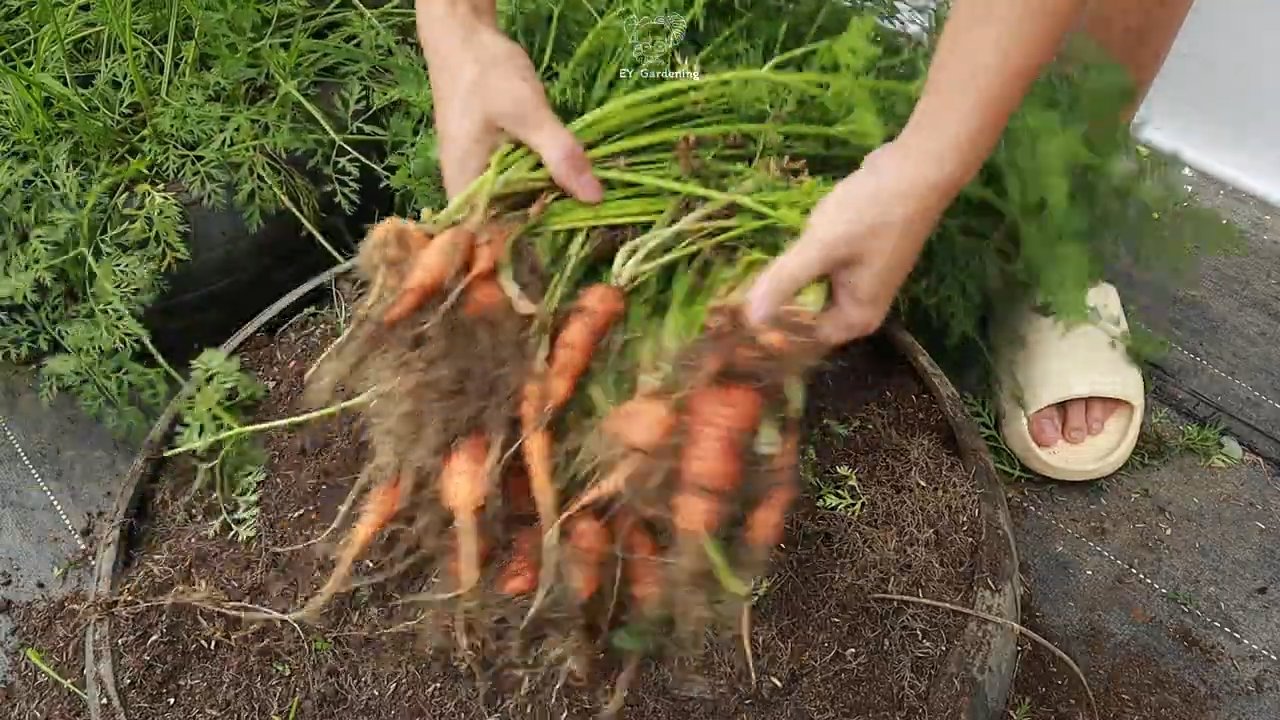
Harvesting Your Baby Carrots
The best part! Baby carrots are typically ready to harvest in 50-70 days, depending on the variety.
* When to Harvest: You can harvest baby carrots at any time once they reach the desired size. I usually start harvesting when they are about 3-4 inches long.
* How to Harvest: Gently loosen the soil around the carrots with a garden fork or trowel. Pull the carrots out of the ground by the tops.
* Washing and Storing: Wash the carrots thoroughly to remove any dirt. Store them in the refrigerator in a plastic bag or container. They will keep for several weeks.
Troubleshooting Common Carrot Growing Problems
Even with the best care, you may encounter some problems when growing carrots. Here are a few common issues and how to fix them:
* Forked or Split Carrots: This is usually caused by rocky or compacted soil. Make sure to prepare the soil properly before planting.
* Stunted Growth: This can be caused by poor soil, lack of nutrients, or pests. Amend the soil with compost, fertilize regularly, and control pests.
* Bitter Taste: This can be caused by hot weather or inconsistent watering. Provide consistent moisture and shade the plants during the hottest part of the day.
* Poor Germination: This can be caused by old seeds, dry soil, or cold temperatures. Use fresh seeds, keep the soil moist, and plant at the right time of year.
Enjoying Your Homegrown Baby Carrots
Now that you’ve harvested your own delicious baby carrots, it’s time to enjoy them! They’re perfect for snacking, salads, dips, and roasting. Here are a few of my favorite ways to use baby carrots:
* Snacking: Simply wash and peel the carrots and enjoy them raw.
* Salads: Add sliced or grated baby carrots to your favorite salads.
* Dips: Serve baby carrots with hummus, ranch dressing, or other dips.
* Roasting: Toss baby carrots with olive oil, herbs, and spices and roast them in the oven until tender.
* Juicing: Add baby carrots to your favorite juice recipes for a boost of vitamins and nutrients.
Growing your own baby carrots is a rewarding experience that will provide you with fresh, healthy, and delicious vegetables. With a little bit of planning and care, you can enjoy a bountiful harvest of baby carrots all season long. Happy gardening!
Conclusion
So, there you have it! Growing baby carrots at home is not only achievable, but it’s also a rewarding and surprisingly simple process. Forget those pre-packaged, often bland, store-bought baby carrots. Imagine biting into a sweet, crisp, and perfectly sized carrot that you nurtured from seed to table. The difference in flavor and texture is truly remarkable. This DIY project offers a unique opportunity to connect with your food source, reduce your reliance on grocery stores, and enjoy the freshest possible produce.
This method of growing baby carrots at home is a must-try for several reasons. First, you have complete control over the growing environment, ensuring that your carrots are free from harmful pesticides and chemicals. Second, you can tailor the variety of carrot to your specific taste preferences. Do you prefer a sweeter carrot? Opt for Nantes varieties. Want something with a bit more color? Try a Rainbow blend. The possibilities are endless! Third, it’s a fantastic way to get kids involved in gardening and teach them about where their food comes from.
Beyond the basic method outlined, there are several exciting variations you can explore. Consider companion planting. Marigolds, for example, can help deter nematodes, while rosemary can repel carrot flies. Experiment with different soil amendments to see what works best in your garden. You could also try succession planting, sowing seeds every few weeks to ensure a continuous harvest of baby carrots throughout the growing season. For those with limited space, container gardening is an excellent option. Choose a deep container and follow the same principles of soil preparation and watering.
Don’t be intimidated by the idea of growing your own food. This project is perfect for beginners and seasoned gardeners alike. The satisfaction of harvesting your own baby carrots is unparalleled. Plus, you’ll be amazed at how much better they taste compared to anything you can buy in a store.
We wholeheartedly encourage you to give this DIY trick a try. It’s a fun, educational, and delicious way to enhance your gardening skills and enjoy the fruits (or rather, vegetables) of your labor. Once you’ve harvested your first batch of homegrown baby carrots, we’d love to hear about your experience! Share your photos, tips, and any variations you’ve tried in the comments below. Let’s build a community of home gardeners who are passionate about growing their own fresh, healthy food. Happy gardening!
Frequently Asked Questions (FAQ)
What is the best time of year to plant baby carrots?
The best time to plant baby carrots depends on your climate. In general, carrots prefer cool weather, so spring and fall are ideal. For spring planting, sow seeds as soon as the soil can be worked, typically a few weeks before the last expected frost. For fall planting, sow seeds about 2-3 months before the first expected frost. In warmer climates, you may be able to grow carrots throughout the winter. Check your local planting calendar for specific recommendations for your region.
What kind of soil is best for growing baby carrots?
Baby carrots thrive in loose, well-drained soil that is rich in organic matter. Avoid heavy clay soils, as they can restrict root growth and result in misshapen carrots. Amend your soil with compost or well-rotted manure to improve drainage and fertility. A slightly acidic soil pH of 6.0 to 6.8 is ideal. Before planting, remove any rocks or debris that could impede root development.
How often should I water my baby carrots?
Consistent moisture is crucial for growing healthy baby carrots. Water deeply and regularly, especially during dry periods. Aim to keep the soil consistently moist but not waterlogged. A good rule of thumb is to water when the top inch of soil feels dry to the touch. Mulching around your carrot plants can help retain moisture and suppress weeds.
How much sunlight do baby carrots need?
Baby carrots need at least 6 hours of sunlight per day to thrive. Choose a sunny location in your garden that receives ample sunlight throughout the day. If you are growing carrots in containers, make sure to place them in a spot that gets plenty of sun.
How long does it take for baby carrots to grow?
Baby carrots typically take 50-70 days to mature, depending on the variety and growing conditions. You can start harvesting them when they reach the desired size, usually around 3-4 inches long. Check the seed packet for specific maturity times for your chosen variety.
How do I prevent pests and diseases from affecting my baby carrots?
Several pests and diseases can affect baby carrots, including carrot rust flies, nematodes, and fungal diseases. To prevent these problems, practice good garden hygiene, such as removing plant debris and rotating crops. Companion planting with marigolds or rosemary can help deter pests. If you notice signs of pests or diseases, treat your plants with appropriate organic pesticides or fungicides.
Can I grow baby carrots in containers?
Yes, you can absolutely grow baby carrots in containers! Choose a container that is at least 12 inches deep to allow for proper root development. Use a well-draining potting mix and follow the same principles of soil preparation, watering, and sunlight as you would for growing carrots in the ground.
What are some good companion plants for baby carrots?
Several plants can benefit baby carrots when planted nearby. Marigolds deter nematodes, rosemary repels carrot flies, and onions and garlic can help prevent fungal diseases. Lettuce, radishes, and beans are also good companion plants for carrots.
How do I know when my baby carrots are ready to harvest?
You can harvest baby carrots when they reach the desired size, typically around 3-4 inches long. Gently loosen the soil around the carrots and pull them out by the tops. You can also use a garden fork to lift the carrots from the ground.
What can I do with my homegrown baby carrots?
The possibilities are endless! You can eat them raw as a healthy snack, add them to salads, roast them with other vegetables, or use them in soups and stews. Homegrown baby carrots are also delicious when pickled or fermented. Enjoy the fresh, sweet flavor of your homegrown harvest!


Leave a Comment