
Grow Ananas Melons at Home? Absolutely! Imagine biting into a juicy, fragrant Ananas melon, bursting with sweetness, knowing you nurtured it from seed to fruit, right in your own backyard. It’s not just a dream; it’s an achievable reality with a little know-how and some DIY spirit. For centuries, cultivating melons has been a cherished practice across various cultures, symbolizing abundance and prosperity. From ancient Egypt, where melons were found in tombs, to the royal gardens of Europe, these delectable fruits have always held a special place.
But why should you bother with the effort of growing your own Ananas melons? Well, store-bought melons often lack the intense flavor and aroma of homegrown varieties. Plus, you have complete control over the growing process, ensuring your melon is free from harmful pesticides and chemicals. In this article, I’m going to share some simple yet effective DIY tricks and hacks that will empower you to grow Ananas Melons at Home successfully, even if you’re a complete beginner. Get ready to transform your garden into a melon paradise!
Grow Your Own Pineapple Melon Paradise: A DIY Guide
Hey there, fellow gardening enthusiasts! Ever dreamt of biting into a juicy, homegrown pineapple melon? Well, dream no more! I’m here to guide you through the surprisingly simple process of cultivating these tropical delights right in your own backyard (or even on your balcony!). It might sound intimidating, but trust me, with a little patience and these easy-to-follow steps, you’ll be harvesting your own sweet and fragrant pineapple melons in no time.
Choosing the Right Variety and Starting Seeds
First things first, let’s talk about variety. While all pineapple melons share that signature aroma, some are better suited for certain climates and growing conditions. Look for varieties labeled as “early maturing” if you live in a region with shorter summers. Some popular choices include ‘Honey Gold’ and ‘Jenny Lind’.
Here’s how to get those seeds started:
* Timing is Key: Start your seeds indoors about 4-6 weeks before the last expected frost in your area. This gives them a head start and ensures they’re strong enough to face the elements when you transplant them.
* Seed Starting Mix: Use a good quality seed starting mix. This is crucial because it’s sterile and provides the perfect balance of nutrients and drainage for delicate seedlings.
* Planting Depth: Sow the seeds about ½ inch deep in small pots or seed trays. I like to use biodegradable pots because they can be planted directly into the ground, minimizing root disturbance.
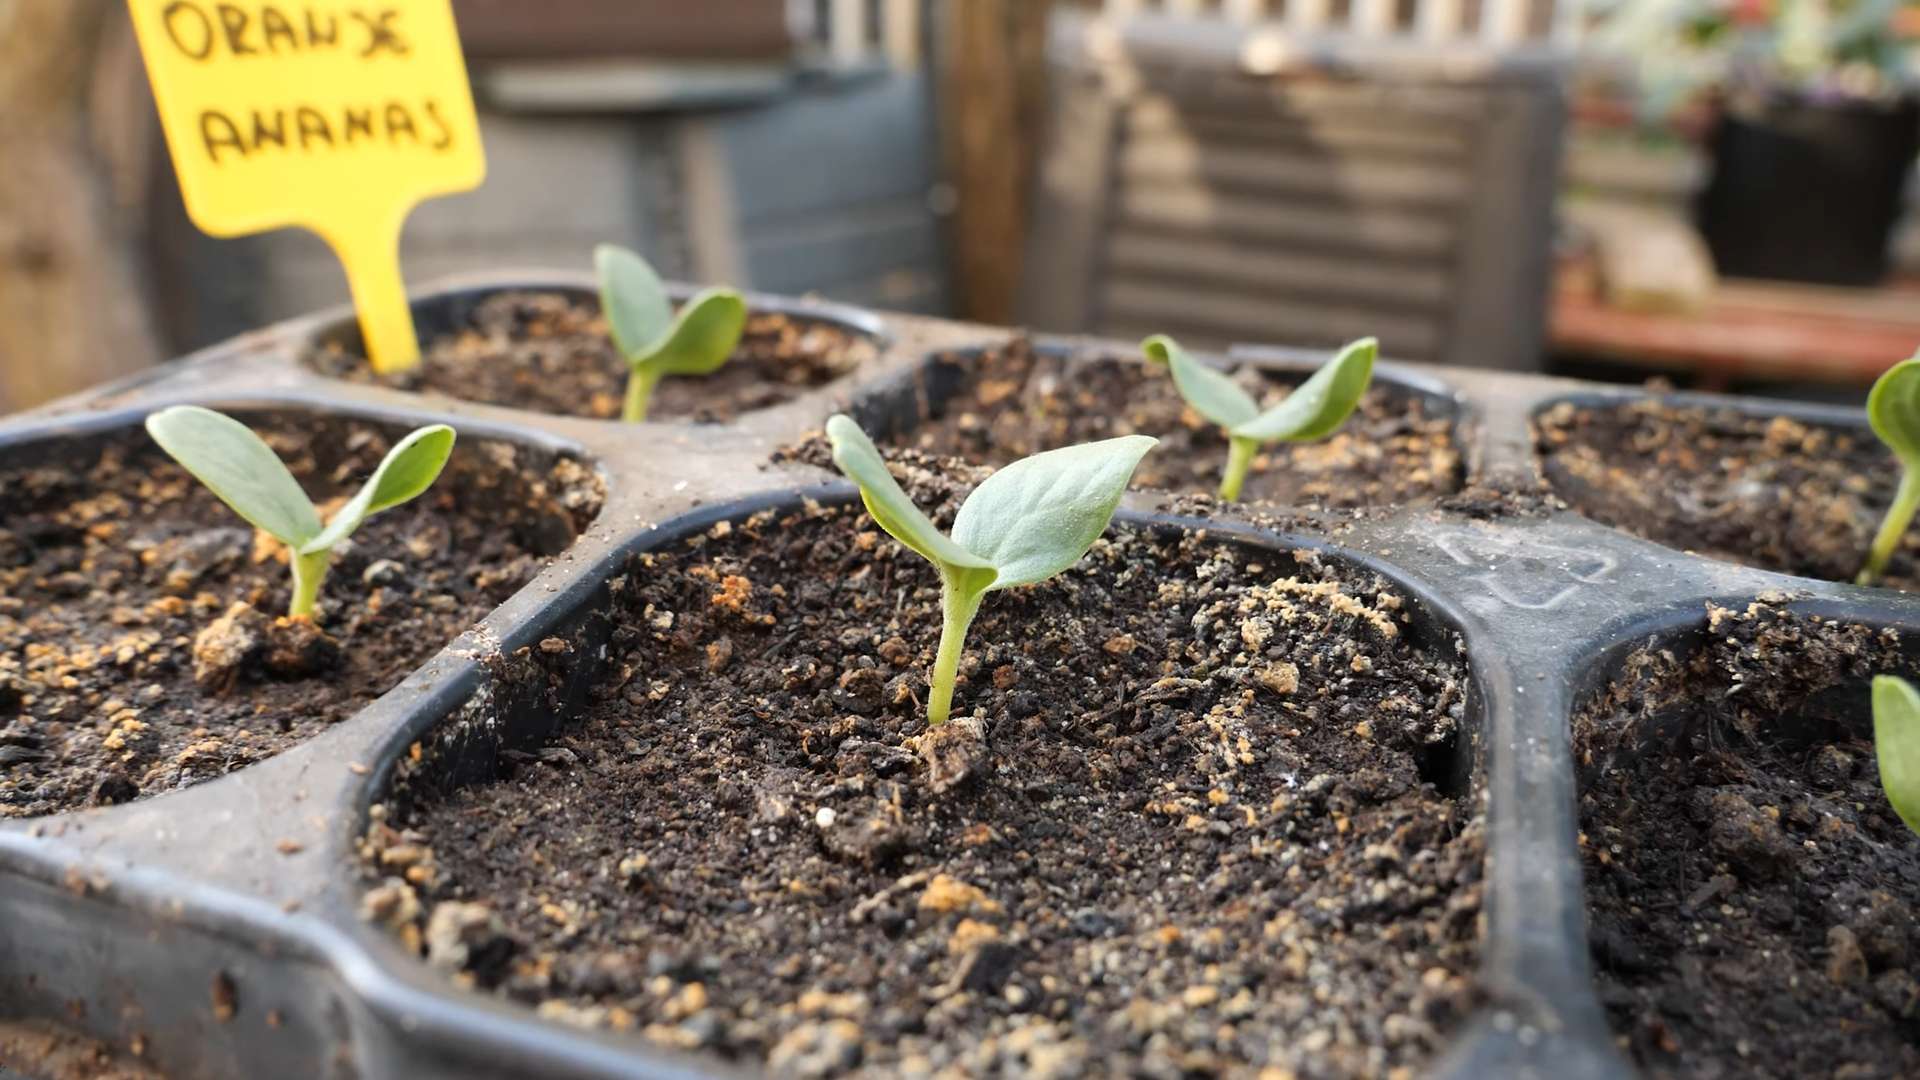
* Warmth and Light: Keep the soil consistently moist (but not soggy!) and provide warmth. A heat mat can be really helpful for germination. Once the seedlings emerge, they’ll need plenty of light. A sunny windowsill or grow lights will do the trick.
* Thinning: If you planted multiple seeds per pot, thin them out to the strongest seedling once they have their first true leaves (the second set of leaves after the initial seed leaves).
Preparing the Garden Bed
Pineapple melons are hungry plants, so preparing the soil is essential for a bountiful harvest.
* Sunlight: Choose a location that receives at least 6-8 hours of direct sunlight per day. These melons thrive in sunshine!
* Soil Type: They prefer well-drained, fertile soil with a slightly acidic to neutral pH (around 6.0-7.0).
* Soil Amendment: Amend the soil with plenty of organic matter, such as compost or well-rotted manure. This will improve drainage, add nutrients, and help retain moisture. I usually dig in a generous amount – about 4-6 inches deep.
* Raised Beds (Optional): Consider growing your pineapple melons in raised beds. This can improve drainage and soil temperature, especially in areas with heavy clay soil.
Transplanting Your Seedlings
Once the danger of frost has passed and the soil has warmed up, it’s time to transplant your seedlings into the garden.
1. Harden Off: Before transplanting, you need to “harden off” your seedlings. This means gradually exposing them to outdoor conditions over a period of about a week. Start by placing them outside for a few hours each day in a sheltered location, gradually increasing the amount of time they spend outdoors.
2. Spacing: Space the plants about 2-3 feet apart. This gives them plenty of room to spread out and allows for good air circulation, which helps prevent diseases.
3. Planting: Dig a hole slightly larger than the root ball of the seedling. Gently remove the seedling from its pot and place it in the hole. Backfill with soil and gently firm it around the base of the plant.
4. Watering: Water thoroughly after transplanting. This helps settle the soil and encourages root growth.
5. Mulching: Apply a layer of mulch around the plants. This will help retain moisture, suppress weeds, and regulate soil temperature. Straw, wood chips, or shredded leaves are all good options.
Caring for Your Pineapple Melon Plants
Now that your pineapple melon plants are in the ground, it’s time to provide them with the care they need to thrive.
* Watering: Water deeply and regularly, especially during hot, dry weather. Aim to keep the soil consistently moist, but avoid overwatering, which can lead to root rot. I usually water early in the morning to allow the foliage to dry before nightfall.
* Fertilizing: Feed your pineapple melon plants with a balanced fertilizer every 2-3 weeks. Look for a fertilizer that is high in phosphorus and potassium, which are essential for fruit development. You can also use a liquid seaweed fertilizer for an extra boost.
* Weeding: Keep the garden bed free of weeds. Weeds compete with your pineapple melon plants for nutrients and water. Hand-pulling weeds is the best option, as herbicides can damage your plants.
* Pruning: While not strictly necessary, pruning can help improve air circulation and encourage fruit production. Remove any yellowing or diseased leaves. You can also pinch off the tips of the vines to encourage branching.
* Pollination: Pineapple melons are pollinated by bees and other insects. If you’re not seeing a lot of bee activity in your garden, you may need to hand-pollinate the flowers. To do this, use a small paintbrush to transfer pollen from the male flowers (which have a long, thin stem) to the female flowers (which have a small, immature fruit at the base).
Dealing with Pests and Diseases
Like all plants, pineapple melons can be susceptible to pests and diseases. Here are some common problems and how to deal with them:
* Squash Bugs: These pests can suck the sap from your plants, causing them to wilt and die. Hand-picking them off the plants is the most effective way to control them. You can also use insecticidal soap.
* Cucumber Beetles: These beetles can transmit diseases and damage the foliage of your plants. Cover your plants with row covers to prevent them from reaching the plants. You can also use insecticidal soap or neem oil.
* Powdery Mildew: This fungal disease can cause a white, powdery coating on the leaves of your plants. Improve air circulation by pruning the plants and avoid overhead watering. You can also use a fungicide.
* Fusarium Wilt: This soilborne disease can cause the plants to wilt and die. Choose disease-resistant varieties and practice crop rotation.
Harvesting Your Pineapple Melons
The moment you’ve been waiting for! Harvesting your own pineapple melons is incredibly rewarding.
1. Ripeness Indicators: Pineapple melons are typically ready to harvest about 70-90 days after planting. Look for these signs of ripeness:
* The skin will turn from green to yellow or orange.
* The melon will have a fragrant, pineapple-like aroma.
* The stem will start to dry and crack near the point where it attaches to the melon.
* The melon will feel slightly soft to the touch.
2. Harvesting Technique: Use a sharp knife or pruners to cut the melon from the vine, leaving a short piece of stem attached.
3. Storage: Store your pineapple melons in a cool, dry place. They will keep for several weeks.
Enjoying Your Homegrown Pineapple Melons
Now for the best part – enjoying the fruits (or rather, melons!) of your labor.
* Fresh Eating: Simply slice the melon in half, scoop out the seeds, and enjoy! The flesh is sweet, juicy, and incredibly fragrant.
* Salads: Add diced pineapple melon to salads for a refreshing and tropical twist.
* Smoothies: Blend pineapple melon into smoothies for a healthy and delicious treat.
* Desserts: Use pineapple melon in desserts, such as pies, tarts, and sorbets.
* Grilled: Try grilling slices of pineapple melon for a caramelized and smoky flavor.
Troubleshooting Tips
Even with the best care, you might encounter some challenges along the way. Here are a few troubleshooting tips:
* Poor Fruit Set: If your plants are producing flowers but not setting fruit, it could be due to poor pollination. Try hand-pollinating the flowers or attracting more bees to your garden by planting bee-friendly flowers.
* Small Melons: If your melons are small, it could be due to insufficient watering or fertilization. Make sure you’re watering deeply and regularly and feeding your plants with a balanced fertilizer.
* Cracked Melons: Cracked melons can be caused by inconsistent watering. Try to maintain a consistent moisture level in the soil.
Saving Seeds for Next Year
If you want to grow pineapple melons again next year, you can save the seeds from your best melons.
1. Seed Extraction: Scoop out the seeds from a ripe melon.
2. Cleaning: Rinse the seeds thoroughly to remove any pulp.
3. Drying: Spread the seeds out on a paper towel and let them dry completely.
4. Storage: Store the dried
Conclusion
So, there you have it! Growing Ananas melons at home might seem like a tropical dream, but with a little patience, the right techniques, and this straightforward DIY approach, you can absolutely cultivate these fragrant, delicious fruits right in your own backyard or even on a sunny balcony. Forget the inflated prices at specialty stores; imagine the satisfaction of harvesting your own homegrown Ananas melons, bursting with sweetness and unparalleled flavor.
This isn’t just about saving money; it’s about connecting with nature, understanding the growing process, and enjoying the freshest possible produce. The aroma alone, as your Ananas melon ripens, is worth the effort. It fills the air with a sweet, almost pineapple-like fragrance that’s simply intoxicating.
But the real magic lies in the taste. Unlike store-bought melons that can often be bland or lacking in sweetness, homegrown Ananas melons offer a depth of flavor that’s truly exceptional. The flesh is incredibly juicy, with a delicate texture that melts in your mouth.
Why is this DIY trick a must-try? Because it empowers you to control the entire growing process, from seed to table. You can choose organic methods, avoid harmful pesticides, and ensure that your melons are grown with love and care. Plus, it’s a fantastic learning experience for the whole family, teaching valuable lessons about gardening, sustainability, and the importance of fresh, healthy food.
Looking for variations? Consider experimenting with different growing mediums. While we’ve outlined a basic soil mix, you could try incorporating more compost or even using a hydroponic system for faster growth. You can also adjust the amount of sunlight your plants receive to see how it affects the sweetness and flavor of the melons. Some gardeners even swear by adding a small amount of Epsom salts to the soil to boost magnesium levels, which can enhance fruit production. Another variation is to try grafting your Ananas melon onto a more vigorous rootstock for increased disease resistance and yield.
Don’t be intimidated by the process. While growing Ananas melons requires some attention, it’s not overly complicated. Follow our guide, be patient, and don’t be afraid to experiment. The rewards are well worth the effort.
We are confident that you can successfully grow your own Ananas melons at home. We encourage you to give this DIY trick a try. Once you’ve harvested your first melon, be sure to share your experience with us! Post photos of your homegrown Ananas melons on social media using #HomegrownAnanasMelon and tag us. We can’t wait to see your success stories and learn from your experiences. Let’s build a community of Ananas melon enthusiasts!
Frequently Asked Questions (FAQ)
1. What exactly is an Ananas melon?
The Ananas melon, also known as the pineapple melon, is a type of muskmelon prized for its sweet, aromatic flesh that resembles the flavor of pineapple. It’s a relatively rare variety, making it a special treat for home gardeners. The name “Ananas” comes from the German word for pineapple.
2. How long does it take to grow Ananas melons from seed?
From seed to harvest, Ananas melons typically take between 80 to 90 days. This timeframe can vary depending on your climate, growing conditions, and the specific variety of Ananas melon you’re growing. Starting seeds indoors a few weeks before the last frost can help shorten the overall growing season.
3. What are the ideal growing conditions for Ananas melons?
Ananas melons thrive in warm, sunny locations with well-drained soil. They need at least 6-8 hours of direct sunlight per day. The ideal soil temperature for germination is between 70-85°F (21-29°C). Consistent watering is crucial, especially during fruit development.
4. How often should I water my Ananas melon plants?
Water deeply and regularly, especially during hot, dry weather. Aim to keep the soil consistently moist but not waterlogged. Avoid overhead watering, as this can increase the risk of fungal diseases. Drip irrigation or soaker hoses are excellent options for delivering water directly to the roots.
5. What kind of fertilizer should I use for Ananas melons?
Use a balanced fertilizer with equal parts nitrogen, phosphorus, and potassium (e.g., 10-10-10) early in the growing season to promote healthy foliage growth. Once the plants start to flower and set fruit, switch to a fertilizer with a higher phosphorus and potassium content (e.g., 5-10-10) to encourage fruit development and sweetness. Organic options like compost tea or bone meal can also be beneficial.
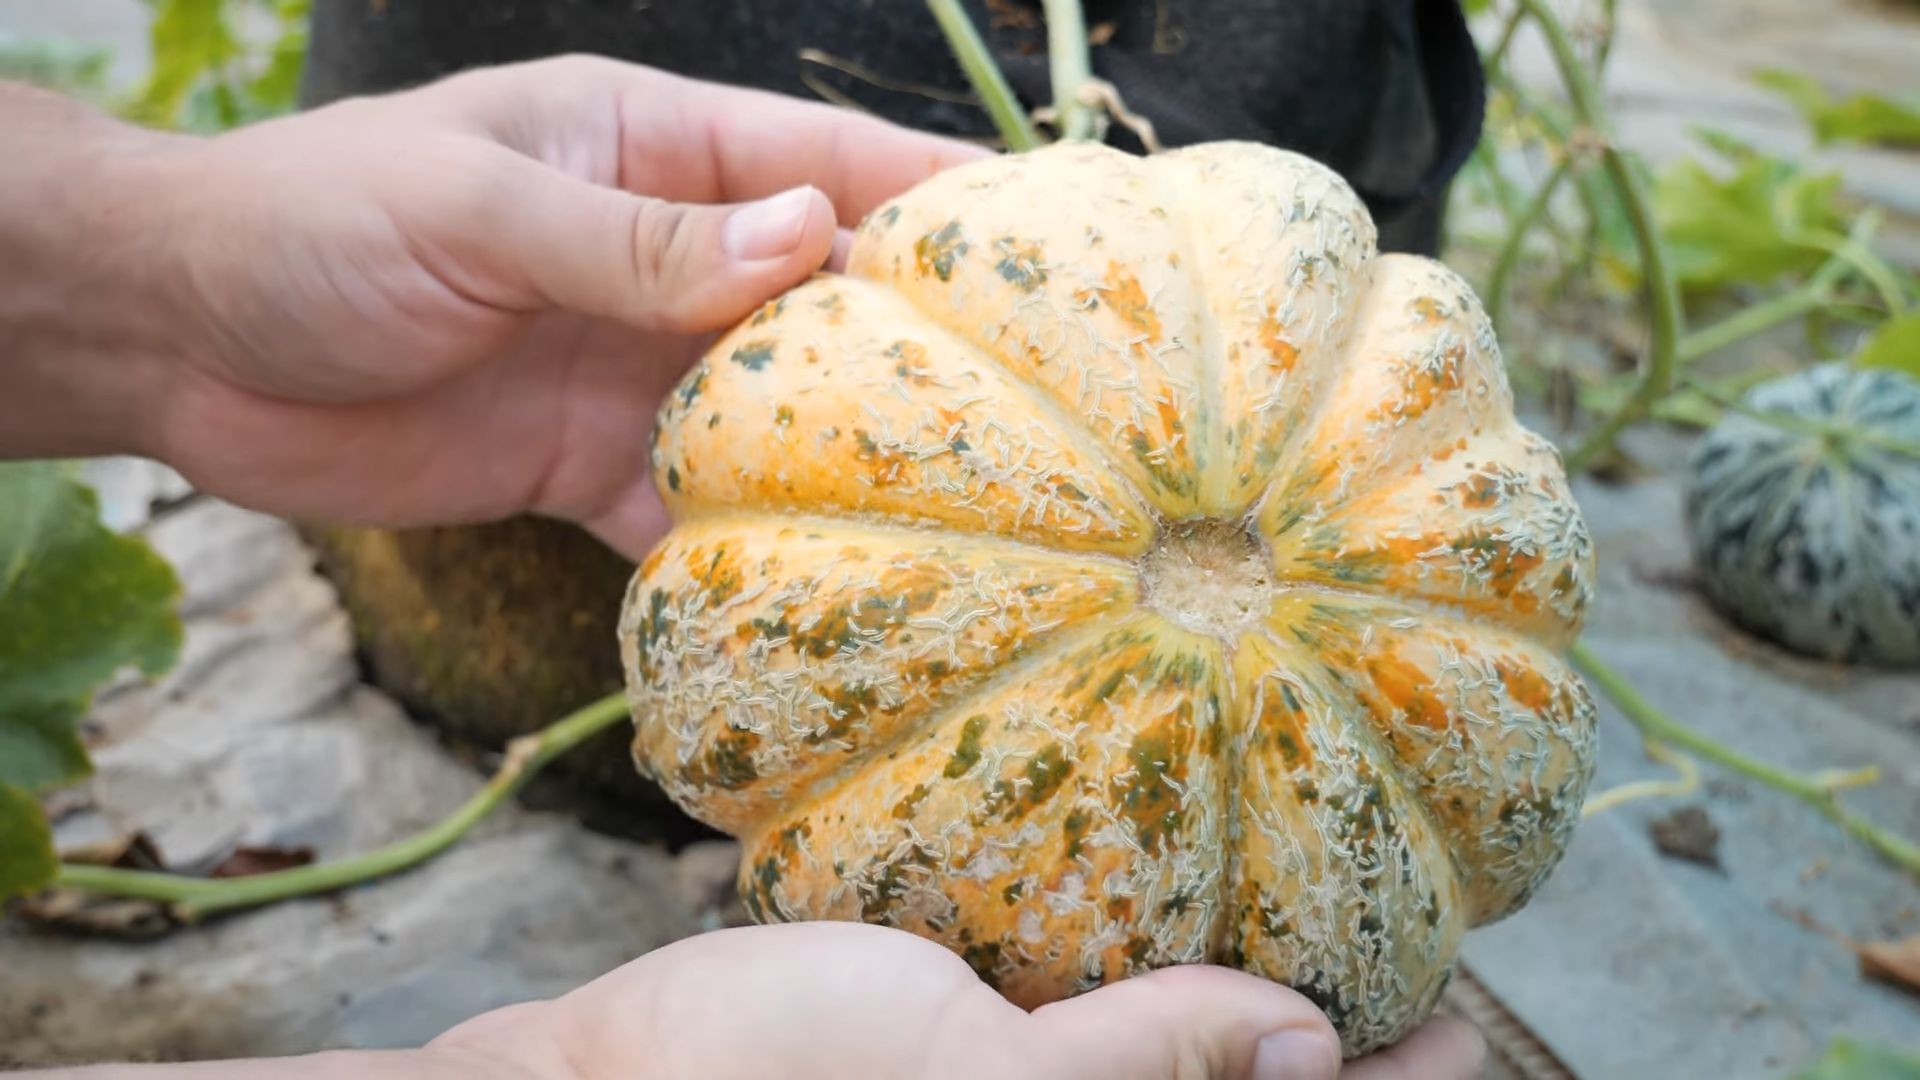
6. How do I know when my Ananas melon is ripe?
Several indicators can help you determine when your Ananas melon is ripe. The skin will change color from green to a yellowish-tan. The stem will start to crack or slip easily from the vine. The melon will also emit a sweet, fragrant aroma, especially near the stem end. Gently press on the blossom end (opposite the stem); it should feel slightly soft and yield to pressure.
7. What are some common pests and diseases that affect Ananas melons?
Common pests include aphids, squash bugs, cucumber beetles, and vine borers. Diseases include powdery mildew, fusarium wilt, and anthracnose. Regularly inspect your plants for signs of pests or diseases and take appropriate action. Organic pest control methods, such as insecticidal soap or neem oil, can be effective. Ensure good air circulation and avoid overhead watering to prevent fungal diseases.
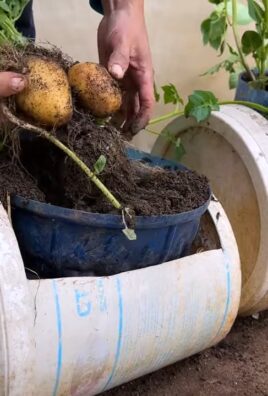
8. Can I grow Ananas melons in containers?
Yes, you can grow Ananas melons in containers, but you’ll need a large container (at least 20 gallons) with good drainage. Choose a dwarf or bush variety of Ananas melon that is better suited for container growing. Provide adequate support for the vines, such as a trellis or stake. Container-grown melons may require more frequent watering and fertilization than those grown in the ground.
9. How can I improve the sweetness of my Ananas melons?
Several factors can influence the sweetness of your Ananas melons. Ensure they receive plenty of sunlight (at least 6-8 hours per day). Avoid overwatering, especially as the melons ripen. Reduce watering slightly in the final weeks before harvest to concentrate the sugars. Adding potassium-rich fertilizer can also enhance sweetness.
10. Can I save seeds from my Ananas melons to grow next year?
Yes, you can save seeds from your Ananas melons, but keep in mind that they may not come true to type, especially if you’re growing multiple melon varieties in the same area. To save seeds, scoop out the seeds from a ripe melon, rinse them thoroughly to remove any pulp, and spread them out on a paper towel to dry completely. Store the dried seeds in an airtight container in a cool, dark place.
Leave a Comment