
Grow Abundant Carrots: Your Guide to a Bountiful Harvest
I’ve always loved the satisfying crunch of a perfectly grown carrot, pulled fresh from the earth. That’s why I’m so excited to share my Grow Abundant Carrots guide with you! This isn’t just another gardening article; it’s a collection of time-tested techniques and clever DIY solutions I’ve developed over years of experimenting in my own garden. Forget store-bought carrots that lack flavor and freshness – this guide will empower you to cultivate your own vibrant, sweet, and incredibly abundant carrot harvest.
The history of carrots is fascinating! Originally, carrots were purple or yellow, and it wasn’t until the 17th century that the orange carrot, the one we’re most familiar with today, emerged in the Netherlands. But regardless of color, the joy of growing your own carrots remains timeless. It connects us to a simpler way of life, allowing us to appreciate the process of nurturing something from seed to harvest.
Why Grow Your Own?
There’s something truly special about biting into a carrot you’ve grown yourself. The flavor is unparalleled, bursting with sweetness and earthiness. Beyond the taste, growing abundant carrots offers a rewarding experience, connecting you with nature and providing a sense of accomplishment. Plus, you’ll save money and know exactly what’s gone into your food, avoiding pesticides and other potentially harmful chemicals.
This Grow Abundant Carrots guide is packed with practical tips and tricks, from preparing the perfect soil to dealing with common carrot pests. I’ll share my secrets for maximizing yield and ensuring your carrots grow big, straight, and delicious. Get ready to transform your garden into a vibrant carrot patch! Let’s get started on your journey to a bountiful harvest.
Growing Abundant Carrots: A DIY Guide
Carrots! Who doesn’t love them? But getting a bumper crop can feel like a challenge. Follow these steps, and you’ll be pulling out carrots bigger than your thumb in no time!
Phase 1: Preparing the Soil – The Foundation for Success
- Choose the right location: Carrots need at least six hours of sunlight per day. A sunny spot in your garden is ideal. Avoid areas with heavy shade.
- Soil testing: Before you even think about planting, test your soil’s pH. Carrots prefer slightly acidic to neutral soil (pH 6.0-7.0). You can get a soil testing kit from most garden centers. Adjust the pH if necessary using lime (to raise pH) or sulfur (to lower pH). This is crucial; carrots hate compacted soil.
- Soil preparation: This is the most important step. Carrots need loose, well-drained soil. Rocks and clumps will cause misshapen roots. I recommend tilling the soil to a depth of at least 12 inches. Remove any rocks, weeds, and debris. The smoother the soil, the straighter your carrots will grow.
- Amend the soil: Add plenty of organic matter, such as compost or well-rotted manure. This improves soil structure, drainage, and fertility. Mix it thoroughly into the soil. A rich soil will give you bigger, healthier carrots.
Phase 2: Sowing the Seeds – Getting Started
- Choose your seeds: Select high-quality carrot seeds from a reputable supplier. Consider the variety – some are better suited to your climate than others. Check the seed packet for information on spacing and planting depth.
- Direct sowing: Carrots are best sown directly into the garden. Avoid transplanting as it can damage the delicate roots. Sow the seeds thinly in rows about 1 inch deep and 1-2 inches apart. If you’re sowing multiple rows, space them 12-18 inches apart.
- Watering: Gently water the seeds after sowing. Keep the soil consistently moist but not waterlogged. Use a gentle spray to avoid washing away the seeds.
- Thinning: Once the seedlings emerge (usually within 1-3 weeks), thin them out to about 2-4 inches apart. This gives each carrot enough space to grow. Be careful not to damage the remaining seedlings when thinning.
- Mulching: Apply a layer of mulch (straw, shredded leaves, or other organic material) around the plants. This helps retain moisture, suppress weeds, and regulate soil temperature.
Phase 3: Carrot Care – Nurturing Your Crop
- Watering consistently: Carrots need consistent moisture, especially during dry periods. Water deeply and regularly, aiming for about 1 inch of water per week. Avoid overhead watering, which can lead to fungal diseases.
- Weed control: Regularly remove weeds, as they compete with carrots for water and nutrients. Mulching helps significantly reduce weed growth.
- Pest and disease control: Monitor your carrots for pests such as carrot root flies and diseases such as leaf blight. Take appropriate measures to control them, such as using organic pest control methods or removing affected plants.
- Fertilizing: While you amended the soil initially, you might need to provide additional nutrients during the growing season. A balanced organic fertilizer can help promote healthy growth. Follow the instructions on the fertilizer package carefully.
- Monitoring growth: Regularly check on your carrots to ensure they are growing well. Look for signs of stress, such as wilting or yellowing leaves. Address any issues promptly.
Phase 4: Harvesting – The Rewarding Part
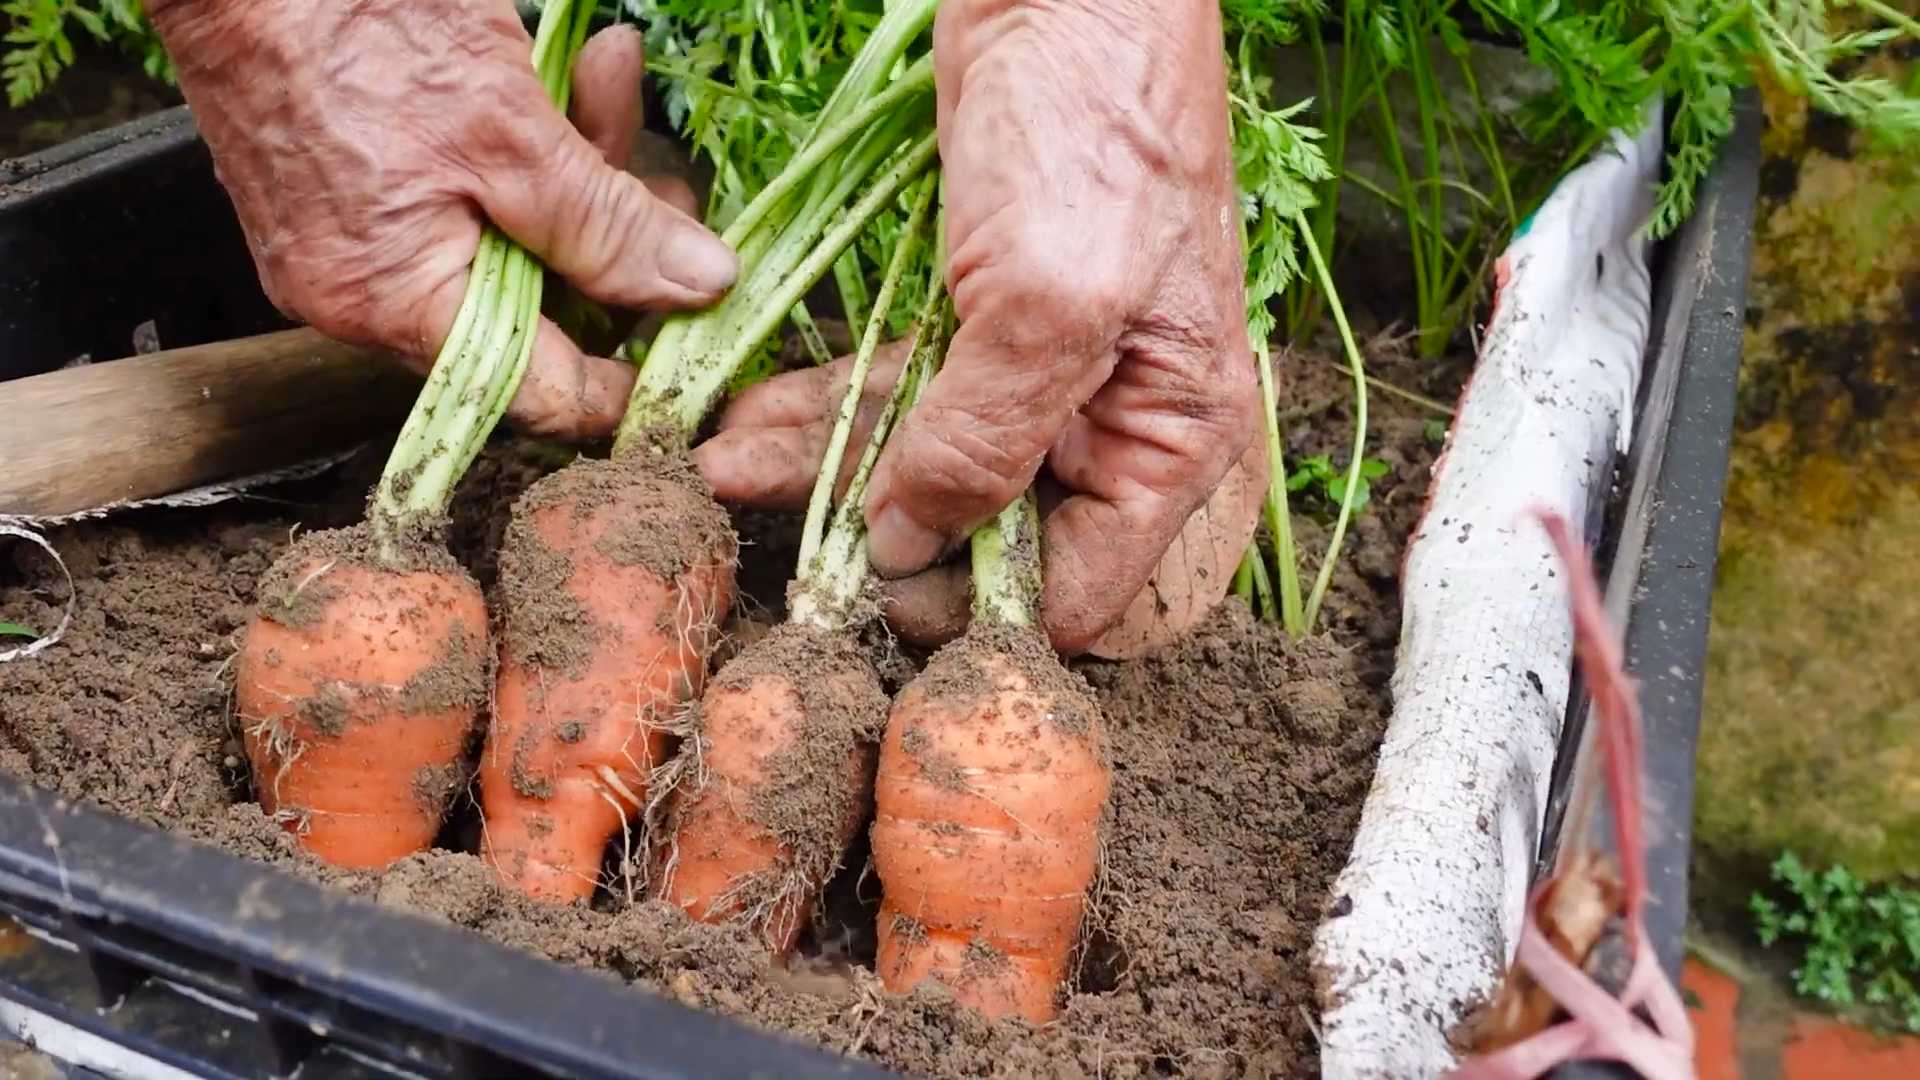
- Harvesting time: Carrots are typically ready for harvest in 70-90 days, depending on the variety. You can check for readiness by gently pulling on a few carrots. If they are firm and the desired size, they are ready.
- Harvesting method: Use a garden fork or trowel to carefully loosen the soil around the carrots. This prevents damage to the roots. Gently lift the carrots out of the ground, avoiding breakage.
- Cleaning and storing: Wash the carrots gently to remove any soil. Trim the tops and any damaged parts. Store the carrots in a cool, dark, and well-ventilated place. You can also store them in the refrigerator for a shorter period.
- Enjoying your harvest: Congratulations! You’ve successfully grown a bountiful harvest of delicious carrots. Enjoy them fresh, cooked, or preserved for later use. Remember to save some seeds for next year’s planting!
Troubleshooting Common Issues
Problem: Carrots are small and stunted.
Possible causes:
- Poor soil conditions (compacted soil, lack of nutrients).
- Insufficient watering.
- Overcrowding.
Solutions:
- Improve soil drainage and fertility.
- Water regularly and deeply.
- Thin out the carrots to provide adequate spacing.
Problem: Carrots are forked or misshapen.
Possible causes:
- Rocks or other debris in the soil.
- Inconsistent watering.
- Nutrient deficiencies.
Solutions:
- Thoroughly prepare the soil before planting.
- Water consistently.
- Provide adequate nutrients.
Problem: Carrot root flies are attacking your crop.
Solutions:
- Use row covers to protect the plants.
- Apply diatomaceous earth around the plants.
- Consider using organic pest control methods.
Conclusion
So there you have it! A simple, yet incredibly effective method for growing abundant carrots right in your own backyard or even in containers on your balcony. This DIY approach to carrot cultivation bypasses many of the common pitfalls associated with store-bought seeds and commercially grown carrots, resulting in a higher yield of sweeter, more flavorful, and perfectly shaped roots. This guide to growing abundant carrots is a must-try for both seasoned gardeners and enthusiastic beginners alike. The satisfaction of harvesting your own homegrown carrots, knowing exactly how they were grown and what went into them, is truly unparalleled.
The beauty of this method lies in its adaptability. You can easily tailor it to your specific needs and growing conditions. Experiment with different carrot varieties to discover your favorites. Some varieties are better suited for specific climates or soil types. Consider trying Nantes carrots for their classic shape and sweetness, or Chantenay carrots for their shorter, wider shape, ideal for smaller gardens or containers. You can also experiment with companion planting. Planting carrots alongside herbs like rosemary or thyme can help deter pests and improve soil health. For those with limited space, vertical gardening techniques can be employed, maximizing your yield in a smaller footprint. Remember to always pay attention to your soil’s health; regular testing and amending will ensure optimal growth and prevent nutrient deficiencies.
Beyond the practical benefits, growing your own carrots offers a rewarding connection to nature. It’s a chance to learn about the life cycle of a plant, understand the importance of soil health, and appreciate the simple pleasure of nurturing something from seed to harvest. It’s a project that can be enjoyed by the whole family, providing a valuable learning experience for children and a sense of accomplishment for adults. The process of sowing seeds, tending to the plants, and finally harvesting the delicious results is incredibly fulfilling.
We strongly encourage you to try this DIY approach to growing abundant carrots. Don’t be afraid to experiment and adapt the techniques to your own circumstances. Share your experiences with us! We’d love to hear about your successes, challenges, and the delicious recipes you create with your homegrown bounty. Post your photos on social media using #GrowAbundantCarrots and tag us – we can’t wait to see your flourishing carrot patches and the beautiful, healthy carrots you’ve grown!
Growing your own food is a rewarding experience, and this method for growing abundant carrots makes it easier than you might think. So, get your hands dirty, embrace the process, and enjoy the sweet taste of success!
Frequently Asked Questions
What type of soil is best for growing carrots?
Carrots thrive in loose, well-drained soil that is free of rocks and clumps. Sandy loam is ideal, but you can amend heavier clay soils with compost or other organic matter to improve drainage and aeration. Avoid heavy clay soils as they can cause carrots to become stunted and misshapen.
How much sunlight do carrots need?
Carrots need at least six hours of direct sunlight per day to grow properly. Choose a sunny location in your garden or ensure your containers receive ample sunlight.
When is the best time to plant carrots?
The best time to plant carrots depends on your climate. In cooler climates, sow seeds in spring after the last frost. In warmer climates, you can sow seeds in fall or during cooler periods in the summer. Check your local frost dates for the most accurate planting time.
How deep should I plant carrot seeds?
Carrot seeds are tiny, so plant them about ½ inch deep. Planting too deep can hinder germination. Ensure the soil is consistently moist but not waterlogged after planting.
What are some common problems when growing carrots?
Common problems include carrot root flies (which can be deterred with netting or companion planting), poor drainage leading to root rot, and nutrient deficiencies. Regular monitoring and addressing these issues promptly will ensure a successful harvest.
How long does it take for carrots to mature?
The time it takes for carrots to mature varies depending on the variety, but generally ranges from 70 to 90 days. Check the seed packet for specific information on the variety you’ve chosen.
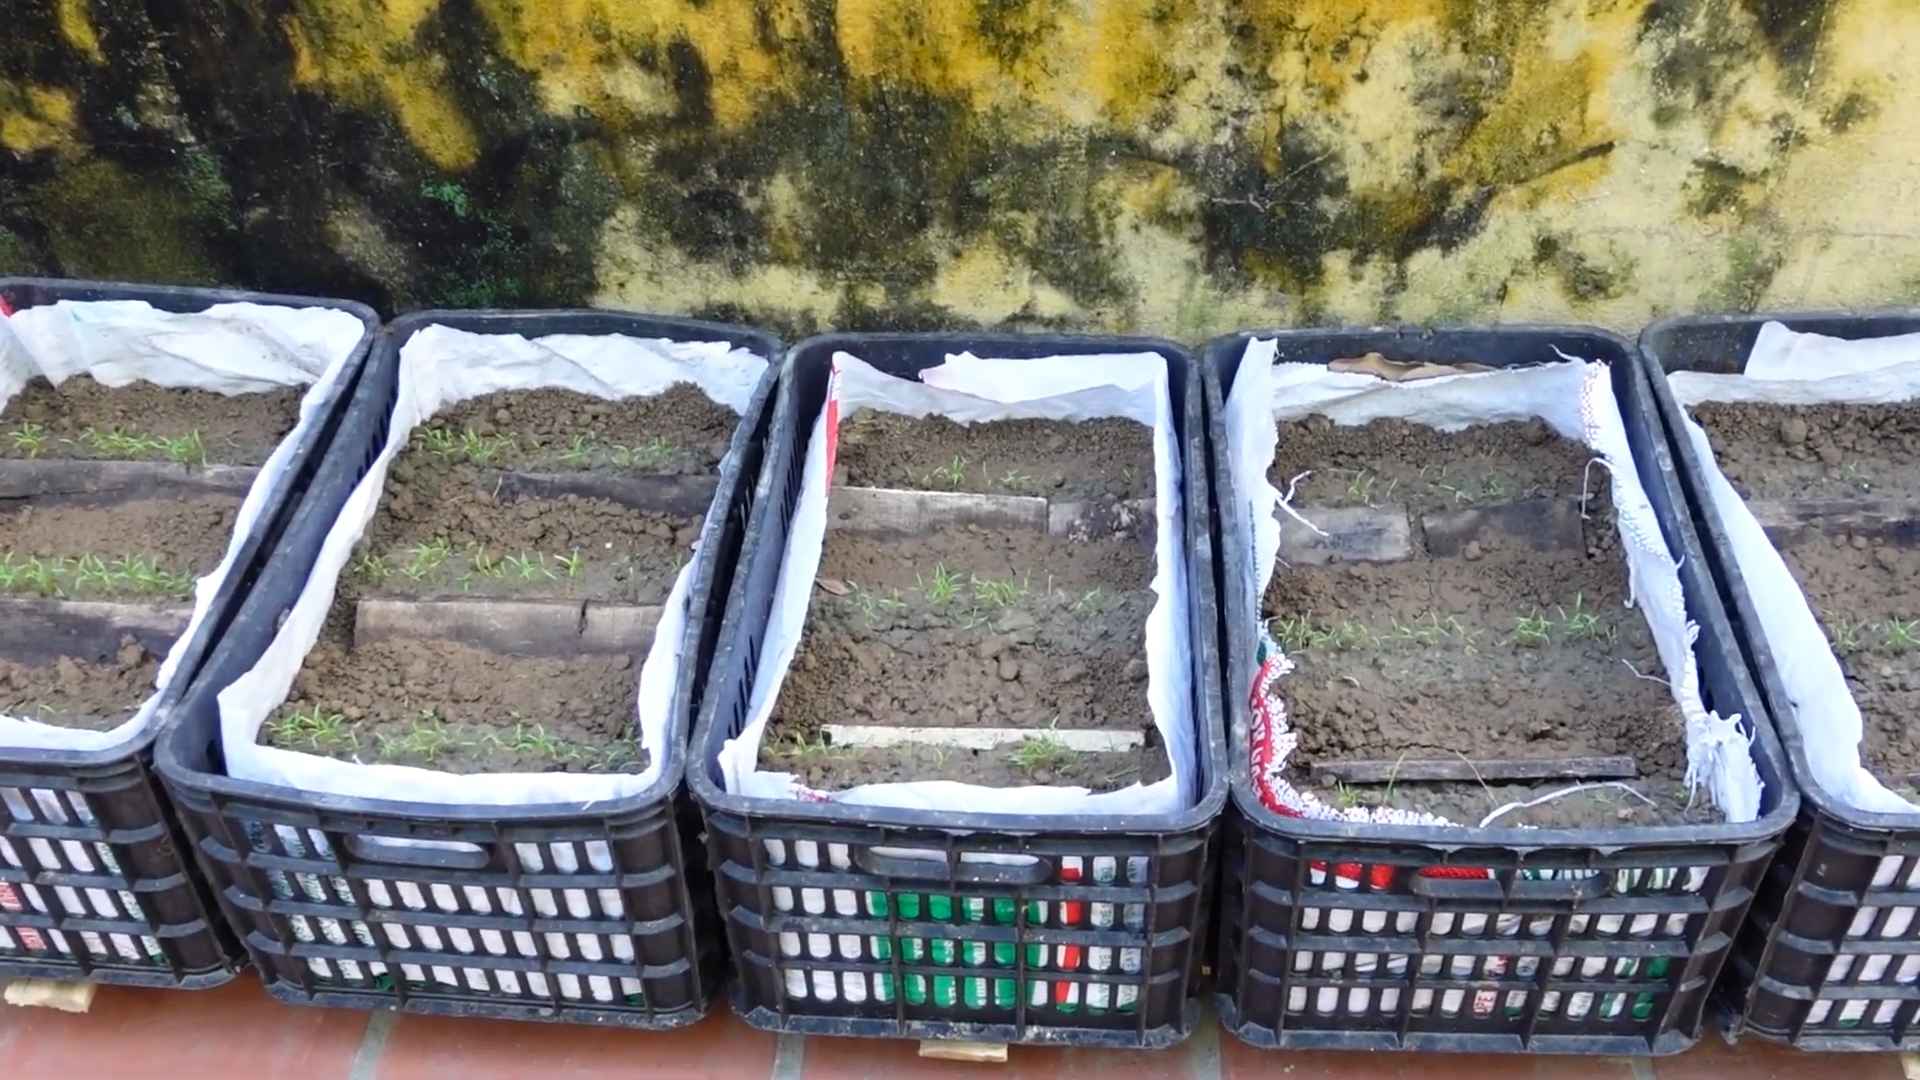
Can I grow carrots in containers?
Absolutely! Containers are a great option for growing carrots, especially if you have limited space. Choose deep containers (at least 12 inches deep) with good drainage to allow the taproots to develop fully. Use a well-draining potting mix.
What should I do if my carrots are small or misshapen?
Small or misshapen carrots are often a result of poor soil conditions (rocky or compacted soil), inconsistent watering, or overcrowding. Ensure your soil is loose and well-drained, water regularly, and don’t overcrowd your seeds when planting.
How do I store my harvested carrots?
Store your harvested carrots in a cool, dark, and humid place. A refrigerator crisper drawer is ideal. Proper storage can extend the shelf life of your carrots for several weeks.
What are some creative ways to use homegrown carrots?
The possibilities are endless! Enjoy them raw as a snack, roast them with herbs and spices, add them to soups and stews, or juice them for a refreshing drink. Your homegrown carrots will add a burst of fresh flavor to any dish.


Leave a Comment