
Grape Growing Techniques can seem daunting, right? I get it! The thought of cultivating your own luscious grapes, envisioning homemade jams, or even crafting your own wine, might feel like a dream reserved for seasoned vineyard owners. But trust me, it’s more achievable than you think, even in your own backyard!
For centuries, grapes have held a special place in cultures worldwide. From the ancient Egyptians, who depicted grape cultivation in their tomb paintings, to the Romans, who spread viticulture across Europe, the grape has been a symbol of abundance, celebration, and connection. Imagine tapping into that rich history by nurturing your own grapevine!
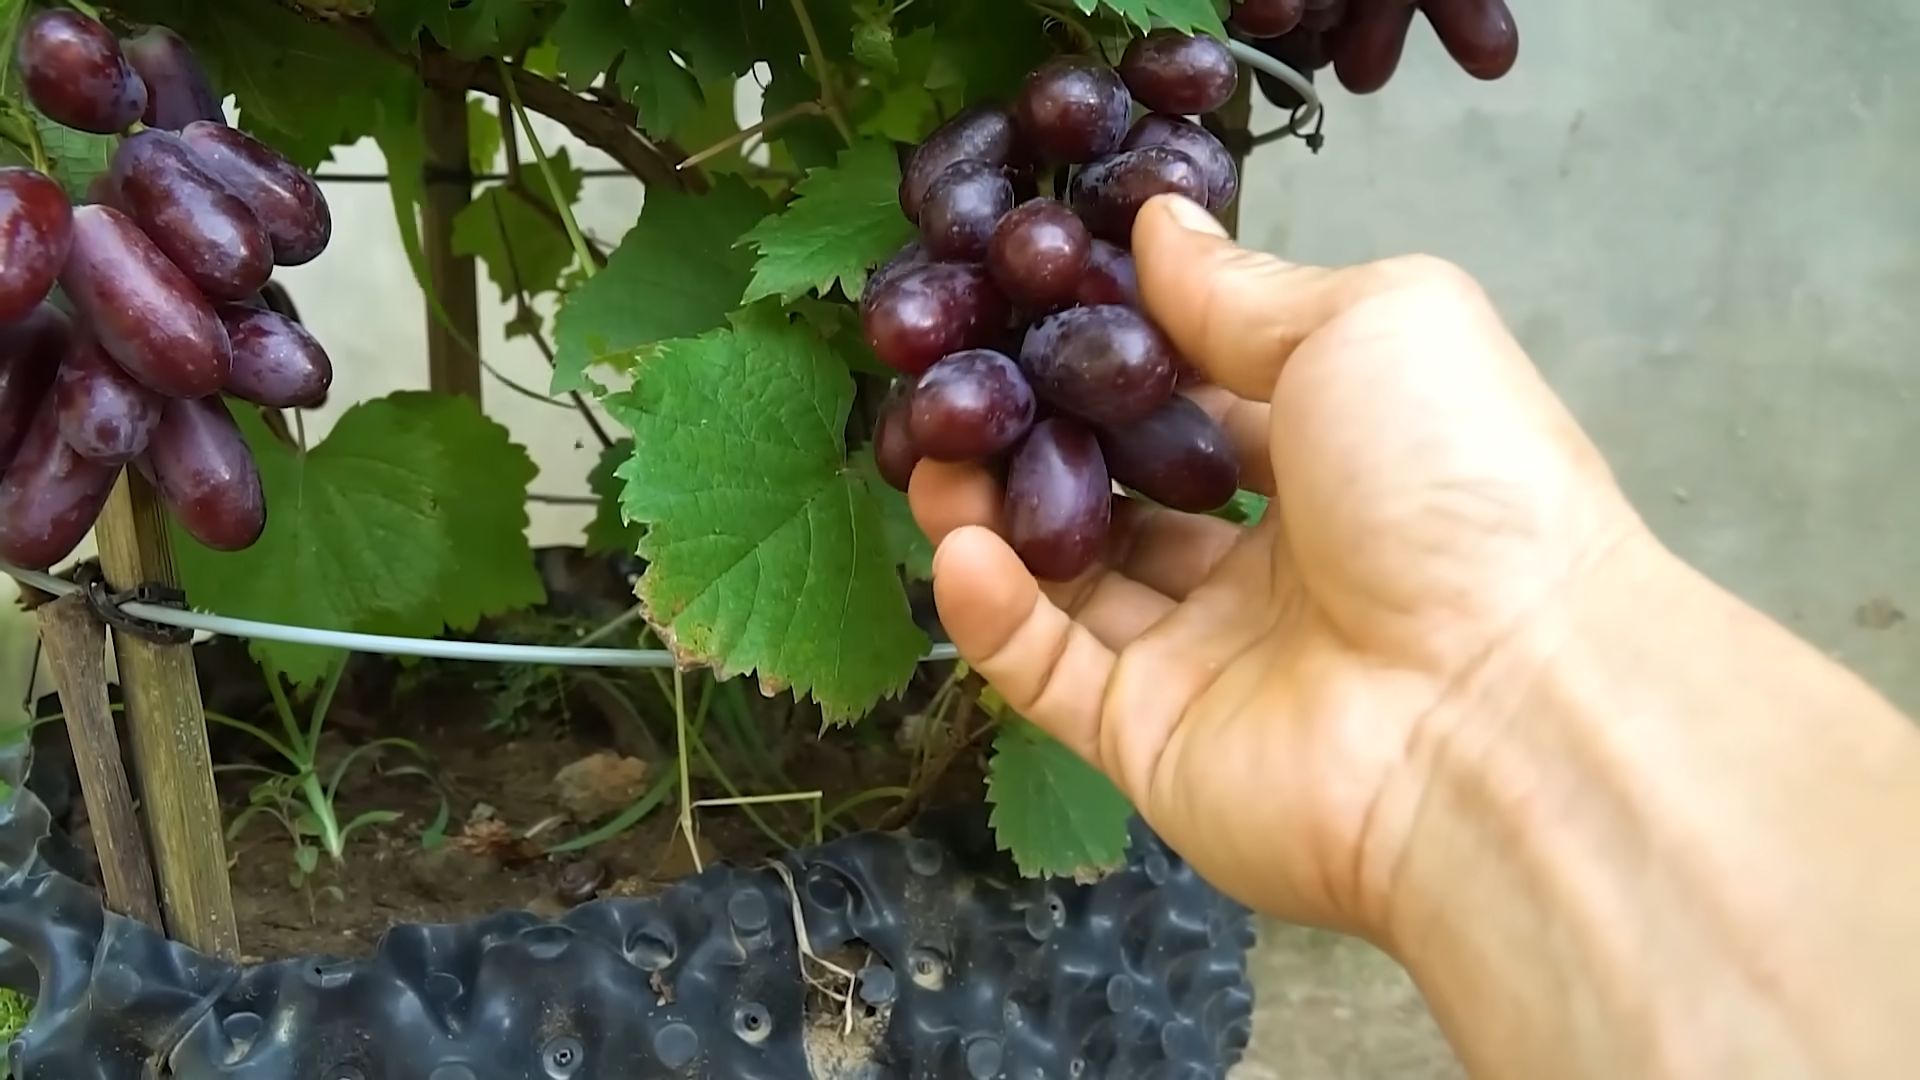
But why bother with grape growing techniques at home? Well, for starters, you get to control exactly what goes into your grapes – no harsh pesticides or questionable fertilizers. Plus, there’s nothing quite like the satisfaction of harvesting your own fruit, knowing you nurtured it from a tiny vine to a bountiful producer. And let’s be honest, store-bought grapes just can’t compare to the flavor explosion of a homegrown variety, ripened to perfection under your loving care. This DIY guide will equip you with simple, effective tricks and hacks to make grape growing accessible and rewarding, no matter your experience level. Let’s get started!
DIY Grape Arbor Construction: From Seedling to Sweet Harvest
Okay, grape lovers! So you’re dreaming of a lush, grape-laden arbor gracing your garden? I get it! There’s nothing quite like the satisfaction of growing your own grapes and enjoying the fruits (pun intended!) of your labor. Building your own grape arbor might seem daunting, but trust me, with a little planning and elbow grease, it’s totally achievable. This guide will walk you through the entire process, from choosing the right spot to training your vines. Let’s get started!
Planning Your Grape Arbor
Before we even think about hammers and nails, let’s lay the groundwork (literally!). Proper planning is key to a successful and long-lasting grape arbor.
* Sunlight is King: Grapes need at least 6-8 hours of direct sunlight per day. Scout your yard and identify a spot that gets plenty of sunshine throughout the growing season.
* Soil Matters: Grapes prefer well-drained soil. Heavy clay soil can lead to root rot, so amend it with compost and other organic matter to improve drainage. A slightly acidic to neutral pH (around 6.0-7.0) is ideal. You can test your soil with a home testing kit or send a sample to your local agricultural extension office.
* Space Considerations: Grape vines can get quite large, so make sure you have enough space for them to spread out. Consider the mature size of the grape variety you choose. A good rule of thumb is to allow at least 8-10 feet between vines.
* Arbor Design: There are tons of grape arbor designs out there, from simple post-and-wire structures to elaborate pergolas. Choose a design that complements your garden and suits your skill level. I’m going to guide you through building a sturdy and relatively straightforward post-and-beam arbor, perfect for beginners.
* Grape Variety Selection: This is the fun part! Research different grape varieties and choose one that’s suitable for your climate and taste preferences. Consider factors like disease resistance, ripening time, and whether you want table grapes, wine grapes, or juice grapes. Local nurseries are a great resource for finding varieties that thrive in your area.
Materials and Tools You’ll Need
Alright, let’s gather our supplies! This list might seem long, but it’s all essential for building a solid and beautiful grape arbor.
* Treated Lumber: This is crucial for longevity, as the arbor will be exposed to the elements. I recommend using pressure-treated 4×4 posts for the uprights and 2×6 or 2×8 lumber for the beams and rafters. The length of the posts will depend on the desired height of your arbor (typically 8-10 feet above ground), plus an additional 2-3 feet for burying in the ground.
* Concrete Mix: For setting the posts securely in the ground.
* Gravel: To improve drainage around the base of the posts.
* Fasteners: Galvanized screws or nails are a must to prevent rust. I prefer screws for their superior holding power. You’ll need screws of various lengths for different connections.
* Wire or Trellis: To provide support for the grape vines as they grow. Galvanized wire, plastic netting, or wooden trellis panels are all good options.
* Post Hole Digger or Auger: For digging the holes for the posts. A post hole digger is fine for smaller projects, but an auger will save you a lot of time and effort if you’re building a larger arbor.
* Level: Absolutely essential for ensuring that your posts are plumb and your beams are level.
* Measuring Tape: For accurate measurements.
* Saw: To cut the lumber to the desired lengths. A circular saw or miter saw will work well.
* Drill/Driver: For driving screws.
* Hammer: For driving nails (if you choose to use them).
* Shovel: For backfilling the post holes.
* Wheelbarrow or Mixing Tub: For mixing the concrete.
* Safety Glasses: Protect your eyes!
* Gloves: Protect your hands!
* Ladder: For reaching higher areas of the arbor.
Building the Arbor Frame: Step-by-Step
Now for the fun part – putting it all together! Follow these steps carefully to build a sturdy and attractive grape arbor.
1. Mark the Post Locations: Use your measuring tape and stakes to mark the locations of the posts. Ensure the spacing is appropriate for your chosen grape variety and arbor design. I usually aim for posts to be 8-10 feet apart.
2. Dig the Post Holes: Using your post hole digger or auger, dig the holes for the posts. The holes should be deep enough to bury the posts at least 2-3 feet below ground level. The diameter of the holes should be about three times the width of the posts (e.g., for 4×4 posts, the holes should be about 12 inches in diameter).
3. Prepare the Post Holes: Pour a layer of gravel (about 6 inches) into the bottom of each hole to improve drainage.
4. Set the Posts: Carefully lower the posts into the holes. Use a level to ensure that each post is plumb (perfectly vertical). You may need to use temporary braces to hold the posts in place while the concrete sets.
5. Mix and Pour the Concrete: Mix the concrete according to the manufacturer’s instructions. Pour the concrete into the holes around the posts, filling them to within a few inches of the ground level. Use a shovel or trowel to smooth the surface of the concrete.
6. Let the Concrete Cure: Allow the concrete to cure for at least 24-48 hours before proceeding to the next step. This will ensure that the posts are securely anchored in the ground.
7. Backfill the Post Holes: Once the concrete has cured, backfill the remaining space in the post holes with soil. Tamp the soil firmly around the posts.
8. Attach the Beams: Measure and cut the beams to the desired length. Position the beams on top of the posts and secure them with galvanized screws. Make sure the beams are level. I like to use two or three screws per post connection for extra strength.
9. Install the Rafters (Optional): If you want to add rafters to your arbor, measure and cut them to the desired length. Space the rafters evenly along the beams and secure them with galvanized screws. Rafters add extra support and create a more visually appealing structure.
10. Add Wire or Trellis: Now it’s time to add the support system for your grape vines. Attach galvanized wire, plastic netting, or wooden trellis panels to the posts and beams. The spacing of the wires or trellis will depend on the grape variety and your desired training method. I usually space wires about 12 inches apart.
Training Your Grape Vines
Okay, the arbor is built! Now comes the crucial part of guiding your grape vines to grow beautifully and produce abundant fruit. Training is essential for maximizing sunlight exposure, promoting air circulation, and making pruning easier.
* First Year: Focus on Root Development: In the first year, your main goal is to establish a strong root system. Allow the vine to grow freely, but prune off any flowers or fruit that develop. This will encourage the plant to put its energy into root growth.
* Choose a Training System: There are several different training systems for grape vines, each with its own advantages and disadvantages. Some popular options include the single-curtain system, the double-curtain system, and the cordon system. Research different systems and choose one that suits your grape variety and arbor design.
* Pruning is Key: Pruning is essential for maintaining the shape of the vine, removing dead or diseased wood, and promoting fruit production. Prune your grape vines annually, typically in late winter or early spring before the buds begin to swell.
* Tie the Vines: As the vines grow, tie them to the wires or trellis using soft twine or plant ties. Be careful not to tie them too tightly, as this can damage the vines.
* Remove Suckers: Suckers are shoots that grow from the base of the vine. Remove them regularly to prevent them from competing with the main vine for resources.
Maintaining Your Grape Arbor
Your grape arbor is built, your vines are planted, and you’re well on your way to enjoying a bountiful harvest! But the work doesn’t stop there. Regular maintenance is essential for keeping your arbor in good condition and ensuring the health and productivity of your grape vines.
* Regular Inspections: Inspect your arbor regularly for any signs of damage or wear and tear. Repair any loose connections or damaged lumber promptly.
* Weed Control: Keep the area around the base of the arbor free of weeds. Weeds can compete with the grape vines for water and nutrients.
* Fertilizing: Fertil
Conclusion
So, there you have it! Mastering these simple yet effective grape growing techniques can truly transform your backyard into a miniature vineyard, overflowing with delicious, homegrown grapes. We’ve covered everything from selecting the right varieties for your climate and soil to providing the essential support structures and implementing crucial pruning strategies. The beauty of these techniques lies not only in their simplicity but also in their adaptability. You don’t need to be a seasoned horticulturalist to achieve success; just a little patience, dedication, and a willingness to learn.
Why is this DIY approach a must-try? Because it empowers you to take control of the entire grape-growing process, from vine to table. You’ll know exactly what goes into your grapes, avoiding potentially harmful pesticides and herbicides often used in commercial farming. Plus, there’s an unparalleled satisfaction in harvesting your own fruit, knowing you nurtured it from a tiny vine to a bountiful producer. Imagine the joy of sharing your homegrown grapes with friends and family, or using them to create homemade jams, jellies, or even your own wine!
Consider these variations to further personalize your grape-growing experience. Experiment with different training methods, such as the cordon or cane pruning systems, to see which works best for your chosen grape variety and available space. Explore companion planting to naturally deter pests and attract beneficial insects. For example, planting basil near your grapevines can help repel aphids, while marigolds can deter nematodes. You can also adjust the fertilization schedule based on the specific needs of your grape variety and the nutrient content of your soil. Remember to always test your soil before adding any fertilizers to ensure you’re providing the right balance of nutrients.
Don’t be afraid to get creative and adapt these grape growing techniques to your unique circumstances. The key is to observe your vines closely, learn from your mistakes, and continuously refine your approach. The rewards of homegrown grapes are well worth the effort, providing you with a sustainable source of delicious fruit for years to come.
We wholeheartedly encourage you to embark on this grape-growing adventure. Start small, perhaps with just a few vines, and gradually expand your vineyard as you gain experience. The journey itself is just as rewarding as the final harvest.
Now, we want to hear from you! Have you tried any of these grape growing techniques? What challenges did you face, and what successes did you celebrate? Share your experiences, tips, and tricks in the comments below. Your insights can help other aspiring grape growers achieve their own fruitful harvests. Let’s build a community of passionate grape enthusiasts, sharing our knowledge and inspiring each other to cultivate thriving vineyards, one vine at a time.
Frequently Asked Questions (FAQ)
What are the best grape varieties to grow for beginners?
Choosing the right grape variety is crucial for success, especially for beginners. Some of the easiest and most rewarding varieties to grow include:
* **’Reliance’**: A seedless red grape that is extremely cold-hardy and disease-resistant. It’s a great choice for colder climates.
* **’Concord’**: A classic blue-purple grape known for its distinctive flavor, perfect for juice, jams, and jellies. It’s also relatively easy to grow.
* **’Niagara’**: A white grape with a sweet, musky flavor, ideal for fresh eating and making white grape juice. It’s known for its vigorous growth.
* **’Marquis’**: A seedless white grape that is very productive and disease-resistant. It’s a good choice for warmer climates.
* **’Jupiter’**: A seedless red grape with excellent flavor and good disease resistance. It’s a relatively new variety that is gaining popularity.
When selecting a variety, consider your climate, soil type, and intended use for the grapes. Local nurseries and agricultural extension offices can provide valuable advice on the best varieties for your specific region.
How much sunlight do grapevines need?
Grapevines require at least 6-8 hours of direct sunlight per day to thrive. Sunlight is essential for photosynthesis, the process by which plants convert sunlight into energy. Insufficient sunlight can lead to poor fruit production, reduced sugar content, and increased susceptibility to diseases. Choose a planting location that receives ample sunlight throughout the day. If you live in a particularly hot climate, some afternoon shade may be beneficial to prevent sunburn on the grapes.
What type of soil is best for growing grapes?
Grapes prefer well-drained soil with a slightly acidic to neutral pH (between 6.0 and 7.0). Good drainage is crucial to prevent root rot, a common problem in grapevines. Heavy clay soils can be amended with organic matter, such as compost or well-rotted manure, to improve drainage and aeration. Sandy soils may need to be amended with organic matter to improve water retention. Before planting, it’s always a good idea to conduct a soil test to determine the pH and nutrient content of your soil. This will help you identify any deficiencies and make necessary amendments.
How often should I water my grapevines?
Watering frequency depends on several factors, including climate, soil type, and the age of the vines. Young vines need more frequent watering than established vines. In general, water deeply and infrequently, allowing the soil to dry out slightly between waterings. During dry periods, water deeply once or twice a week. Avoid overwatering, as this can lead to root rot. A good rule of thumb is to water when the top inch of soil feels dry to the touch.
When and how should I prune my grapevines?
Pruning is essential for maintaining the health and productivity of grapevines. The best time to prune is during the dormant season, typically in late winter or early spring, before the buds begin to swell. Pruning removes excess growth, improves air circulation, and encourages fruit production. The specific pruning method will depend on the training system you’ve chosen. In general, remove any dead, damaged, or diseased wood. Also, remove any suckers (shoots growing from the base of the vine) and water sprouts (vigorous, non-fruiting shoots). Consult a local expert or refer to a pruning guide for specific instructions on pruning your chosen grape variety and training system.
How do I protect my grapes from pests and diseases?
Protecting your grapes from pests and diseases is crucial for a successful harvest. Common pests include aphids, Japanese beetles, and grape phylloxera. Common diseases include powdery mildew, downy mildew, and black rot. To prevent problems, choose disease-resistant varieties, provide good air circulation, and practice good sanitation. Remove any fallen leaves or diseased fruit from around the vines. If necessary, use organic pesticides or fungicides to control pests and diseases. Always follow the instructions on the product label carefully. Consider using netting to protect your grapes from birds and other animals.
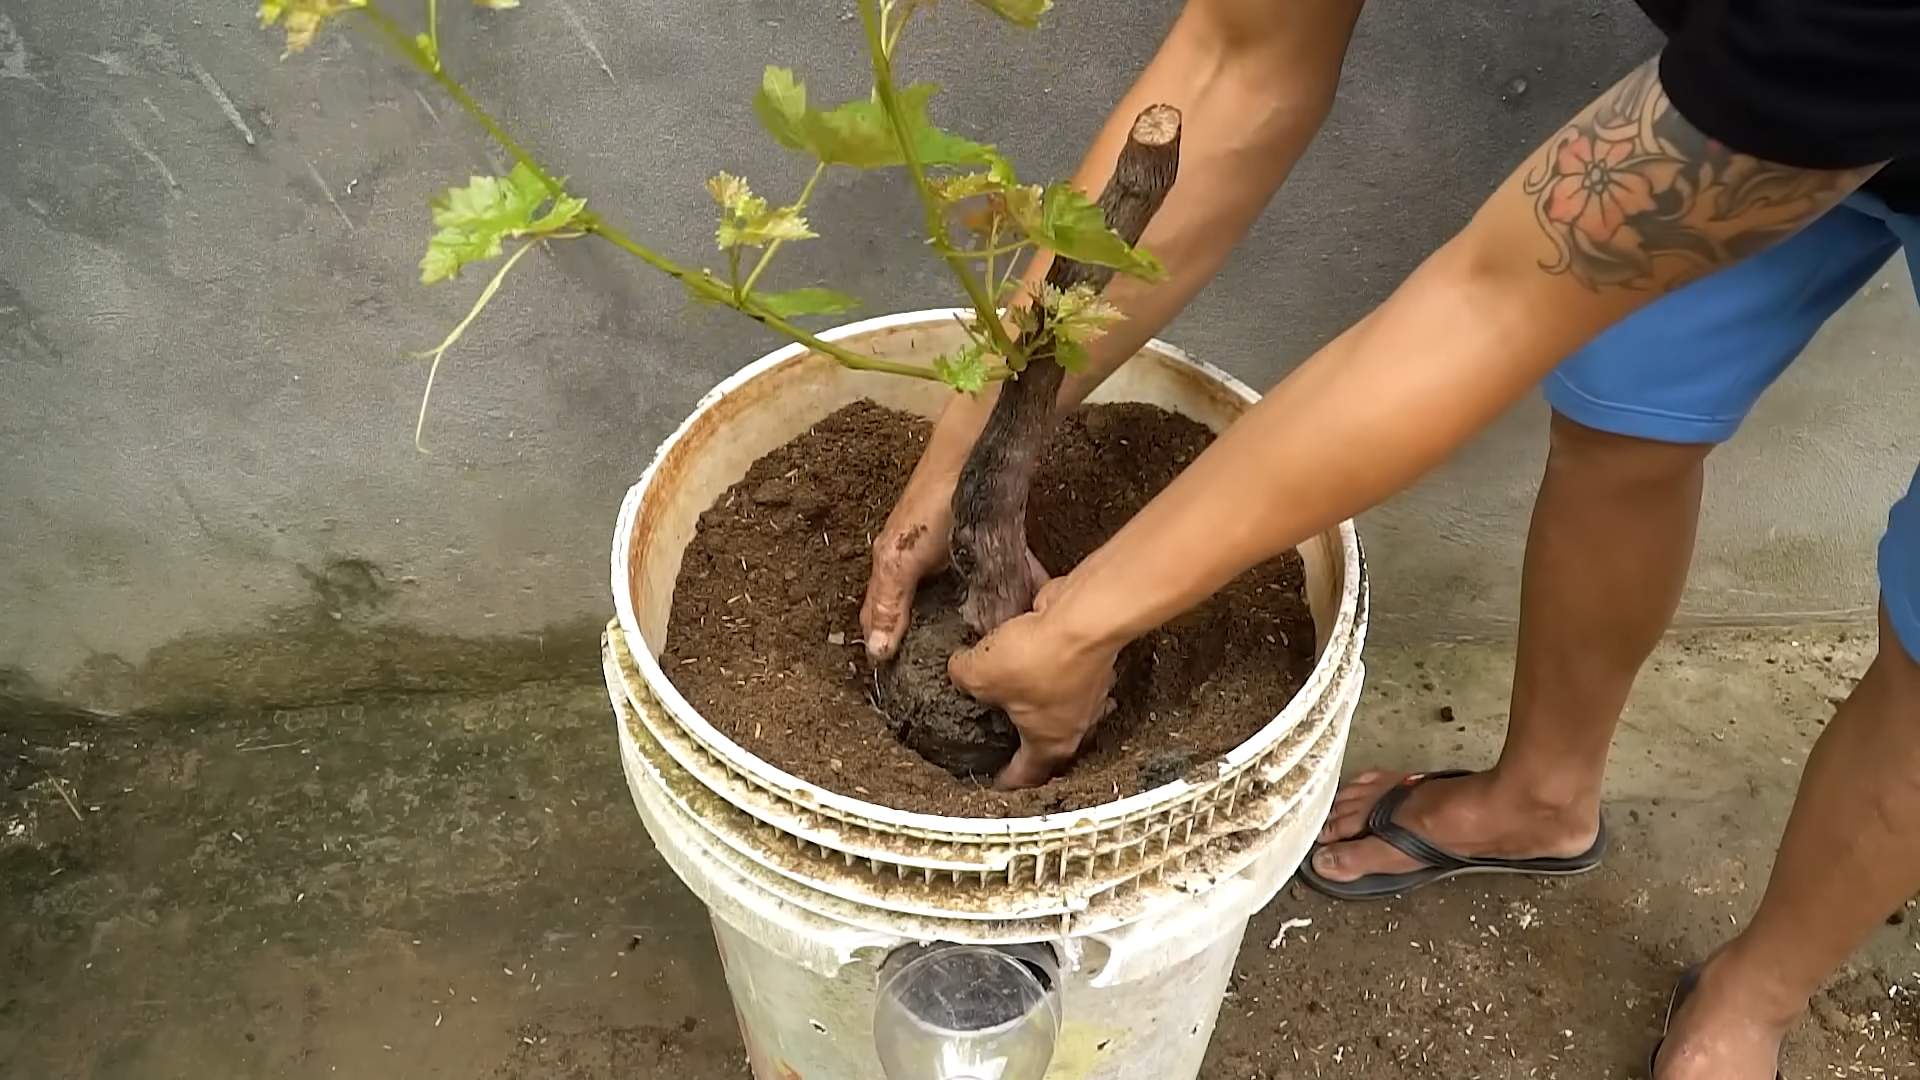
Can I grow grapes in containers?
Yes, you can grow grapes in containers, but it requires careful planning and attention. Choose a large container (at least 15-20 gallons) with good drainage. Use a well-draining potting mix. Select a compact grape variety that is suitable for container growing. Provide adequate support for the vines to climb. Water regularly and fertilize as needed. Container-grown grapes may require more frequent watering and fertilization than grapes grown in the ground.
How long does it take for grapevines to produce fruit?
Grapevines typically take 2-3 years to begin producing fruit. The first year is focused on establishing the root system and developing the main trunk. The second year, the vine will begin to produce some shoots and leaves. The third year, you may see some fruit production, but the yield will likely be small. Full fruit production typically occurs in the fourth or fifth year. Be patient and continue to provide proper care, and your grapevines will reward you with a bountiful harvest for many years to come.

Leave a Comment