
Garlic Bottle Growing DIY: Unleash Your Inner Gardener with This Simple Hack!
Have you ever dreamed of having fresh, flavorful garlic readily available, right at your fingertips? Imagine skipping those trips to the grocery store and instead, harvesting your own pungent cloves from a recycled bottle! This isn’t some far-fetched fantasy; it’s a reality you can achieve with our easy and rewarding garlic bottle growing DIY guide. For centuries, garlic has been revered not only for its culinary prowess but also for its medicinal properties, playing a vital role in various cultures around the globe. From ancient Egypt, where it fueled the pyramid builders, to modern kitchens where it elevates countless dishes, garlic’s significance is undeniable.
But let’s face it, traditional gardening can be intimidating. Space constraints, soil quality concerns, and the general time commitment often deter aspiring gardeners. That’s where this ingenious DIY trick comes in! We’ll show you how to transform a simple plastic bottle into a thriving garlic garden, perfect for balconies, patios, or even sunny windowsills. This method is not only space-saving and budget-friendly but also incredibly satisfying. You’ll be amazed at how easily you can cultivate your own supply of fresh garlic, adding a burst of flavor to your meals and a touch of green to your living space. So, grab a bottle, some soil, and a few garlic cloves, and let’s embark on this exciting gardening adventure together!
Growing Garlic Greens from a Bottle: A Fun DIY Project!
Hey there, fellow plant enthusiasts! Ever wondered what to do with those leftover garlic cloves that are starting to sprout? Don’t throw them away! I’m going to show you a super easy and rewarding DIY project: growing garlic greens in a bottle. It’s a fantastic way to get fresh, flavorful greens right in your kitchen, and it’s a great conversation starter too! Plus, it’s incredibly simple, even if you don’t have a green thumb. Let’s get started!
What You’ll Need:
* An empty plastic bottle (a 2-liter soda bottle works perfectly)
* Garlic cloves (sprouted ones are ideal, but regular ones will work too)
* Potting soil
* Scissors or a craft knife
* Water
* Optional: Pebbles or gravel for drainage
Preparing the Bottle:
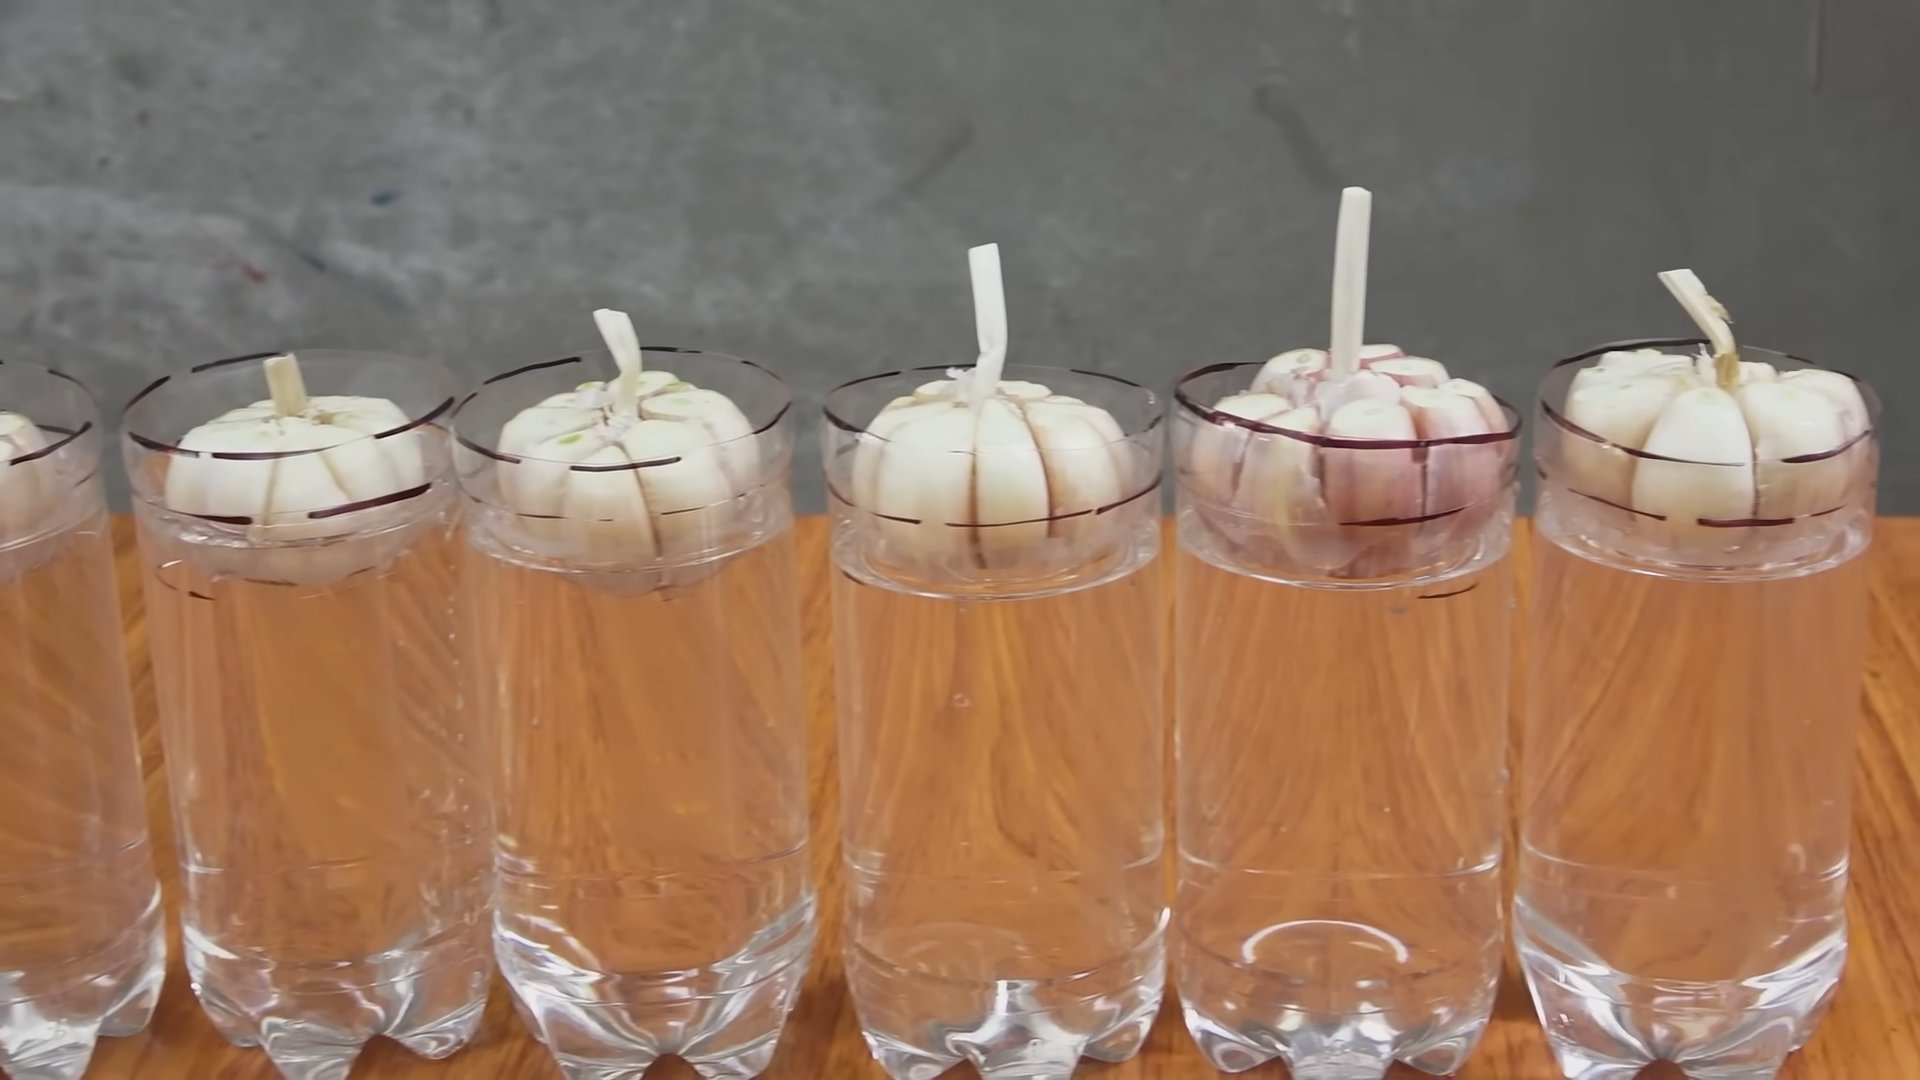
1. Clean the Bottle: First things first, give your plastic bottle a good rinse with soap and water. Make sure to remove any sticky residue or labels. You want a clean slate for your garlic garden.
2. Cut the Bottle: Now, grab your scissors or craft knife. Carefully cut the bottle in half horizontally. You’ll be using the bottom half as your planting container and the top half as a sort of humidity dome (more on that later!). I usually cut mine about 6-8 inches from the bottom. Be careful with the knife!
3. Create Drainage Holes: This is crucial for healthy garlic greens. Use your scissors or knife to poke several drainage holes in the bottom of the bottle. This will prevent the soil from becoming waterlogged and rotting your garlic. I usually make about 5-6 holes, evenly spaced.
Planting the Garlic:
1. Add Drainage Layer (Optional): If you have some pebbles or gravel lying around, you can add a thin layer (about an inch) to the bottom of the bottle. This will further improve drainage and prevent the soil from sitting directly in water. It’s not absolutely necessary, but it’s a nice touch.
2. Fill with Potting Soil: Now, it’s time to add the potting soil. Fill the bottom half of the bottle with soil, leaving about an inch or two of space at the top. Gently press down on the soil to compact it slightly. You don’t want it too loose, but you also don’t want it rock hard.
3. Plant the Garlic Cloves: This is the fun part! Take your garlic cloves and gently push them into the soil, pointy side up. Space them about an inch or two apart. You don’t want to bury them too deep; just enough so that the top of the clove is slightly covered with soil. I usually plant about 5-6 cloves in a 2-liter bottle.
4. Water Thoroughly: Once you’ve planted all your garlic cloves, give the soil a good watering. Make sure the water drains out of the drainage holes. This will help settle the soil and get the garlic cloves off to a good start.
Creating a Humidity Dome (Optional):
1. Invert the Top Half: Remember the top half of the bottle you cut off earlier? Now, invert it and place it over the bottom half, creating a dome-like structure. This will help create a humid environment, which can encourage faster growth, especially in drier climates.
2. Ventilation: If you’re using the humidity dome, it’s important to provide some ventilation. You can do this by leaving the bottle cap off or by poking a few small holes in the top of the bottle. This will prevent the air from becoming too stagnant and causing mold or mildew.
Caring for Your Garlic Greens:
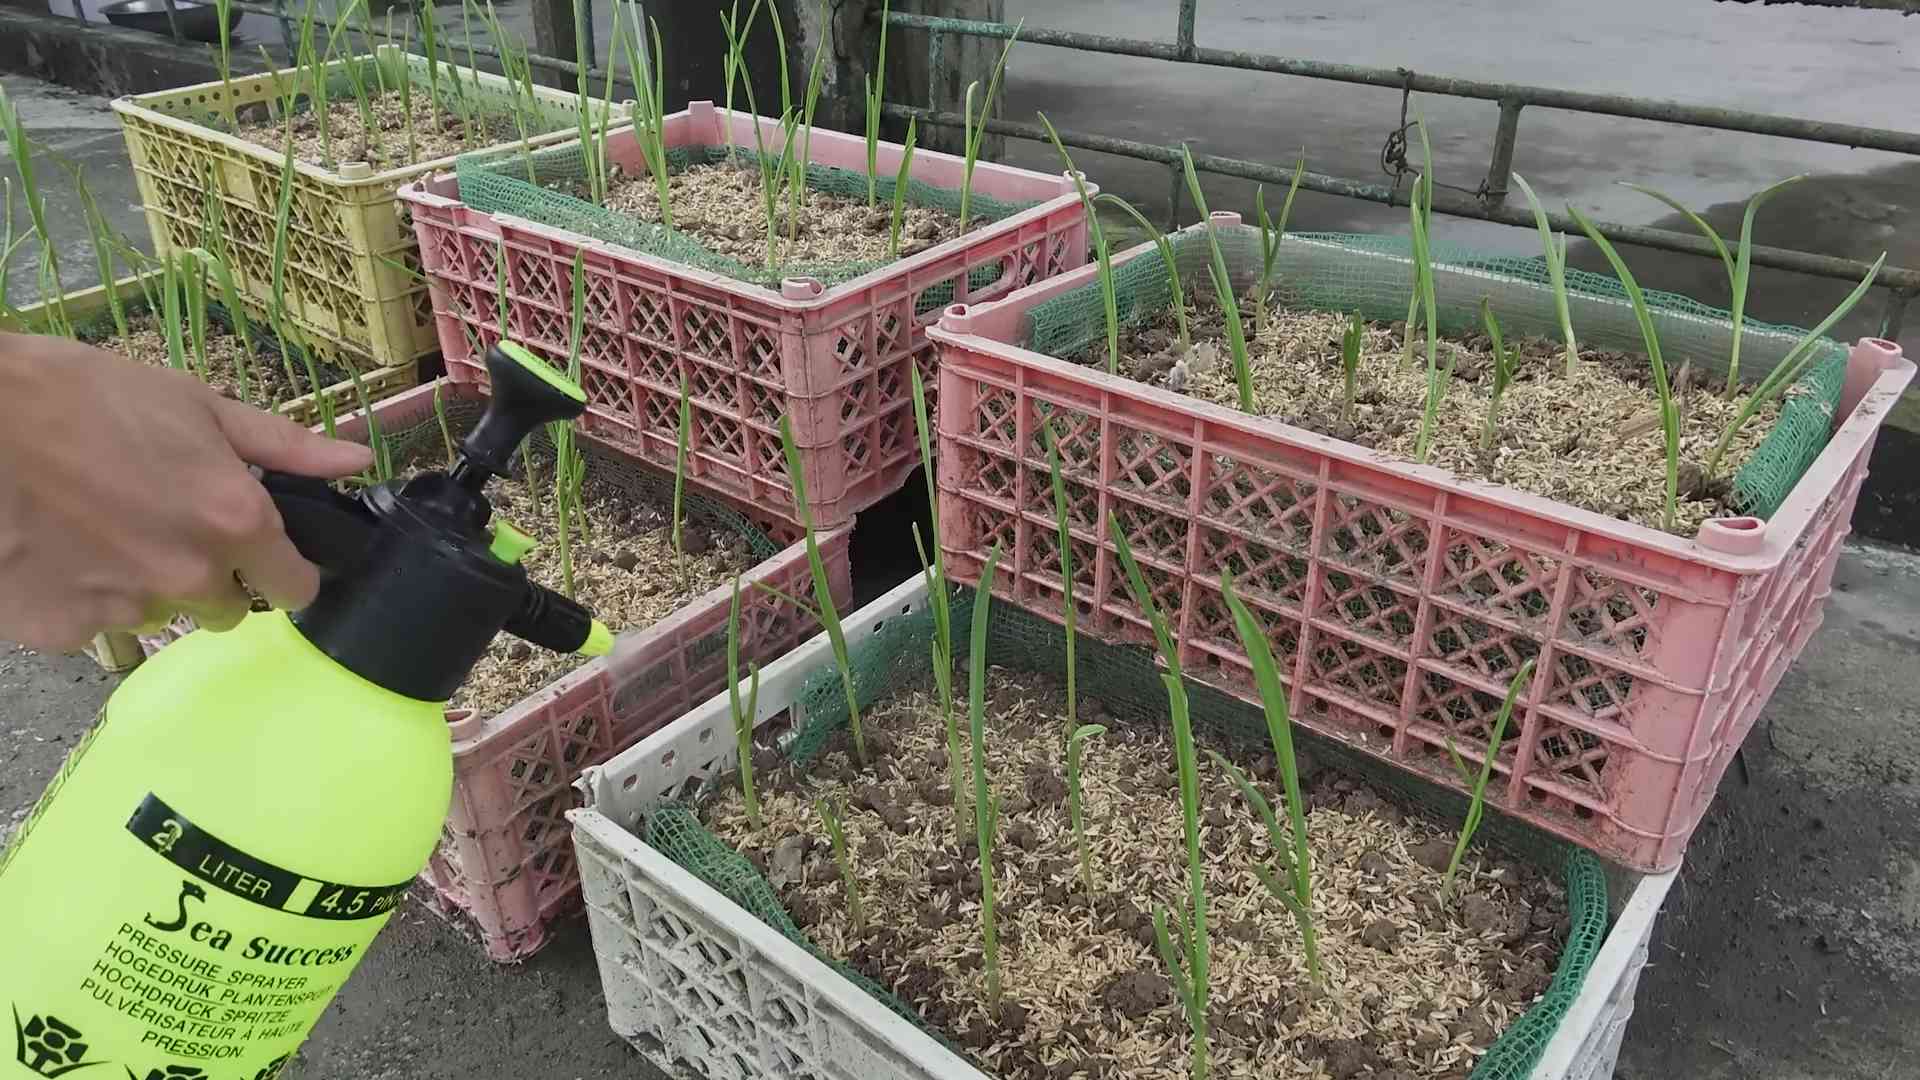
1. Location, Location, Location: Place your bottle garden in a sunny location. Garlic greens need plenty of light to thrive. A windowsill that gets at least 6 hours of sunlight a day is ideal. If you don’t have a sunny windowsill, you can use a grow light.
2. Watering: Keep the soil consistently moist, but not soggy. Water when the top inch of soil feels dry to the touch. Be careful not to overwater, as this can lead to root rot. I usually water mine every 2-3 days, depending on the weather.
3. Fertilizing (Optional): If you want to give your garlic greens an extra boost, you can fertilize them every few weeks with a diluted liquid fertilizer. I like to use a balanced fertilizer, such as a 10-10-10. Just be sure to follow the instructions on the fertilizer label.
4. Rotating: To ensure even growth, rotate your bottle garden every few days. This will prevent the garlic greens from leaning towards the light source.
Harvesting Your Garlic Greens:
1. When to Harvest: Your garlic greens will be ready to harvest in about 2-3 weeks, when they are about 6-8 inches tall.
2. How to Harvest: Use scissors to snip off the greens near the base of the plant. Be sure to leave about an inch or two of the plant intact, so it can continue to grow.
3. Enjoy! Your freshly harvested garlic greens are now ready to use in your favorite recipes. They’re delicious in salads, soups, stir-fries, and omelets. They add a mild garlic flavor that’s not overpowering.
Troubleshooting:
* Yellowing Leaves: If your garlic greens are turning yellow, it could be a sign of overwatering or underwatering. Check the soil moisture and adjust your watering accordingly. It could also be a sign of nutrient deficiency, in which case you can try fertilizing.
* Slow Growth: If your garlic greens are growing slowly, it could be due to lack of sunlight. Try moving your bottle garden to a sunnier location or using a grow light.
* Mold or Mildew: If you notice mold or mildew growing on the soil or the garlic greens, it could be due to poor ventilation. Remove the affected areas and improve ventilation by removing the bottle cap or poking more holes in the top of the bottle.
Tips and Tricks:
* Use Different Varieties of Garlic: Experiment with different varieties of garlic to see which ones you like best. Some varieties have a stronger flavor than others.
* Successive Planting: To ensure a continuous supply of garlic greens, plant new cloves every few weeks.
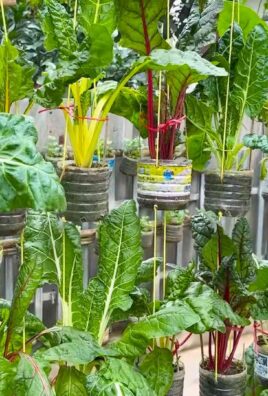
* Repurpose Other Containers: You don’t have to use a plastic bottle. You can also use other containers, such as yogurt containers, milk cartons, or even old coffee cans. Just be sure to provide drainage holes.
* Get Creative with Decoration: Decorate your bottle garden to make it more visually appealing. You can paint the bottle, add stickers, or even wrap it with twine.
Why I Love This DIY Project:
I absolutely love this DIY project because it’s so easy, rewarding, and sustainable. It’s a great way to reduce waste by repurposing plastic bottles and using up those leftover garlic cloves. Plus, it’s a fun and educational activity for kids. They can learn about plant growth and where their food comes from. And of course, the best part is having fresh, flavorful garlic greens right at my fingertips!
So, there you have it! A complete guide to growing garlic greens from a bottle. I hope you give it a try. It’s a fun and easy way to add some fresh flavor to your meals and brighten up your kitchen. Happy gardening!
Conclusion
So, there you have it! Transforming a simple garlic clove into a thriving green source using nothing more than a bottle, water, and a little patience is not just a fun experiment; it’s a game-changer for anyone who loves fresh garlic flavor at their fingertips. This garlic bottle growing DIY method is a must-try for several compelling reasons.
First and foremost, it’s incredibly convenient. Imagine needing a sprinkle of fresh garlic chives to elevate your pasta dish, brighten up your salad, or add a zesty kick to your soup. Instead of running to the store, you simply snip a few strands from your indoor garlic garden. The accessibility and ease of having fresh garlic greens readily available are unparalleled.
Secondly, it’s sustainable. By repurposing a plastic bottle, you’re contributing to a more eco-friendly lifestyle. You’re reducing waste and creating something beautiful and useful in the process. Plus, you’re minimizing your reliance on commercially grown garlic, which often involves pesticides and long-distance transportation.
Thirdly, it’s surprisingly rewarding. Watching a tiny clove sprout and flourish into a vibrant green plant is a deeply satisfying experience. It’s a reminder of the simple beauty of nature and the power of nurturing something from scratch. It’s a fantastic project for kids, teaching them about plant life cycles and the importance of sustainability.
But the benefits don’t stop there. This method is also incredibly versatile. While we’ve focused on growing garlic greens, you can experiment with different varieties of garlic to see which ones thrive best in your indoor bottle garden. You can also try adding a small amount of liquid fertilizer to the water every few weeks to boost growth.
Consider these variations to personalize your garlic bottle growing DIY experience:
* Herb Garden Combo: Plant multiple garlic cloves in a larger bottle alongside other herbs like basil or chives for a miniature indoor herb garden.
* Vertical Garden: Create a vertical garden by hanging multiple garlic bottle planters on a wall or balcony.
* Decorative Touches: Decorate your bottles with paint, twine, or other embellishments to match your home décor.
* Hydroponic Upgrade: For a more advanced setup, consider adding an air pump and air stone to oxygenate the water, promoting even faster growth.
Ultimately, this garlic bottle growing DIY trick is more than just a gardening hack; it’s a gateway to a more sustainable, convenient, and rewarding lifestyle. It’s a chance to connect with nature, reduce waste, and enjoy the fresh, vibrant flavor of homegrown garlic greens year-round.
So, what are you waiting for? Grab a bottle, a garlic clove, and some water, and get started today! We’re confident that you’ll be amazed by the results. And once you’ve experienced the joy of growing your own garlic greens, we encourage you to share your experiences with us. Post photos of your garlic bottle gardens on social media using #GarlicBottleDIY and tell us about your successes, challenges, and creative variations. We can’t wait to see what you create! Let’s grow together!
Frequently Asked Questions (FAQ)
Q: What kind of garlic should I use for this DIY project?
A: You can use any type of garlic clove for this project, but organic garlic is generally recommended to avoid any potential pesticide residue. Softneck varieties tend to produce more greens, but hardneck varieties will also work. Experiment with different types to see which ones you prefer!
Q: How long does it take for the garlic to start growing?
A: You should start to see sprouts within a week or two, depending on the temperature and humidity in your environment. Keep the bottle in a well-lit area, but avoid direct sunlight, which can scorch the leaves.
Q: How often should I change the water?
A: Change the water every 2-3 days to prevent algae growth and keep the water fresh. This will also help to prevent any unpleasant odors.
Q: What if my garlic clove starts to rot?
A: If your garlic clove starts to rot, it’s likely due to overwatering or poor drainage. Make sure the bottom of the clove is not submerged in water at all times. Only the roots should be in contact with the water. Remove the rotting clove and start with a fresh one.
Q: Can I use tap water for this project?
A: Yes, you can use tap water, but it’s best to let it sit for 24 hours to allow the chlorine to dissipate. Alternatively, you can use filtered water or rainwater.
Q: How much light does the garlic need?
A: Garlic greens need bright, indirect light to thrive. Place the bottle near a sunny window, but avoid direct sunlight, especially during the hottest part of the day. If you don’t have enough natural light, you can supplement with a grow light.
Q: Can I eat the garlic bulb after I’ve harvested the greens?
A: The garlic bulb may be smaller and less flavorful than a bulb grown in the ground, but you can still eat it. It will likely have a milder flavor.
Q: How long will the garlic greens keep growing?
A: The garlic greens will continue to grow as long as the clove has energy stored within it. Eventually, the clove will deplete its resources, and the greens will stop growing. You can then replace the clove with a fresh one.
Q: Can I grow garlic this way outdoors?
A: Yes, you can grow garlic this way outdoors, but you’ll need to protect it from extreme weather conditions, such as frost or excessive heat. Make sure the bottle has drainage holes to prevent waterlogging.
Q: Is it safe to eat garlic greens grown in a plastic bottle?
A: Yes, it is generally safe to eat garlic greens grown in a plastic bottle, especially if you are using a food-grade plastic bottle. However, it’s always a good idea to wash the greens thoroughly before eating them. If you are concerned about chemicals leaching from the plastic, you can use a glass bottle instead.
Q: Can I add fertilizer to the water?
A: Yes, you can add a small amount of liquid fertilizer to the water every few weeks to boost growth. Use a balanced fertilizer diluted to half strength. Be careful not to over-fertilize, as this can damage the plants.
Q: My garlic greens are turning yellow. What should I do?
A: Yellowing leaves can be a sign of several problems, including overwatering, underwatering, nutrient deficiency, or lack of light. Check the water level, ensure the bottle is getting enough light, and consider adding a small amount of fertilizer.
Q: Can I grow other vegetables in a bottle like this?
A: Yes, you can experiment with growing other vegetables in a bottle, such as lettuce, spinach, or herbs. The key is to choose plants that have shallow roots and don’t require a lot of space.
Q: How do I harvest the garlic greens?
A: Simply snip off the greens with scissors when they are a few inches tall. Avoid cutting the entire plant down to the base, as this will prevent it from regrowing.
Q: Can I use this method to grow garlic indoors during the winter?
A: Yes, this method is perfect for growing garlic indoors during the winter, as it provides a controlled environment and doesn’t require a lot of space. Just make sure the bottle is getting enough light and water.
Leave a Comment